Organizations in OneFocus
Overview
OneFocus™ adds an Organization Profile to the Lead Liaison platform. You can view any Prospects, Attachments, Activities, Deals, and Contracts associated with the Organization. You can also add Notes, Tasks, and new Attachments.
Adding New Organizations
You can manually add new Organization in three different ways. You can click the New button in the top-right corner of the Organizations page; you can click the New Organization icon in the Sales Shortcuts; you can click Add to Org on the Organization Info Card.
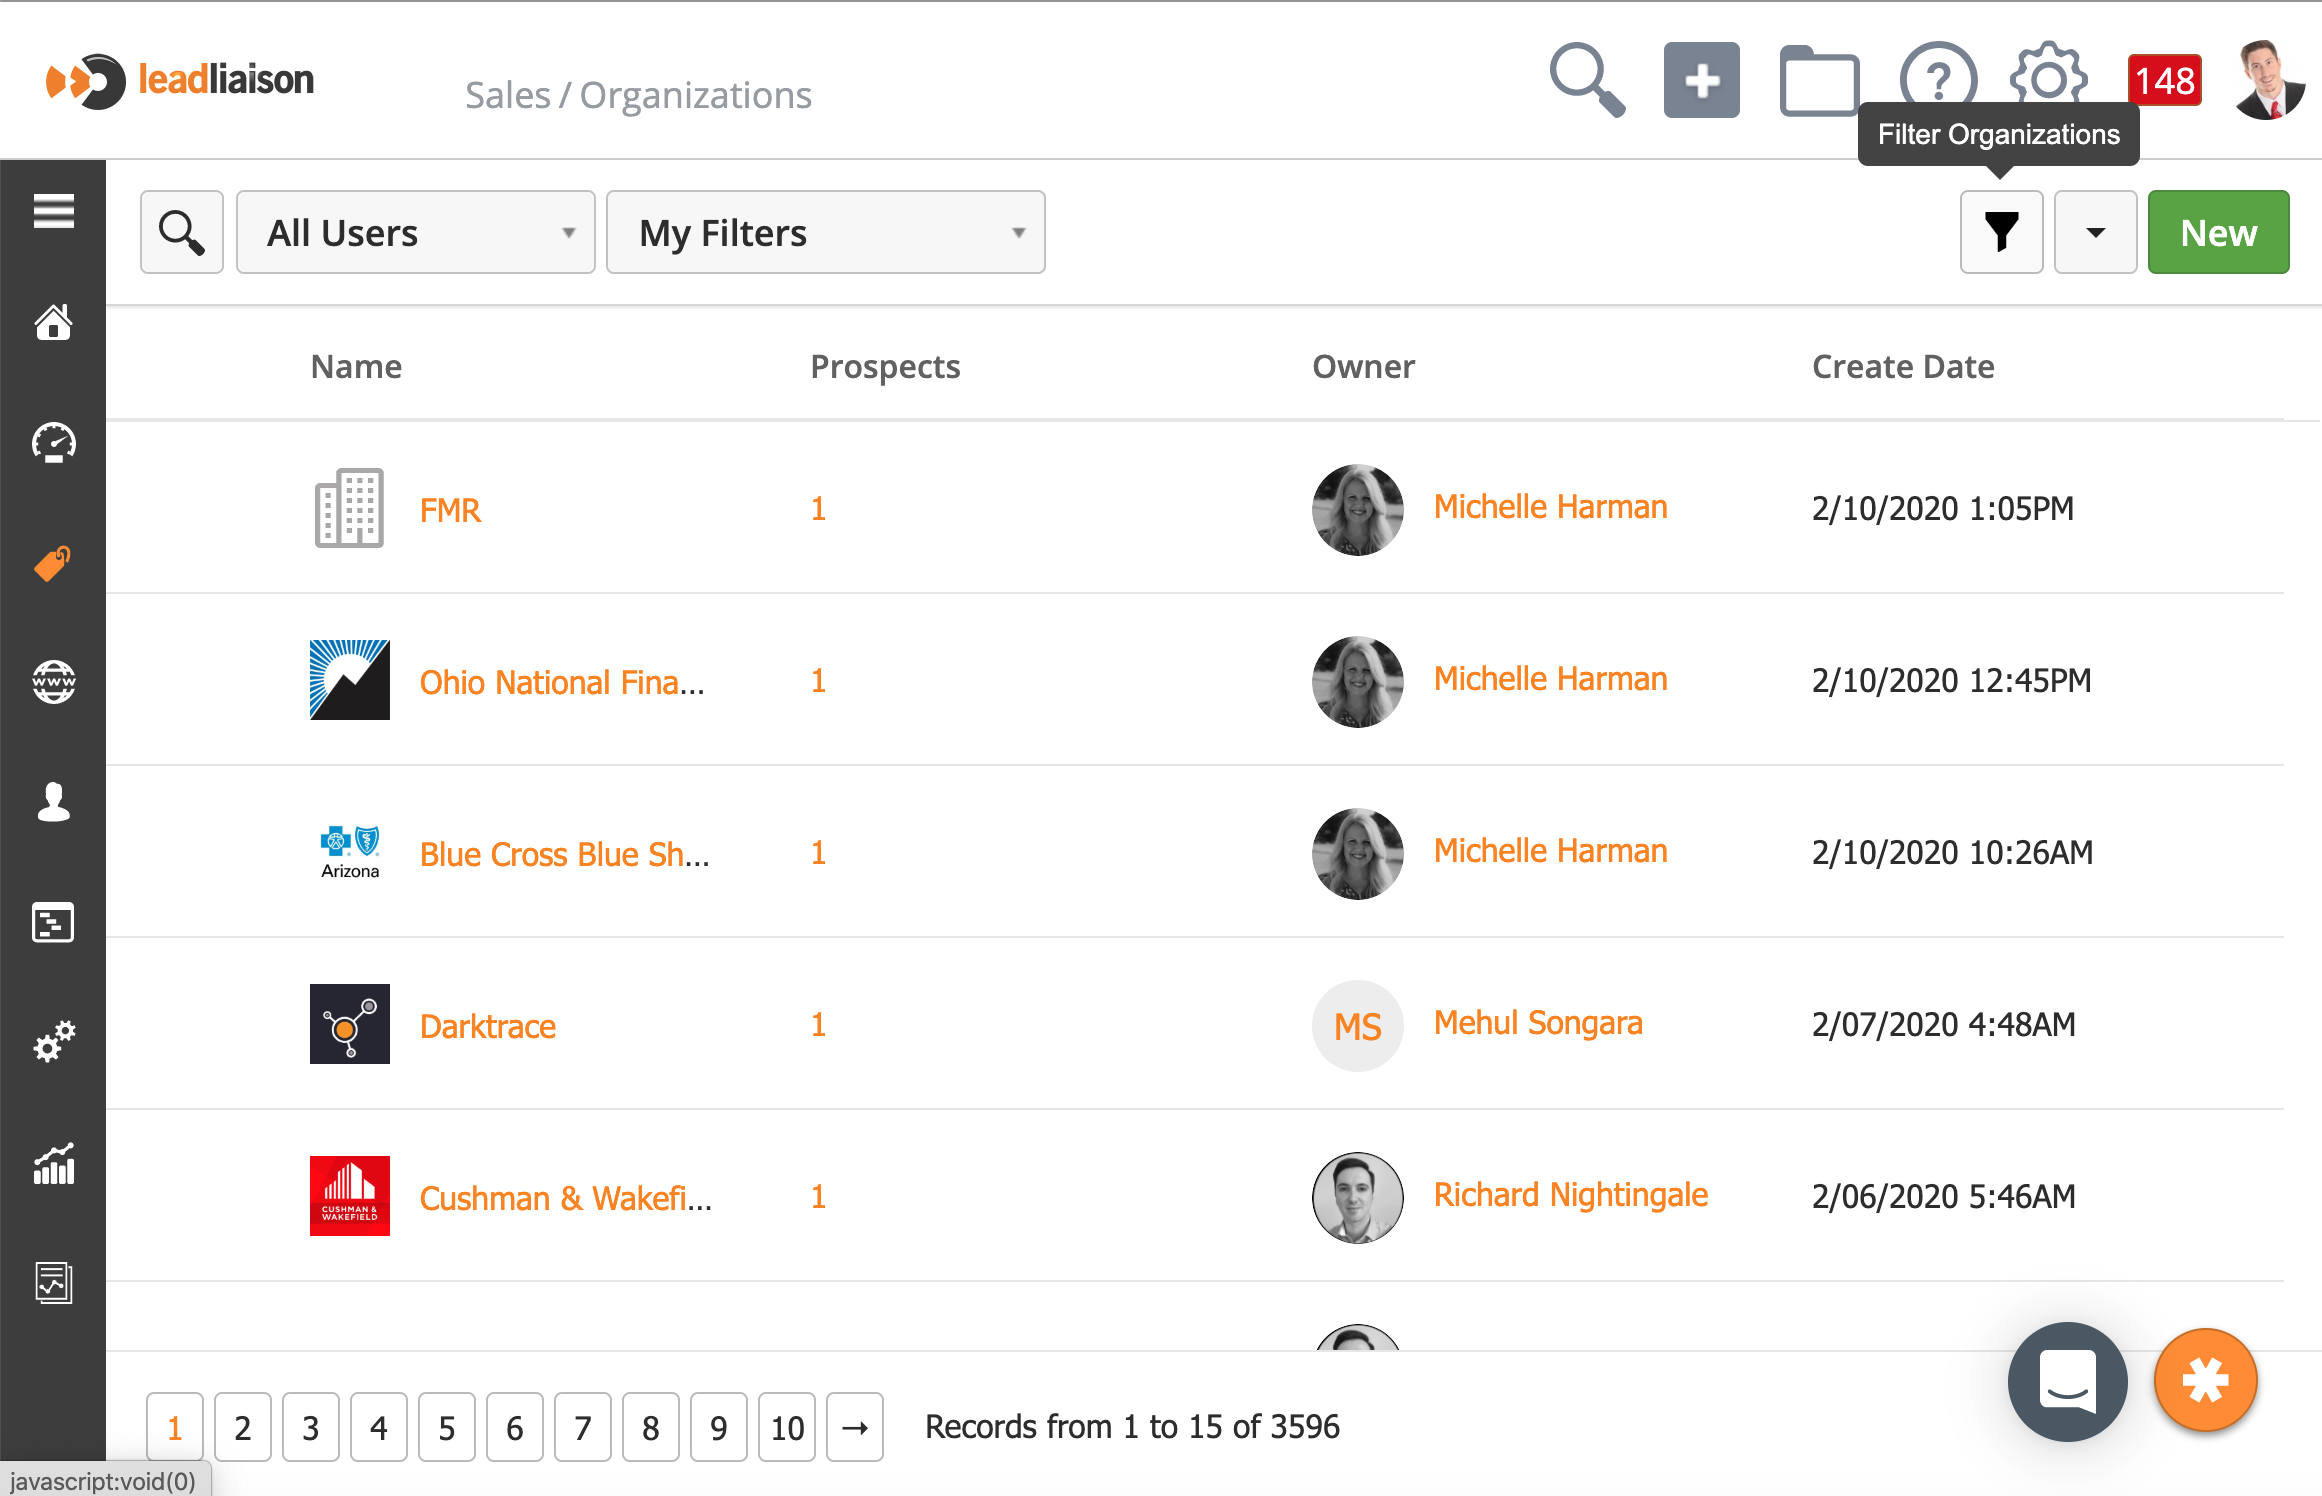
The Organizations page is a new addition with OneFocus™. You can find it under Sales > Organizations. From that page, you can search for a specific Organization using the search icon in the top-left corner, and can add new Organizations with the green New button. You can also print or export your organizations list from this screen.
New Organization Form
Use the New Organization Form to add any information you have on the Organization.
- Name – enter the Organization's name
- Website – enter the Organization's website if applicable.
- Owner – select the user who will own the Organization Profile
- Address – enter the Organization's mailing address
Using the Organization Profile
All Organizations in OneFocus™ have an Organization Profile. The Organization Profile has three main sections:
- Info Cards
- Organization Overview
- Timeline
Info Cards
The Info Cards to the left of the screen give you a quick visual summary of the Prospect's information and connections. You can rearrange the cards by clicking and dragging them to the order you prefer. Anything you move is exclusive to your login, so feel free to customize as you like.
Organization Overview
In the Organization Overview, you will see the Organizations's profile picture, name, Owner, and location. You can edit these fields by clicking them. You can explore additional fields by clicking the drop-down menu in the top right.
Beneath the Overview, you will see the Task Panel. From the Task Panel, you can add Notes or new Activities associated with the Organization. You can also attach files; for example, you could upload a credit application for equipment leases.
Timelines
The Timelines section shows you all activities associate with the Organization. Organization timelines include manually-entered notes and activities. The Organization will also show Notes and Tasks associated with Prospects from within the Organization. That means if you're working with multiple contacts, all of your interactions will be in one place.
Managing Organizations
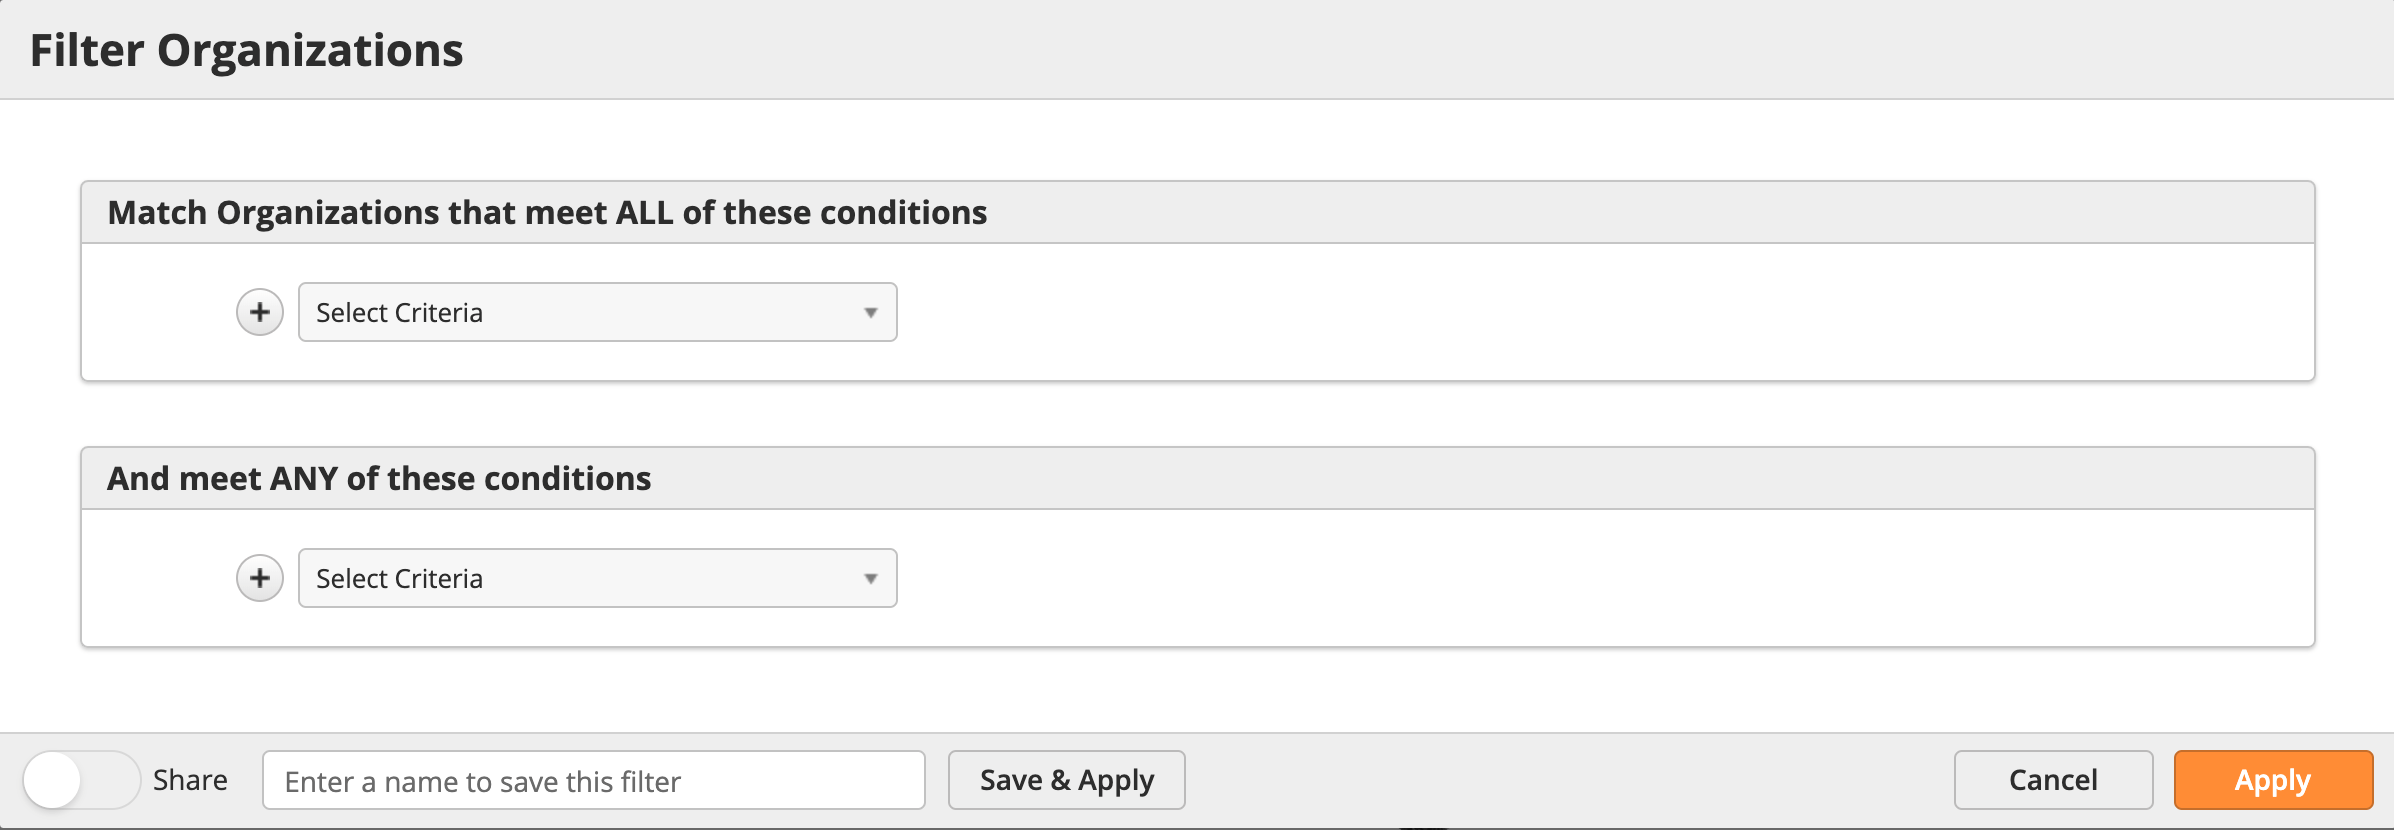
Filter through Organizations using the quick filters for Users and Filters that might have been saved for later use. Clicking the Filter icon as shown in the top-right of the screen below brings up an advanced search box that can use any Standard and Custom fields for your Organizations.
At the bottom of the advanced search box you've got options to save the filter and/or share it with your team.
Bulk Actions
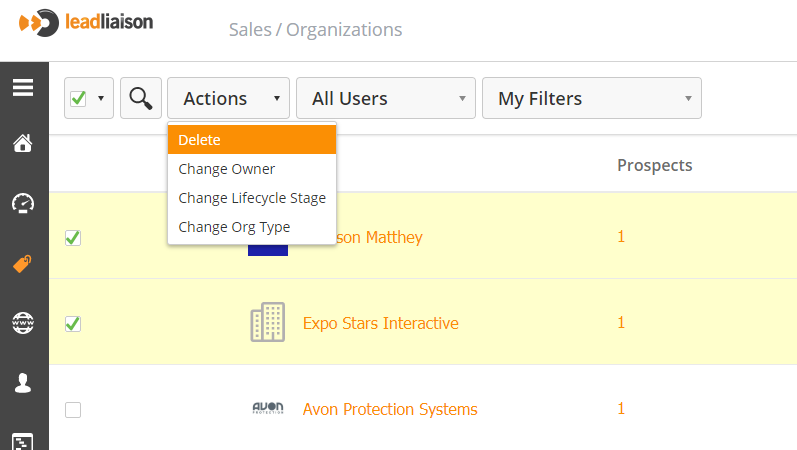
You can use Bulk Actions to edit multiple Organizations at the same time. Use the checkbox in the top-left corner to select the appropriate Organizations.
l
Changing Organization Owner
Just like Prospect owner, you can change the Organization owner as well. To change owner, click on the current owner name, select new owner from the drop-down and click the tick symbol (✓).
When updating the organization owner, system will show a prompt to change the owner for all prospects within the same organization too. This is useful especially where you'd like to bulk update the ownership of the Prospects in the same organization.
If the organization has any open deals or tasks, then system will also show a prompt to update the ownership of these organization level objects.
Merging Organizations
You can merge up to three Organizations into a single Organization record. When merging a record all timelines are merged into a single timeline.
Follow these steps to merge one or more records together:
Search for the record you’d like to merge.
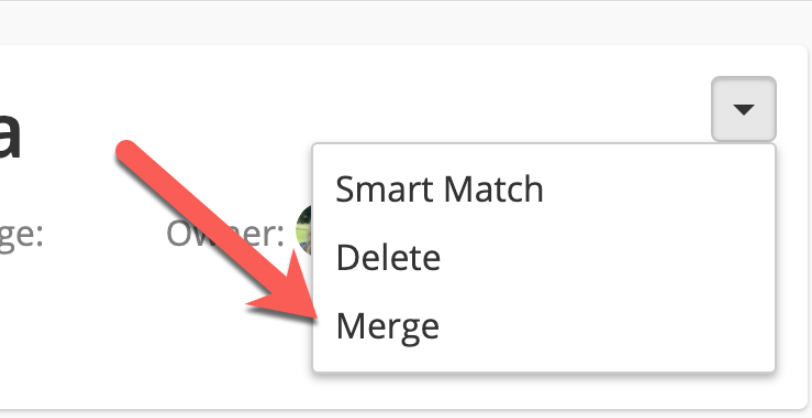
Click the down arrow and select Merge as shown in the screenshot below.
Merge Settings
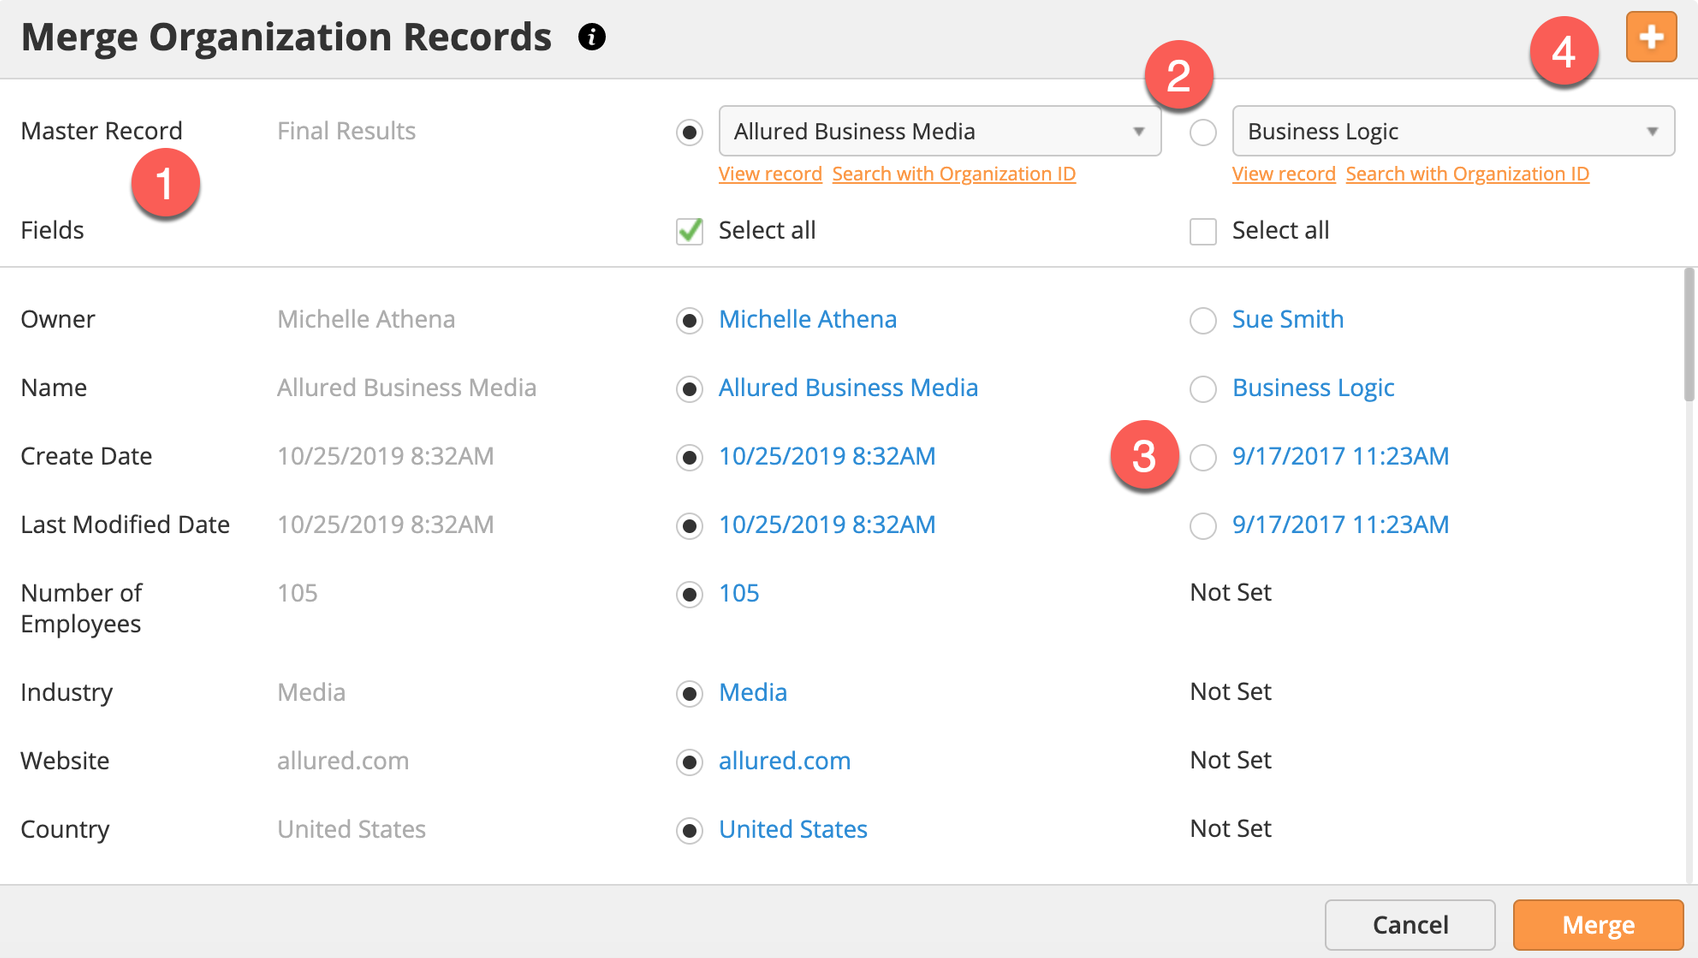
When the merge window appears there are four main areas:
The first column shows the Master Record. The Master Record will become the new record. All selected values from the duplicate records will be merged with the Master Record. Be default, the most recent value for each field is selected. All related timeline activities, notes, tasks, etc. will be associated with the Master Record.
Select additional records to merge with the original record selected for merge. You can select up to three total records to merge.
Pick each individual value that you’d like to use instead of the default selection. Changes appear in real-time under the Master Record column.
Add additional records to merge using the plus symbol.
Related content
© 2021 Lead Liaison, LLC. All rights reserved.
13101 Preston Road Ste 110 – 159 Dallas, TX 75240 | T 888.895.3237 | F 630.566.8107 www.leadliaison.com | Privacy Policy
