Privacy
Overview
With Lead Liaison's Privacy settings, you can give your users a choice in how we interact with them. Users can opt out of visitor tracking, personalization, and marketing in general. These comprehensive options give you the tools to make sure your marketing efforts are compliant with your region's privacy laws.
While Lead Liaison provides many great tools, it is your responsibility to make sure you stay compliant with your region's privacy laws. When in doubt, review local laws and seek legal council.
Requires Latest Tracking Code Version
To take advantage of these new security features your organization must install an updated version of the tracking code, as of May 17th 2018, from your control panel.
Regions
You can apply different privacy rules based on the user's region. For example, you might give European users the option to opt out of tracking cookies, but not give users in the United States the same option. To add a new region,
- Navigate to Settings > App Setup > Regions
- Click the New button
- Give the region a name
- Pick the countries associated with the region using the Countries drop-down menu
OR - Paste a list of countries into the "Enter each country on a new line" dialogue box
A default region, called "GDPR", to help with the EU's General Data Protection Regulation, is preconfigured in your account.
Privacy Settings
You can control how Lead Liaison stores data on new Prospects. To adjust Privacy settings, Settings > App Setup > Privacy. The table below explains each of the settings.
| Setting | Description |
|---|---|
| Automatically store company name | When enabled, Lead Liaison will use its proprietary IP to company technology to identify the visitor's company name and store the information in the Prospect's Profile. |
| Automatically store location using geolocation information | When enabled, Lead Liaison will use its proprietary IP and geolocation technology to identify the visitor's location and store the information in the Prospect's Profile. |
| Do note set cookies for assets if visitor is not already cookied | When enabled, Lead Liaison assets such as landing pages, trackable content, or sales emails will not cookie the user's browser. The user will only be cookied if they visit the website with the Lead Liaison tracking code. |
| Do not identify prospects for assets if visitor is not already tracked | When enabled, Lead Liaison assets such as landing pages, trackable content, or sales emails will not track or identify the visitor. Use this option if you want to give users the right to opt in to visitor tracking. |
| Data Retention Period | Sets how long Lead Liaison will store tracked data of anonymous Prospects. Note, Lead Liaison will store Known Prospect data indefinitely. |
| Default Consent Handler | Optionally choose a Consent Handler that will be shown to all visitors, even if they are not in the Handler's specified region. Note: if there is another Consent Handler that does target the visitor's region, they will see that Handler instead of the default. |
Privacy Fields
There are several fields on the Prospect Profile that can change how we interact with the Prospect. Many of these fields are for your own records, but some can also change the way Lead Liaison works with that Prospect.

| Field | Notes |
|---|---|
| Call Opt Out | |
| Email Opt Out | When set to Yes, Lead Liaison will not email the Prospect, even if they are directly targeted in an automation or email send. |
| Direct Mail Opt Out | |
| SMS Opt Out | |
| Tracking Opt Out | When set to Yes, Lead Liaison will not cookie the user's browser and will not track the user's activity. |
| Marketing Opt Out | |
| Personalization Opt Out | When set to Yes, Lead Liaison will not show SiteEngage™ personalizations or pre-fill data into hosted forms. |
| Lawful Basis | Use this field if you are required to show a lawful basis for a marketing to an individual. |
Consent Management
Consent Handlers help manage consent on a granular basis and give your users a choice over what types of visitor tracking and marketing they are comfortable with. For example, a user could choose to opt out of website personalization, but still allow visitor tracking. Best of all, you can create unique Consent Handlers for each Region you add to the system. By using Regions, you can ensure you are getting the best possible data while staying compliant with each region's local laws.
To create a new Consent Handler:
- Navigate to Settings > App Setup > Privacy
- Click on the Consent Handlers tab
- Click the New button
- Enter a name for the Consent Handler
- Select a region
After selecting a region, you will need to enter the region's default settings. The default settings are described in the table below:
| Setting | Description |
|---|---|
| Do not track | Disables all visitor tracking |
| Consider browser do not track settings | Disables all visitor tracking if the user's browser has a do not track request enabled. |
| IP address anonymization | Hides the user's individual IP address by replacing the final digits with zeros. |
| Do not store or process geolocation | Prevents Lead Liaison from using IP geolocation technology to store location data |
| Do not cookie | Uses IP address and browser information to track instead of using a tracking cookie |
You will also need to set your default banner settings.
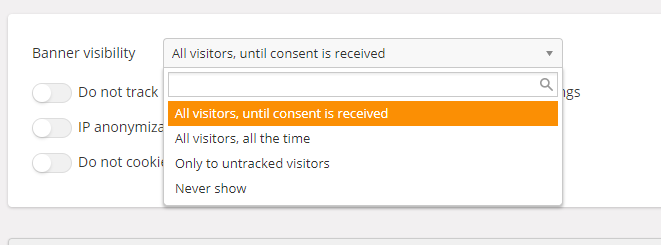
Consent Banner
If you are in a region that requires users to declare their tracking preferences, you can use Lead Liaison's Consent Banner. This banner will display until a user declares their settings.

Below is an example of the banner with default display settings using the text shown above.

The Preview option will only be available after you save the settings using the Save button at the bottom of the screen.
Consent Manager Settings
The Consent Manager is the modal that users will use to change their settings. You can fully customize this modal.
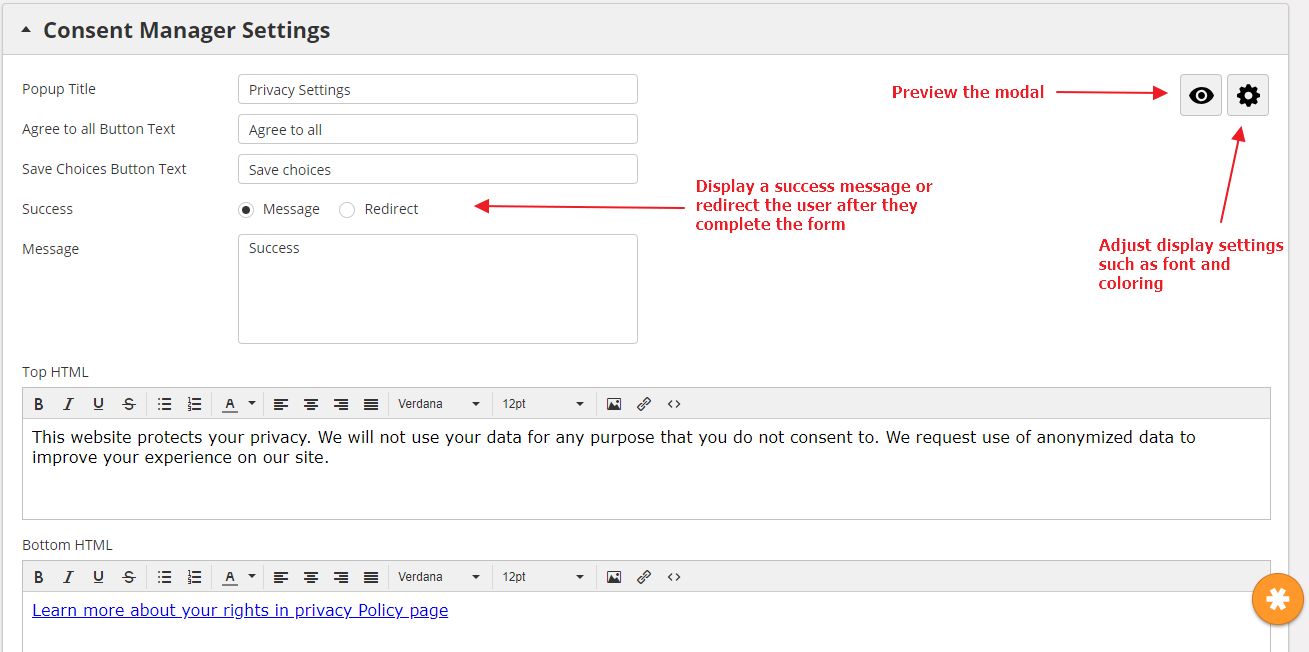
The Preview option will only be available after you save the settings using the Save button at the bottom of the screen.
You can also choose what options the user sees on the menu.
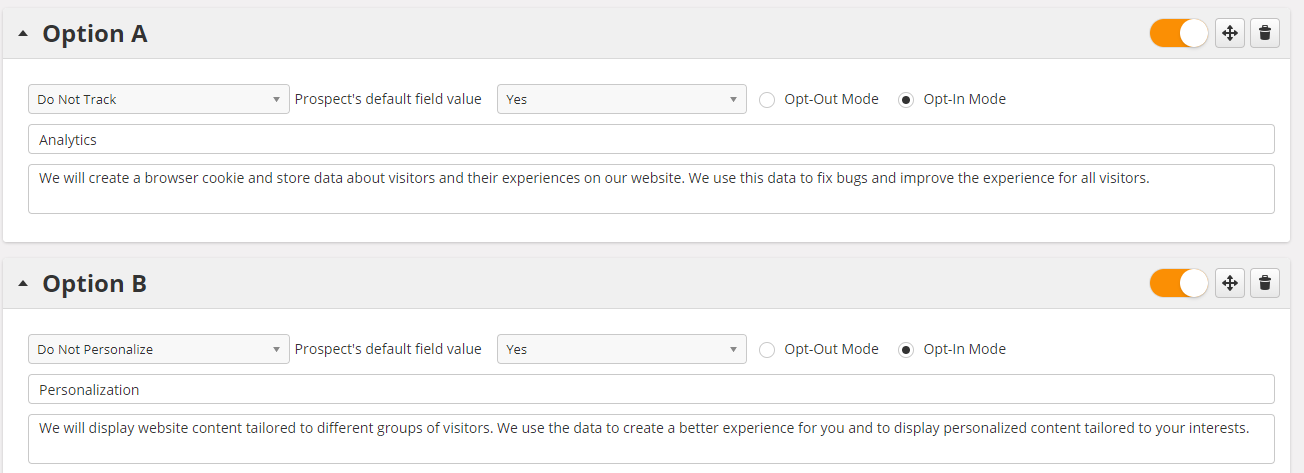
These options can be in one of two modes:
Opt-Out Mode: The user will select this option to opt out of marketing features. Use this option if the feature should be ENABLED by default.
Opt-In Mode: The user will select this option to opt in to marketing features. Use this option if the feature should be DISABLED by default.
Example: If you do not want to track visitors until they opt in, you would set the Do Not Track field to "Yes" and set the option to Opt-In Mode.
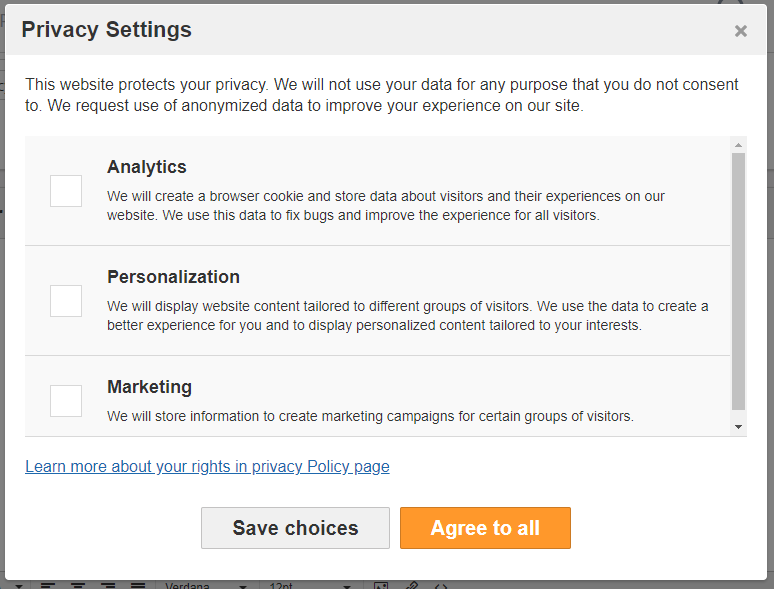
Below is an example of the Consent Manager using the settings above.
Embed Code
Instead of using Lead Liaison's Consent Banner, you can also use JavaScript to open the Consent Manager. Use this option if you would like to include a button or Privacy Settings page on your website. Using this option will allow a user to change their settings after the are initially set. To access the embed code:
- Navigate to Settings > App Setup > Privacy
- Click on the Consent Handlers tab
- User the drop-down menu next to the New button to select Embed Code
- Copy the code from the pop up and place it on your website.
There are several ways you might use the embed code. Below are two examples, one inline, and one JQuery.1
Inline Options (either of these 2 options will work):

<a href="javascript:void(0)" onclick="ll_privacy_manager.request_log_popup_open()">Click Here</a>

<a href="javascript:ll_privacy_manager.request_log_popup_open()">Click Here</a>


jQuery:


<a href="javascript:void(0)" id="btn_consent_handler">Click Here</a>
<javascript>
$(document).ready(function(){
$('#btn_consent_handler').on('click', function(){
	ll_privacy_manager.request_log_popup_open()
});
});
</javascript>
Data Subject Requests
Your users may want you to take an action on their data. This could range from asking you to provide them with all data you have gathered on them to deleting all of their data. Lead Liaison can help you manage these requests.
To set up a data request manager:
- Navigate to Settings > App Setup > Privacy
- Click on the Data Requests tab
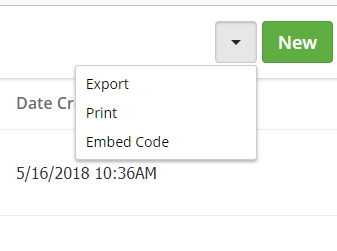
- Use the drop-down menu in the top-right corner to select Data Subject Request Editor
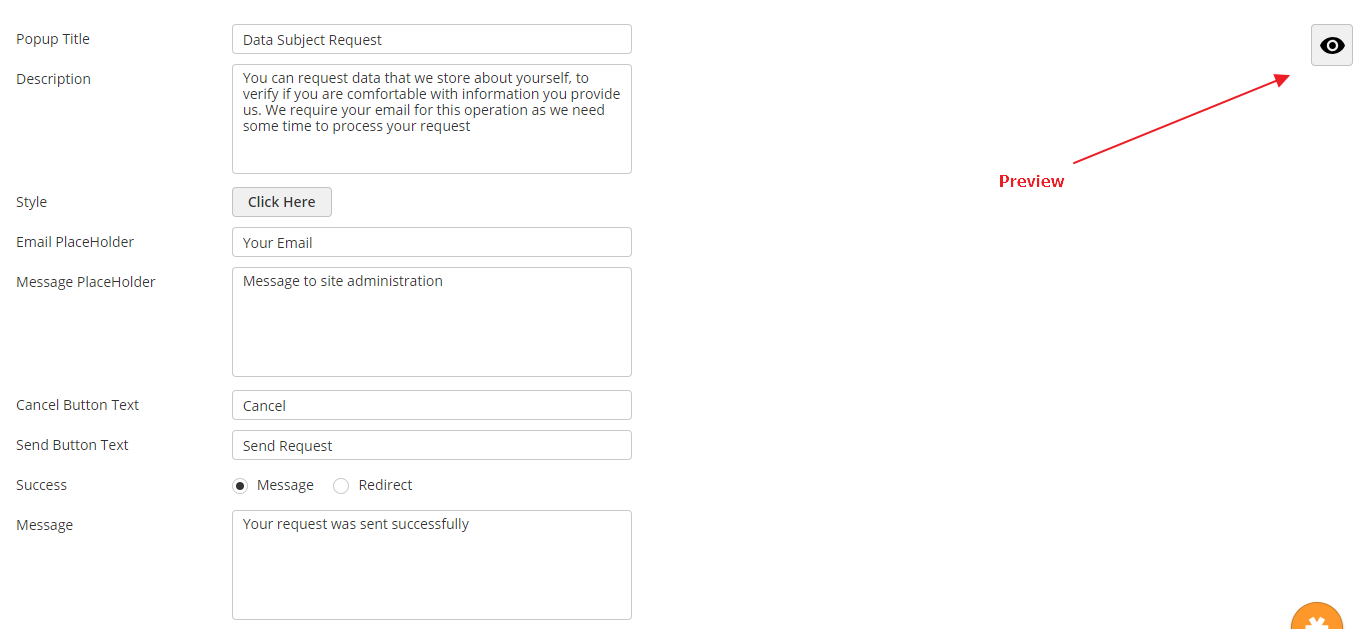
- Change the wording and styling to match your brand
- Click the Save button
- Use the drop-down menu in the top-right corner to select Embed Code
- Place the code on your site where you would like the Prospect to make data requests
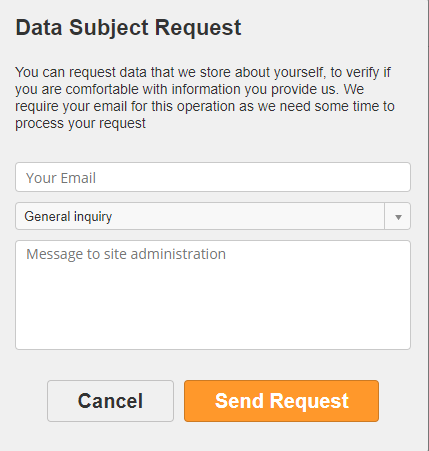
Below is an example of the data request menu using the settings shown above.
Processing Data Requests
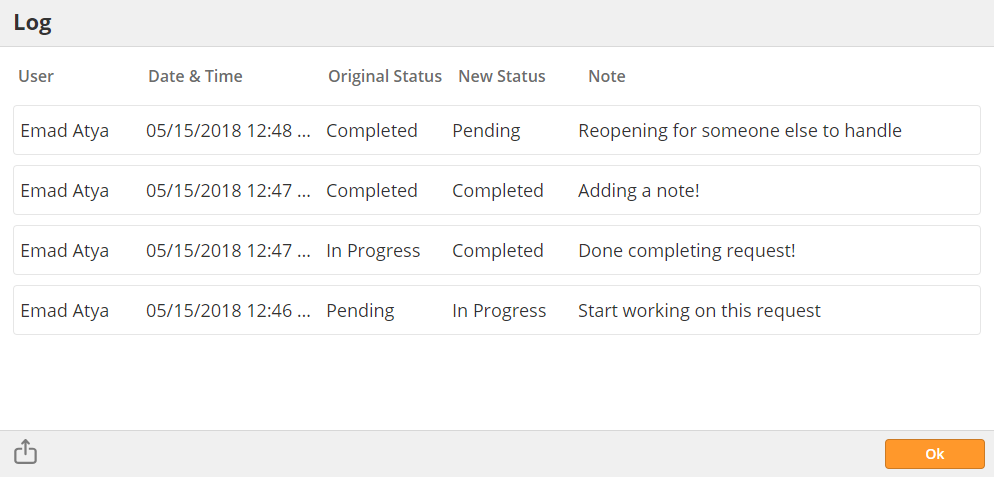
When a user submits a data requests, all users in the Admin Security Profile will receive an alert. Admins can then use Lead Liaison to log progress on the request. To log progress, navigate to Settings > App Setup > Privacy. From the data request tab, use the drop-down menu to the far right of the request to mark the request as In Progress, Complete, or to add a Note.
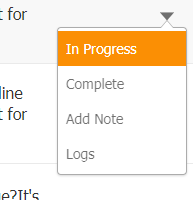
Select Logs to view all notes and updates to a data request. You can also export the Log using the icon in the bottom-left corner of the Log menu.
Opt-In Forms
Some regions may require you to have Prospects opt in to specific forms of marketing. For example, in your region, it may not be enough to have a privacy statement letting Prospects know that filling out a form will add them to email marketing. Instead, you may have to allow the user to opt in to specific email lists, such as your newsletter, special offers, and product updates.
To add an opt-in statement to a Hosted Form,
- Create a new custom field matching your email list ("Receive Newsletter" in this example) following these instructions
- Add a Boolean Field type to your form
- Map the Boolean Field to the Receive Newsletter field
- Click Save and Close on the field
- Finish editing your form and click Save and Exit
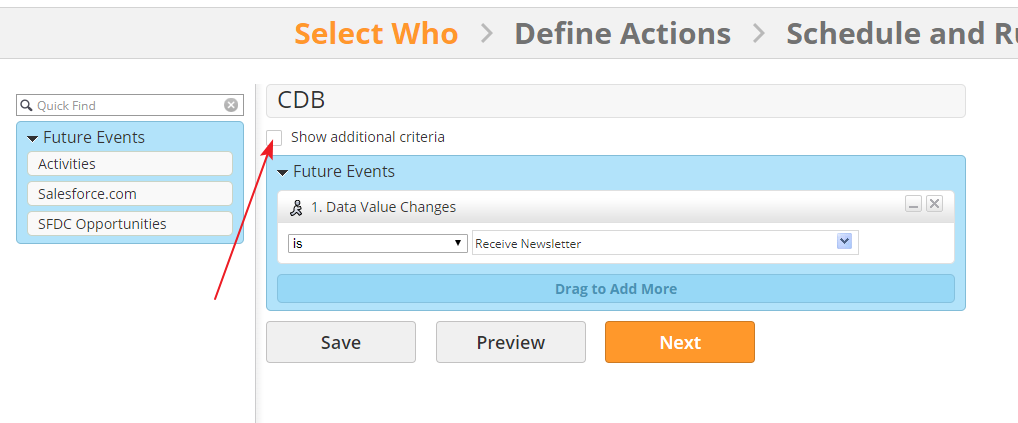
- Create a new behavior-based automation
- Select "Change Data Value" as the automation trigger
- Select the Receive Newsletter field
- Check the "Show additional criteria" box
- Add the Newsletter field as an attribute and set it "True"
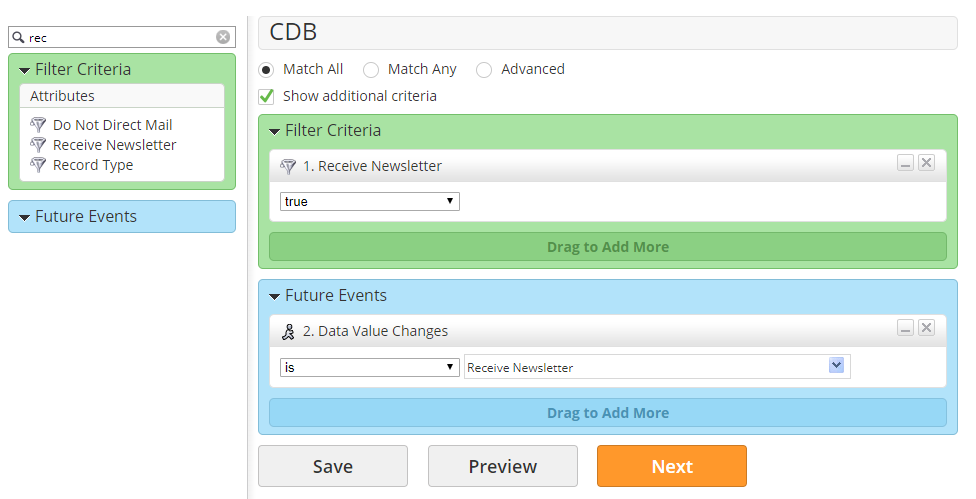
- Click Next
- Add an "Add to List Action" and select the appropriate List
- Click Next
- Save and Activate the automation
You may work with multiple regions, and not every region may require the Prospect to opt in to specific lists. If this is the case, follow the steps above, but also
- Add a new single-line text field to the form
- Map the single-line text field to the Region Prospect Field
- Set this field to be Hidden
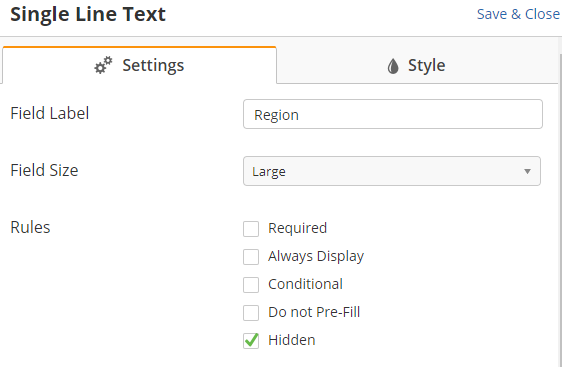
- Click Save and Close
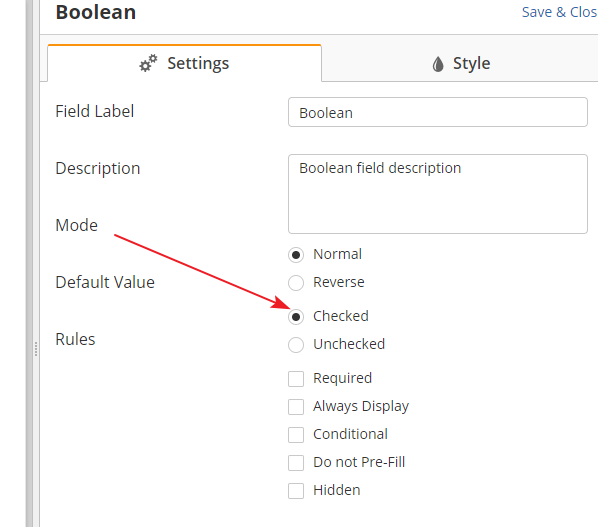
- Open the options for your Boolean Field
- Set the Default Value to Checked
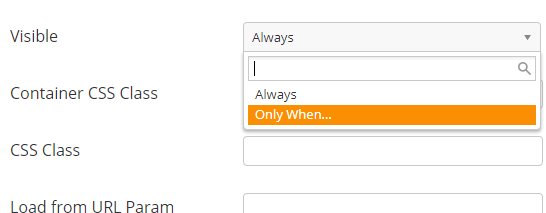
- Change the Visibility Rules to "Only When..."
- Click Set Rule
- Use the settings shown below
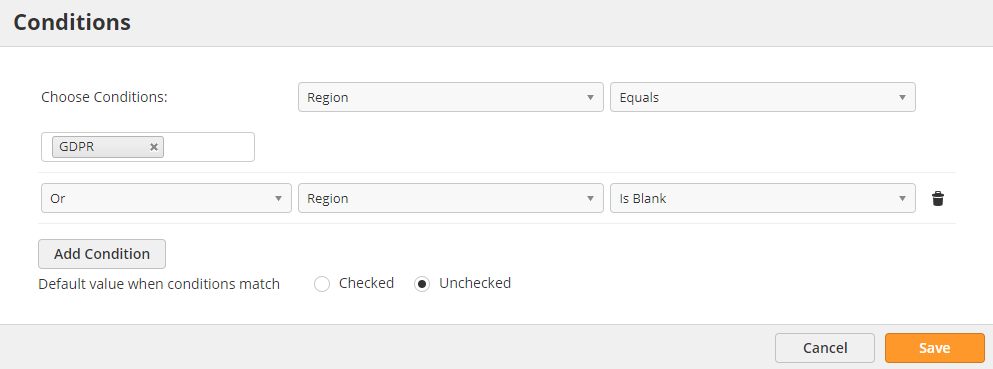
When setting the region, select all regions which require a specific form opt-in statement. By setting your form up with these settings, the opt-int field will only display on the form if the user is in a region that requires it. Otherwise, the default setting will hide the field and automatically opt in the Prospect.
![]()
© 2021 Lead Liaison, LLC. All rights reserved.
13101 Preston Road Ste 110 – 159 Dallas, TX 75240 | T 888.895.3237 | F 630.566.8107 www.leadliaison.com | Privacy Policy