Lists
- Ryan Schefke
This document provides an overview of Lists. To access your Lists navigate to Prospects > Lists.
Lists Overview
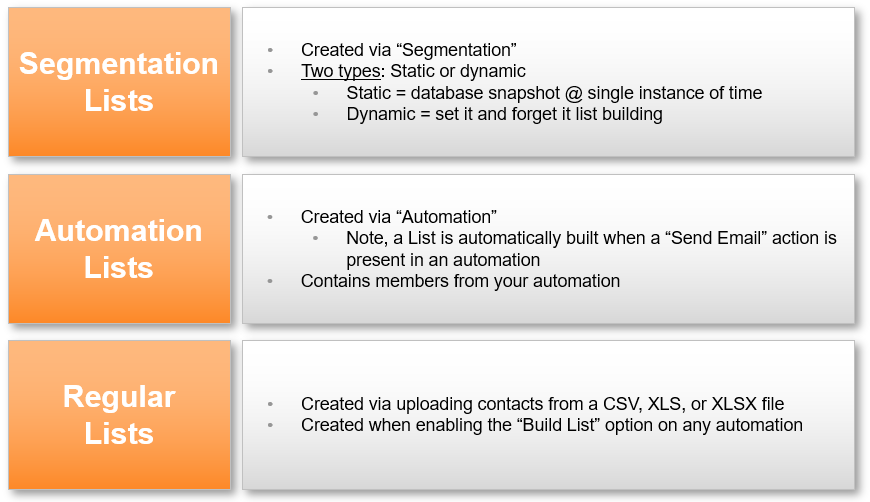
Lists can be created in Lead Liaison in one of three primary ways:
Use any list to send a direct email, use it in nurturing, or export it.
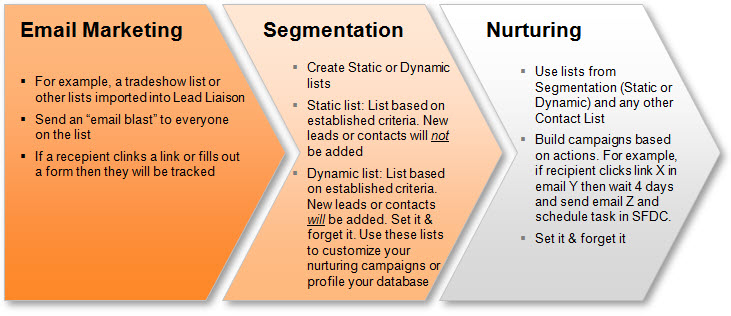
Where Lists are Used
Lists are primarily used in three areas of Lead Liaison. Each of the three areas are described in the graphic below.
Managing Lists
Creating a List
To create a list do the following:
- Navigate to Prospects > Lists.
- Click the New button.
- In the New List window, fill in the form:
- Private Name: Internal name of the list (not visible publicly). By default, the public name is the same name as the private name unless changed.
- List Categories: Group lists into categories, such as "Best Practices", "Tips", etc. Categories help simplify list management for your users and create an area for them to manage their preferences. When a recipient clicks unsubscribe, they'll be able to unsubscribe from Categories as well as individual lists. For example, if there a person is part of 5 lists, and all 5 lists are in one category, unsubscribing from the category will remove the person from all 5 lists.
- Make Public: Makes the list visible to the public when they try to unsubscribe.
- Public Name: Name that people will see when they update preferences or try to unsubscribe.
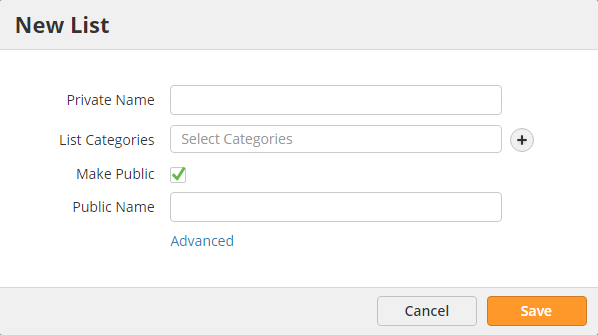
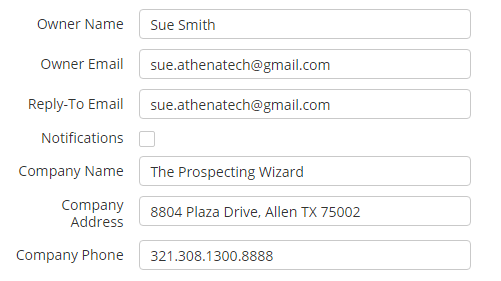
- To define list ownership, click the Advanced link and fill in the rest of the form.
Private Lists
Consider only making lists private that are used for internal purposes only. When recipients try to unsubscribe from a private list by clicking the unsubscribe link, they will only see public lists and cannot unsubscribe from individual private lists. The only way recipients are unsubscribed from private lists are when they unsubscribe from all communication (global unsubscribe).
Test Lists
Max 20 Prospects
Test Lists can contain no more than 20 Prospects.
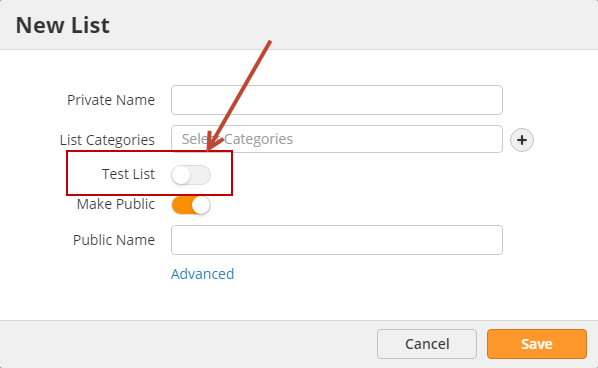
Test lists can be used to get feedback from recipients, such as your internal team. Test lists cannot have more than 20 recipients per list. To create a test list do the following:
- Navigate to Prospects > Lists.
- Click the New button.
- Enable the Test List setting as shown below
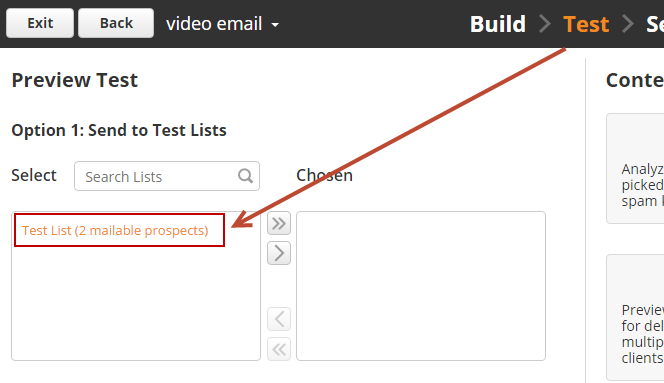
Send email to your test lists by using the Test step when sending an email. On the left side under the "Preview Test" section use Option 1 to send to a test list, as shown below:
Removing Prospects from Lists
Prospects can be removed from Lists in the following ways:
- Using an automation with the Remove from List action.
- Manually, from the Prospect Profile page under the Nurture tab.
- Manually, from the Prospects page by using the master checkbox as shown below.
Key Info
Note, When a Prospect is removed from a List manually this overrides any Dynamic List settings. In other words, the Prospect will not get added again to the same list if they meet the Segmentation List criteria.

Exploring Different Lists
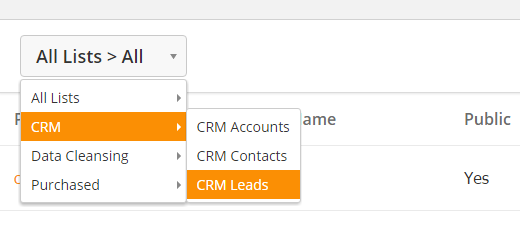
Use the multi-level navigation button to explore different lists on the system.
Purchased
This grid shows contacts that were purchased. Each column is described below:
- First/Last Name = Name of the acquired contact.
- Title = Title of the acquired contact.
- Organization = Company of the acquired contact.
- Rating = Proprietary rating system for the contact that identifies the quality of the contact. A 100 Rating means the contact is of high quality and the contact information is accurate and up to date.
- T/P = Identifies if the contact was purchased or traded when acquired.
- Credits = Number of credits used to purchase the contact.
- Date = Date of the transaction.
- Actions = View the contact information in a popup.
To learn more about Traded/Purchased contacts visit the Trade/Purchased Wiki page.
CRM
The CRM tab displays all of your CRM leads, contacts and accounts in your CRM that are also synchronized with Lead Liaison. Each column is described below:
- Synced = Is the contact synced between Lead Liaison and your CRM (yes/no).
- Name = Name of the contact.
- Title = Title of the contact.
- Company = Company of the contact.
- Email = Email of the contact.
- Phone = Phone number for the contact.
- Owner = Name of the Lead Owner.
Data Cleansing
Data cleansing displays all contacts that were filtered/removed from the system. For example, blacklisted contacts. See Blacklisting Visitors for more information.
Automation Lists
A list is automatically created and linked to an automation when:
- the automation has a "Send Email" action in it or
- you choose to build a list in the options of an automation using the "Show as list in email marketing" option at the end, as shown below.
Automation lists contain people in the automation. Lists created from an automation cannot be used with the "Add to List" action of another automation or Fulfilment Action; however, they can be used with the “Send to Workflow” action, which will add the prospect to the automation and the associated list at the same time.

Updating Company Address
The company address information used with the %%companyaddress%% merge field comes from the address saved with the list. If your company has changed addresses do the following to update all address information across your lists:
Updating Existing Lists:
- Navigate to Prospects > Lists
- Click the edit icon
- Click the "Advanced" section
- Update the "Company Address" field
Updating New Lists:
- For each user that can create lists navigate to Settings > Users and click the Edit icon
- Update the "Company Full Address" under the "Additional Information" section
- Navigate to Settings > App Setup > Email and update the information under the Lists section. Make sure to update the Company Full Address.
![]()
© 2021 Lead Liaison, LLC. All rights reserved.
13101 Preston Road Ste 110 – 159 Dallas, TX 75240 | T 888.895.3237 | F 630.566.8107 www.leadliaison.com | Privacy Policy