Email Categories
Overview
Categories provide an easy way to group Lists into a "bucket". If you don't want your recipients seeing the details of your public Lists, create Categories and place your Lists into the Categories. For example, you might have five different Lists that relate to tips or tricks for your product/service. You could assign each of the five Lists to a new Category, called "Tips & Tricks". Now when a recipient wants to unsubscribe, they could choose to unsubscribe from only the Tips & Tricks category, which would unsubscribe them from all five Lists in the Category.
Managing Categories
You can manage your Categories from the Email Marketing page in the admin panel. To reach the page,
- Click the Settings gear icon in the top-right corner of the screen
- Navigate to Admin > App Setup > Email
- Click the Categories tab
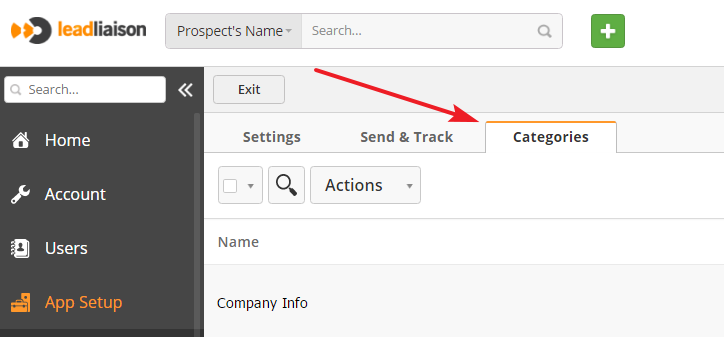
On this page, you will see your organization's Categories. You can edit or delete existing Categories, and you can add a new Category by clicking the green New button.
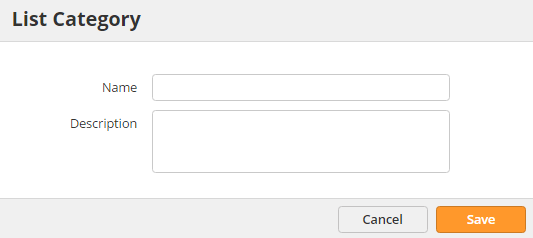
When creating a new Category, you only need to enter a name and optional description. When you're done, click Save.
Adding Lists to Categories
You can add a List to a Category when creating a new List or editing an existing List. To access add a List to a Category,
- Navigate to Prospects > Lists
- Click the green New button
OR - Click the Edit icon next to an existing List

- Use the List Categories drop-down menu to choose an existing Category
OR - Click (+) to create a new Category
Adding Categories to Custom Unsubscribe pages
To enable Categories on your unsubscribe page, flip the Categories switch on your unsubscribe template. Your email recipients will see all of the Categories containing Lists and can choose which to unsubscribe from.
Main Article: Custom Unsubscribe.
![]()
© 2021 Lead Liaison, LLC. All rights reserved.
13101 Preston Road Ste 110 – 159 Dallas, TX 75240 | T 888.895.3237 | F 630.566.8107 www.leadliaison.com | Privacy Policy