Hosted Web Forms
- Ryan Schefke
- Sam Mahboob
- Christopher Kipgen (Unlicensed)
- Mike Pauer
Overview
You can use Lead Liaison's visual form builder to create new forms for your website. By using hosted forms, you can map custom form fields to any standard or custom prospect field. Add these forms to your website through a snippet of HTML, or host them on a Lead Liaison landing page.
Using the Visual Form Designer
Lead Liaison's visual form designer makes it simple for anyone to create a new form. To build a new form, navigate to Content > Web Forms and click the green New button. After filling out the form info and selecting "New form not on my website," the system will redirect you to the form builder.
Choose a 1 column, 2 column, or 3 column layout for your new form.
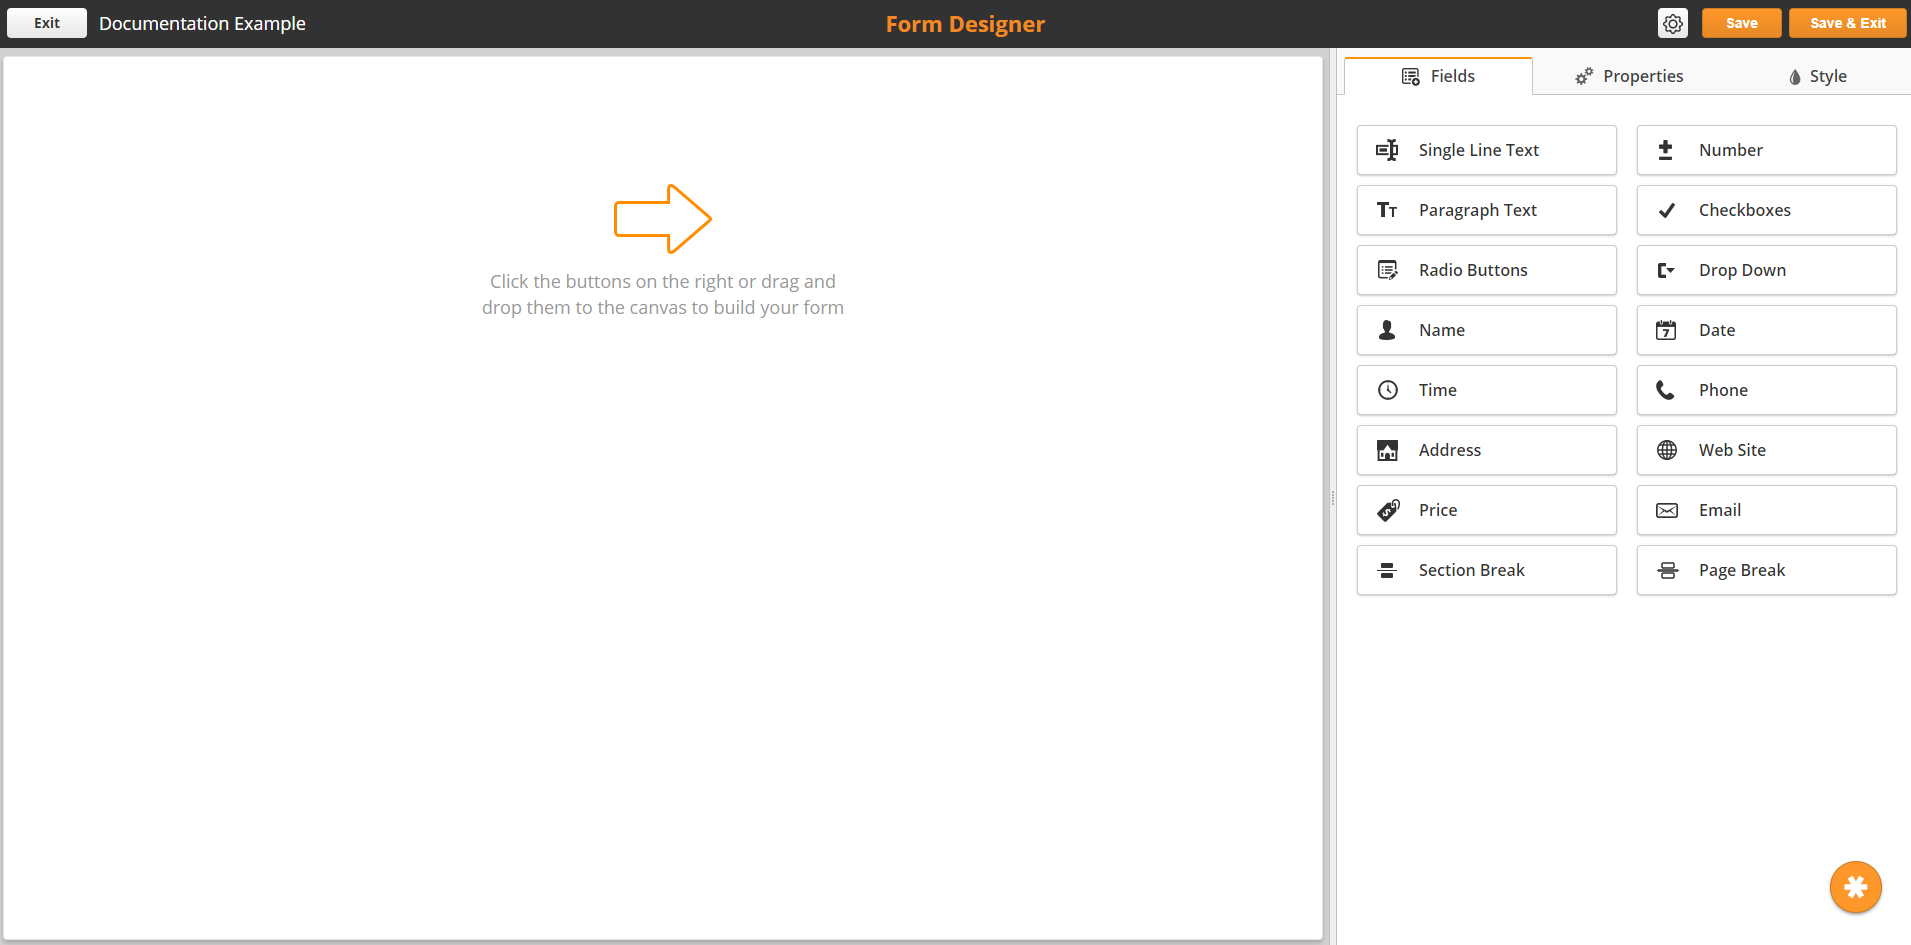
The menu on the right side of the form designer includes the form fields, form properties, and form style. To add a new field to the form, either click the field or drag it from the right side to the left. Once you have placed your fields, you can rearrange fields by clicking and dragging.
Our form builder is unique in that you edit the form's HTML in real time. Because of this, you have more control than most form builders. However, if you have a plugin that can also edit HTML in real time, it might add code to the form builder. If you notice a form not resizing properly or a non-responsive field, please deactivate your plugins and try again. If this does not fix your issue, contact support@leadliaison.com.
Form Properties
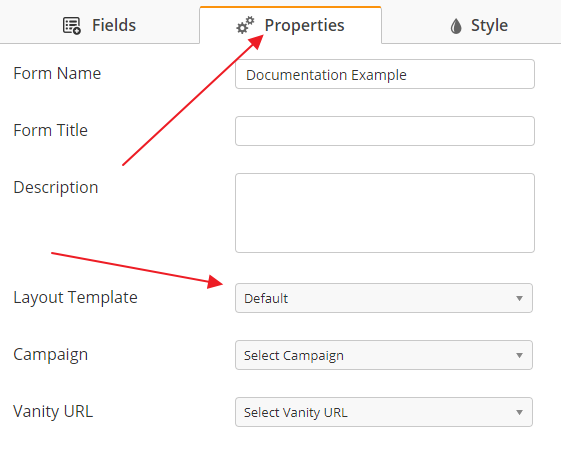
To access the form properties, click the Properties tab. Make sure you don't have a field selected on the left side of the builder.
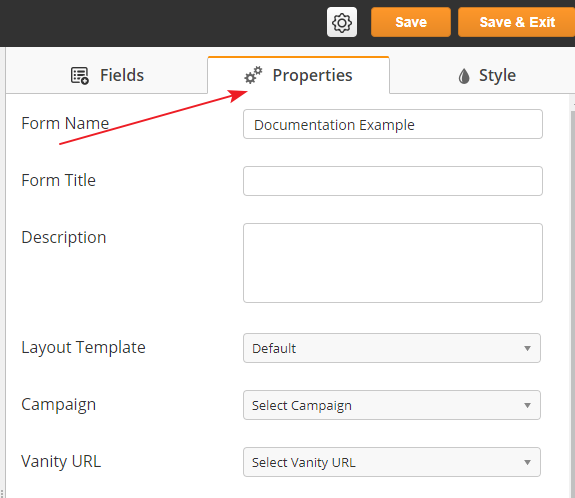
- Form Name – edit the name of form on the Web Forms page
- Form Title – create a title that will appear above the form
- Description – add an internal description of the form
- Layout Template – use the style attributes of a layout template
- Campaign – add the form to a Lead Liaison campaign
- Vanity URL – select the vanity URL used for the form
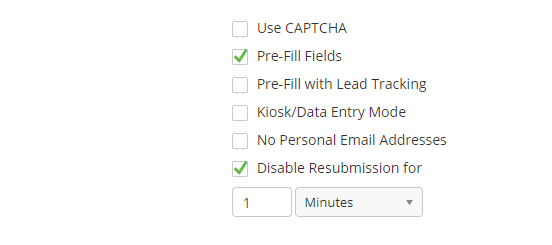
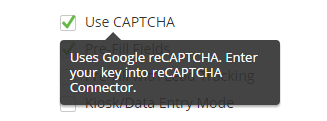
- Use CAPTCHA – add Google's reCAPTCHA to the form
- Pre-Fill Fields – use prospect fields to fill in known information about the prospect such as name or email
- Pre-Fill with Lead Tracking – use lead tracking data to fill in fields such as country or city
- Kiosk/Data Entry Mode – create a Kiosk Form
- No Personal Email Addresses – block submissions from personal emails such as yahoo.com and gmail.com
- Disable Resubmissions – prevent users from resubmitting a form for a certain period of time
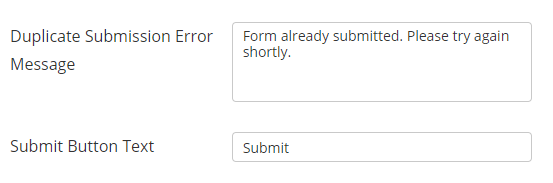
- Duplicate Submission Error Message – set a message to display while resubmissions are disabled
- Submit Button Text – edit the text on the submit button
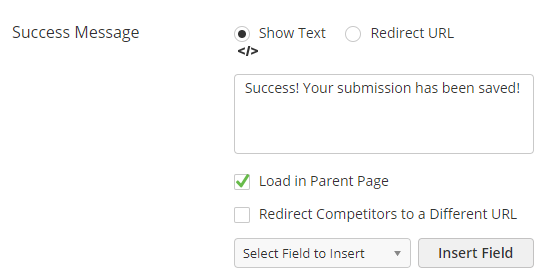
- Success Message – define form behavior on successful submission
- Show Text – display text from box below
- Redirect URL – redirect user to specific page
- </> – edit the success message in an HTML WYSIWYG editor
- Load in Parent Page – load the success message or redirect URL in the form's frame on the page. Note for this feature to work the form must be embedded into the parent page using an iFrame. This feature will not work with forms embedded via JavaScript, unless the parent page is also an iFrame.
- Redirect Competitors to a Different URL – redirect prospects with a company in the Competitor org type
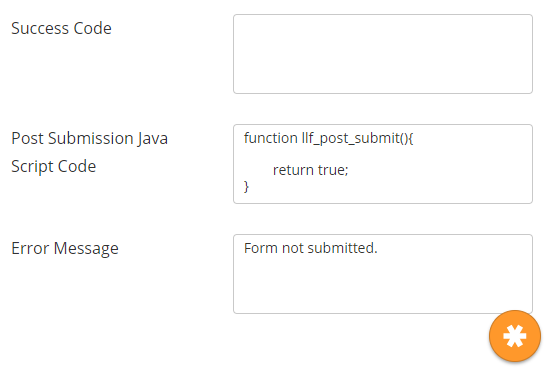
- Success Code– insert 3rd party tracking code (such as Google's tracking code) to help measure the success of PPC campaigns
- Post Submission Java Script Code– insert custom java script code to be called on a successful submission
- Error Message– set the message that appears during an unsuccessful submission (such as a personal email address.

- Validate data by page– check required fields on each page of a form with Page Breaks.
Style
Use the style tab to change the style of different form attributes, such as the fields, labels, and the button. If you have added a Layout Template to the form properties, the system will use the styles from the Layout Template instead.
Custom Fonts
You can add a custom font in the style tab. Simply enter the URL and name of the font you would like to use.
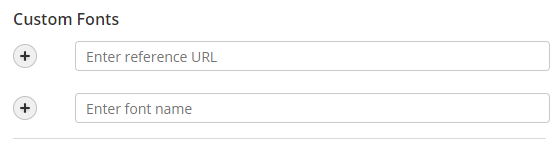
Click the (+) buttons to add more custom fonts.
Fields
To add a field to your form, click on the field element on the right menu or drag it to the left side of the form designer.
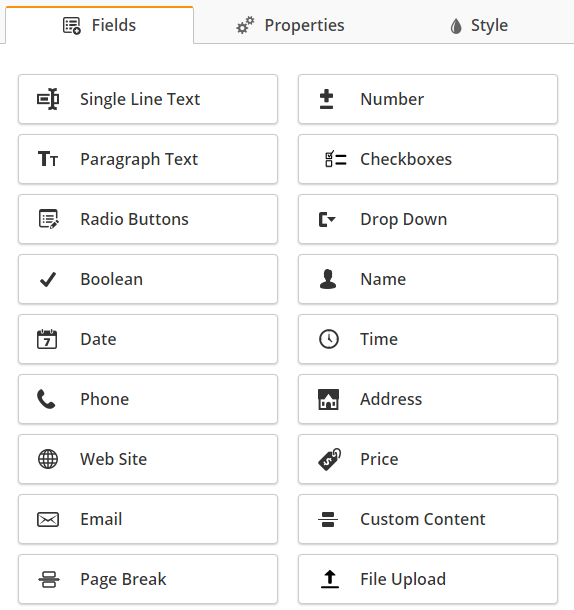
While some form fields have default mapping (such as Name being mapped to the First Name/Last Name prospect fields), they can all be mapped to fields of the same type (text to text, number to number etc.).
- Single Line Text – a single line of text mappable to text fields like Company or Job title
- Number – numerical value mappable to numerical fields like Number of Employee
- Paragraph Text – a large text field mappable to any paragraph fields like Description.
- Checkboxes – multiple-choice selection allowing multiple answers
- Radio Buttons – multiple-choice selection allowing a single answer
- Drop Down – drop-down menu of pre-defined choices
- Boolean – true/false checkbox field
- Name– single-line text field mapped to First Name and Last Name
- Date– field that inserts current date
- Time– field that inserts current time
- Phone– field mapped to Work Phone
- Address– fields mapped to Street Address, Street Address 2
- Web Site– single-line field mapped to Website
- Price– numerical fields for currency fields like Budget
- Email– single-line text field mapped to Email
- Section Break– divider between field groupings
- Page Break– adds multiply pages to the form and changes "Submit" to "Next" on all but the last page.
- File Upload – allows user to upload files such as PDFs, sheets, or documents
- Documents – allows users to share selected documents (or e-literature) after a form submission. The process for adding documents is the same as for the event form outlined here.
Field Properties
Each field has its own properties. Once you have placed a field, click on it to edit its properties. Depending on the field type, you will see different options. Below is a list of standard properties followed by field-specific properties
- Field Label– label for the field
- Field Size– size of the field on the form
- Rules
- Required– must be filled out to submit form
- Always Display– makes sure the field is always displayed for dynamic forms
- Progressive Profiling– hides field and replaces it with another conditional field if the information is already known (hiding Email and replacing with Website, for example) – does not work with external forms
- Do not Pre-Fill– never pre-fills the field, overriding the form properties
- Hidden– field is rendered to the form but hidden from the user
- Default Value– prepopulate the field with the information you enter here
- Field Error Message– error displayed when a required field is missed or formatted incorrectly
- Identifier– internal field ID
- Visible
- Always – always displays regardless of other responses
- Only When...– displays based on rules (a "Please Specify" text field appearing when someone selects "Other" in a drop-down menu, for example)
- Container CSS Class– sets the CSS class of the field's container for forms using layout templates
- CSS Class– sets the CSS class of the field for forms using layout templates
Load from URL Param– set the name of a parameter for the form to scan for; if the form detects the parameter in the URL, it will auto-fill the field with the value
You can also add a query string parameter to the form's URL. For example, if the field is set to scan for the parameter "text1," and the url is "https://t1.llanalytics.com/view-form.php?ll_custID=XXXXX&id=XXXX&text1=hello," the field would insert "hello" when the form's iframe loads in.
Load from URL Index– the field will auto-fill using the index level selected here; index levels are as follows: domain.com/index1/index2/index3
You can use both Load from URL Param and Load for URL Index at the same time. First the form will scan for the parameter, and if no parameter is found it will load the field with the value in the index level.
- Map Rules– the Lead Liaison field the form field is mapped to
Field-Specific Properties
Choices
Used in Checkboxes, Radio Buttons, and Drop-Down Menus.
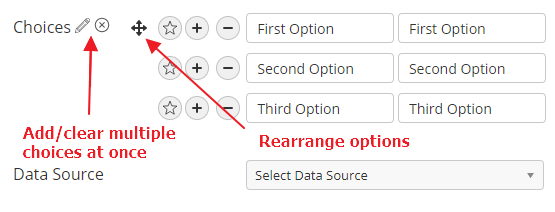
The box on the left is the field label, and the box on the right is the field description. Use the (+) and (-) buttons to add and remove options. Use the star icon to set a default choice.
You can add multiple choices at once by clicking on the pencil to the right of "Choices." Clear all choices by clicking on the x. Move choices around by clicking and dragging on the space to the left of the choice.
Use the Data Source drop-down menu to import values from an existing drop-down field such as Industry or Original Lead Source.
Randomize
Randomize the order of Radio Button options.
Field Items Direction
Set Checkbox and Radio Button options to appear vertically or horizontally.
Currency Format
Set the currency type for the Price field.
Phone Format
Choose between US format or international. International format will remove parenthesis and dashes.
Field Hints
Display hints for address fields.
Default Country
Set the default country for address fields.
File Uploads
If you've added the File Upload element, users can send files along with their submission. While you can only upload one file per element, you can have up to three File Upload elements on the form. If you require more than 3 files per submission, contact your Lead Liaison representative.
Lead Liaison supports the following file types:
- .png
- .jpg
- .jpeg
- .gif
You can download the user's documents from the Submissions screen or from the Web Form Alert.
If you are using the File Upload element, you can only embed via iFrame. The form will not work properly if you embed via Javascript.
Embedding Forms via iFrame
After creating the form Lead Liaison produces HTML code which can be copied and pasted into your website.
To obtain the HTML code for any form do the following:
- Go to Content > Web Forms
- Click the drop-down under the Actions column and select HTML
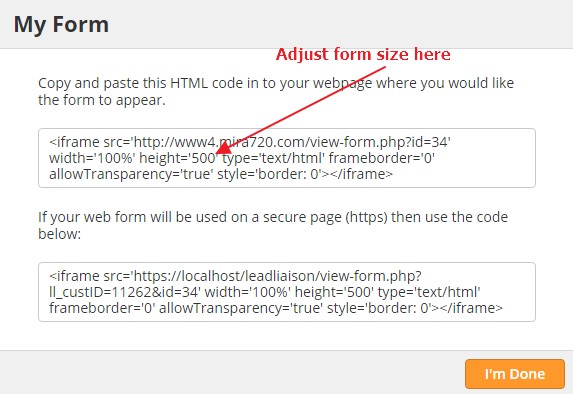
- A popup similar to the one below will be displayed
- Place iframe onto your webpage
Web Master
Provide this HTML code to your web master or place it directly onto the page in the <div> tag the form should go. If you see scroll bars on the form, adjust its width or height within the iframe.
Embedding Forms into SSL-Enabled Pages
When you insert your form embed code into an HTTP Secure page (HTTPS) on your website you may get a security error. Lead Liaison provides web form embed code that uses your vanity domain (CNAME), which is not HTTP Secure by default.
Since Lead Liaison only has a security certificate for leadliaison.com all you need to do to make your web form HTTP Secure is replace your original embed code with the HTTP Secure embed code.
Access your HTTP Secure embed code by doing the following:
- Go to Content > Web Forms
- Click the gear under the Actions column and select HTML
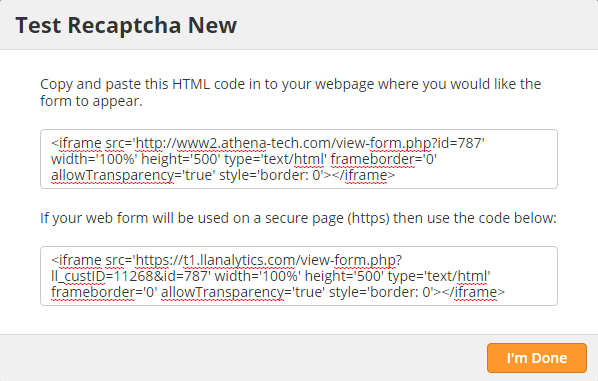
Although your embed code might look different, here's an example:
Original Lead Liaison iframe Code:
<iframe src='http://www2.athena-tech.com/view-form.php?id=45528' width='100%' height='500' type='text/html' frameborder='0' allowTransparency='true' style='border: 0'></iframe>
Updated HTTP Secure iframe Code:
<iframe src='https://t1.llanalytics.com/view-form.php?ll_custID=112489&id=45528' width='100%' height='500' type='text/html' frameborder='0' allowTransparency='true' style='border: 0'></iframe>
Embedding Forms via JavaScript
Using multiple forms on a single webpage
A single website URL can only have 1 JavaScript embedded form. Trying to add more will cause the other's on the page to break, most commonly so they no longer submit information.
If you require more than 1 form on a single webpage, you can use JavaScript for one, then iframe for the rest to work around this limit.
If you don't prefer to you use iFrames when embedding content, you can also embed Lead Liaison forms via JavaScript. JavaScript forms will responsively fit into the location you have placed them; no need to adjust he height of the form to eliminate scroll bars. The form can also use the styling of the page for more precise control over the form's appearance.
To obtain the JavaScript code for any form do the following:
- Go to Content > Web Forms
- Click the drop-down under the Actions column and select HTML
- A popup similar to the one below will be displayed
- Use the code in the third window highlighted below.
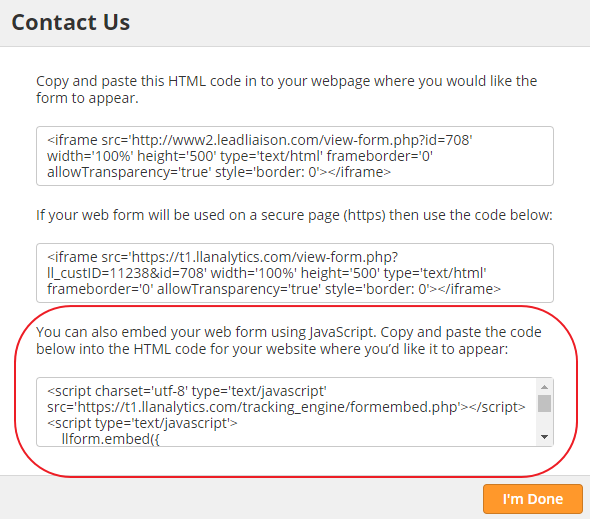
Because the form can inherit the page's styles, you might see some unexpected rendering behaviors. Typically this is caused by your page enforcing general styling. Adjusting your styles can correct this issue. If you continue to have issues, contact support@leadliaison.com and include a link to both the form and the page the form is embedded on.
The JavaScript embed option does not work if the form has an upload element or has a page break element. Such forms can only be embedded using the iFrame option.
Handling Form Submissions from Competitors and Personal Emails
Web form submissions from personal email addresses may be blocked and submissions from competitors may be redirected. Setting this capability up is described in more detail below.
Blocking Form Submissions from Personal Email Domains
Lead Liaison provides a flexible way to block web form submissions from personal email domains. This feature is customizable at the web form level. In other words, it's not a global feature and can be enabled/disabled for each web form. To block form submissions from personal domains do the following:
- First, make sure your list of Personal Email Domains is set
- Next, start creating your new web form
- Click the Form Properties tab in the web form builder
- Check the box next to Do Not Accept Personal Email Addresses
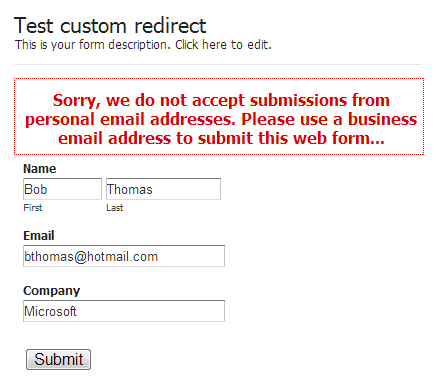
- When checked, a new Error Message box appears below. This is the message that will be displayed when the visitor attempts to submit the web form using a personal email domain.
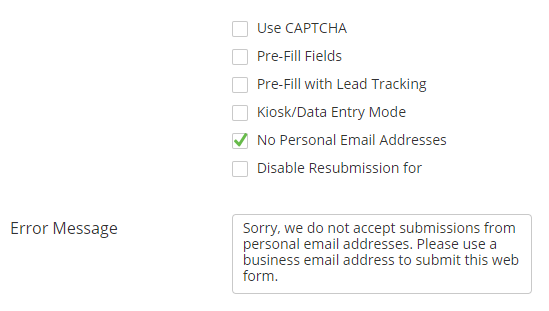
- When the form is submitted by someone using a Personal Email Address the response will look like this:
Submission Count
When a visitor submits a form from a Personal Email Address and this feature is turned on the Submission count will not increase and the visitor's information will not be collected.
Redirecting Form Submissions from Competitors
Lead Liaison provides a flexible way to block web form submissions from competitors. This feature is customizable at the web form level. In other words, it's not a global feature and can be enabled/disabled for each web form. The list of competitors may also be modified globally as well as on the web form-level. To redirect form submissions from competitors do the following:
- First, make sure you've build a Domain List of your competitors
- Next, start creating your new web form
- Click the Form Properties tab in the web form builder
- In the Success Message section check the box next to Redirect Competitors to a Different URL

- When checked, two new sections appear below. Each box is described as follows:
- Redirect Competitors to a Different URL = Enter the URL that you want to send your competitors to.
- Domain List = Select to use one of your Domain Lists containing a list of your competitors which you wish to redirect.
- Redirect Using Specific Competitors = Check this box to add or remove Competitors that may not be in your global list of competitors.
- Redirect Using Specific Email Addresses = Check this box to add or remove specific email addresses that may not be in your global list of competitors. Using this option will only redirect the specific address, not the entire domain.
Using a Domain List and a Custom List Together
By selecting a Domain List Lead Liaison will redirect competitors in your Domain List. It's also possible to use only a custom list of Competitors and skip the Domain List. To do this remove the Domain List value and check the "Redirect Using Specific Competitors". Additionally, both the Domain List and custom list can be combined by selecting both checkboxes.
Likert Scales (Surveys)
You can create a survey using Likert scales. Likert scales are commonly used in questionnaires for respondents to give a rating. For example, you might ask an existing client how likely they are to recommend your company. A Liker scale would allow the Prospect to rate their likelihood.
To add a Likert scale and create a survey,
- Add a Radio Button or Checkbox field.
- Open the field options.
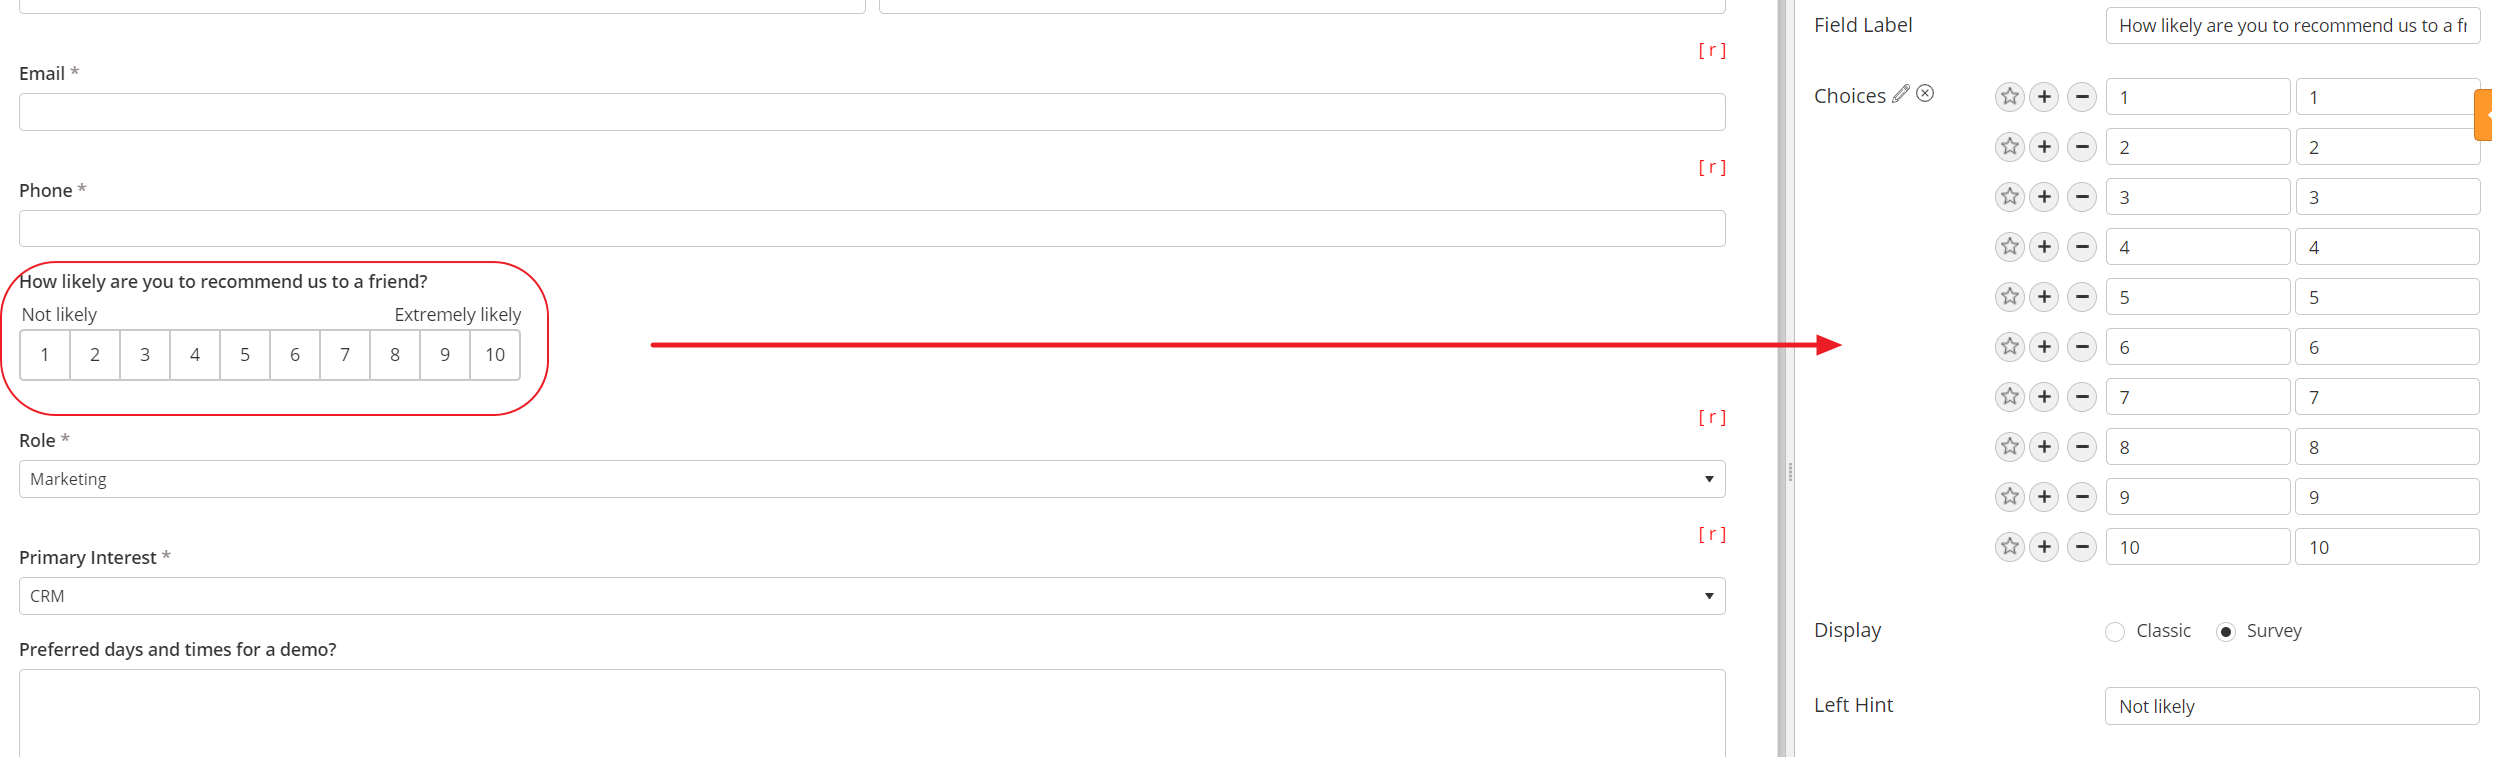
- Add your selections (for example, the numbers 1-10).
- Change the display mode to Survey.

- Add a left hint and a right hint for the scale.
In the example below, we have a scale for how likely a user is to recommend us to a friend. They can rate their response from 1-10 from "Not very likely" to "Extremely likely."
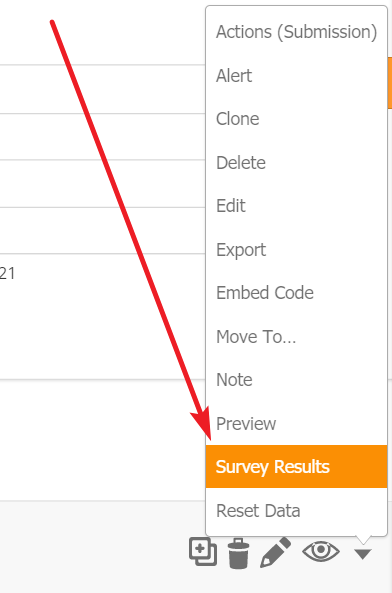
Viewing Survey Responses
To view survey responses, select the Survey Results option in the Action Menu.
Using Custom CSS
- CSS Class = CSS Class sets the CSS class that will be used on this form field. Use this option to add your own custom styling to the field. The CSS class should be defined in your Layout Template. The CSS code can be embedded into your Layout Template or referenced in a file, which can be hosted in your Media Manager or on your own server.
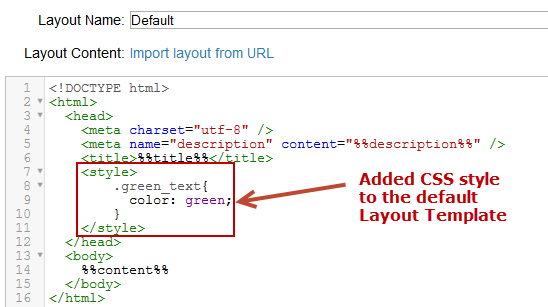
In the example below we use a css class name of "green_text" to be applied to the form field:

We then added the green_text CSS Class to the Default Layout Template:
See the results:
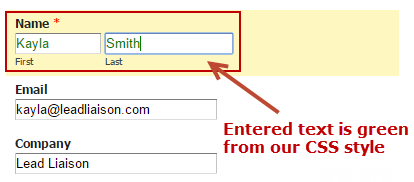
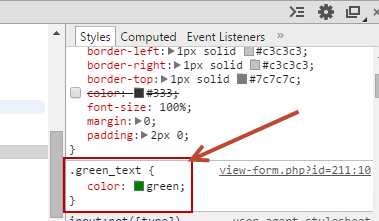
We inspect the code in our browser to confirm our CSS style was added to the field:
Using Field Conditions
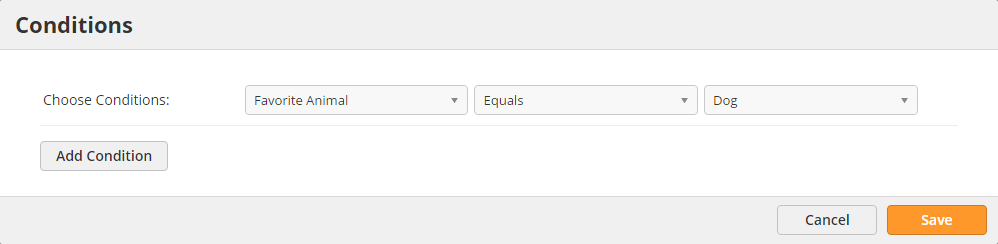
You can add conditions to whether a field appears or not by using the Visible field property. In the example below, we build a form for the user to choose their favorite animal, between a cat or a dog.

For the two Animal Choices fields, we load one with types of dogs and the other with types of cats. Click the Set Rule option to load the Conditions selector. Tell the system to show the dog types only when the Favorite Animal field, which controls the two fields below it, equals Dog. Do the same when it equals Cat, as shown below.


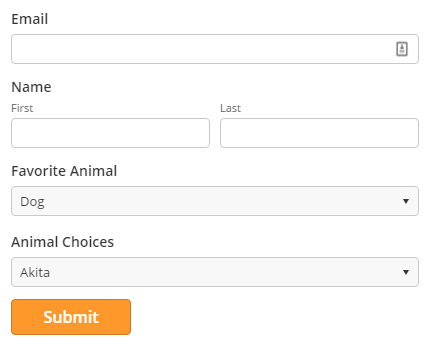
In the live form the bottom field is controlled by the Animal Choices field and becomes a dynamic form field.
Using Custom Java Script Code
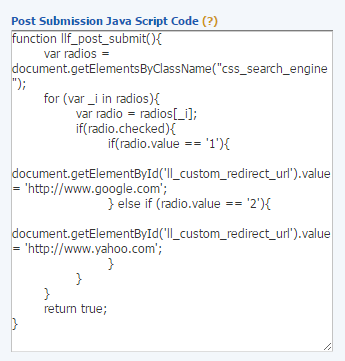
You can insert your own java script code to call when a user submits a form. Use the Post Submission Java Script Code form property.
In the example below, we inserted a Radio Button field into the form (Google, Yahoo, Other).
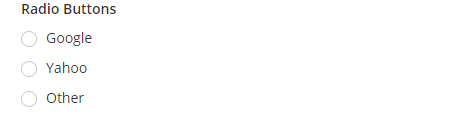
The Post Submission Java Script Code below will redirect the submitted form to different websites depending on the selected values in the Multiple Choice field.
Similarly, to redirect the user to the same page where the form is, add this JavaScript code to the Post Submission Java Script Code box. Note, this will show the contents of your page and no thank you message will be shown.
function llf_post_submit(){
 document.getElementById ('ll_custom_redirect_url').value = parent.document.location
 return true;
}
Enabling Google reCaptcha
To reduce spam, Lead Liaison supports Google's reCAPTCHA for hosted and embedded forms. To use Google's reCaptcha with your form do the following:
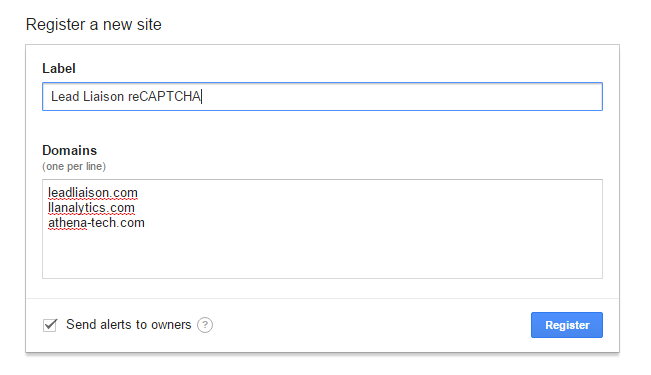
- Visit Google's reCAPTCHA page.
- Generate reCAPTCHA and enter these domains:
- leadliaison.com
- llanalytics.com
- Your company domain (example, athena-tech.com as shown below)
- Save reCAPTCHA info in a file for future use
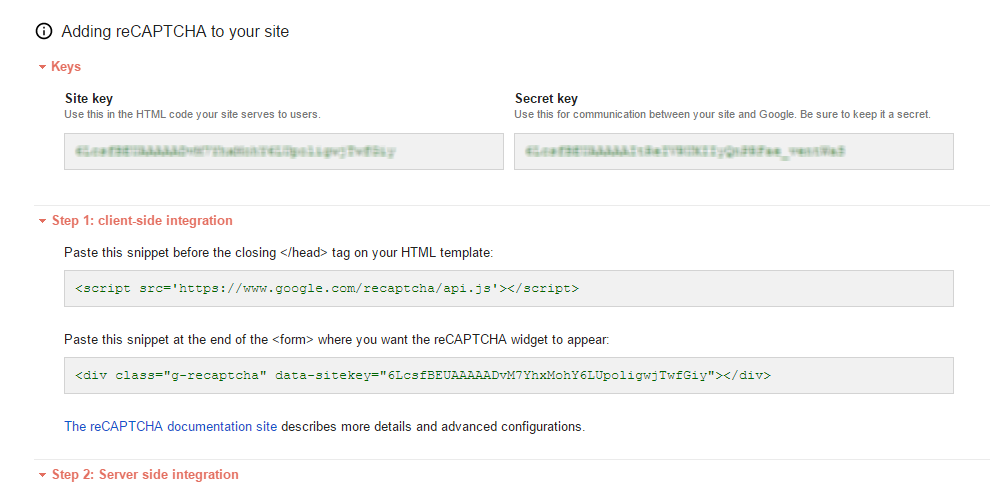
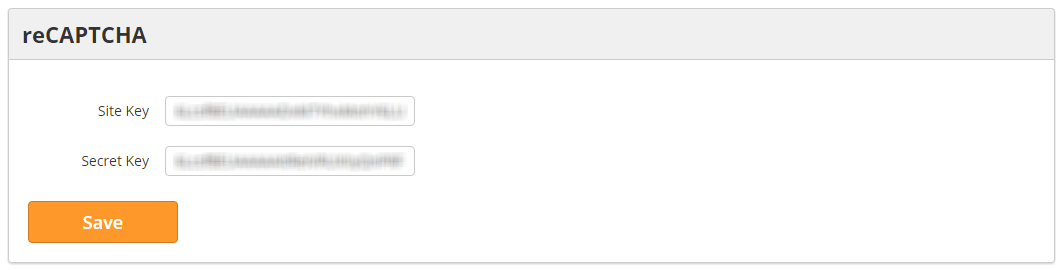
- Enter your reCAPTCHA Site and Secret Keys in the Lead Liaison Connector under Settings > Integrations > Connectors > reCAPTCHA
- Enable the "Use CAPTCHA" checkbox on the form
- Now, the form reCAPTCHA will work under all domains
Using a Layout Template
Any experienced HTML or Web Developer can easily style your web form using CSS. To style your form first create a Layout Template. The Layout Template can be assigned to individual forms or all forms. When the Layout Template is updated your forms will automatically be updated. Layout Templates are designed to abstract styling and make it easier to manage changes. Styling can be applied on the field level (under the Field Properties section) or inside your Layout Template. Here's an example of how to stylize a web form:
- Build your form.
- Build a Layout Template you'll apply to the form. Follow these steps to build your Layout Template.
- Assign the Layout Template to your form and save your form.
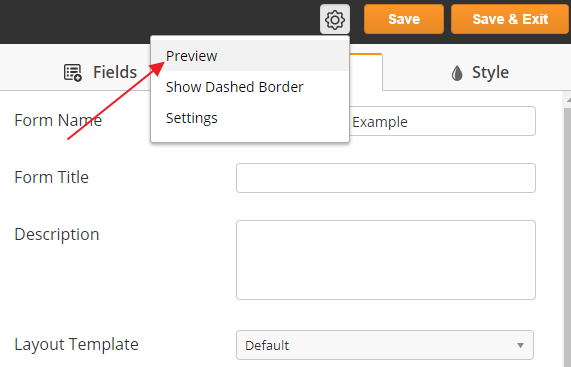
- Preview your form by clicking the "Preview" button.
- Here's a preview of the form we built:
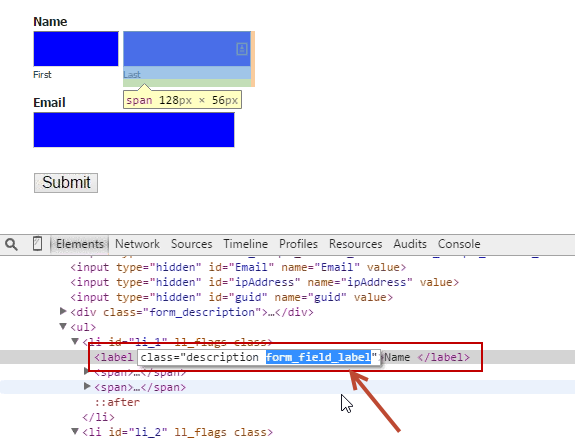
- Use your browser's debug tools to inspect the source code. Find the class names you'll want to modify and apply new styling to. The screenshots below show how to find the Field Sublabel and Form Field Label classes.

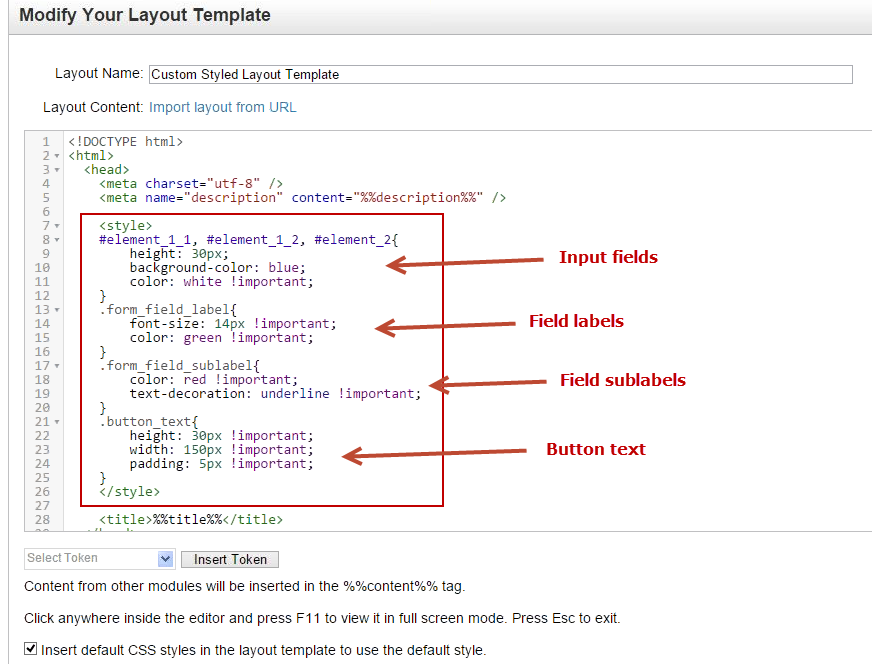
- In the Layout Template below you'll see we added the <style></style> block where our custom CSS code resides. We added some basic styling for the input fields, field labels, field sub labels and button text.
- In the example below, we remove field highlighting on cursor focus by adding CSS to the Layout Template:
#webform_main_container_div form li.highlighted {
background-color: transparent !important;
}
- In the example below, we could change the submit button styling in the Layout Template by using this code:
#webform_main_container_div .buttons input {

}
Adding Google Analytics or Google Tag Manager
One thing you can do with the above mentioned template editing, is to add in the gtag.js script that is needed to add Google based tracking or events to your hosted page.
- Inside the template, look for the following, it should be near the bottom:
<script>
</script>
- Replace that with the following, replacing Tracking Code with your identifier (xx-xxxxxxxxxxxxxx-x) such as AW-12345678-1 or UA-12345678-1. This replacement needs to happen in 2 places in the following snippet.
    <script async src="https://www.googletagmanager.com/gtag/js?id=Tracking Code"></script>
    <script>
       window.dataLayer = window.dataLayer || [];
       function gtag(){dataLayer.push(arguments);}
       gtag('js', new Date());
       gtag('config', 'Tracking Code',{cookie_flags: 'secure;samesite=none'});
    </script>
Related content
![]()
© 2021 Lead Liaison, LLC. All rights reserved.
13101 Preston Road Ste 110 – 159 Dallas, TX 75240 | T 888.895.3237 | F 630.566.8107 www.leadliaison.com | Privacy Policy