Trackable Content
Overview
Lead Liaison provides media tracking and hosting to help businesses bring all kinds of media to life. We make it easy to take all kinds of media (PDF, Word Document, Text Files, Images, Executables, etc.) and securely upload and store it on Lead Liaison, which runs on Amazon's Web Services (AWS). When content is uploaded it becomes trackable and has built in facilities to help convert anonymous visitor traffic to known Prospects.
Prerequisites
Before using this feature the following configurations are required:
- The File Storage application from the Lead Liaison App Cloud must be installed.
- The feature must be enabled by your Lead Liaison Representative.
- A CNAME must be setup in your account.
Uploading Media
To upload media to Lead Liaison follow the steps below:
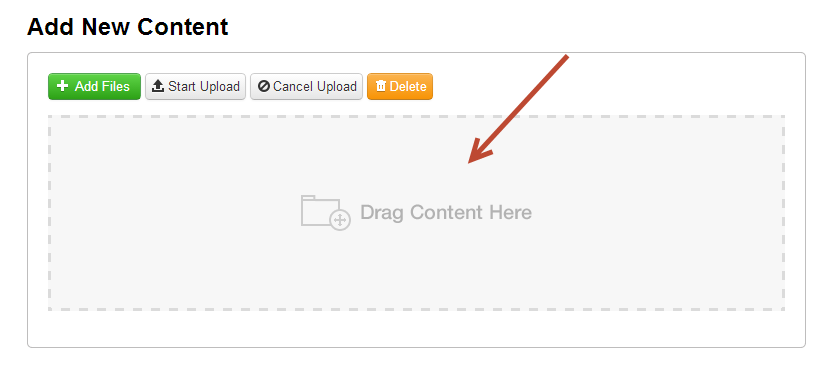
- Go to New > Trackable Content
- Drag and drop your content to the "Drag Content Here" section (darker grey area)
Drag Multiple Files
If you're using a modern browser, you can drag & drop multiple files at once to the "Drag Content Here" section.
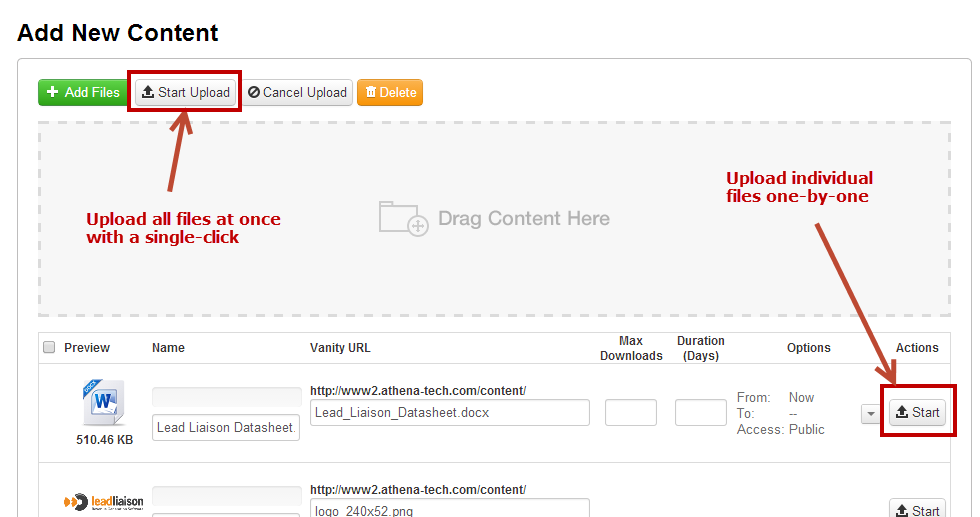
- Now, upload your media. Uploading can be done one-by-one or all at once with a single-click as shown below:
Configuring Media After Upload
Image Configuration
Images (png, jpeg, gif, etc.) do not have controls. However, images can still be profiled, as discussed below under the Profiling section.
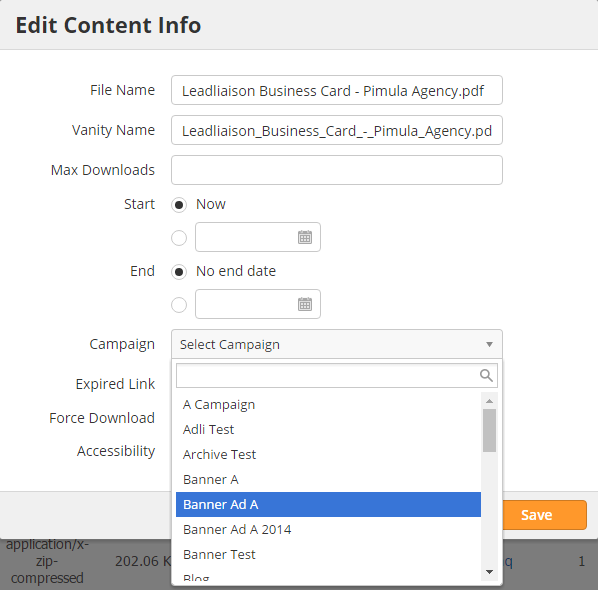
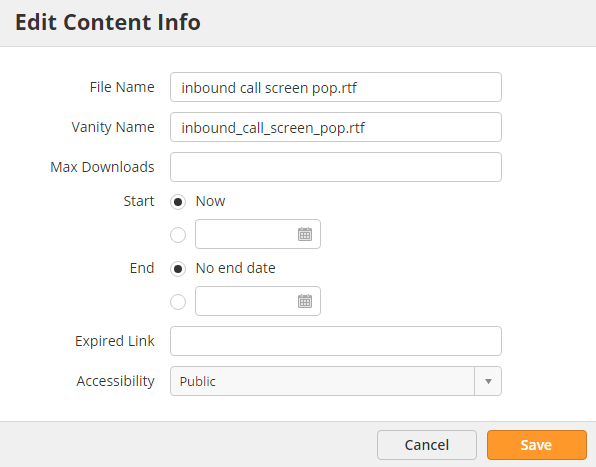
Once your media has been uploaded Lead Liaison provides a number of settings to help you have maximize control and conversion opportunity. The following settings are available:
- Name = The name of the media.
- Vanity URL = A unique URL to download the media which is branded to your company. Use any format such as "my-content", "my_content", "my-content.doc"..you name it!
- Max Downloads = Sets the maximum number of times the document can be downloaded. Downloads are unique and per Email Address or IP/GUID. For example, if the same prospect downloaded the same document multiple times, this will count one in the download limit: As another example, if you set the max download to 100 and a single Prospect downloaded the document 99 times then 99 downloads (not 1) would be available.
- Duration (Days) = Enter a number here to set the number of days the content will be available for download. Alternatively, click the small down arrow next to the Start button on the right to set an End date.
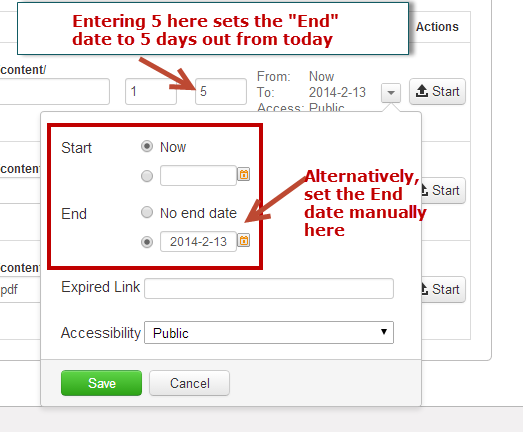
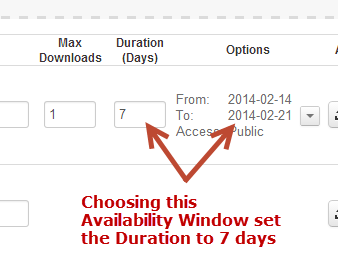
- Availability Window = Set an Availability Window (period of time) for which the media will be available for download. The Availability Window could be for a period of time in the future and doesn't necessarily have to be from todays date. Notice the Availability Window will also set the Duration value once set as shown in the screenshots below.
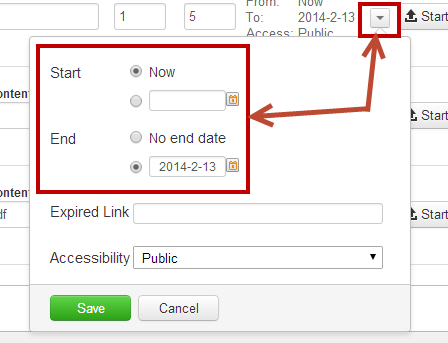
- Expired Link = Redirects the viewer to any link specified here once the media is outside of the Availability Window or past the End date. Use any link here, such as a customized web page setup in your own environment.
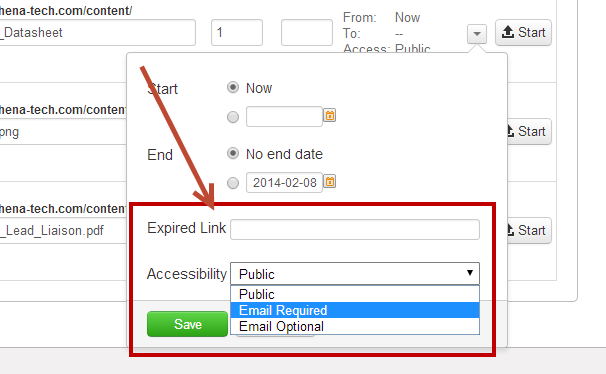
- Accessibility= Helps convert anonymous viewers to known Prospects. The settings are as follows:
- Public = Anyone with the link can download the document.
- Email Required = Will show an email prompt in front of the document and collect the viewer's email before they can download the document.
- Email Optional = Will show an email prompt in front of the document; however, there will be an option for the user to "Skip" the process wherein they're not required to enter in their email to download the media.
- After the content has been uploaded click the tab to see all config options.
- In the screenshot below the user is assigning the Trackable Content to a Lead Liaison Campaign. In this case, if the Trackable Content link is included in an email (behind a link or a button) and the Prospect clicks the link then they'll be added to this Campaign. Since the Trackable Content link was in an email, the First Touch Campaign would be the Campaign of the email and a subsequent Campaign Touch would be recorded for the Campaign of the Trackable Content.
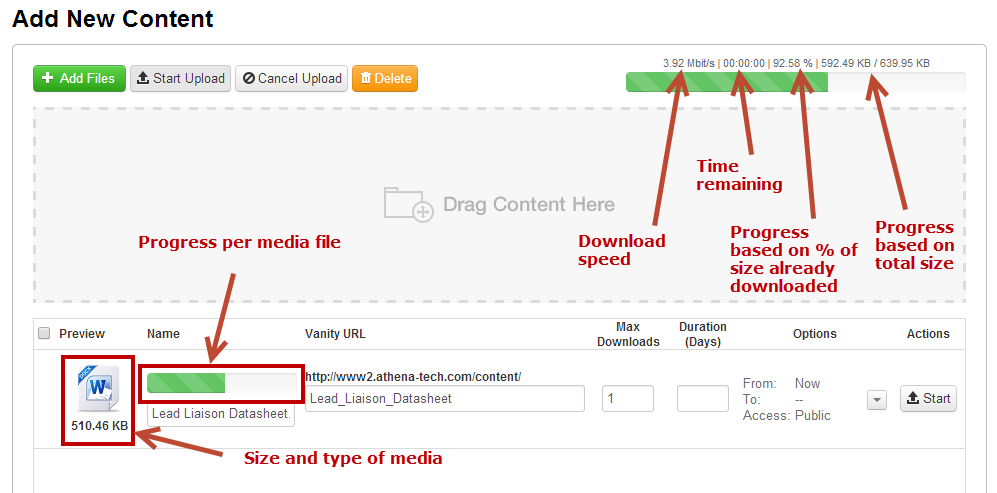
Upload Progress
The below screenshot explains how to gage upload progress:
Managing Media
Updating Media with New Versions
Suppose you added a brochure as your media six months ago and your marketing team just produced a new, updated version of the brochure. Deleting the original version would erase all your download stats and controls on the media. To replace existing media with a new version you have two options:
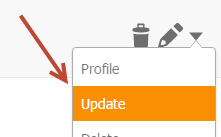
Option 1: Use the Interface
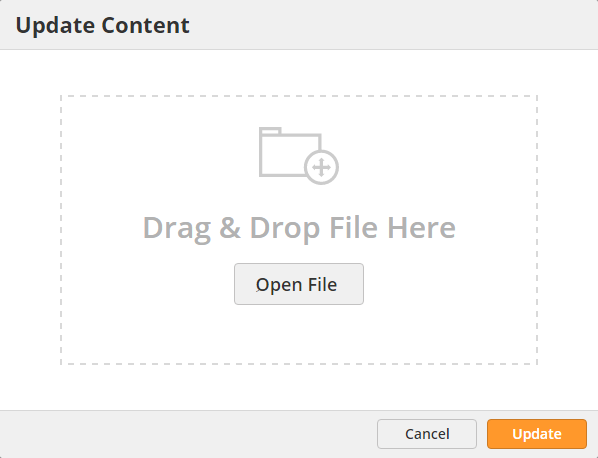
- Click Update in the actions menu next to your content
- Drag and drop your updated file into the popup and click the Update button. The document does not have to be named the same. The original name of your document will be preserved after upload.
Option 2: Upload a Document with the Same Name
- Upload the same file again and make sure to use the same file name/vanity URL, this will update/override the existing file.
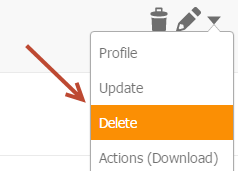
Deleting Media
To delete media do the following:
- Go to Content > Trackable Content
Once the media is deleted it is saved in the Recycle Bin.
Exploring Media
While on the Manage Content page the following values will be displayed in the grid (as shown in the screenshot below).
- Remove = Select all or individual and click the "Remove Selected" link on top to delete the media
- Name = The name you provided when uploading the media file
- Type = Type of media
- Size = Size of the file
- Location = The Vanity URL you provided when uploading the media
- Short URL = The shortened URL for the media, which is automatically created. Use the shortened URL in social media or other marketing material
- Downloads = Total number of times the media file has been downloaded
- Unique = The number of times the media file has been downloaded by unique Prospects
- Date Modified = The last time the media file was modified/updated
- Status
- Active = The media is live and can be downloaded
- Pending = Shown when today's date is before the start of the Availability Window
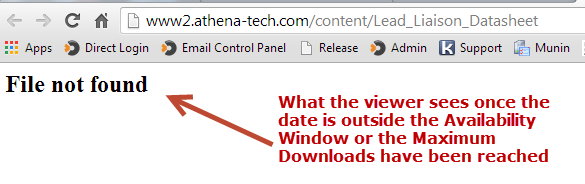
- Expired (Date) = When the media has expired and the date is past the Availability Window
- Expired (Downloads) = When the media has expired due to downloads exceeding the Maximum Number of Downloads value
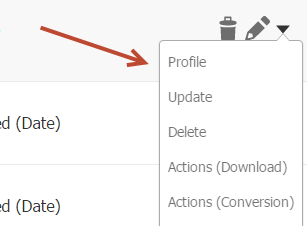
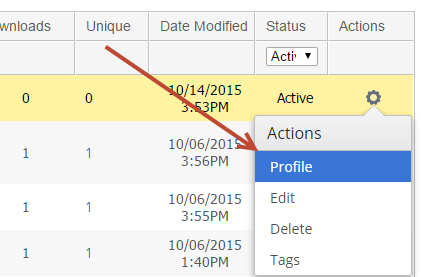
- Actions
- Profile = Explore stats for the media file
- Delete = Delete the media file
- Edit = Change media configuration
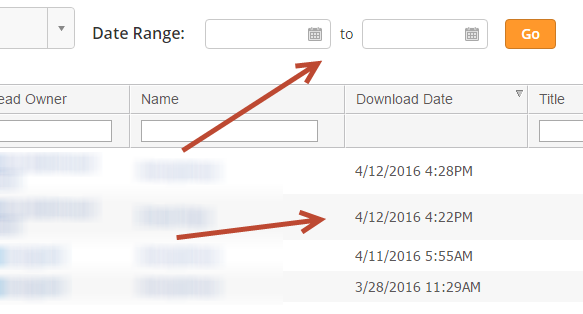
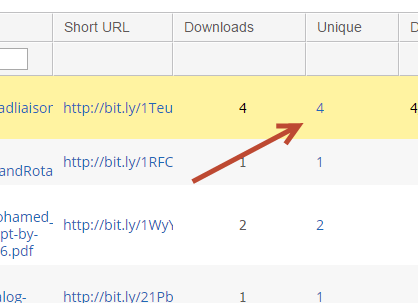
Exporting Download Records
To export download records:
- Click the link under the Unique column.
- Optionally select the from and to date range to filter content downloaded within a specific time frame. To show content downloaded since a specific date leave the second date field empty. To show content downloaded up to a specific date leave the first date field empty.
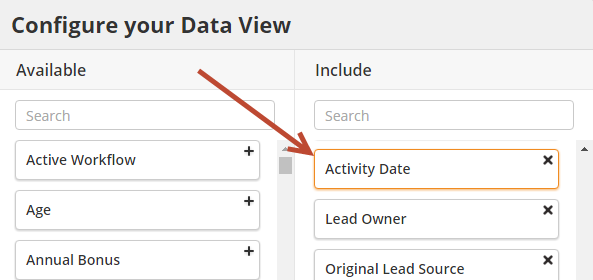
- Click the gear on the top right and select Export.
- Include the Activity Date parameter then click Export.
Media Statistics
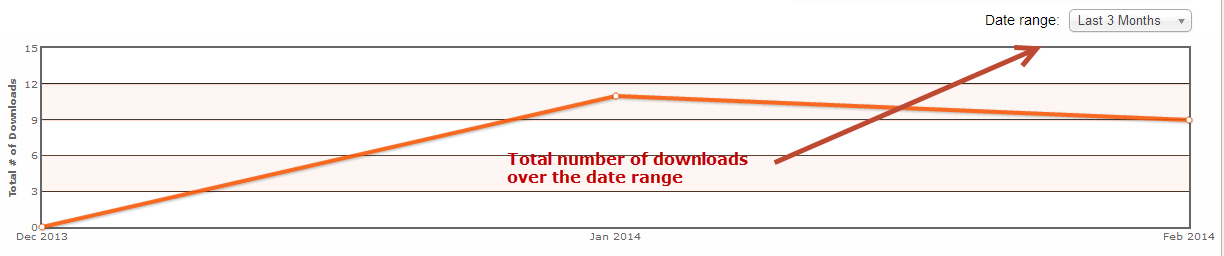
Overall Stats
To see how your media downloads have grown over time view the graph on the top of the Manage Content page as shown below:
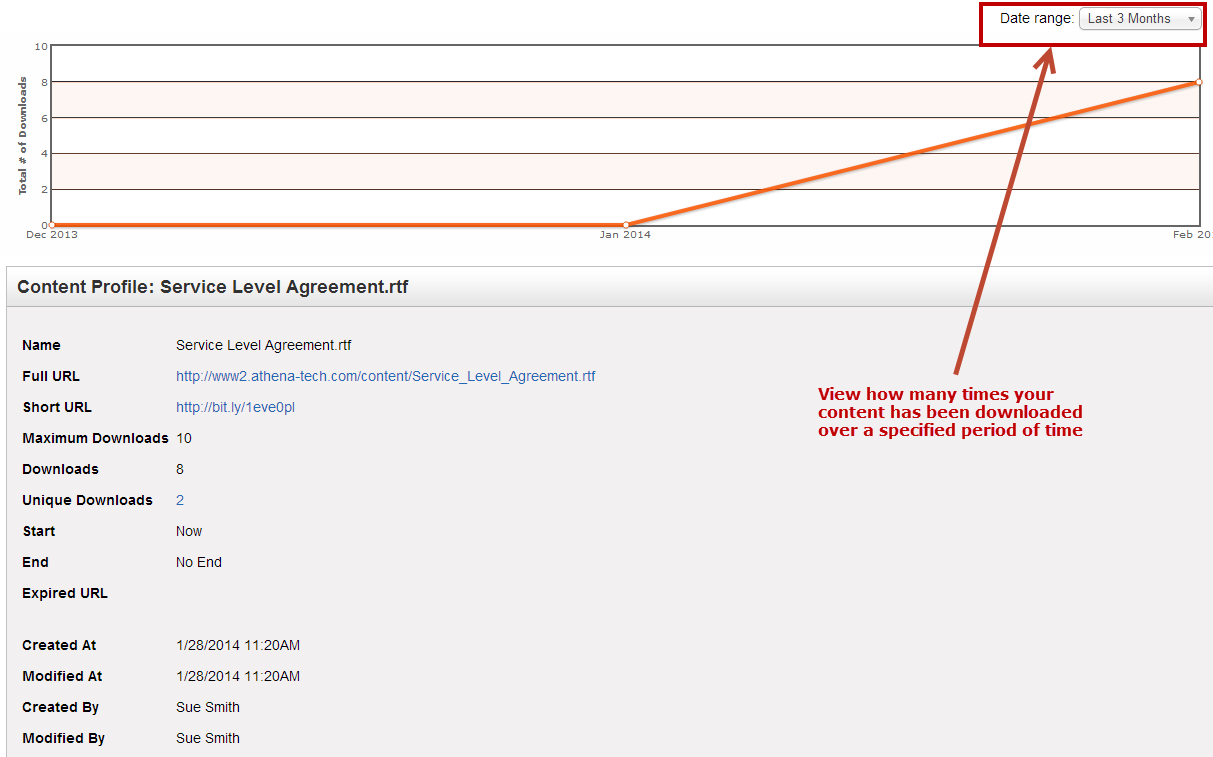
Profiling Media
Media profiling helps you understand how effective your media has been over time by displaying the number of downloads for the specific content over a specified time period. To profile your media do the following:
- Click Content > Trackable Content
- Click Profile under the Actions column next to the media you'd like to profile
Who Downloaded Your Media?
Lead Liaison tracks total downloads as well as unique downloads. Anonymous (Unknown) and Known Prospects are tracked and can be further filtered (to see only Known) if needed. To drill down and see who downloaded your media do the following:
- Click Content > Trackable Content
- Click the number under the Unique Downloads column
- The Membership page is displayed with more information on the Prospects
Building Personas
When content is downloaded Lead Liaison adds this behavior to the Prospect's activity, enabling sales to better understand what Prospect's are interested in. Lead Liaison can also use custom scoring rules to rate Prospects higher depending on the type of content they download. Downloads are tracked on the Prospect's Prospect Profile page and shown under the Timeline.
Converting Visitors
Lead Liaison helps you convert your visitor traffic by optionally adding an email prompt in front of your media. This is useful if you have premium, valuable content that you want to gate. To add an email prompt in front of your content, do the following while uploading your content. Note, these settings can be changed later by editing the media in the Manage section.
- Click the down arrow under the Options column
- Next to Accessibility, choose either "Email Required" or "Email Optional"

Styling the Landing Page
To style the landing page that visitors will see when trying to download content that has Accessibility set to "Email Required" or "Email Optional", do the following:
- Go to Settings > App Setup > Trackable Content
- Fill in the values for the landing page
- Go to Settings > Account > Settings > Look and Feel
- Edit the Look and Feel section to add your company logo .The company logo will appear on the upper left side of the landing page. We suggest a small sized logo (240 x 52) with a transparent background (png).
- To test, open an incognito window in your browser and load the content.
Inserting Media into Email Messages
When inserting a link to your content into an email message sent with Lead Liaison for download make sure to include the link with your full vanity URL (www2.domain.com) and not the bit.ly. When the full URL is used the recipient will get tracked on visitor tracking and identified by name after their click through to download the content. The person's name will also show up on the page showing the number of downloads (total and unique) by each person.
Scoring Downloads
Lead Liaison automatically scores media downloads for you to help qualify your Prospects. No extra work or customization is required, it all happens automatically. The default score for a Document Download is +100; however, it can be changed. Custom scoring for specific types of content can also be setup.
Changing the Default Score
To change the default lead score for document downloads do the following:
- Go to Settings > App Setup > Lead Qualification > Lead Scoring
- Double click the value under the "Points" column next to "Document Download"
Setting a Custom Score
Suppose you have premium content and want to set up a custom lead score any time the premium content is downloaded. To set up a custom lead score when a specific media file is downloaded to the following:
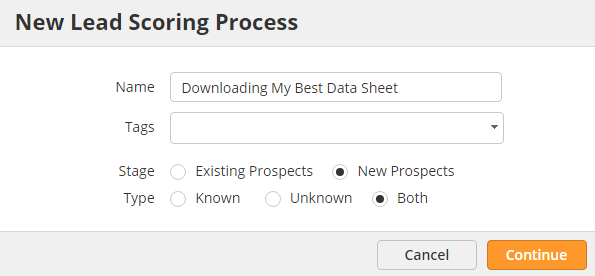
- Go to Settings > App Setup > Lead Qualification > Lead Scoring > Add Custom Scoring
- In the popup, score existing or new prospects. If you'd like to score Known prospects only (people whose email address you've collected) choose only "Known"
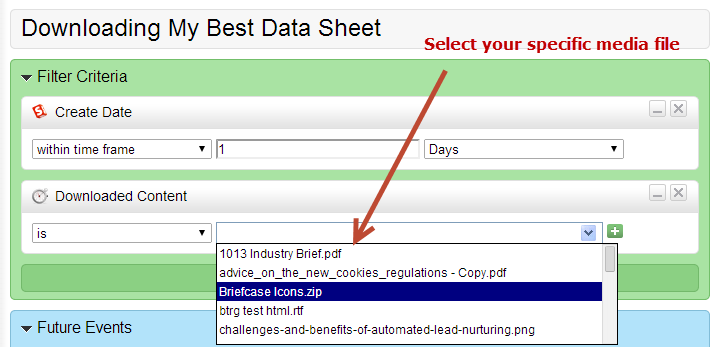
- Add criteria to the canvas. Drag and drop the "Downloaded Content" filter to the canvas and select your media.
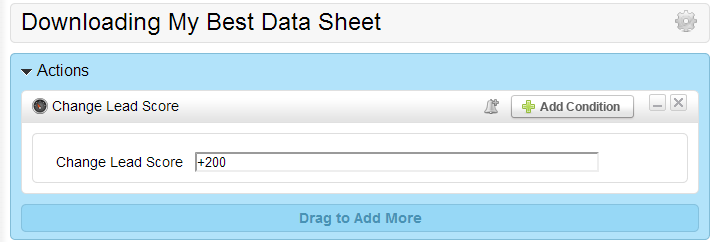
- Click the Next button
- Set your custom lead score in the Change Lead Score action. In the screenshot below, we're adding 200 points every time our premium content is downloaded.
Limits
Storage Limits
Depending on how your account was provisioned, your storage limit displays how much storage your account has been authorized for as well as the amount consumed. To view your storage limit and amount of storage remaining do the following:
- Click Content > Trackable Content
- At the top of the page you'll see the storage indicators

Upload Limits
Uploads are limited to 20MB per file. If you're considering uploading video we suggest using Lead Liaison's video marketing solution which offers similar trackability, live streaming, scoring and more.
Time Limited Media Endpoints
The final link that the user is directed to will be a link on Amazon's Web Services platform. The link will look similar to the one below:
http://ll-sa-test001.s3.amazonaws.com/content-management-file-uploads/customers/11268/Briefcase_Icons.zip?AWSAccessKeyId=AKIAI4AF5JYLG3U6JVZA&Expires=1392311405&Signature=er%2BeyOx%2BBi7rHJWgcNpz%2FvSlRHw%3D
The link will be valid for only a short period of time before it expires. Typically, it's valid for 15 minutes by default; however, your Lead Liaison Administrator can change the endpoint expiration to a different time limit if needed. The expiration ensures stronger security as the endpoint will not be shared with others who are not authorized to access your media.
Download Period
Download Interval
Downloads from the same Prospect within 60 minutes will not trigger download activity and will not increment the number of downloads. Use a private browsing window if you need to test statistics or triggers after a download.
Force Download
Most modern browsers can automatically render your content, such as a PDF or Excel document, in the browser without requiring the user to download the content. We automatically determine the most appropriate content header, such as application/pdf, used to store your content.
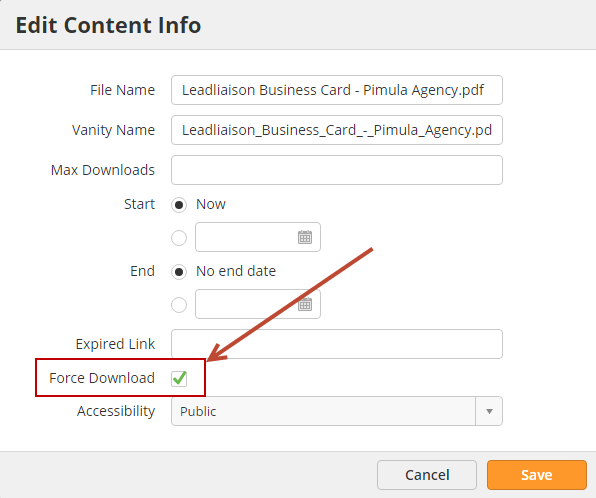
However, if you are using a less common file extension or your content does not render properly in a browser, which can happen with advanced/intricate content, you can bypass our content header and force the file to be downloaded instead of rendered in the browser. In the case of a PDF, instead of using application/pdf we'll use application/file for the content header. Enable the Force Download feature when uploading new content or edit existing content to force the content to be directly downloaded to the user's computer.
![]()
© 2021 Lead Liaison, LLC. All rights reserved.
13101 Preston Road Ste 110 – 159 Dallas, TX 75240 | T 888.895.3237 | F 630.566.8107 www.leadliaison.com | Privacy Policy