Badges with Avery
Overview
Lead Liaison provides the ability to create and print your own badges for companies running their own events. The badge system integrates with Avery, a leading manufacturer of labels/badges.
Access Rights
Please contact your Lead Liaison Representative to gain access to Lead Liaison's Badge system.
Creating Badges
Badges can be created in groups or individually. A Badge Group is a collection of badges. You might need to create and print a Badge Group if you're looking to lay badges out on a table for attendees to pick up when they check-in to your event.
Step 1: Create a Badge Group
To create a Badge Group do the following:
- Navigate to Events > Hosted > Badges
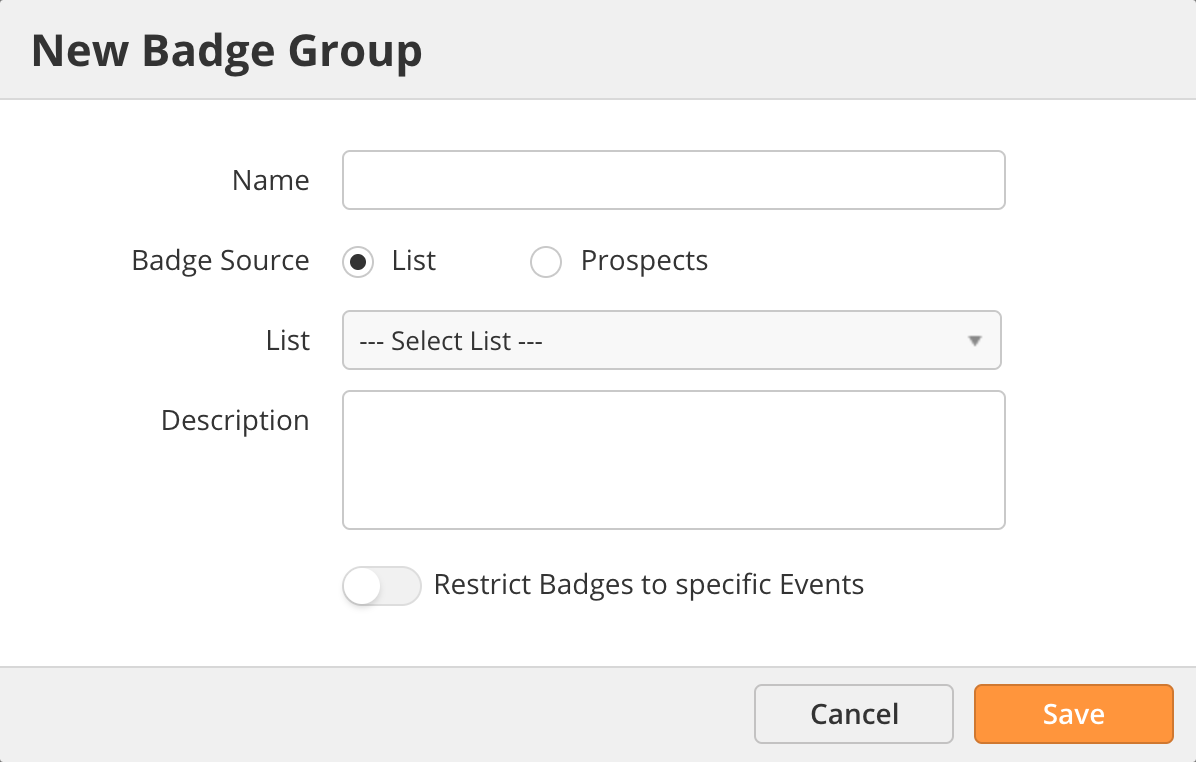
- Click the New button
- Select your options:
- Name: Name of the Badge Group
- Badge Source: Create badges from a Lead Liaison List or from one or more Prospects
- Description: Short summary of your Badge Group
- Restrict badges to specific Events: When disabled, badges for any Event can be scanned. When enabled, a badge scan will not work unless the Badge Group on the Event configuration page is selected. See the section below on Configuring Badge Scanning.
- Depending on the number of people in your Badge Group, the Badge Group will have the following status:
- Draft: System is preparing Badge Group for badge creation.
- Running: Badges are being created in the background.
- Ready: Badge Group is ready to be printed.
Step 2: Print Badges
To print your badges do the following:
- Navigate to Events > Hosted > Badges
- A list of Badge Groups will be displayed
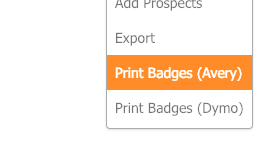
- Hover over the Badge Group you'd like to print badges for and select Print Badges
- Choose whether to print a badge for all people or one or more individuals within your Badge Group.
- They system will open a new browser tab with the Avery system.
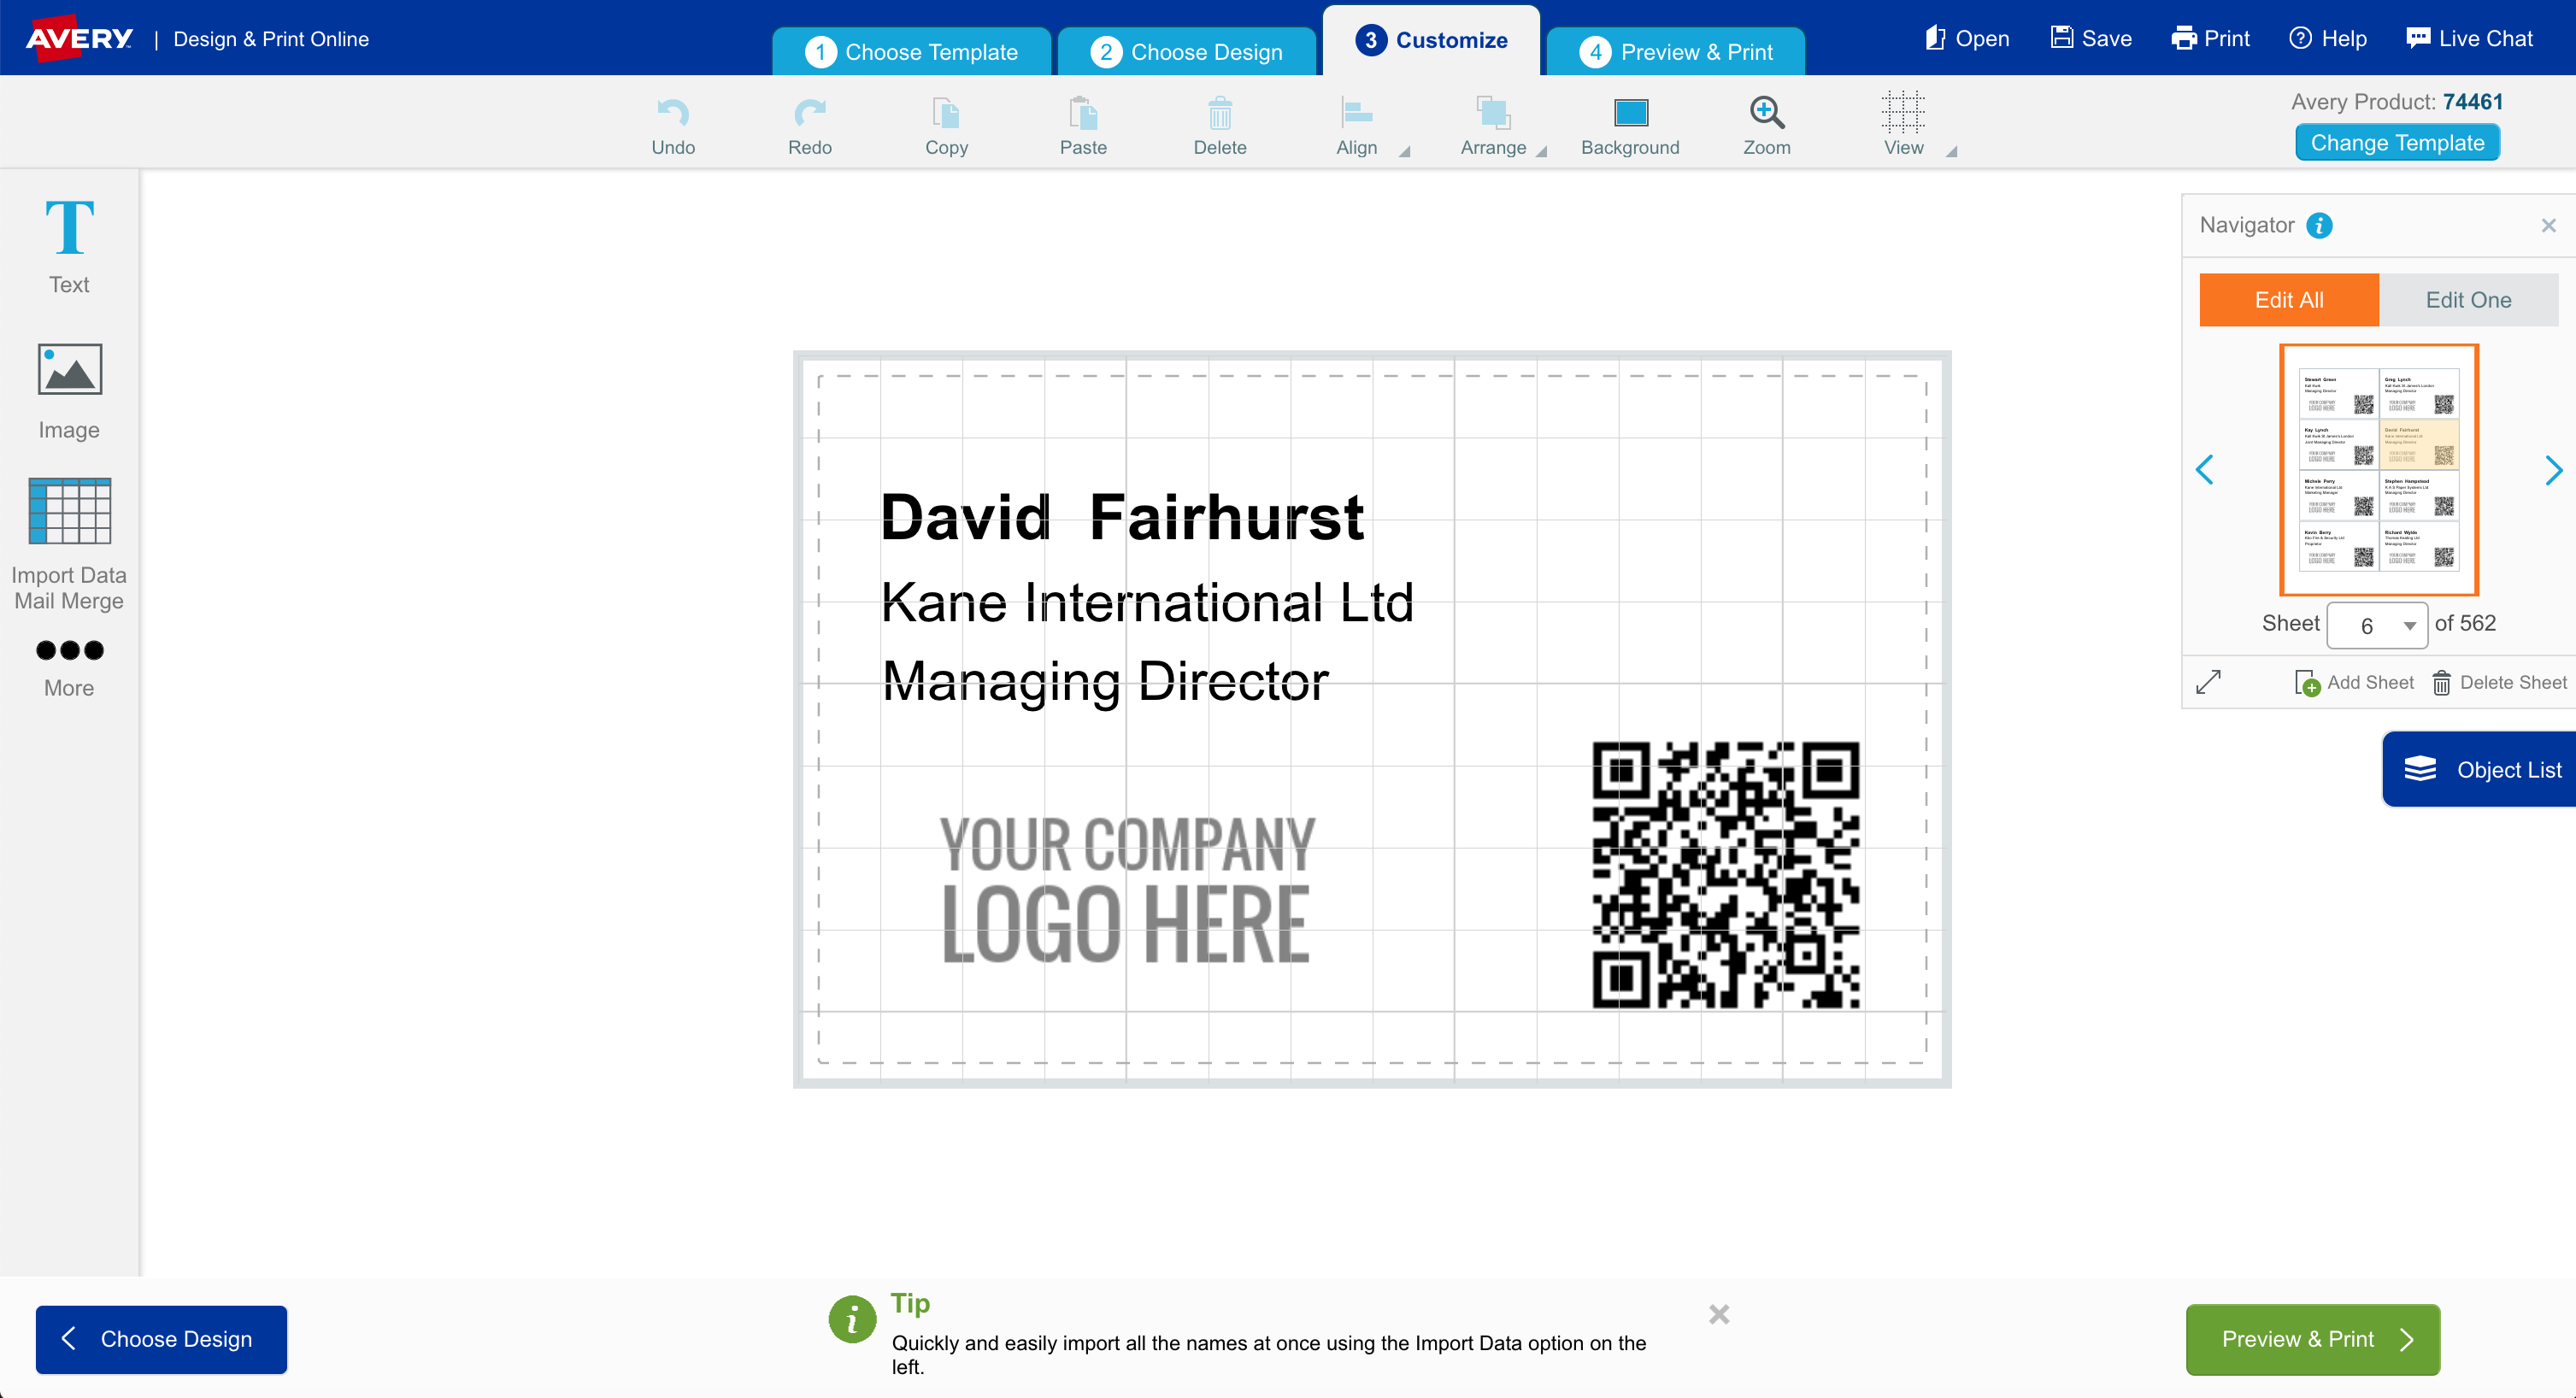
- The Avery system uses a default Lead Liaison Badge Template; however, a custom Badge Template can be created. See the section below on Customizing Badges. You can also edit the default Badge Template within the Avery system.
Default Avery Badge Template
The default Avery Badge Template uses Avery style 74461. You can purchase the badge kit, which comes with lanyards, inserts, paper, and more directly from Avery or from online retailers such as Amazon.
- Select Preview & Print.
Step 3: Linking an Event to Badges
Once your Badge Group is created you need to link your Event to your Badge Group. Follow the steps below to link your Event(s) to your badges:
- Create a new Event
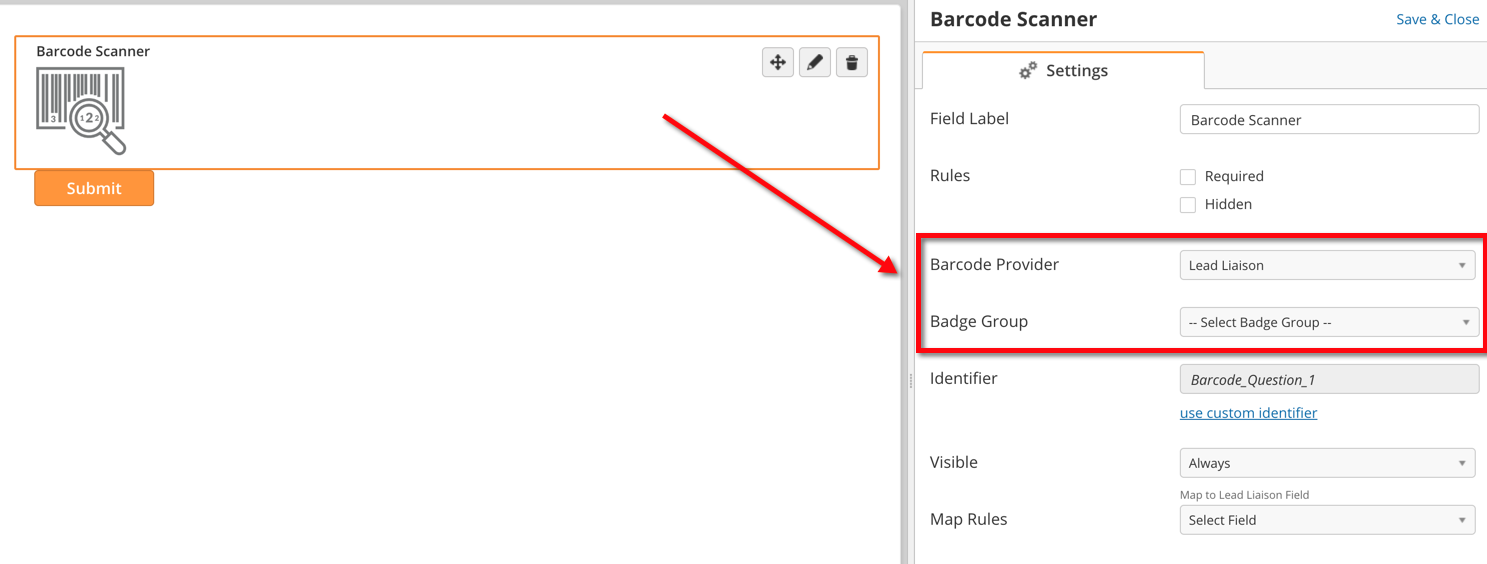
- Add the Barcode Scanner element to the canvas on the left.
- Click on the Barcode Scanner icon on the left. A configuration panel will open to the right.
- Select Lead Liaison from the Barcode Provider option as shown below.
- In the Badge Group setting, select your Badge Group (see Step 1 above) as shown below.
Restricting Badges to Specific Events
When creating your Badge Group, if you enabled the Restrict badges to specific Events option then your Event will only work with the selected Badge Group. If this option was not enabled, then any Event created in your account will work with your badges regardless of the Badge Group selected as shown in the screenshot below.
Customizing Badges
Badges are created using the Avery system. The Avery system uses a .avery file to determine how your badges look. You can create your custom badge by modifying the existing badge template or by creating a custom .avery file. Both options are covered below.
Modifying the Default Template
Follow the instructional video below to customize the default template before printing your badges:
Using a Custom Avery File
Lead Liaison uses a default .avery file; however, you can create your own .avery file to create your badges with Lead Liaison. Follow the steps below to create a custom .avery file.
- Download this template and save it as an Excel/CSV file. The template contains the data that Lead Liaison can add to your custom badge. Do not change the column names in the file or your badge will not print correctly. The file will be imported into Avery as shown in the video below.
- Open the Avery Design & Print Online center.
- Follow the instructions in the video below.
Pro Tip
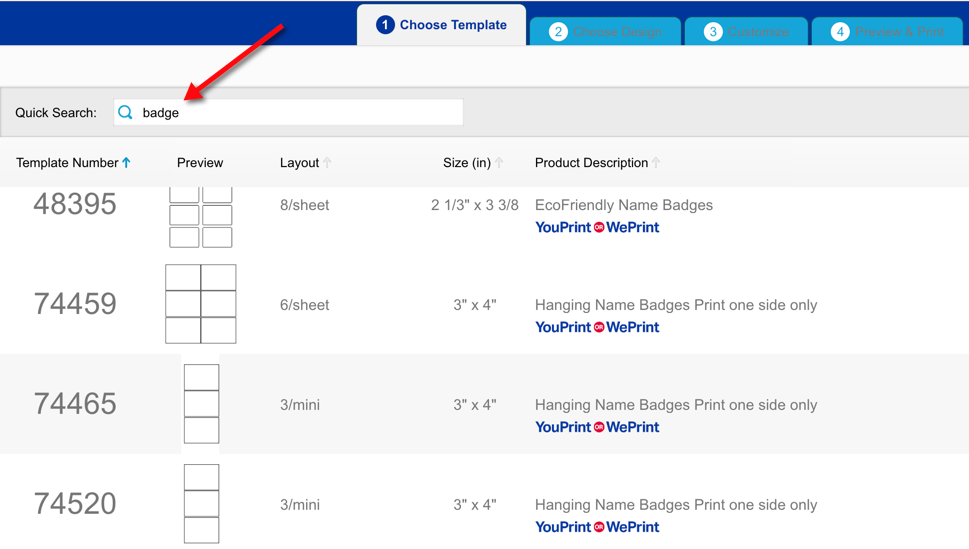
Search all Avery badge options by typing "badge" in the Choose Template step.
To change the .avery file used when printing your badges do the following:
- Navigate to Settings > App Setup > Events > Avery Badge Template
- Select Custom
- Click the Upload button and choose your custom .avery file
Finding the Right Avery Badge Template
Use these tips to search for and buy the right Avery template for your badges. Here's the link to Avery's Design and Print Online software.
Printing Badges
For help printing badges, see this section of our documentation.
Help from Avery
- Avery can print your badges/labels for you if you're not interested in doing it yourself. This service from Avery is called WePrint. Here's the Q&A on WePrint. This guide explains how to use the WePrint service with Lead Liaison:
- For more help from Avery, reference the Avery help system.
Notes
- Badge QR codes will work only on the same Lead Liaison account.
- If you have your own badge scanning software, you can generate an API key inside Lead Liaison and use that API key when scanning badges to return Prospect data. When scanning a QR code a text link, such as the one below, will be generated. There are two query string parameters passed to Lead Liaison's API. This request is sent to Lead Liaison's API, which returns the Prospect data set in JSON format as shown below.
- api_key: The API key in your Lead Liaison account.
- barcode_id: The ID of the QR code that you scan.
https://demo-api.leadliaison.com/v1.0/barcode/scan.json?api_key=E4ZZU0CgxSW7JDhxM4PTBi1Gi9a0B8rzCk&barcode_id=378453:2:44JbnI5nAV6oE7d22vRddTmqEKM90EAUAbVNJac1Vaerajk2E17JNm0
{"status":200,"info":[{"ll_field_id":"27","ll_field_unique_identifier":"City","value":""},{"ll_field_id":"22","ll_field_unique_identifier":"Company","value":"google"},{"ll_field_id":"26","ll_field_unique_identifier":"Country","value":""},{"ll_field_id":"21","ll_field_unique_identifier":"Email","value":"g@p4.com"},{"ll_field_id":"12","ll_field_unique_identifier":"Fax","value":""},{"ll_field_id":"16","ll_field_unique_identifier":"FirstName","value":"imported"},{"ll_field_id":"48","ll_field_unique_identifier":"JobTitle","value":"test"},{"ll_field_id":"17","ll_field_unique_identifier":"LastName","value":"prospect 10"},{"ll_field_id":"10","ll_field_unique_identifier":"WorkPhone","value":""},{"ll_field_id":"47","ll_field_unique_identifier":"Salutation","value":""},{"ll_field_id":"28","ll_field_unique_identifier":"State","value":""},{"ll_field_id":"29","ll_field_unique_identifier":"StreetAddress","value":""},{"ll_field_id":"93","ll_field_unique_identifier":"StreetAddress2","value":""},{"ll_field_id":"9","ll_field_unique_identifier":"WorkPhone","value":"32323"},{"ll_field_id":"31","ll_field_unique_identifier":"Zipcode","value":""}]}
Related content
© 2021 Lead Liaison, LLC. All rights reserved.
13101 Preston Road Ste 110 – 159 Dallas, TX 75240 | T 888.895.3237 | F 630.566.8107 www.leadliaison.com | Privacy Policy
