Account Setup
If you have a subscription to our automation platform this applies to you. During your on-boarding session with your Revenue Performance Specialist they will walk you through the key areas below to get your account setup. If you're interested in making progress prior to your session, feel free to complete as much as you can.
- Add tracking code
- Complete the Setup area (see section below)
- Install Send & Track
- Outlook version. Download it from the App Cloud under Settings > Integrations > App Cloud.
- Google Apps for Work version (make sure you're licensed for it). Download if from the Chrome Store.
- Setup filters
- Enable social appends
- Add social accounts
- Import contacts
- Update DNS
- Create assets (emails, landing pages, content)
- Build an automation campaign
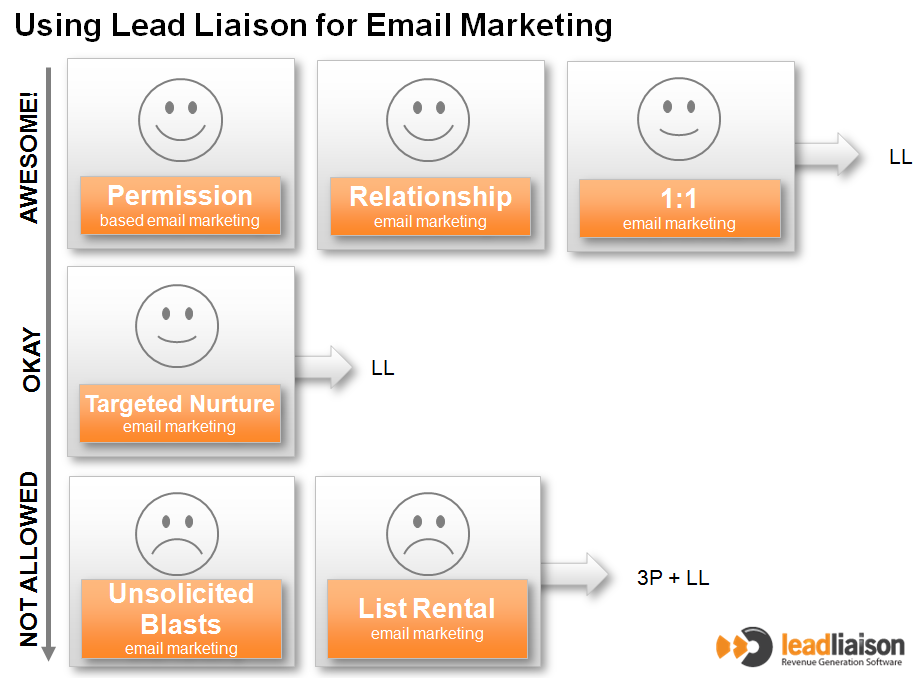
- Make sure you understand the Email Policy
- Is My List Okay to Use?
- Who Can I and Can't I Email?
- Laws in North America and Europe
- Indicator chart (see below)
Setup Area
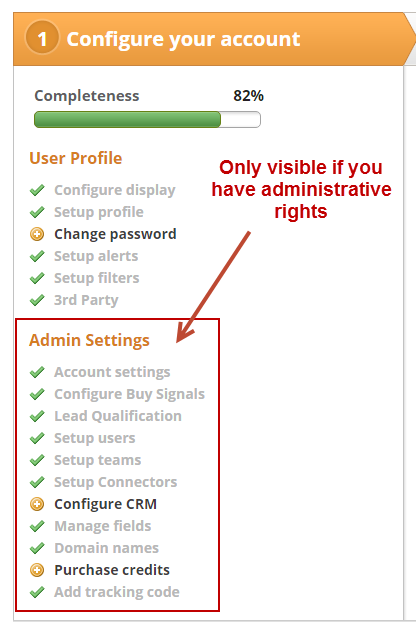
A setup page is provided to all users and administrators to help them successfully configure Lead Liaison and get the most out of the solution. To assist with configuration a 'Completeness' bar is used. The Completeness bar shows the % of configuration completed by the user.
For example, if the Completeness bar showed 73% then the user has configured approximately 3/4ths of the necessary setup.
Each user should obtain a 100% Completeness level.
When each section is complete it turns grey and the Completeness bar increases. In the screen shot below the user has completed the 'Configure display', 'Setup profile', 'Change Password' and 'Setup email report' sections. They still have to complete the 'Setup filters' and 'Enter CRM credentials' section. Lead Liaison users with administrative rights will see an 'Admin Settings' section below their 'User Profile' section. The 'Admin Settings' section contains global configurations for Lead Liaison, which affects all users.
To access the Setup section again do the following:
- Click Home


