...
Overview
The Prospect Profile page provides an overview of a prospect's:
- activities
- contact information
- nurturing lists they're part of
- contact lists they're part of
- past, present and future actions

Accessing a Prospect Profile
Access the Prospect Profile page by doing any of the following:
- clicking on the Prospects name anywhere in the application or
- by entering the Prospect's name or email in the search box at the top
Lead Liaison Profile
Lead Liaison profile a profile snapshot. The left hand side lists key information on the prospect while the right hand side provides an overview of the prospect's engagement. This helps to identify how the prospect has interacted with your company's brand.
| Info |
|---|
Click on the Activities, Emails Clicked, Website Visits or Forms Submitted box to to filter the Activities table at the bottom of the page and see only the activities you care about. |
Each parameter is described below:
- Name = Prospect's full name
- Email = Prospect's email address
- Company = Prospect's company
- Lead Source = The source used to find the prospect. See more information on Lead Source tagging to understand how Lead Liaison automatically identifies the lead source. Also, check out Lead Liaison 101 to understand how the Lead Source value differs from Campaigns. The Lead Source value is per prospect and is the same Lead Source value displayed in your CRM and on the Visitors page.
- Score = Prospect's lead score
- Grade = Prospect's lead grade
- Owner = Lead Owner
- Campaign = Lead Liaison First Touch Campaign. See Lead Liaison 101 for more information on Lead Liaison First Touch Campaigns.
- Activities = The total count of inbound and outbound activities. It's a measure of the total touch points you've had with a prospect.
- Emails Clicked = Total number of emails that they've clicked a link through.
- Website Visits = Total number of website visits (only once per 24 hours).
- Forms Submitted = Number of Web Forms (setup through Lead Liaison - external or hosted) that have been submitted.
- Search Engine = This is the search engine as well as the search terms the prospect used to find your website. In the graphic below the prospect used the Bing search engine and typed in "leadliaison.com" to find our website.
- Search Terms = As shown in the screen shot below (next to bing logo), "leadliaison.com" was used as the Search Terms for this prospect. This value is the original Search Terms used by the Prospect to find your companies website. This value is different from the Search Terms value on the Visitors page, which are the Search Terms used for the visit and does not imply that these Search Terms were the original Search Terms used by the visitor.

Monitoring Activity
The Prospect Profile page consolidates a rich set of prospect activity. Past activity, present activity and future activity is tracked and stored in a central location, under the "Activity" tab. In addition to the Activity tab a Nurture, Score, Grade, Automation and Audit tab are included for sales and marketers to gain further insight into a prospects interest and behavior. This section effectively provides a dashboard that facilitates sales-readiness. Each section (tab) of the activity grid is described below.
- Activity = Tracks all activitys including when they happened. Example activity includes Web Form Submissions, Landing Page Visits, Chat Declined, Website Visit, Responded to Send & Track Email, Clicked a Link in an Email, Clicked a Link in Autoresponder, Email Open, Email Sent, Invited to Chat, Had Chat, Document Download and more!
- Nurture = Allows sales/marketers to add/remove prospects to/from nurturing campaigns or lists pre-built by the marketing team.
- Score = Historical log of changes in a lead score.
- Grade = Historical log of changes in a lead grade.
- Automation = Lists all Automation Campaigns a prospect has gone through.
- Audit = Lists all Automation actions
Activity Tab
Itemizes a prospect's ctivity. Click the specific Activity to drill down. For example, as shown in the graphic below, drilling down into a website visit shows the exact pages visited along with the time of visit.

Drill down into page views:

Nurture Tab
The Nurture tab is a powerful tab that enables sales or marketers to add/remove prospects to/from Automations and Lists.
| Note | ||
|---|---|---|
| ||
When a drop down is grey in color it means the prospect is part of the Automation/List. Click the minus sign to remove them from a Automation/List. Similarly, click the plus sign to add them to a Automation/List. |
| Info | ||
|---|---|---|
| ||
When a prospect is added to an automation only the actions in Step 2 of the nurture process apply. All filters in Step 1 of the nurture Workflow are skipped. |

Score/Grade Tab
The Score and Grade tab provide a log of lead score and lead grade changes on a prospect.

Automation Tab
The Automation tab lists the Automation ID, Automation Name and Date & Time the prospect was added to the Automation Campaign. This section is helpful for troubleshooting/debugging. For example, using an Automation ID with Lead Liaison Support. Additionally, this section provides insight to into which Automation Campaigns a prospect has gone through, which helps sales/marketers better understand which marketing efforts influenced the prospect through the sales pipeline. Click on the Automation Name to drill into the specifics of the Automation Campaign.

Audit Tab
The Audit tab has four columns, Automation Name, Action Type, Date & Time and Status. The Status column indicates when the respective action was applied, skipped or when it's scheduled to run. Lead Liaison logs three types of date records for each action. ID B & C below are displayed in the Audit tab. The following three statuses apply to all actions:
- Waiting = Means the action has not yet been applied.
- Applied = Means the action was successfully applied.
- Skipped = Means the action was skipped. An action gets skipped if it was skipped by conditions or in the case of a Send Email action, the prospect's record is marked with Do Not Email or Bounced.
The following table breaks down descriptions, status and explains the Date & Time parameter based on action status:
ID | Date & Time Type | Description | Status |
|---|---|---|---|
A | Schedule Date | Date the action was scheduled |
|
B | Scheduled to Run On | Date the action is supposed to run on | Waiting |
C | Run Date & Time | Date the action was applied | Applied or Skipped |

Campaigns Tab
The Campaigns Tab identifies every Lead Liaison Campaign the Prospect has been added to. The row for the First Touch Campaign will be highlighted. The color of the highlighted row can be changed by adjusting the "Row color for a new lead" value on the Display Settings page . Prospects may be added to one or more Campaigns manually by clicking the "Add to Program(s)" link at the top left of the table. If the Prospect is removed from the Campaign by clicking the Delete link under the Actions column then all touches of this Campaign on the Prospect will be removed.

Programs Tab
The Programs Tab identifies every Lead Liaison Program the Prospect has been added to. The row for the First Touch Program will be highlighted. The color of the highlighted row can be changed by adjusting the "Row color for a new lead" value on the Display Settings page. Prospects may be added to one or more Programs manually by clicking the "Add to Program(s)" link at the top left of the table. If the Prospect is removed from the Program by clicking the Delete link under the Actions column then all touches of this Program on the Prospect will be removed.

Updating Data
To change data on a prospect (Lead Liaison Custom or Standard fields) edit the field from the Prospect Profile page. Click the "Show Details" link on the Prospect Profile page which presents a drop down of all Standard and Custom fields.
 is your main source of information for individual prospects. From the profile, you can see all data collected on the prospect, a timeline of their engagements, and directly engage with the prospect through letters, postcards, and automations.
Using the Prospect Profile
You can access the Prospect Profile from almost anywhere in the platform. Whether in visitor tracking, lists, automations, click on their name to open their profile.
Prospect Overview
In the overview, you will see the prospects name, score, grade, priority, owner, and location. Click on any of these fields to update them.

If the system has identified the prospect's social media profiles, the overview will also include their social profile picture.
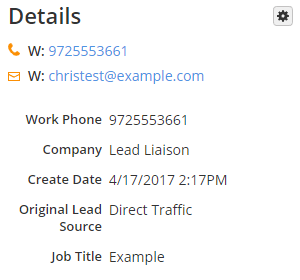
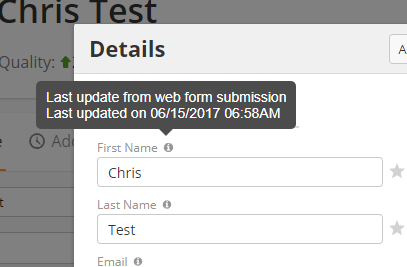
Details
The Details info card on the left of the screen shows a preview of the data on the prospect. Click on any of the fields to update them.
If you would like to see all of the prospect's details, click on the gear in the top-right corner of the info card. A new window will open with every standard and custom prospect field. Click the stars next to the field to add or remove them from the info card.
| Info |
|---|
When users add or remove fields from their info cards, it only affects their account. This means you can add or remove fields so you only see data relevant to you without affecting other users. |
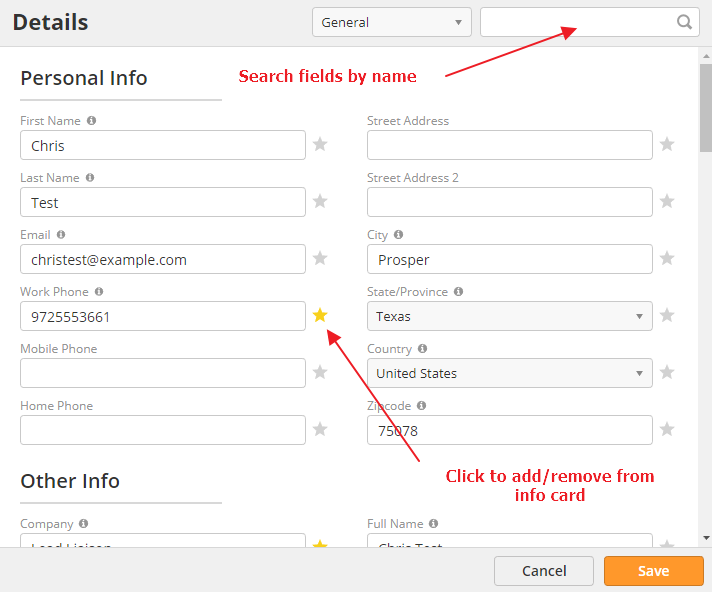
Use the drop-down menu at the top of the details window to sort fields.
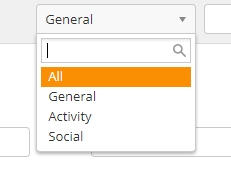
- All – view all fields
- General – view standard and custom prospect fields
- Activity – view activity fields such as Last Email Open Date
- Social – view fields collected from social appends
If you would like to rearrange your fields, click and drag the field.
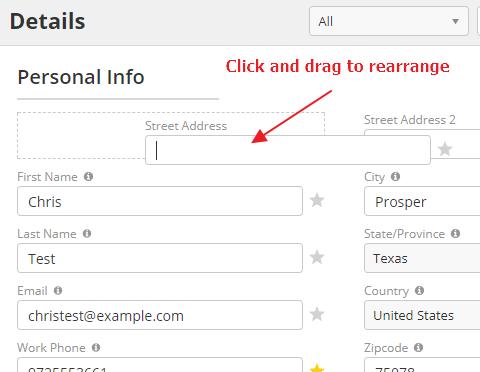
| Info |
|---|
Changing the order of the fields in the details window will change their order on the info card as well. |
Finally, you can click on the "i" icon next to a field to see when it was last updated and what updated it.
Action Bar
The action bar is located directly below the Prospect Overview. From here, you can quickly engage your prospect without having to move to other parts of the platform. Some options may not appear depending on your product license and security profile.

Letter
Send a handwritten letter to your prospect for a personal touch. Clicking this option will open our handwritten-letter builder. Once you create the content and select your settings, we will write the letter by hand and mail it on your behalf (we have good handwriting). Learn more about handwritten letters here.
Postcard
Send a postcard to your prospect to thank them for their business, with them a happy birthday, or to send special offers. Select a postcard template to mail to the prospect.
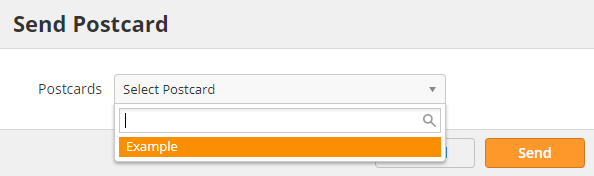
To create a new postcard template, navigate to Content > Postcards. Learn more about postcards here.
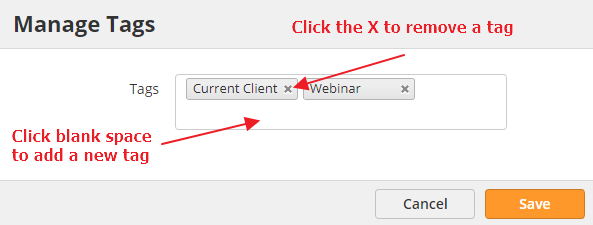
Tags
View, add, or remove tags for the prospect. Click the blank space to add a new tag, and click the "x" to the right of a tag to remove it.
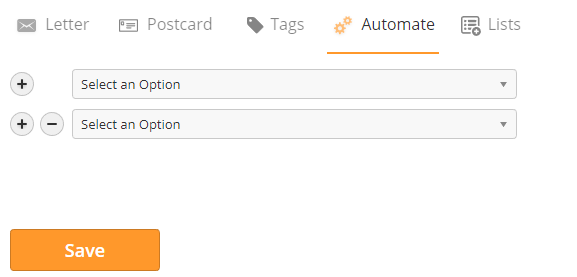
Automate
Manually add or remove the prospect from an automation. To add a new automation, click the (+) button and select the automation from the drop-down menu. To remove the prospect from an automation, click the (-) button. Once you are finished, click Save.
| Info |
|---|
This is a great way to add a prospect to sales nurture campaigns. For example, you might realize that a prospect is a good fit but isn't qualified yet. You could add them to a nurture campaign from here to keep in touch via automation while you concentrate on more qualified prospects. |
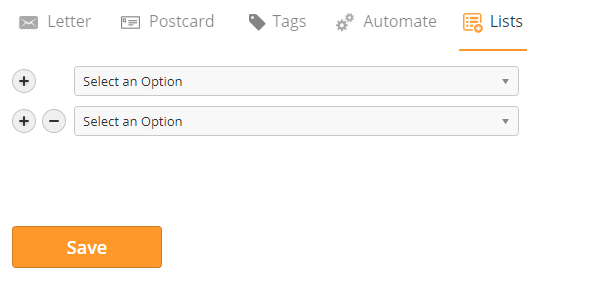
Lists
Manually add or remove the prospect from a list. To add a new list, click the (+) button and select the list from the drop-down menu. To remove the prospect from a list, click the (-) button. Once you are finished, click Save.
Action Menu
The action menu is located directly to the right of the Prospect Overview. From here, you can take additional actions.
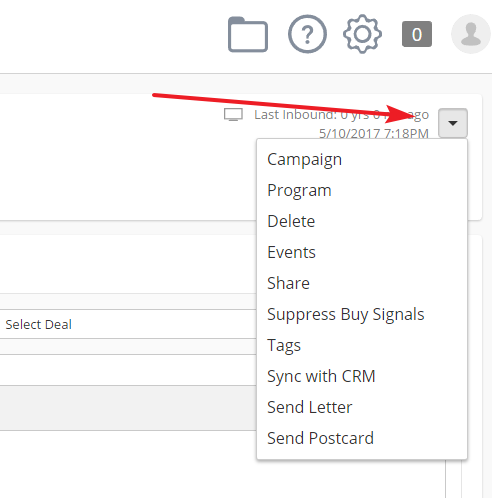
- Campaign – add or remove the prospect from campaigns
- Program – add or remove the prospect from programs
- Delete – delete the prospect or send them to the recycle bin
- Events – view GoToWebinar events the prospect has participated in
- Share – share the prospect profile with other users
- Suppress Buy Signals – stop receiving buy signal alerts from this prospect or their domain
- Tags – view, add, and remove tags
- Sync with CRM – sync to Salesforce.com or Microsoft Dynamics
- Send Letter – send a handwritten letter
- Send Postcard – send a postcard
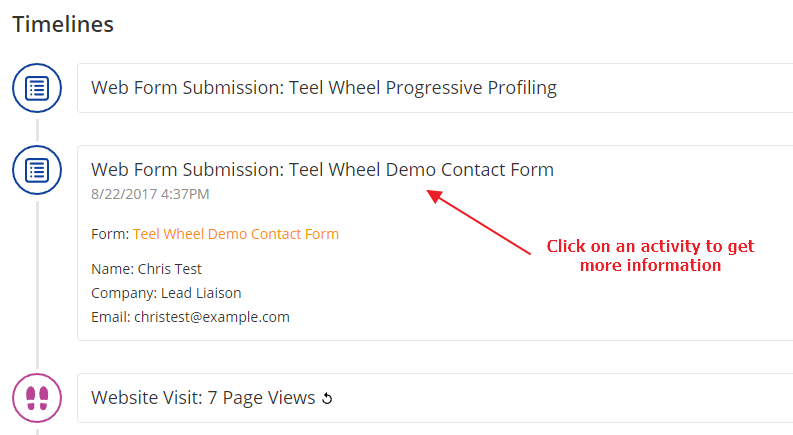
Timelines
The Timelines show all engagements and actions for a prospect. This includes outbound activities like an email sent to the prospect, inbound activities like a website visit, and automation activities. Click on an activity to get more information like form submission results, watched video heat maps, and automation steps.
Timeline Options
You can view different Timelines with a variety of options. To change timelines, use the drop-down menu in the top-right corner of the Timelines panel.
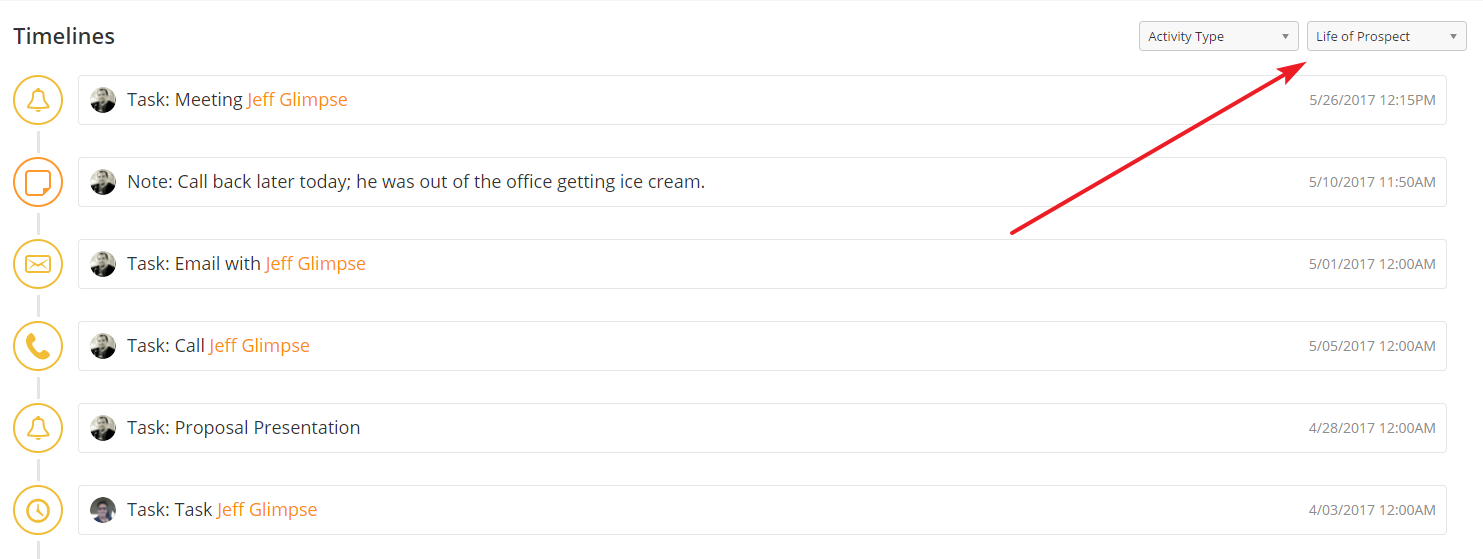
The Prospect Profile supports the following Timelines:
- Life of Prospect – all activities associated with the Prospect
- Inbound Activity – actions by the Prospect bringing them to your content, such as web page visits, email links clicked, and form submissions
- Outbound Activity – outbound marketing sent to the Prospect
- Activities – tasks completed or scheduled in OneFocus™
- Notes – Prospect notes added to OneFocus™
- Score – activities that changed the Prospect's Lead Score
- Grade – activities that changed the Prospect's Grade
- Automations – automations the Prospect is added to/taken out of
- Audit – individual automation steps applied to the Prospect
- Campaign – campaigns the Prospect is added to/taken out of
- Programs – programs the Prospect is added to/taken out of