Webhooks Use Case: Sending Direct Mail
Overview
Integration with a direct mail service can easily be setup in Lead Liaison using Webhooks. In this example, we integrate Direct Mail Manager's Webhook with Lead Liaison. We love Direct Mail Manager because of their flexibility. You add funds to your Direct Mail Manager account and funds are deducted when each mail piece is delivered. You can add as little funds as you want (as little as what's required for a single postcard) or add more funds to get higher volume price breaks.
For more information on Lead Liaison's Webhooks see this wiki page. Integration can be done in four (4) easy steps:
- Design your mail piece or use Direct Mail Manager's templates
- Create a campaign in Direct Mail Manager
- Create a Webhook in Lead Liaison
- Add the "Call Webhook" action to any Lead Liaison automation
Why Use Direct Mail?
Direct mail is a powerful tool when used with timing. By including direct mail in your Lead Liaison campaigns you can increase ROI with your leads and current customers by sending a tangible postcard. This is a tactile experience not offered with digital media! Some of the best ways to integrate direct mail are:
- Lead follow up
- Thank You cards
- Promotional up selling
- Customer appreciation
- Customer acquisition
- Customer retention
Delivery Time
All direct mail will be sent out within 48 business hours. Most post offices can deliver mail within three to four days. That means your direct mail piece will arrive in your prospects, customers or partners hands within 5 to 7 business days.
Integration Steps
The instructions below detail how to integrate direct mail in four (4) steps.
Step 1: Design your Direct Mail Piece
Here are some useful tips and steps to follow if you decide to design your own direct mail piece:
- Upload your own artwork.
- Download templates to use with Direct Mail Manager. You can upload your artwork as any PDF or JPEG files. Keep your art at 300 DPI and create it in CMYK (not RGB). Follow these steps to upload your own artwork.
- Use Direct Mail Manager's online designer. Choose from 100s of professionally designed themes.
- Have Direct Mail Manager create a custom artwork design for you (extra costs). Call them at 866.571.3111 for help.
- Tip: Include a QR code on your direct mail piece and have the QR code point to a landing page that is specific to your campaign message. Make sure you have a good call-to-action on your landing page. For example, if you're providing a discount and it's less than 40%, use the amount instead of the percentage. Case in point, save $1,000 instead of save 10%.
- Easily generate a QR code using this web tool.
- Use Lead Liaison's landing page designer to build a beautiful looking landing page. Copy/paste your landing page URL into the tool.
- Make the QR code 500x500 pixels so you get more pixel density.
- Right-click and save the QR code, then insert it into your artwork. Resize it to fit.
Step 2: Create a Campaign in Direct Mail Manager
Direct mail and email are very similar. In Lead Liaison, any other other email system, you first create the content (email) and then it becomes a campaign. The same concept applies with Direct Mail Manager. First, create your artwork in Direct Mail Manager then create a direct mail campaign from your artwork. In Lead Liaison, you'll create a Webhook for each direct mail campaign you want to include in your marketing campaigns.
Grab Some Info
You'll need the following bits of information from Direct Mail Manager to insert into the Webhook in Lead Liaison:
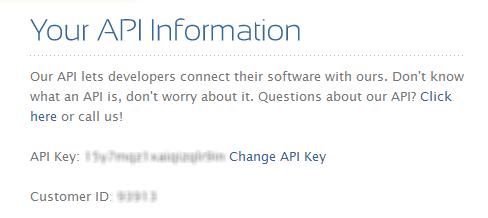
- API Key
- Customer ID
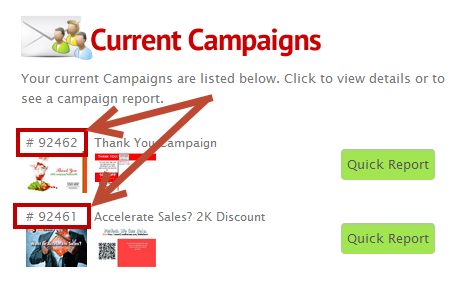
- Campaign ID
- Your Email Login
#1 and #2 can be collected from this page and will look like this:
#3 can be seen on this page and will look like the below. The numbers in the red boxes are the Campaign ID.
Here are a few things to keep in mind with Direct Mail Manager:
Tips with Direct Mail Manager
- Make sure you're mailing to US addresses only. Direct Mail Manager does not support international mail. It's sent domestically, first class.
- Make sure to add funds into your Direct Mail Manager account. Add a buffer just to be sure.
- If no data (address info for example) is sent the order will still go through, but it will not mail and your account will be charged the amount of the card mailed.
- A return address is required on all mailings and it goes in the area marked. If no return address is there they add the billing address for your account before mailing.
Step 3: Create a Webhook in Lead Liaison
To create a Webhook in Lead Liaison go to Settings > App Setup > Webhooks and follow the instructions below.
- Make sure to add the Webhook app to your instance if it's not already installed. Click the App Cloud link on the top of the page, located the Webhook app and install it.
- Click Add Webhook
- Enter in the following values for each field
- Webhook Name: Anything you want. This name will be what you'll use to search with when you add the "Call Webhook" action.
- Description: Anything you want.
- URL: http://postcardservices.com/api/mgapi.asp?
- Request Type: POST
- Request Token Encoding: FORM/URL
- Response Type: XML
- Template: Copy and Paste the code below and replace all parameters in ALL CAPS (below) with your information from your Direct Mail Manager account.
- YOUR_API_KEY and YOUR_CUSTOMER_ID can be found in the Update My Account area of your Direct Mail Manager account.
- YOUR_CAMPAIGN_ID (or Order ID) is listed next to your campaigns on the Direct Mail Manager main page.
- YOUR_EMAIL_LOGIN is the email address you use to login to your Direct Mail Manager account.
apikey=YOUR_API_KEY&idcust=YOUR_CUSTOMER_ID&orderno=YOUR_CAMPAIGN_ID&action=dmmaddleadandmail&ListName=LeadLiaisonProspects_%%FirstName%%%%LastName%%.csv&name=%%FullName%%&company=%%Company%%&address1=%%StreetAddress%%&city=%%City%%&state=%%State%%&zip=%%Zipcode%%&customeremail=YOUR_EMAIL_LOGIN
Tip: List Name
You can use any value for the "ListName" parameter; however, make sure it is unique for each Prospect. To achieve that, keep %%FirstName%%%%LastName%% in the ListName variable but feel free to change LeadLiaisonProspects_ to anything you'd like.
- Once done, your template should look similar to the one in the screenshot below:

Done!
Your Webhook is done! You can now go to a new or existing Lead Liaison automation and drop a "Call Webhook" action anywhere in the process and your prospect, customer or partner will receive your selected postcard campaign. Follow the steps below to add the Call Webhook action.
Step 4: Add the Call Webhook Action
To add the Call Webhook action and select your direct mail campaign do the following.
- Create a new automation process or edit an existing process
- Add the Call Webhook action
- Select your direct mail Webhook from the dropdown
Validate Addresses
Make sure to validate your mailing addresses. It might be helpful to wrap criteria around the Call Webhook action to only send the direct mail piece if all parts of the mailing address are available. See how we built this action below.
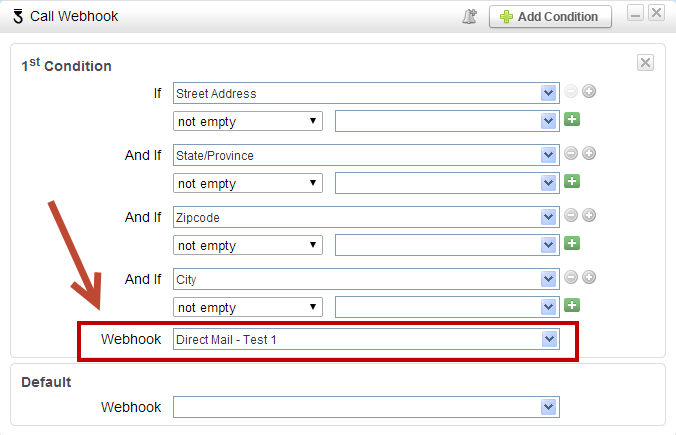
![]()
© 2021 Lead Liaison, LLC. All rights reserved.
13101 Preston Road Ste 110 – 159 Dallas, TX 75240 | T 888.895.3237 | F 630.566.8107 www.leadliaison.com | Privacy Policy