Overview
In this example, we'll explain how to setup a Zap using Zapier and enter the Webhook into Lead Liaison. When the Webhook is called and the packet of information is sent to Zapier, Zapier will trigger the email using the information provided.
Directions
- Go to https://zapier.com/
- Create an account.
- Make a Zap.
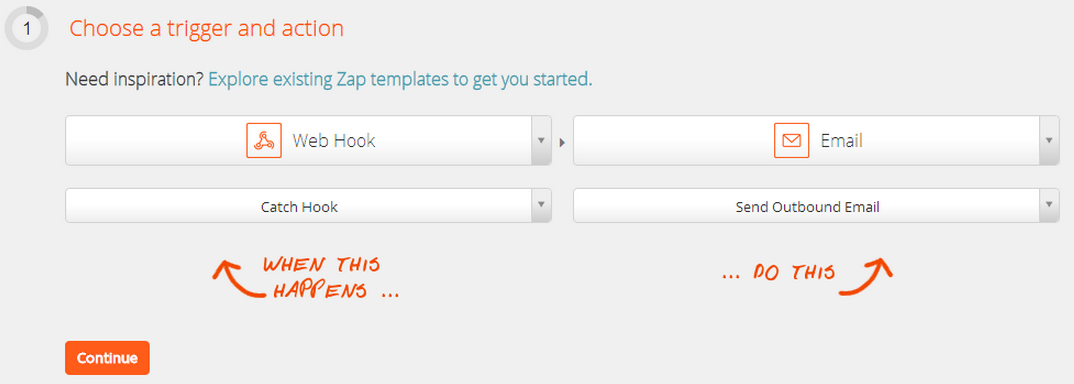
- Select "Web Hook" as the trigger and select "Email" as the action as shown below.
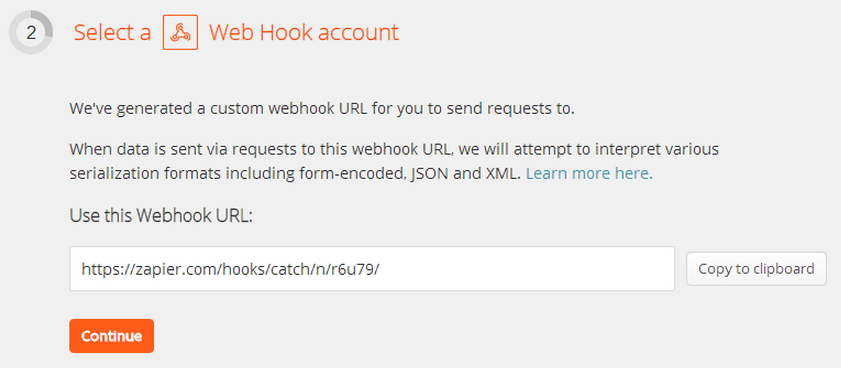
- Press continue to get the Webhook URL.
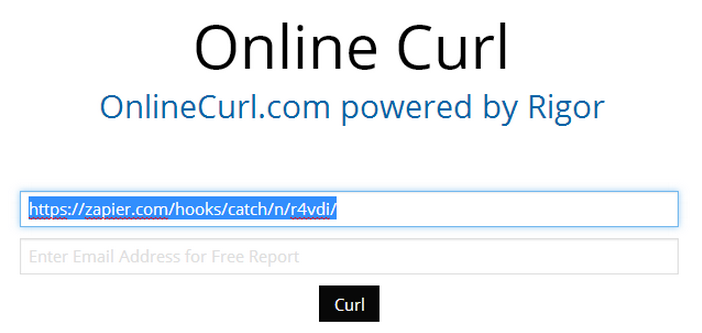
- Take this url and go to http://onlinecurl.com/ to setup the Webhook. With this step you're using simulating the Webhook call.
Put the Webhook URL in the first textbox as shown below:
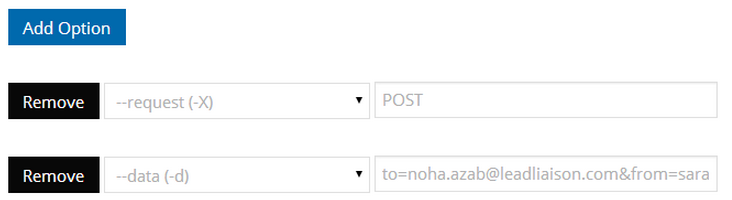
- Add the headers of the email by doing the following:
- Click on Add Option button and Select "–request(_X)" and set its value to "POST".
- Click again on Add Option and this time choose --data(-d) and set its value to to=your_to_mail@example.com&from=your_from_mail@example.com&message=your_message&subject=your_subject
- Then click on the Curl Button. Now you have simulated the Webhook call and Zapier has detected the fields required for setup.
- Now lets go back to Zapier to continue the setup.
- Click continue which will take you to Step # 5. In this section we will setup the fields that will be replaced by Lead Liaison's token values (variables and/or mail merge fields) when using this Webhook.

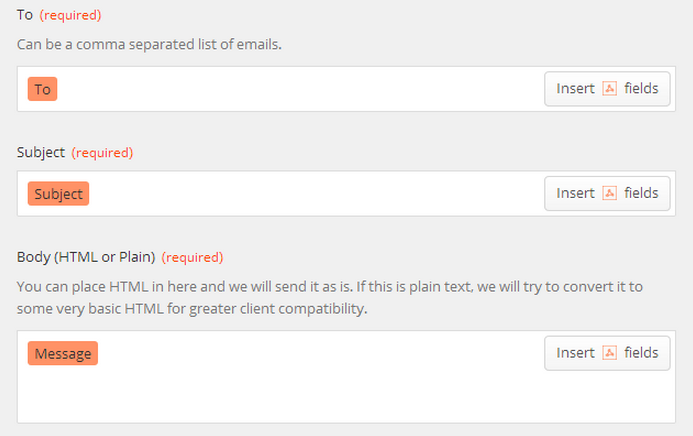
- In the "To" field, click on the Insert fields button. A list of all detected fields are shown.
- Choose the "to" field.
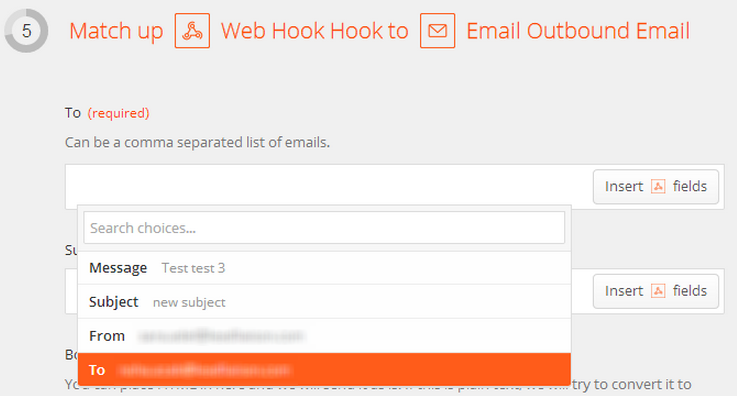
- Repeat this step for the subject and the body.
- Continue the steps until you reach the Turn on the Zap button. Click the button once you see it.
- Now this Webhook can be used to send emails by passing the field values to it in the POST request.
- To setup this Webhook in lead liaison:
- Create a new Webhook.
- Enter the Webhook Name and Description.
- Enter the Webhook URL: https://zapier.com/hooks/catch/n/r6u79/ (this was for our example, you'll have your own URL).
- Select POST as a Request Type.
- In the Template area, put the POST data which will be passed to the Webhook when it's called. "to=%%Email%%&message=your_message&subject=your_subject"
- Select "FORM/URL" as an Encoding Request Type.
- Click save.

Congrats!
Your Webhook is now ready to be used in a Lead Liaison automation process.