Overview
Sales Enablement users can create their own personalized meeting links that can be used to book a time on the calendar effortlessly.
To use the meeting scheduler feature, your email account first needs to be connected. Follow the instructions here to connect your email account.
Creating a Meeting
In order to create a meeting link, click on the Profile photo at the top right side of the dashboard and click Settings. Then click on the Meeting Tab as shown here:
Click on the green New button to open the New Meeting dialogue.
Provide the following information:
Title: the title of the meeting as shown on the booking screen.
Location: your Zoom Personal Meeting ID or Microsoft Teams link or Google Meet link.
Duration: duration of your meeting in hours or minutes.
URL Slug: the slug, or unique part of your meeting link. For example, if you put “book_with_me” as your slug then the resulting URL would look something like this:
https://meetings.connect-anywhere.com/book_with_me
The “connect-anywhere.com” domain will always remain the same.
Use With Capture Forms: When enabled the meeting type will be available for use with Capture Forms to schedule meetings while capturing data. Add the Schedule Meeting element to your Capture Form to select the available meeting types.
Schedule Builder
Once you’ve created a new meeting, you’ll be taken to the Schedule Builder page.
Availability
Basic Info
Here you can set the followings:
Duration: the length of the calendar events created.
Min. Booking Notice: the minimum amount of time an event must be booked before the meeting.
Min. Cancel Notice: the minimum amount of time that the guest is allowed to cancel via the booking page.
Future Limit: the number of days into the future event should be allowed.
Buffer Time: the minimum amount of time required between events.
Description: the meeting’s description as shown in the calendar invite.
Cancellation Policy: the policy displayed in the meeting invite; for if you require 24 hours notice of cancellation, you can make that clear to the Prospect in your Policy.
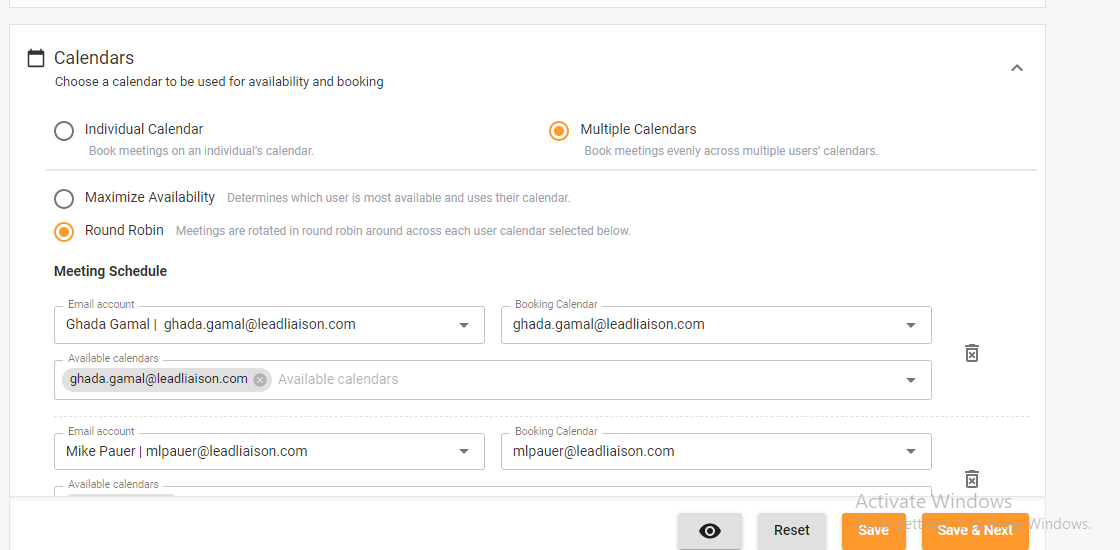
Calendars
This shows a list of all available Calendars linked to your connected email address.
You can select from Individual Calendar or Multiple Calendars options:
Multiple Calendars option allows the ability to book meetings evenly across multiple users’ calendars.
You can choose from two different bookings distribution methods:
Maximize Availability - Determines which user is most available and uses their calendar.
Round Robin - Meetings are rotated in round robin around across each user calendar selected.
The ‘Multiple Calendars’ option allows the scheduler to check availability on multiple calendars, but it does not book meetings on multiple calendars.
Booking Hours
You can also specify the time zone and booking hours for your calendar. Invitees will see your availability in their local time zones. You can add multiple time slots for Booking Hours on your calendars.
Note that booking hours do not sync with Google’s working hours.
Workflow
Under this tab, you can configure your booking flow as well as the reminders.
Booking Flow
There are two modes available for booking flow:
Automatic: bookings are auto-confirmed when they are submitted (instant booking).
Manual: you'll be notified and can confirm or decline bookings manually.
When the ‘Multiple Calendars’ option is selected, the scheduler does not send approval requests to all calendars, that is because this option is only for checking availability on multiple calendars and not booking on multiple calendars.
After a booking is confirmed, you can redirect the person to:
Host page: shows the guest the standard thank-you page.
Custom page: redirects to a page on another website. For example, you can use the homepage of your website here.
You can also set an expiry for your booking link. There are three options available:
None: the booking link will never expire.
Date/Time: booking links expire on a certain date and time.
Number of uses: booking links expire after a specific number of uses. This value must be greater than or equal to 1.
Once a booking has expired, the system will show this page:
Reminders
You can send reminders to the Host, Guest, or both at a specified time before the meeting.
You can also toggle On/Off a confirmation email message. Here's an example of a confirmation email.
Customization
Custom Fields
Here you can configure custom questions for the booking form. For example, you might ask the Prospect their area of interest as shown below.
You can add as many fields as you like and choose from a variety of predefined field types.
Page Style
In this section you can design your personal booking link with a custom company logo and theme color.
You can also customize the submit button label as well as the Thank you message.
Here is an example of how the final booking page would look like:
Fulfillment Actions
You can trigger actions based on the following events:
Meeting Cancel - Fulfillment Actions will trigger when a meeting is cancelled.
Meeting Scheduled - Fulfillment Actions will trigger when a meeting is scheduled.
Creating Prospects from Meetings
System can automatically create new Prospects from scheduled meetings. To use this option, go to Setup > App Setup > Email > Sales Enablement and enable this setting:
Once enabled, system will create a new Prospect if one does not already exist. All people invited to the meeting, including additional participants, will be created as new Prospects as well.
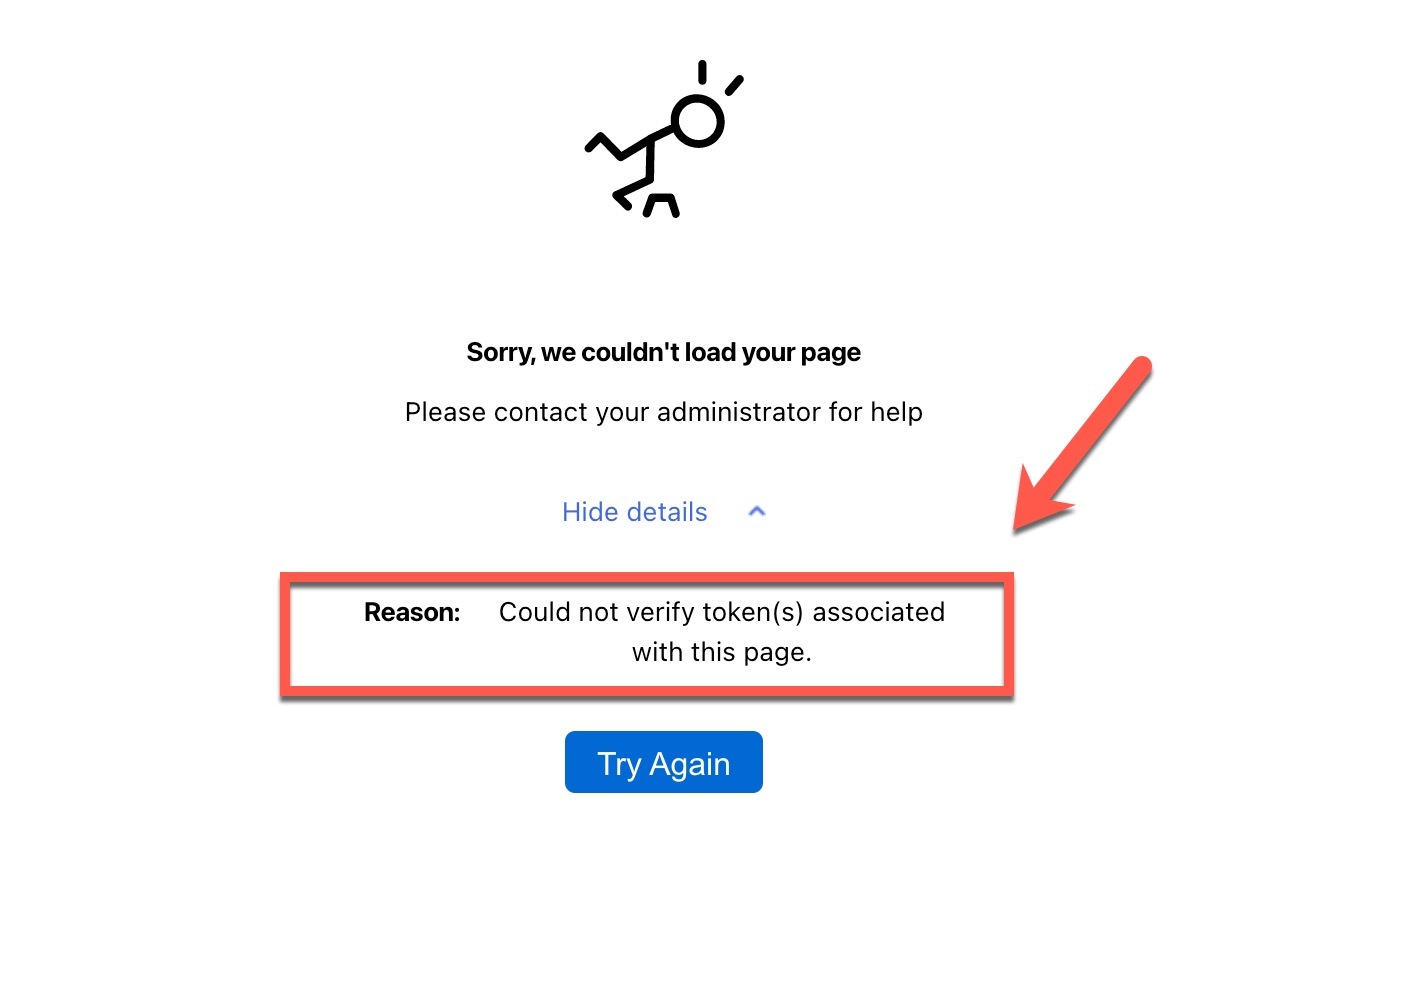
Troubleshooting “Could not verify tokens…” Error
In some cases, you may see an error when trying to access your meeting booking link:
In this case, you’d need to follow these steps to fix the error:
First, reauthenticate your connected email account from the Settings > 3rd Party tab:
2. Next, go to the Meetings tab and edit the meeting link that is showing the error.
3. Reselect/refresh your calendar options from the meeting scheduler and hit save.
Here is a quick video showing the steps:


