Overview
Deal History
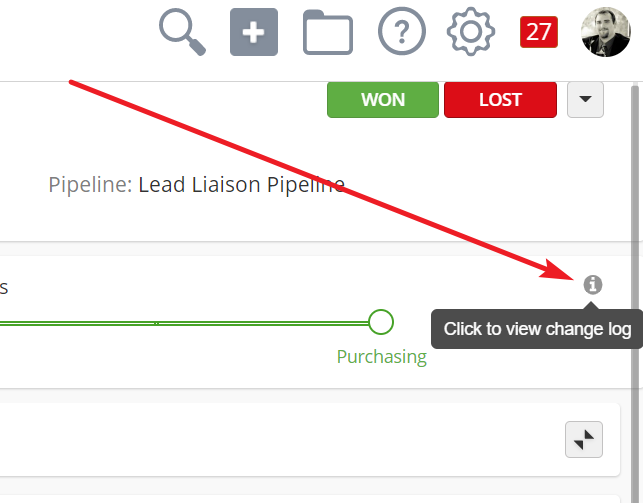
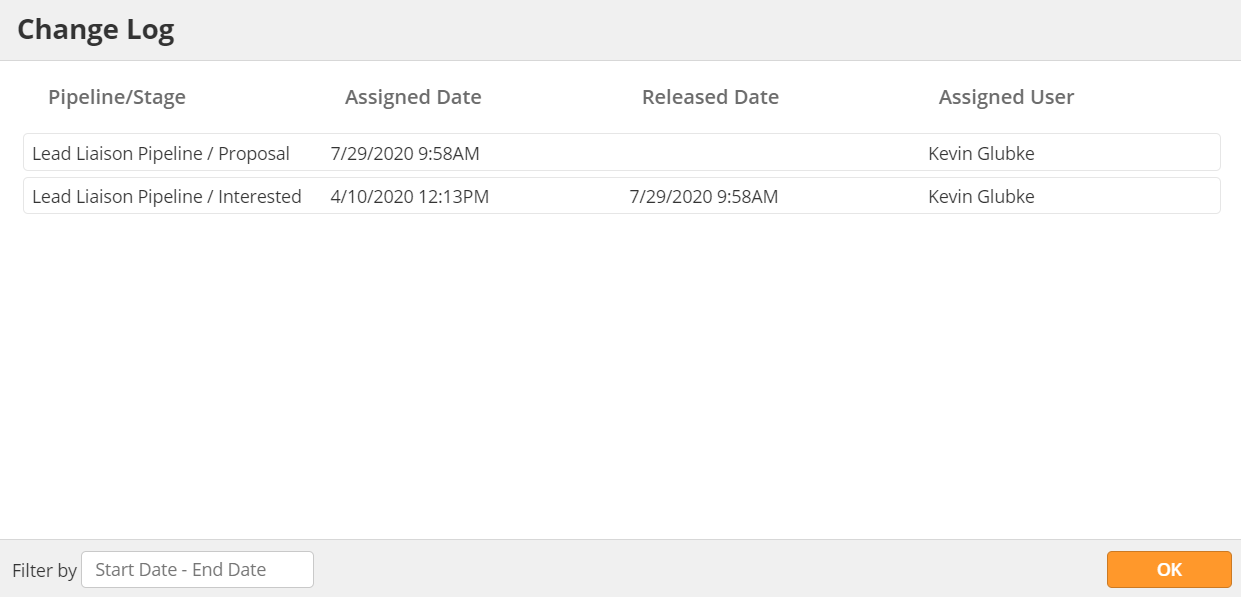
The system logs every Deal's history. Users can view every change to the Deal in the Sales Pipeline from the Deal Profile. To view a Deal's history, click on the info icon to the right of the Pipeline Stages.
Pipeline Stages
Pipeline Stages indicate where a Deal is in the sales process. By default, OneFocus™ will use Awareness, Qualification, Interest, Proposal, and Closure as Stages. However, your organization may customize the Stages to fit your business model. For example, a non-profit charity may delete the Proposal Stage, or a sales organization may prefer to use "First Meetings" instead of "Qualification."
Make sure you keep your Deals in the appropriate stage. Automations can use Stages as a field for sending out specific nurture emails. You don't want a prospect you're ready to close on getting emails for a special offer you haven't discussed.
Stage Rot
Every Stage has a Stage Rot timer. If a Deal stays in a Stage for longer than your organization's set time, OneFocus™ will flag it with Stage Rot. On the Manage Deals page, the CRM will give it a yellow color stripe. When Deal Cards are sorted by task, the CRM will list any Card flagged with Stage Rot first.
If you notice a Deal with Stage Rot, make sure you address it immediately. These Deals have stalled and are taking longer than your organization's normal sales cycle. Make sure you keep detailed notes for why a Deal is taking longer than normal.
Probability
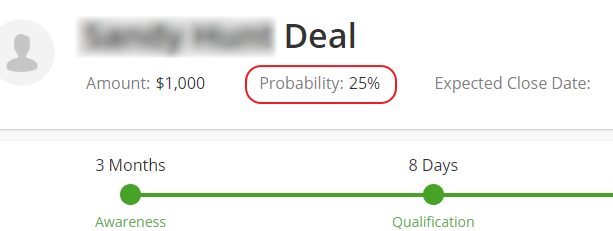
You can view deals based on their probability to closing. Probability will affect the total value of Deals in the Pipeline. For example, a $1000 Deal with 10% probability will report $100 in value. This value is the expected revenue.
To view Deals by expected revenue, use the drop-down menu in the top-right corner of the Deals page.
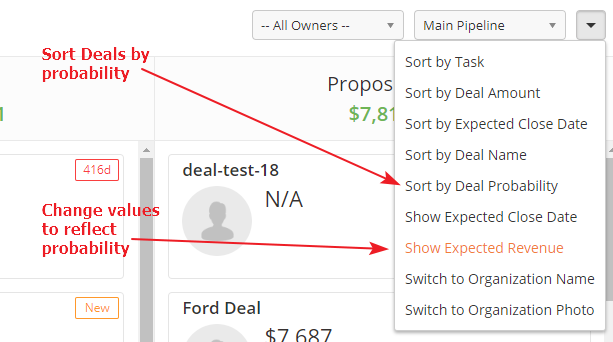
If you are using custom probability on your Deals, you can also sort by Deal probability. To add a custom probability to a Deal, navigate to the Deal profile and double-click the Probability rating beneath the Deal Name.
Learn more about setting Probability by pipeline stage here.
Close Deal
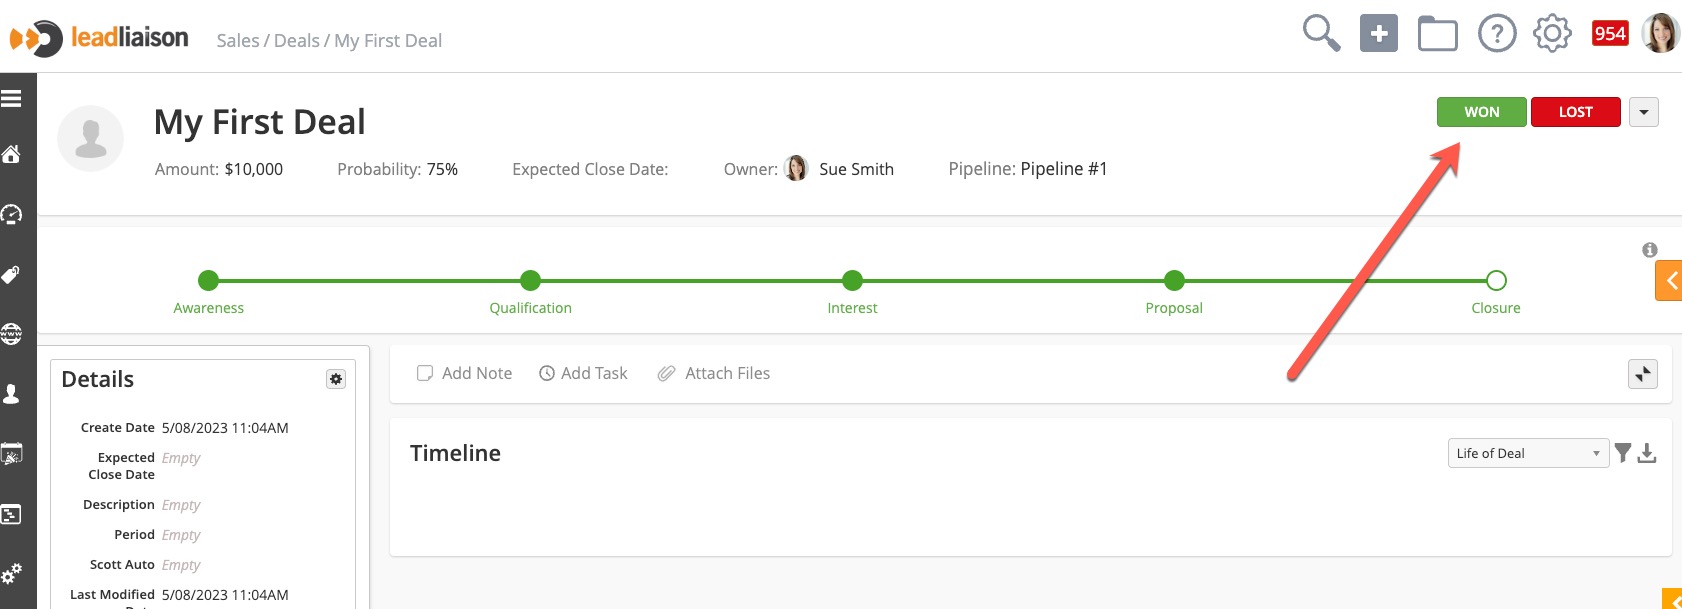
Whether a Deal is won or lost, make sure you close it out. By using either the green Won button or red Lost button on the Deal Profile, you can pull the Deal out of the Pipeline. Alternatively, you can drag and drop the Deal Card from the Deals Management Page to buckets on the bottom of the page.
If you want to see your closed Deals,
- Navigate to the Manage Deals page
- Switch to Table View
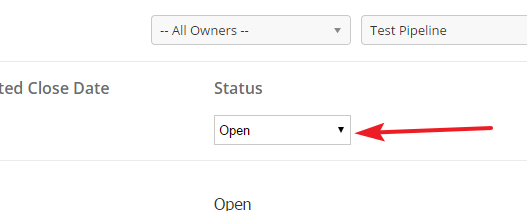
- Click the Search icon

- Change the Status field to Closed Won to view won Deals
OR - Change the Status field to Closed Lost to view lost Deals
Deals can be closed from the Deal profile page by clicking the WON button.
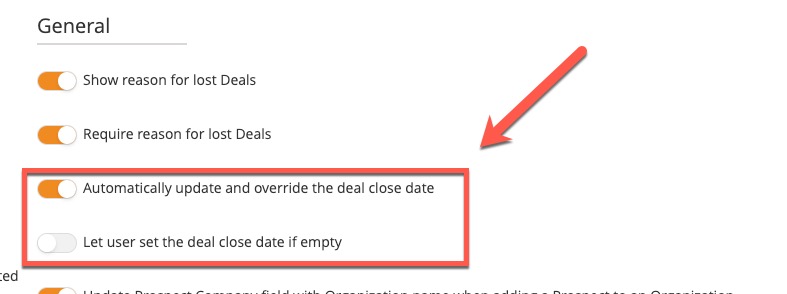
The Close Date will be updated to todays date depending on settings. The following settings provide control over the Closed Date:
- Automatically update and override the deal close date = When enabled the deal close date will automatically update to today's date regardless of the close date field having an existing value or not. If you do not want to override the existing value then turn this switch off.
- Let user set the deal close date if empty = When enabled the user will be prompted to provide more details on the closed deal. The prompt includes the option to update the closed-won date if there was no closed-won date already entered. As shown below, if this setting is enabled a prompt will appear after closing the deal asking the user to enter the Close Date.

To update the settings:
- Navigate to Setup > App Setup > CRM > Settings > General section
Trash
You can also add a Deal to the Trash. When a lead is trashed, it is completely removed from the Pipeline, and you will not see it on any of the Profiles or Manage Deals page. To send a Deal to the Trash, either use the drop-down menu in the Deals Profile or drag the Deal Card to the Trash bucket on the bottom of the screen.
In general, it's a best practice to mark the Deal either way rather than trashing it. Even if a Deal falls through due to silence, it's better to close it as Lost so sales leadership can review later.
Task Panel
From the Task Panel, you can add Notes or new Activities associated with the Deal. You can also attach files; for example, you could upload a credit application for equipment leases.
Any Notes or Activities associated with the Deal will show up in the Timeline below. This includes Automated activities.
Info Cards
The Info Cards to the left of the screen give you a quick visual summary of the Prospect's information and connections. You can rearrange the cards by clicking and dragging them to the order you prefer. Anything you move is exclusive to your login, so feel free to customize as you like.
Exporting Deals
To export Deals do the following:
- Click the List View icon as shown below.
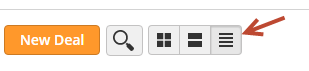
- Filter results as desired by using the spyglass icon to the right of the New Deal button.
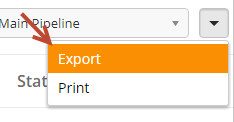
- Click the down arrow as shown below, and choose Export.
Merging Deals
You can merge up to three Deals into a single Deal record. When merging a record all timelines are merged into a single timeline.
Follow these steps to merge one or more records together:
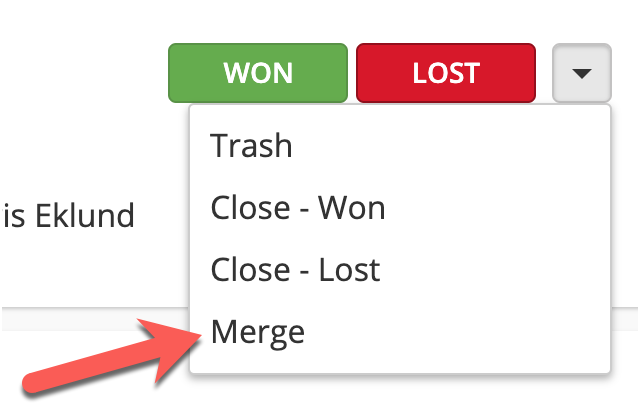
Search for the record you’d like to merge.
Click the down arrow and select Merge as shown in the screenshot below.
Merge Settings
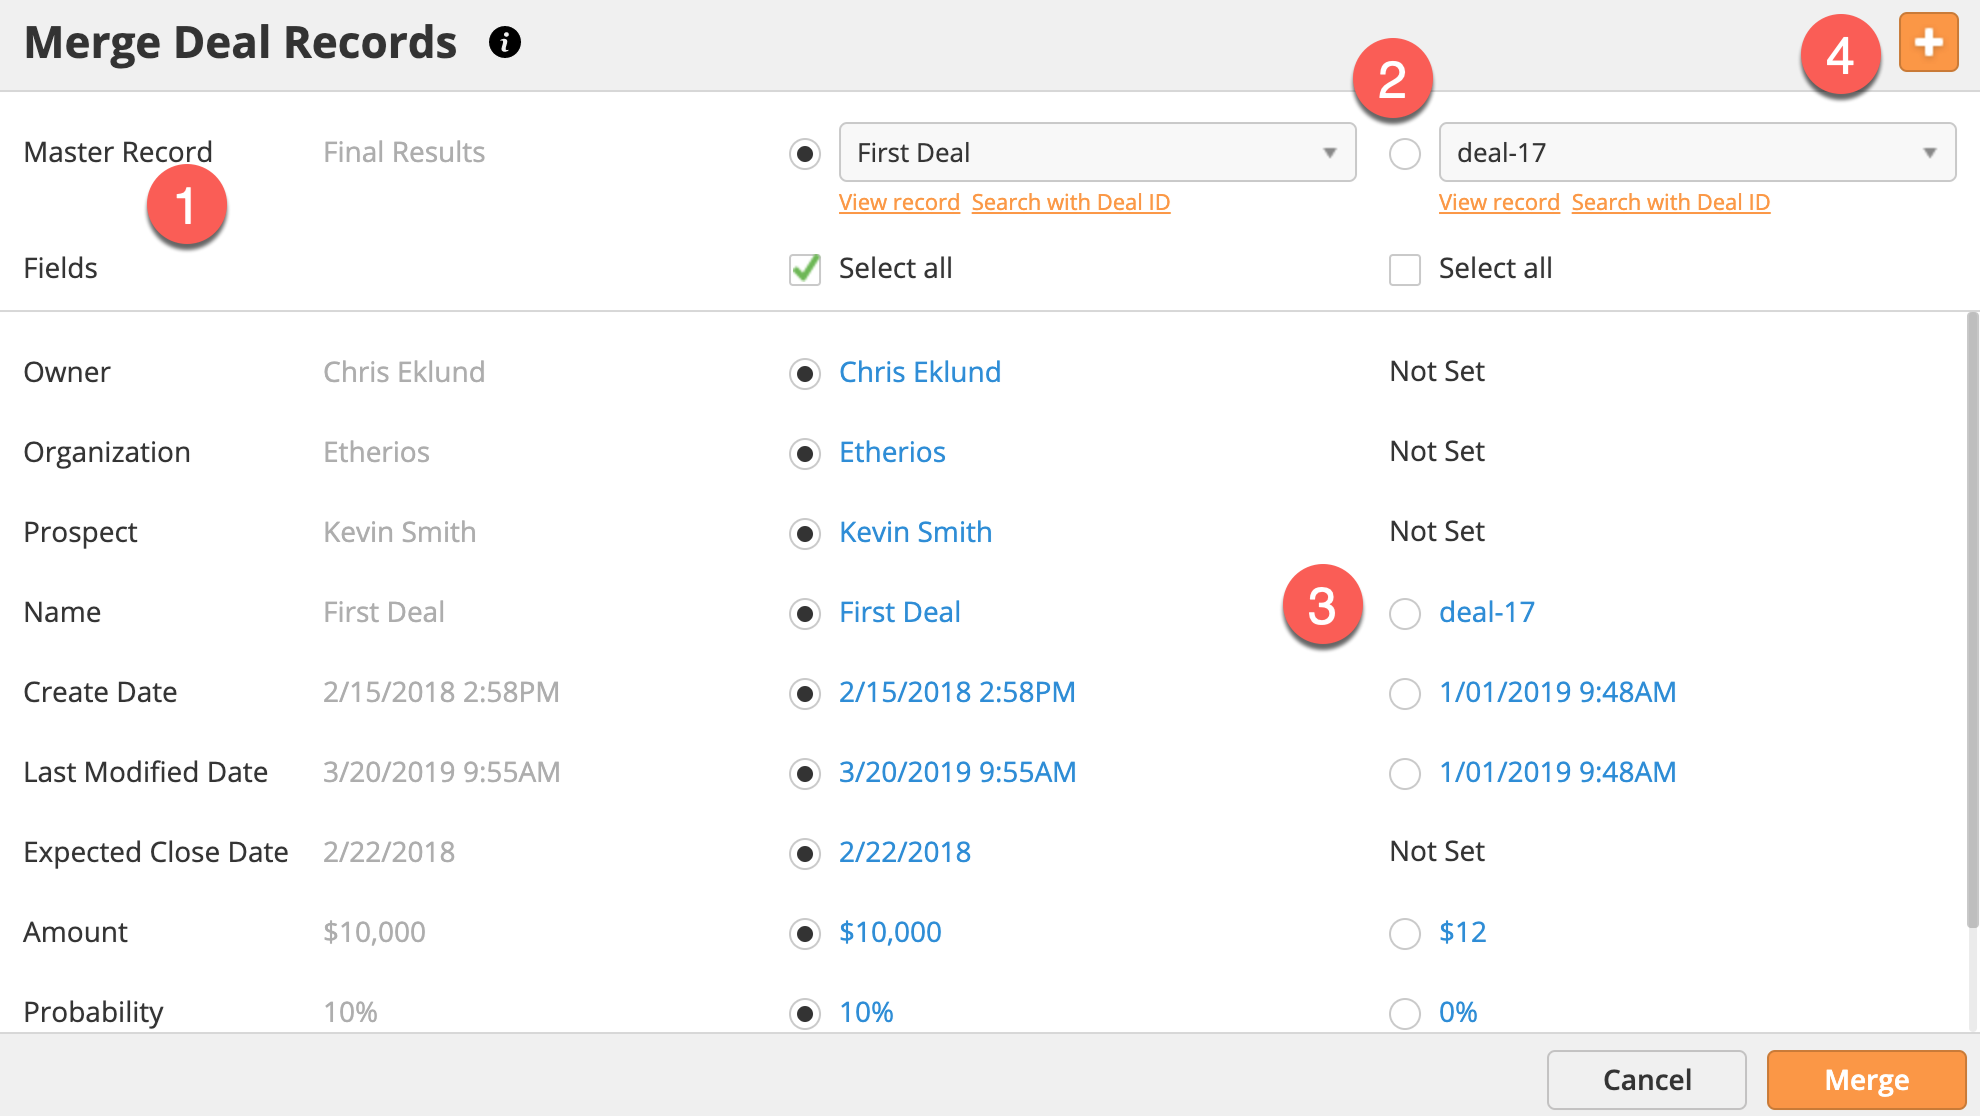
When the merge window appears there are four main areas:
The first column shows the Master Record. The Master Record will become the new record. All selected values from the duplicate records will be merged with the Master Record. Be default, the most recent value for each field is selected. All related timeline activities, notes, tasks, etc. will be associated with the Master Record.
Select additional records to merge with the original record selected for merge. You can select up to three total records to merge.
Pick each individual value that you’d like to use instead of the default selection. Changes appear in real-time under the Master Record column.
Add additional records to merge using the plus symbol.