Overview
Finding things can be hard, we understand. That's why we've created tags. Tags are an effective way to stay organized. It's also easy to search for Tags using the search box at the top of the application.
What Can be Tagged?
The following items can be tagged:
- Emails
- Email Lists
- Segmentation
- Automation
- Lead Nurturing
- Lead Distribution
- Lead Scoring
- Lead Grading
- Uploaded Content (Trackable Content)
- Web Forms
- Landing Pages
- Surveys
- Tracking URLs
- Programs
- Campaigns
- Sparks
- Webhooks
- Prospects
Tagging Stuff
Tagging Marketing Assets and Processes
When creating a marketing asset or process from the Create or Workflow menu a Tag option will appear in the display prompt. Enter in the name of the Tag you want to add. If a Tag already exists the system will display the tag in a blue drop down. One or more Tags may be entered.
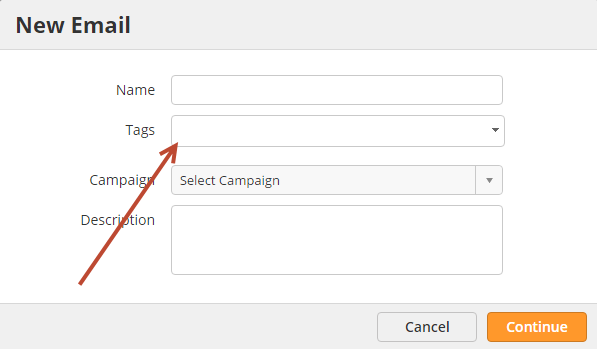
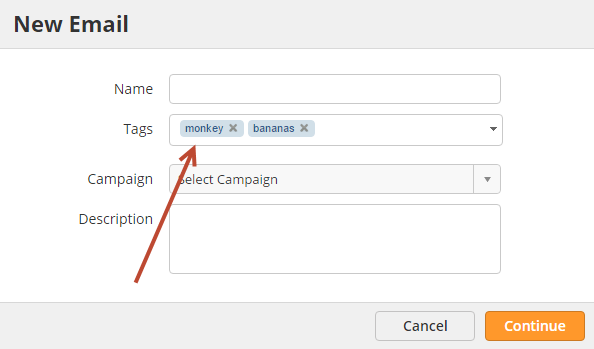
Once a Tag has been created/selected it will look like this:
Tagging Prospects
Prospects can be tagged from the Prospect Profile page or when importing into Lead Liaison.
Tagging Prospects from the Prospect Profile Page
- Open the Prospect Profile page for the Prospect you'd like to tag.
- Click the Tags button at the top of the page.
- In the prompt, enter the Tag. One or more Tags may be added.
Tagging Prospects on Import
One or more Tags can be added to Prospects when importing Prospects into Lead Liaison by doing the following:
- Make sure to understand how to import Prospects into Lead Liaison
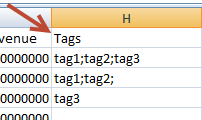
- Add a "Tags" column to your CSV file
- Separate multiple tags using a semicolon (";")
- The column should look similar to the one below
Tagging Prospects using Automation
To Tag Prospects using an automation do the following:
- Create a new automation by going to New > Automation
- In Step 1 select any criteria you'd like to pick who you want to Tag
- In Step 2, select the Tag action and enter one or more Tag values separated by a semicolon (";") as shown below:
Tips When using the Tag Action
When using the Tag action only one Tag can be added. Multiple Tags may not be added separated with a semicolon, like "tag1;tag2". Also, the Tag must already exist.

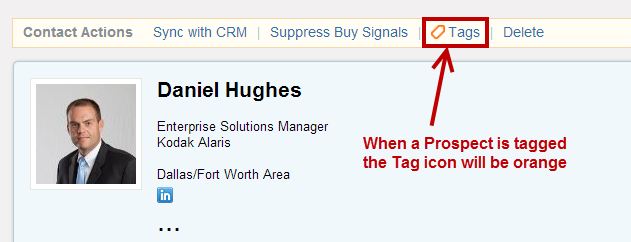
Viewing a Prospect's Tags
To see which Tags were added to a Prospect do the following:
- Open the Prospect Profile page for the Prospect you'd like to tag.
- Click the Tags button at the top of the page. The Tag icon will be orange, like the screenshot below, when a Prospect is tagged.
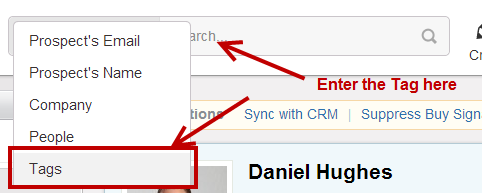
Searching Tags
Search for marketing items or Prospects by Tags by doing the following:
- Select "Tags" from the search drop down at the top of the page
- Enter the Tag you want to search for in the search box
- Hit enter on your keyboard or click the search icon
- The Manage Tags page appears showing results for all items and Prospects that contain the Tag value used in the search
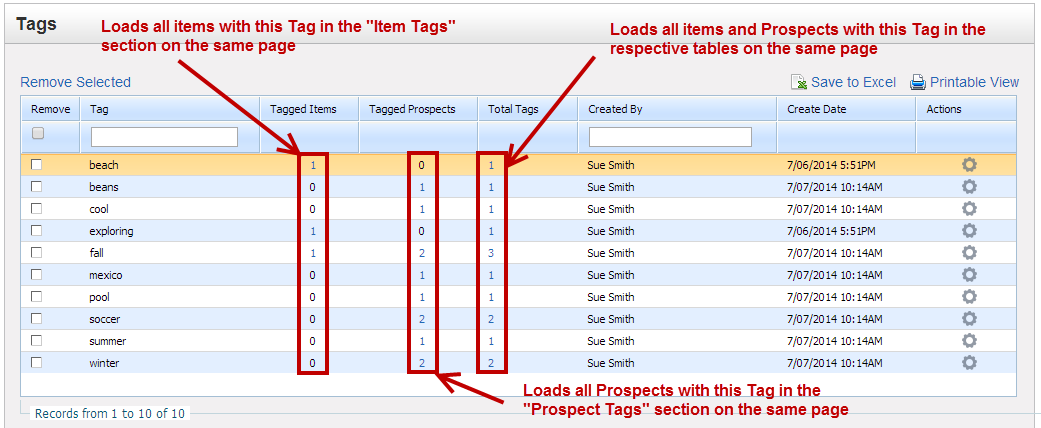
Another way to search for items or Prospects with specific Tags is directly via the Manage Tags page. See the screenshot below to better understand how Tagged items or Prospects can quickly be viewed.
- Go to Marketing > Tags
- Under the "Tags" box click the numbers in blue under the Tagged Items, Tagged Prospects or Total Tags columns depending on what you're looking for.
Using Tags in Workflows
To use Tags in your Workflows use the "Tags" filter.

Removing Tags
This section explains how to remove a Tag from a Prospect or marketing item as well as deleting Tags permanently from the system.
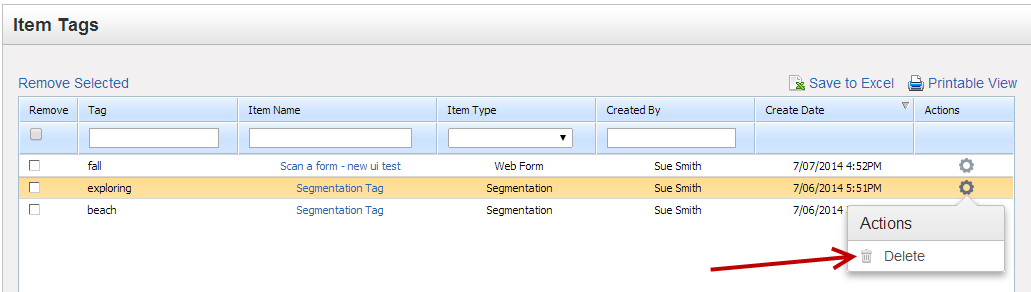
Removing Tags from Items or Prospects
To remove a Tag on a Prospect or item do the following:
- Go to Marketing > Tags
- If you're removing a Tag from a marketing item use the "Item Tags" box. If you're removing a Tag from a Prospect use the "Prospect Tags" box.
- Under the "Actions" column, select "Delete" from the drop down.
- Note, this action does not delete the Tag itself; rather, it removes the Tag from the item/Prospect.
- In the screenshot below we're removing the Tag from the web form:
Permanently Removing Tags
To remove a Tag from the system do the following:
- Go to Marketing > Tags
- Under the "Tags" box individually delete Tags by clicking Delete under the Actions column. Alternatively, select one or more Tags using the boxes under the Remove column and click Remove Selected.