...
...
...
...
...
...
...
...
...
...
...
...
...
...
...
...
...
...
...
...
...
...
...
...
...
...
...
...
...
...
...
...
...
...
...
...
...
...
...
...
...
...
...
...
...
...
...
...
...
...
...
...
...
...
...
...
...
...
...
...
...
...
...
...
...
...
...
...
...
...
...
...
...
...
...
...
...
...
...
...
...
...
...
...
...
...
...
...
...
...
...
...
...
...
...
...
...
...
...
...
...
...
...
...
...
...
...
...
...
...
...
...
...
...
...
...
...
...
...
...
...
...
...
...
...
...
...
...
...
...
...
...
...
...
...
...
...
...
...
...
...
...
...
...
...
...
...
...
...
...
...
...
...
...
...
...
...
...
...
...
...
...
...
...
...
...
...
...
...
...
...
...
...
...
...
...
...
...
...
...
...
...
...
...
...
...
...
...
...
...
...
...
...
...
...
...
...
...
...
...
...
...
...
...
...
...
...
...
...
...
...
...
...
...
...
...
...
...
...
...
...
...
...
...
...
...
...
...
...
...
...
...
...
| Info |
|---|
This document explains the steps required to connect Lead Liaison with your Salesforce.com Professional, Enterprise or Unlimited Edition account. |
| Table of Contents |
|---|
Installation Overview
Lead Liaison is installed into Salesforce.com in a few easy steps. Here's an overview of the installation process:
- Setup a CRM sync user by adding your CRM credentials into Lead Liaison.
- Install Lead Liaison's Salesforce.com package through Salesforce.com's AppExchange.
- Add fields into your Salesforce.com Lead and Contact Layouts.
- Setup Lead <> Contact field mappings in Salesforce.com.
- Use Lead Liaison's CRM configuration wizard and sync your Salesforce.com data to Lead Liaison.
Lead Liaison's Salesforce.com package will make the following changes to your Salesforce.com account:
- Add two new sections to your Leads and Contacts page layouts
- Lead Liaison (Native force.com module) to display activities, nurturing, scoring, grading, etc.
- Lead Liaison Marketing Data to display important marketing information such as total website visits, last website visit, lead score, and more.
- Create a new layout for the Leads and Contacts pages (optional to use).
Connect Salesforce.com to Lead Liaison
Follow these step by step instructions to connect your Salesforce.com account to Lead Liaison.
Step 1: Add CRM Sync User
Lead Liaison requires one Salesforce.com user account be used as a master sync account. The sync account is the account used to send data bidirectionally, from Salesforce.com to Lead Liaison and from Lead Liaison to Salesforce.com. The sync account is required for operation and has no material impact on leads, contacts, opportunities or any other event.
| Note |
|---|
Salesforce.com suggests updating passwords every 90 days. If credentials for the sync account expire then syncing between Lead Liaison and Salesforce.com will fail. We suggest using a Salesforce.com Admin user as the sync account to use with Lead Liaison. See the section below called "Salesforce.com Password Profiles" for tips on how to set the password to never expire on your Salesforce.com user account. |
Follow the steps below to enter your CRM sync user:
...
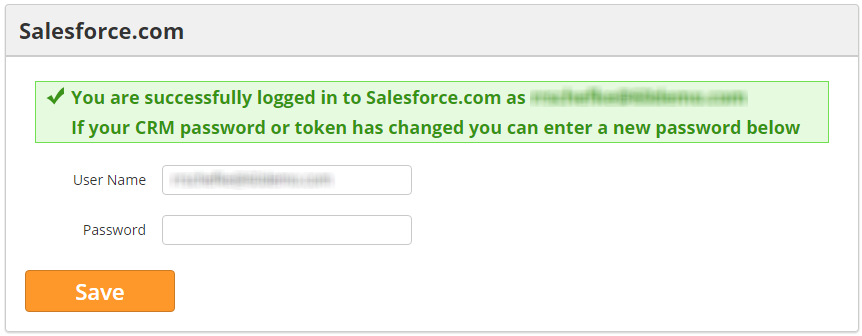
Once you've connected your Lead Liaison account to your Salesforce.com account successfully you'll see a success prompt similar to the one below:
Step 2 (Optional): Install Lead Liaison's Plugin into Salesforce.com
Install URL
Lead Liaison's Salesforce.com plugin is live on Salesforce's AppExchange portal. Access the plugin here: http://appexchange.salesforce.com/listingDetail?listingId=a0N30000009vFlTEAU
...
Follow the instructions below:
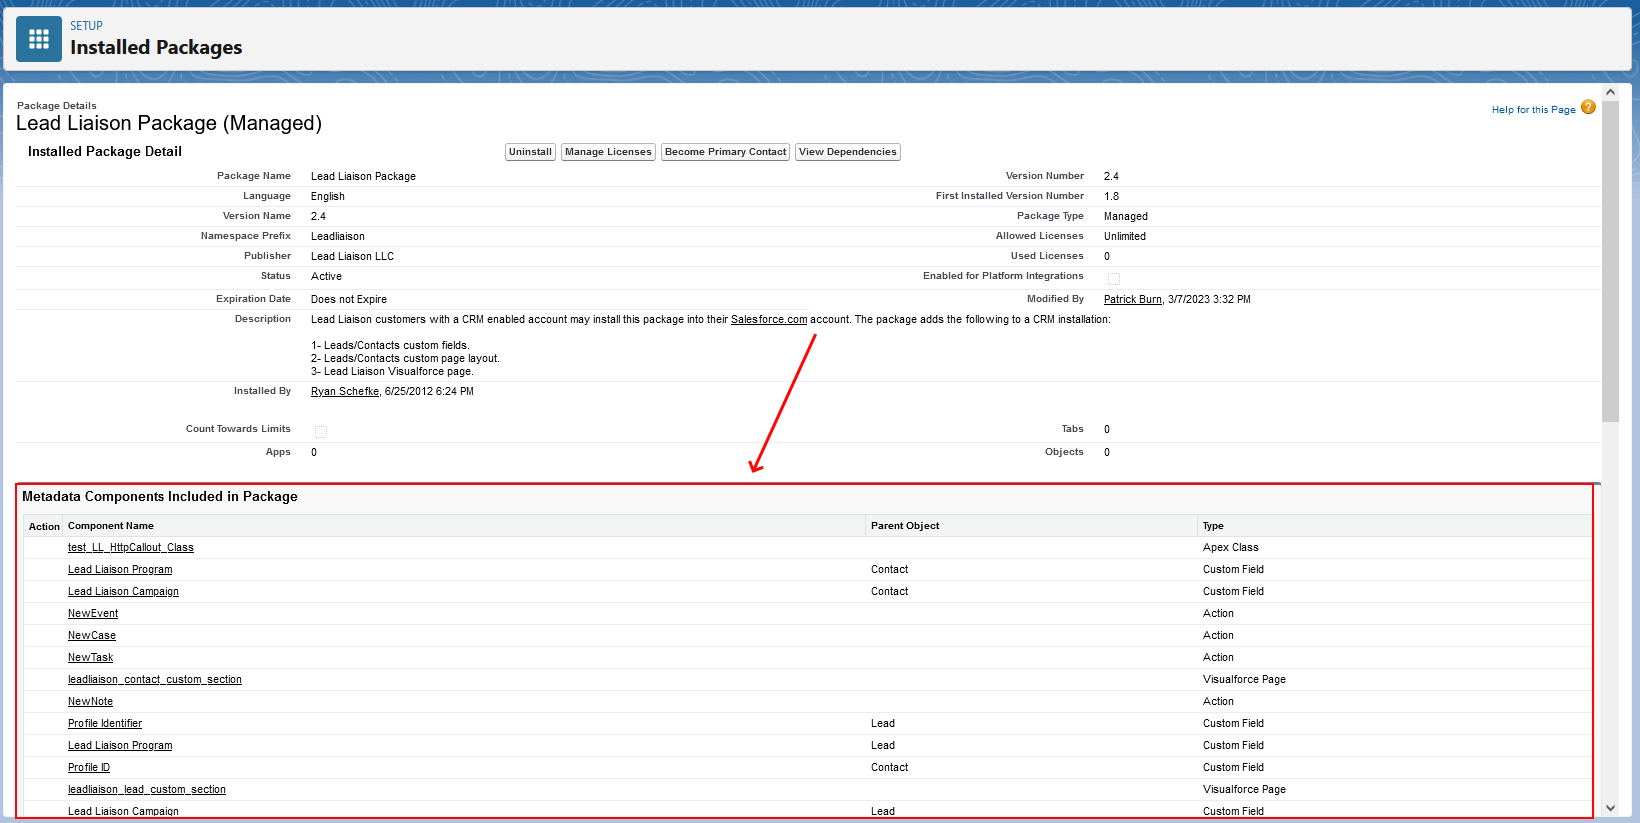
- After install, and to view the package contents at a later point show all installed package contents under 'Setup' > 'Installed Packages'.
- Proceed to Step 3 to integrate Lead Liaison into your layout.
...
Step 3: Add Lead Liaison's Custom Fields/Sections to your Salesforce.com Layout
| Info | ||
|---|---|---|
| ||
If you have the Enterprise or Unlimited Edition of Salesforce.com then it is optional to add these two sections. If you have the Professional Edition or Group Edition then you must add the Lead Liaison Marketing Data section to your Lead/Contact layout; however, the Lead Liaison section is optional. |
During this step you will add two sections, "Lead Liaison Marketing Data" and "Lead Liaison", to the Lead and Contact layouts.
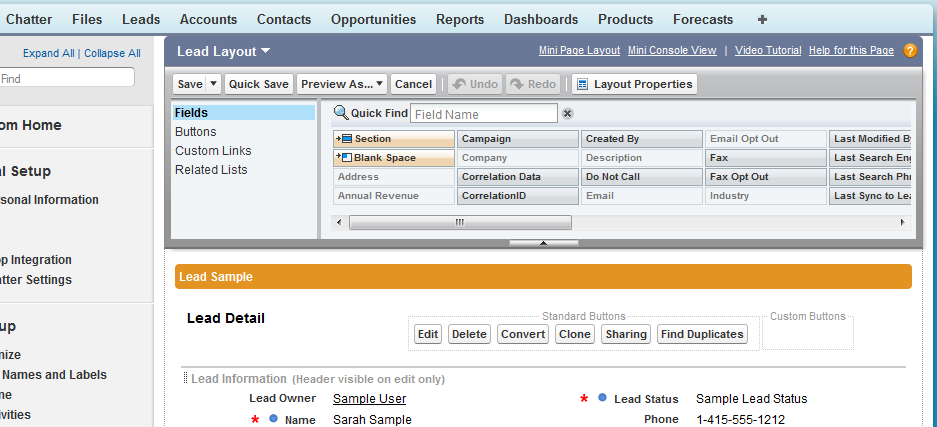
- Open the Leads page layout by going to 'Setup' > 'Customize' > 'Leads' > 'Object Manager > Lead > Page Layouts'.
- Click the 'Edit' link next to the Salesforce.com on the layout you'd like to add Lead Liaison's custom fields/sections to.
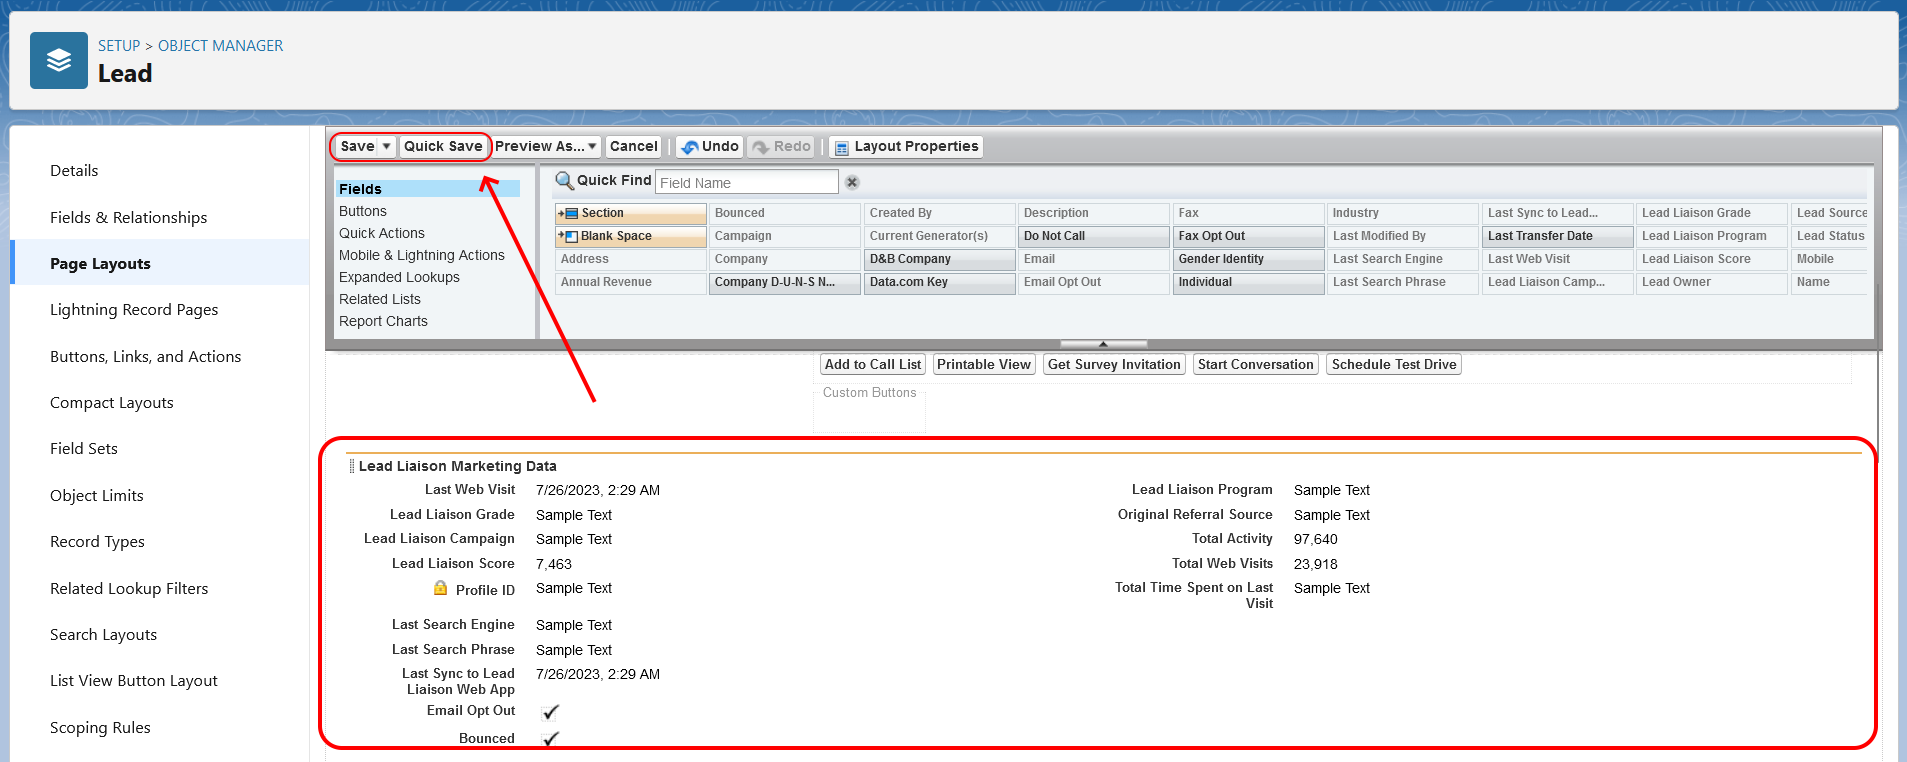
- You will see a page similar to the one below.
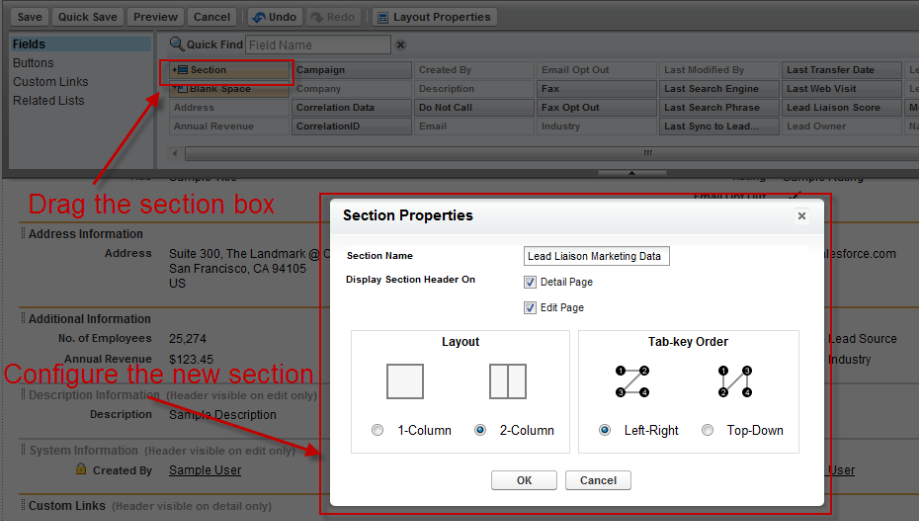
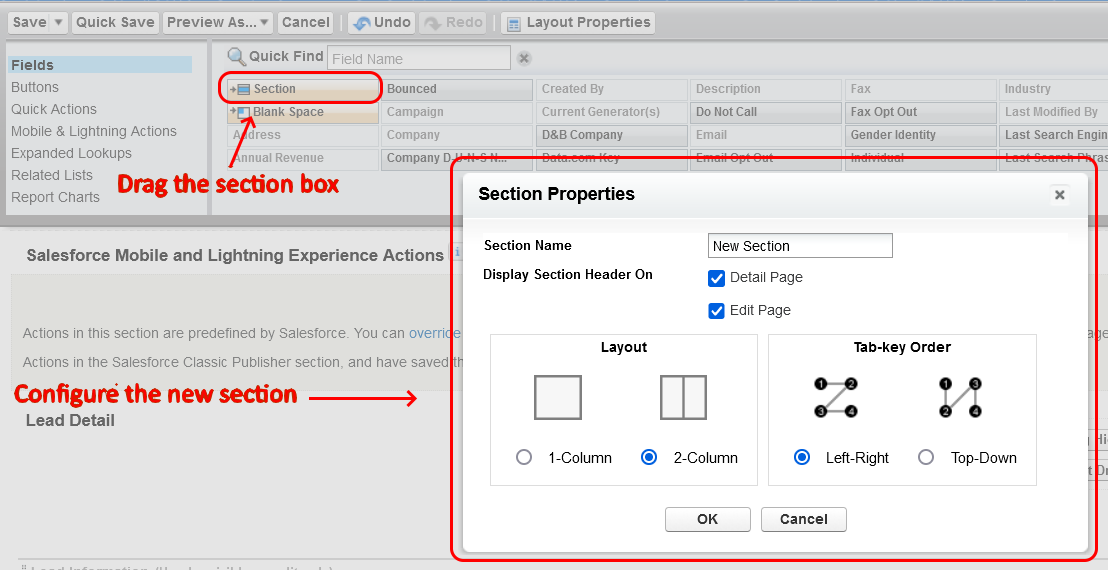
- Drag the "Section" box into the page below in the location you desire.
- In the popup enter "Lead Liaison Marketing Data" as the "Section Name". Leave "Layout" and "Tab-key Order" with the default settings unless you need to change them.
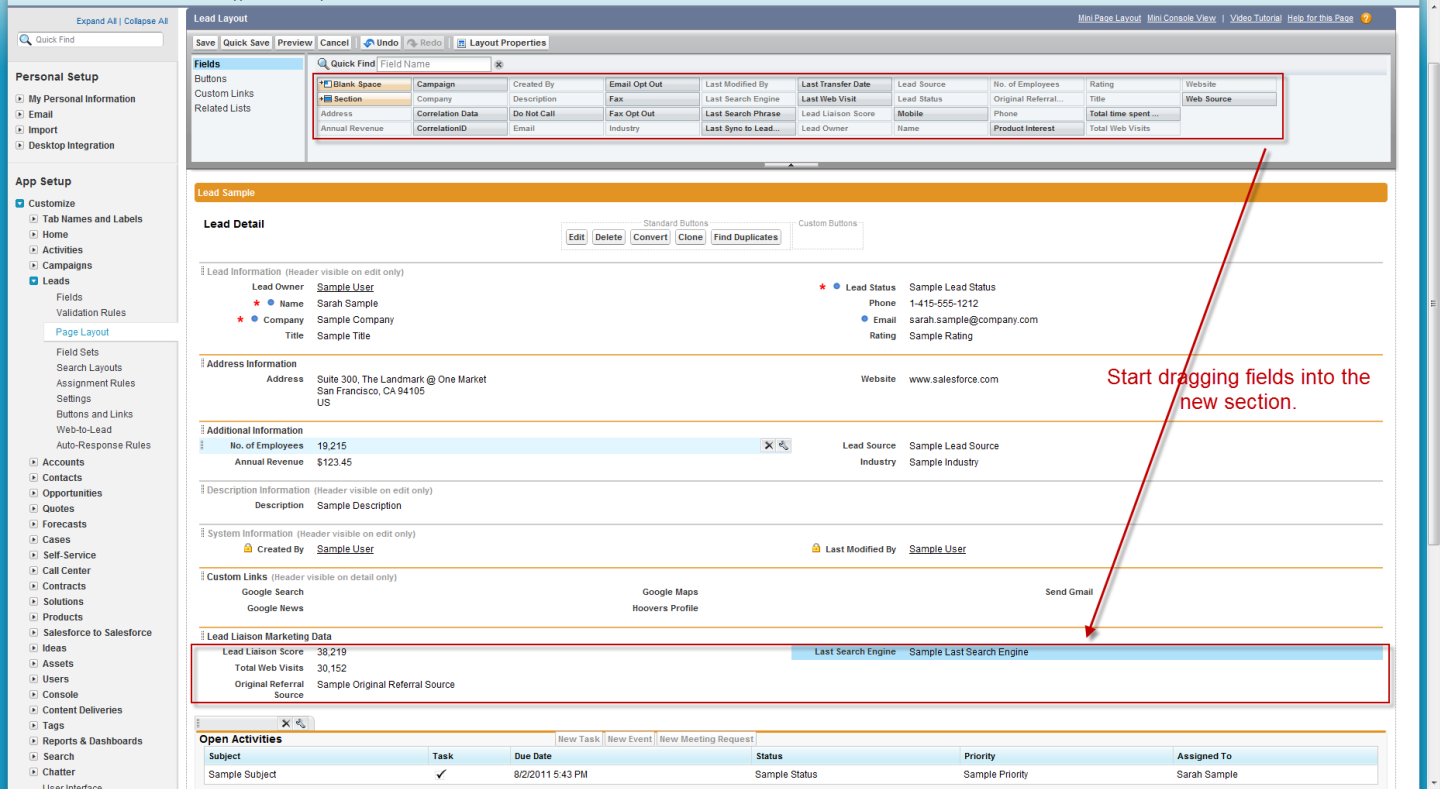
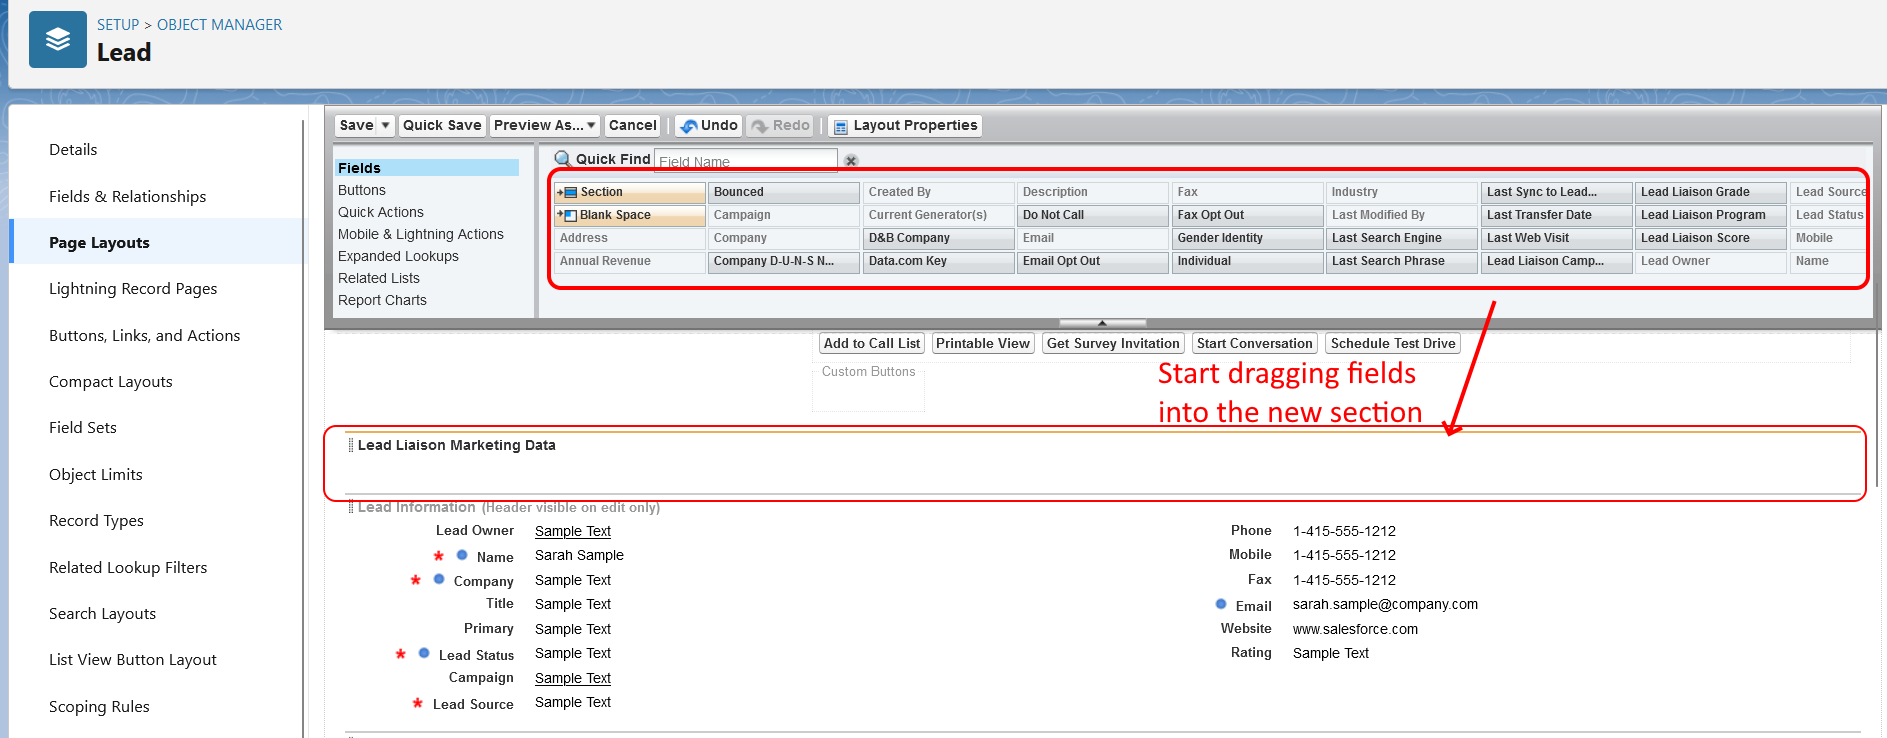
- Start dragging and dropping Lead Liaison's custom fields to the newly created "Lead Liaison Marketing Data" section.
- Keep going until you've added all of the following fields (15 in total):
- Lead Liaison Score
- Total Activity
- Total Web Visits
- Total Time Spent on Last Visit
- Last Sync to Lead Liaison Web App
- Last Web Visit
- Last Search Engine
- Last Search Phrase
- Original Referral Source
- Bounced
- Email Opt Out
- Lead Liaison Grade
- Lead Liaison Campaign
- Lead Liaison Program
- Profile ID
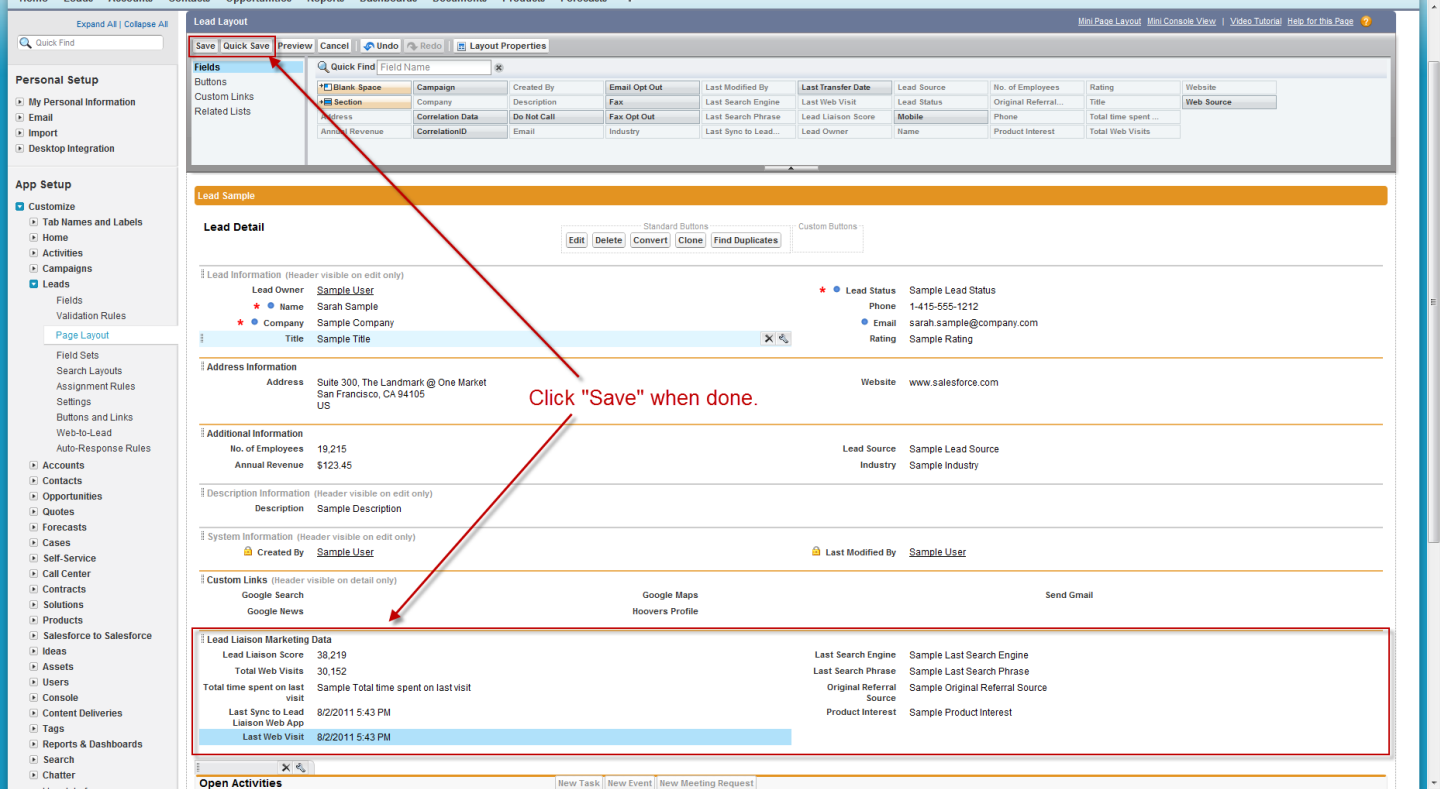
- When your section looks like the "Lead Liaison Marketing Data" section in the screen shot below click the 'Save' button to finish.
- Repeat the process of adding the new fields to your Lead Page Layout for the Contact Page Layout.
- Next, install the "Lead Liaison" section into your Lead and Contact Layout. This is a Visualforce page customized for Salesforce.com.
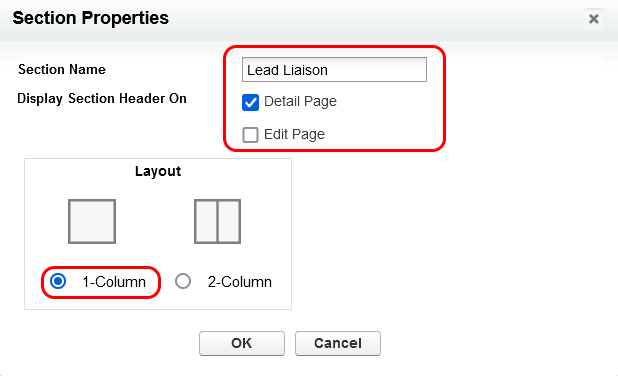
- Follow the screenshots below to repeat the process for both your Lead and Contact Layout.
...
- Set the following section properties:
- Click the settings icon (wrench) in the top-right of the Visualforge page (blue section)
...
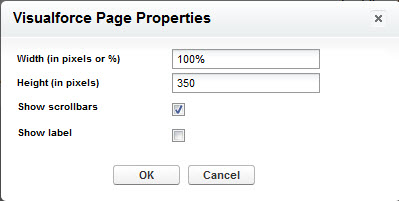
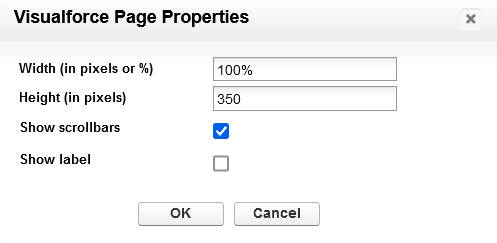
- Set the Page Properties as follows:
| Info | ||
|---|---|---|
| ||
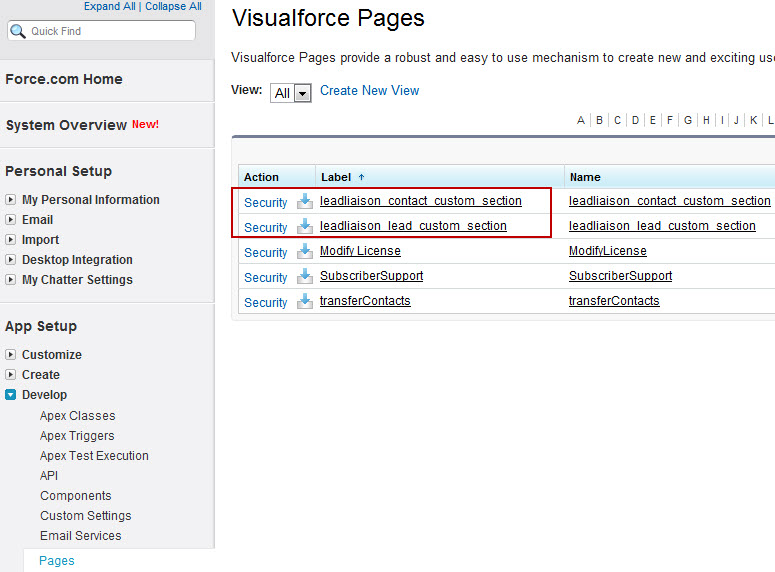
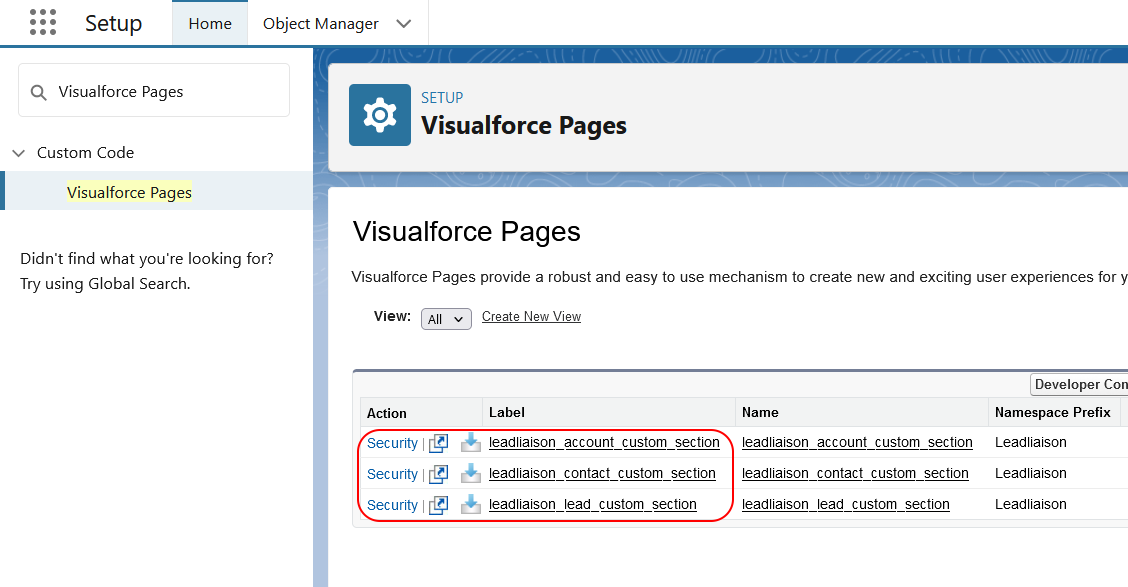
If your users cannot see the Lead Liaison Nurturing section in their Lead or Contact layout and they see an error like the one below then access permissions for the users profile needs to be modified. Content cannot be displayed: You do not have sufficient privileges to access the page: /apex/leadliaison__leadliaison_contact_custom_section You can set permissions by going to Under 'to Under Setup' > 'Develop' > 'Pages' make sure you set the proper security settings for the Salesforce.com profiles which should see this section. |
Step 4: Make Company Field on Lead Object not Required
- Navigate to Setup > Leads > Page Layouts
- Click the wrench on the Company field
- Uncheck the "Required" box.
This allows Lead Liaison to convert Leads to Person Accounts from an Automation action.
...
> Custom Code > Visualforce Pages make sure you set the proper security settings for the Salesforce.com profiles which should see this section. |
Step 4: Map Lead Custom Fields to Contact Custom Fields
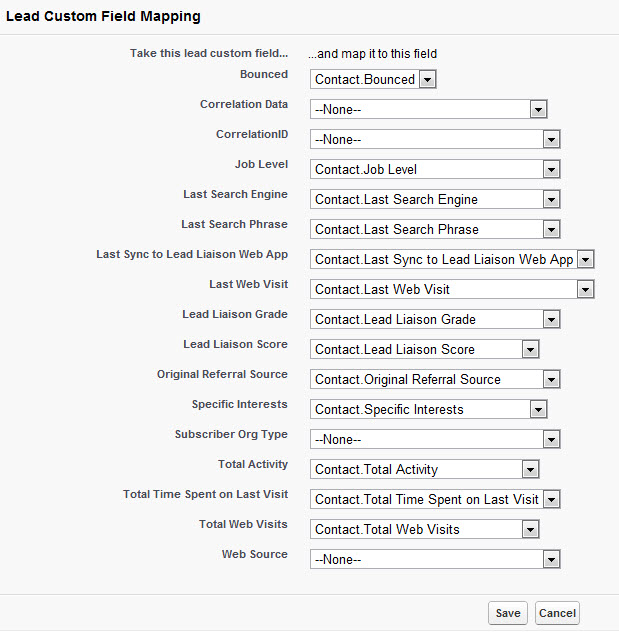
Next, map the custom fields added by the Lead Liaison plug-in. Mapping custom fields ensures information added to a Lead is transferred to a Contact when the lead is converted in Salesforce.com. To map fields do the following:
...
following1.
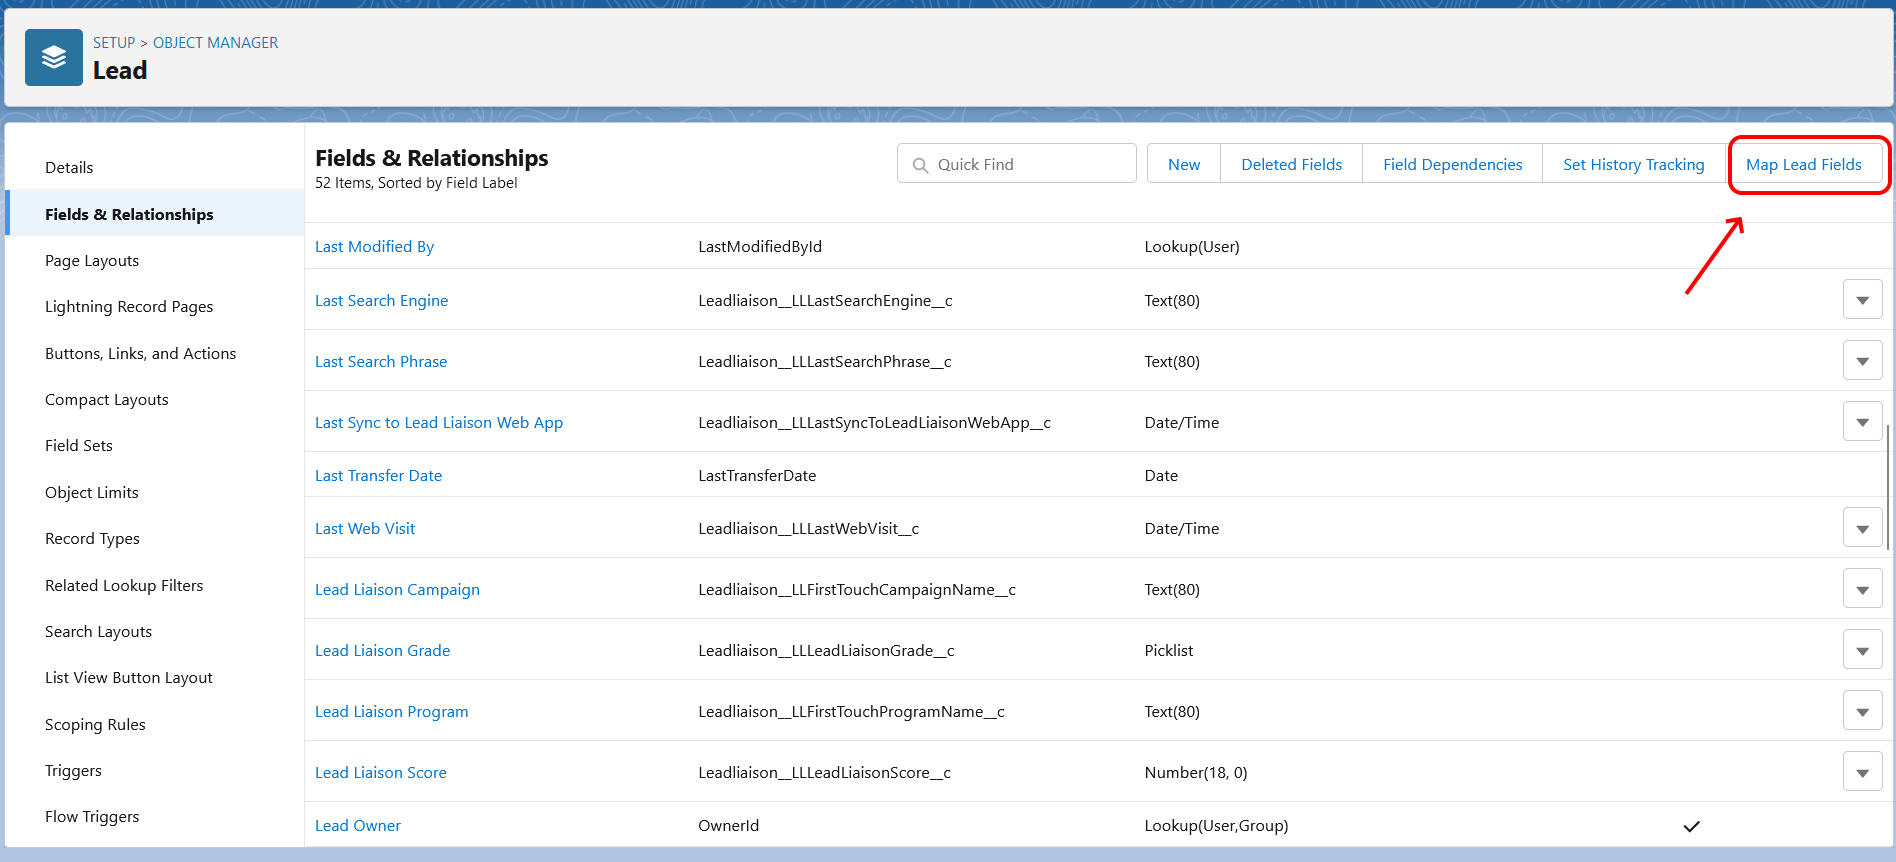
1. Go to Setup > Object Manager > Lead > Fields and Relationships.
2. Scroll to the bottom and click the "Map Lead Fields" button in the "Lead Custom Fields & Relationships"
...
section.
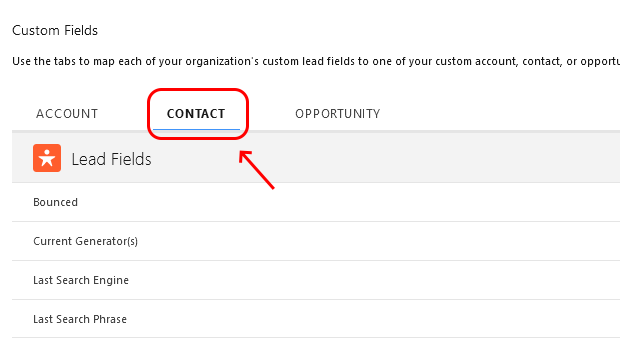
3. Click on the 'Contact' Tab.
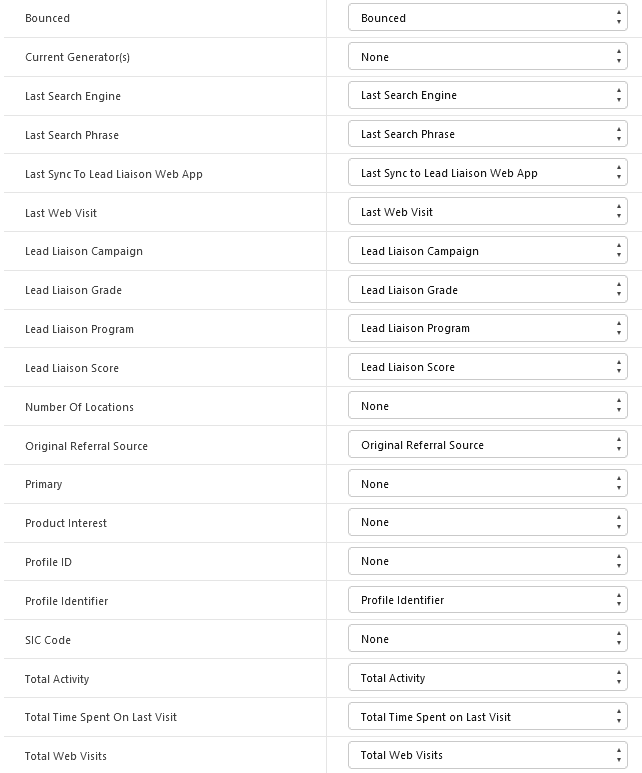
4. Map each custom Lead field to the related Contact field. Your results should look similar to the image below:
| Info | ||
|---|---|---|
| ||
Make sure to map all the custom fields added by Lead Liaison package (Lead Liaison Score, Total Activity, Total Web Visits, Total time spent on last visit, Last Sync to Lead Liaison Web App, Last Web Visit, Last Search Engine, Last Search Phrase, Original Referral Source, Bounced and Profile Identifier) |
| Info | ||
|---|---|---|
| ||
Map only the "Profile Identifier" field. Do not map the "Profile ID" field. Lead Liaison adds the Profile Identifier field automatically. This field is a formula that builds the hyperlink for the Profile ID. By mapping the Profile Identifier Salesforce.com will automatically map the Profile ID value for you. |
...
Step
...
5: Change Field Accessibility to Allow Syncing
| Note | ||
|---|---|---|
| ||
This section is not required for Group or Professional Editions of Salesforce.com. |
To allow Lead Liaison's software to view and interact with certain Salesforce.com fields visibility permissions must be changed for each field listed below under the respective object. Five (5) objects contain fields that need updated visibility permissions. The 5 objects are:
- Leads
- Contacts
- Accounts
- Tasks
- Opportunities
- Campaigns (if you're using them)
| Note |
|---|
These settings must be applied only to the profile of the CRM user whose account is used for automatic syncing (see 'Step 1: Add CRM Sync User' section above). |
How to Change Visibility Permissions
- Go to 'Setup' > 'Manage Users' > 'Profiles'
- Click on the profile of the CRM sync account
- Click "Object Settings". Alternatively, look under "Field-Level Security" find the "Lead" object and click "View"
- Make sure to check all the checkboxes under "Visible" (or "Read" and "Edit" columns) then save.
- Repeat the same process for the Contact, Account, Opportunity and Task objects
Step
...
6: Create Custom Fields in Lead Liaison
| Note | ||
|---|---|---|
| ||
It's not necessary to create an equivalent custom field in Lead Liaison for each and every custom field in Salesforce.com. Create custom fields in Lead Liaison only for the fields you need to use in your business processes, such as segmentation, nurturing, scoring, etc. |
...
Note, custom fields can automatically be created for you as shown in the steps below.
Step
...
7: Configure Lead Liaison and Sync your Salesforce.com Data
You're now done with setup inside Salesforce.com. Next, go to Lead Liaison and finalize setup from Lead Liaison's web application.
Complete Lead Liaison's CRM Configuration Wizard:
Lead Liaison synchronizes data between Lead Liaison's local database and Salesforce.com in real-time. To configure your CRM settings for Lead Liaison:
- Login to Lead Liaison at https://app.leadliaison.com/login.php
- Click the Settings > Integrations > CRM
- Follow the wizard step by step to get your CRM account configurations complete
| Info |
|---|
Step 1: Select Edition and Default Sync Options |
...
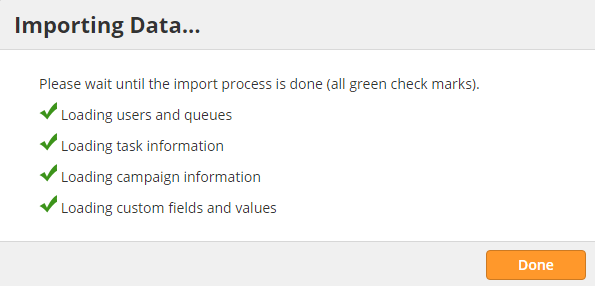
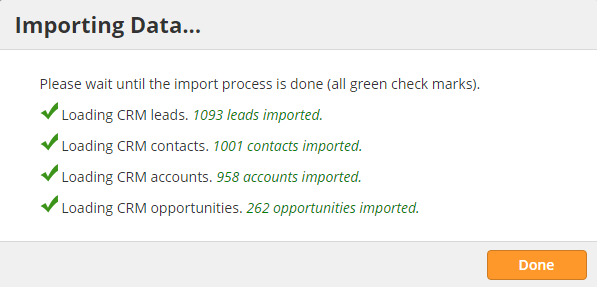
- If the import ran successfully you'll see green check marks on the ensuing popup. Click the "Done" button to proceed.
| Info |
|---|
Step 4: Map Fields |
| Info | ||
|---|---|---|
| ||
Only create and map custom fields in Lead Liaison for the custom fields in SFDC that you plan to use. There is no need to create a Lead Liaison custom field for each SFDC custom field. For example, if you plan to use only 10 custom fields in SFDC for scoring, grading, nurturing, segmentation, distribution, etc. then create 10 custom fields in Lead Liaison. We suggest using the same name for the custom field in both Lead Liaison and Salesforce.com to make mapping easier. |
- In Step 4 you can map your Lead, Contact and Account fields to Lead Liaison's Standard and/or Custom fields.
- A field mapping allows Salesforce.com and Lead Liaison to share data between the mapped fields.
- It's possible to pull in only a subset of your CRM data by using the "Sync Criteria" section at the top of each mapping page. Filtering which CRM data to bring into and sync with Lead Liaison is helpful if you're using Lead Liaison for specific products or your license is limited to a certain amount of prospects. In the example below, we're pulling in only Saleforce.com Leads in the Finance and Software industry who are also in Texas.
...
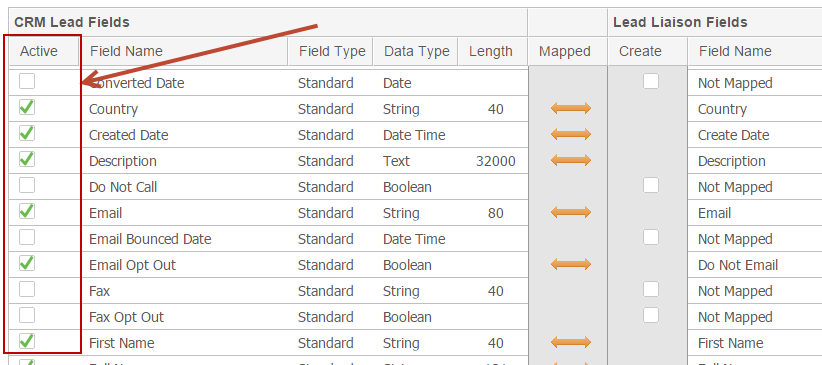
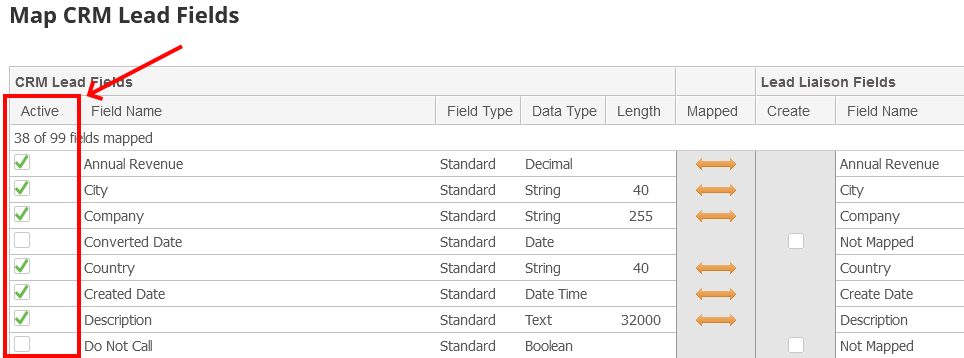
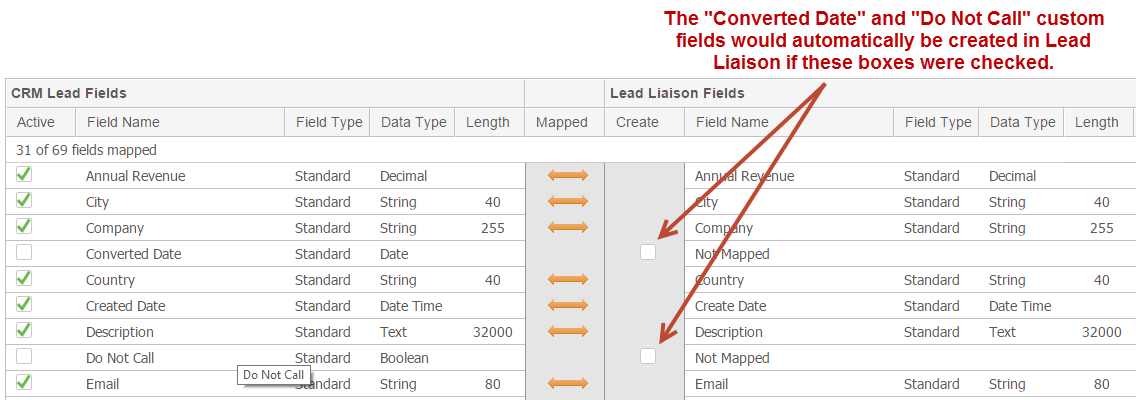
- Checking the "Active" box allows data to be imported from Salesforce.com into Lead Liaison from the time the field is made Active, regardless if the field is mapped to a Lead Liaison field or not.
- Instead of manually creating new custom fields in Lead Liaison the fields can automatically be created by checking the "Create New" box next to the field.
- Once you've mapped fields for leads, contacts and accounts make sure to return to the CRM setup wizard by clicking the link at the top of each mapping page.
...
- Note, you'll see some new SFDC fields on the left-hand side such as the ones inside the red boxes below. These SFDC fields are not Lead Liaison custom or standard fields; however, they are internal Lead Liaison fields and mapped automatically in the background. You can optionally create Lead Liaison custom fields and map this information from SFDC to Lead Liaison for any purpose.
- Proceed to Step 5 by clicking "Next" on the wizard.
...
| Info | ||
|---|---|---|
| ||
Lead Liaison will start importing SFDC records from SFDC to Lead Liaison. For each record type (Lead, Contact or Account) Lead Liaison makes only one query to SFDC and loads a list of records to process in Lead Liaison. The default amount of imported data per request is 500, but may vary from one edition of SFDC to another. If more records need to be imported from SFDC then the process will continue working in the background. |
| Info |
|---|
Step 6 (Final Step): Verify Data |
...
Once you are done, then your CRM configurations are complete and the bi-directional sync process between Salesforce.com and Lead Liaison will work automatically.
Salesforce.com Password Profiles
We recommend using your Administrator User for the sync account. Disable resetting of your password for your sync account by doing one of the following:
...
In the end, the user will have the same profile as before except with the password expiration set to never expire.
Enable Automatic Lead Creation (optional)
Lead Liaison offers the ability to automatically create a lead in Salesforce.com from visitors to your website that come from Connector (E-mail Marketing solution) or Send & Track (Microsoft Outlook Plug-in).
- Login to Lead Liaison at https://app.leadliaison.com/login.php
- Click Settings > Setup on on the top right of the page.
- Under "Admin Settings" section, click 'Account settings'.
- Check the check boxes Navigate to Account > Settings from the left side.
- Turn on the switch next to "Auto-create CRM lead from email campaignscampaigns" and "Auto-create CRM lead from Send & Track emails" to enable automatic lead creation.
...
Reference this page.
| Tip |
|---|
Congratulations, you're done! |
SFDC Custom Objects
The integration can include pushing Salesforce.com custom fields into Lead Liaison; however, does not include pushing Salesforce.com custom objects into Lead Liaison. As a workaround, the data from the Salesforce.com custom objects can be configured into a custom report and that report extract can then be imported into Lead Liaison.
Removing Fields
Removing Custom SFDC Fields
| Warning | ||
|---|---|---|
| ||
Removing a custom field in SFDC will disrupt the synchronization process between Lead Liaison and SFDC. |
...
1. Delete custom field in SFDC and remove from SFDC lead/contact layout
2. Run Step 3 of the CRM Configuration Wizard (Import Metadata) immediately after deleting/remove custom field
Removing Lead Liaison Fields Under "Lead Liaison Marketing Data"
Any field in the Lead Liaison Marketing Data section can be renamed or removed. When removing a field in this section make sure to follow the same steps as mentioned above in the Removing Custom SFDC Fields section. Basically, run Step 3 of the CRM Configuration Wizard right away to avoid breaking the synchronization process.
Removing the Lead Liaison Package
- First, remove all dependencies. Dependencies must be removed first before uninstalling. For example, assigning the Lead Liaison Lead Layout to a profile is a dependency. Change the layout profile to another profile or the standard profile first.
- Inside Salesforce.com go to 'Setup' > 'View > Apps > Packaging > Installed Packages'. If there are any dependencies,removal will fail.
Alternative Ways to Add Lead Liaison's Sections to Lead/Contact Layouts
There are two additional ways to add Lead Liaison's sections to your Salesforce.com layout.
- Assign Lead Liaison's layout to your profiles
- Automatically during the "Install Package" step of Lead Liaison's Configure CRM wizard (recommended for people using a standard Salesforce.com layout)
#1 Assigning Lead Liaison's layout to your profiles
To view the newly created Lead Liaison fields and sections assign the 'Lead Liaison Layout' to each profile which needs to see the data.
- Open the profiles page by going to 'Setup' > 'Administration Setup' > 'Manage Users' > 'Profiles'. In this example, we'll assign the Lead Liaison Layout to the Salesforce.com 'Standard Profile'.
- Click on the 'Standard User' link.
- Under the 'Page Layouts' section under 'Lead' click the 'View Assignment' link.
- Click the 'Edit Assignment' button.
- Next to "Page Layout To Use:" select 'Lead Liaison Lead Layout' and click 'Save'.
- Now you have successfully assigned the Lead Liaison layout to your profile.
- Repeat the same procedure for the Contacts section and assign the 'Lead Liaison Contact Layout' layout to the appropriate profiles.
#2 Automatically during the "Install Package" step of Lead Liaison's Configure CRM wizard
Go to the CRM configuration wizard:
- Click Settings > Integrations > CRM
Begin by selecting your CRM version. You can find your CRM version by hovering your mouse over your browser's tab.
In Step 2 of the CRM Wizard, simply check turn on the box switch in the "Install Plug-in" section at the bottom of your screen.
| Note |
|---|
This step will add only the Lead Liaison Marketing Data section to your layout. You must manually add the Lead Liaison section (visual force page) to your layout. |
