...
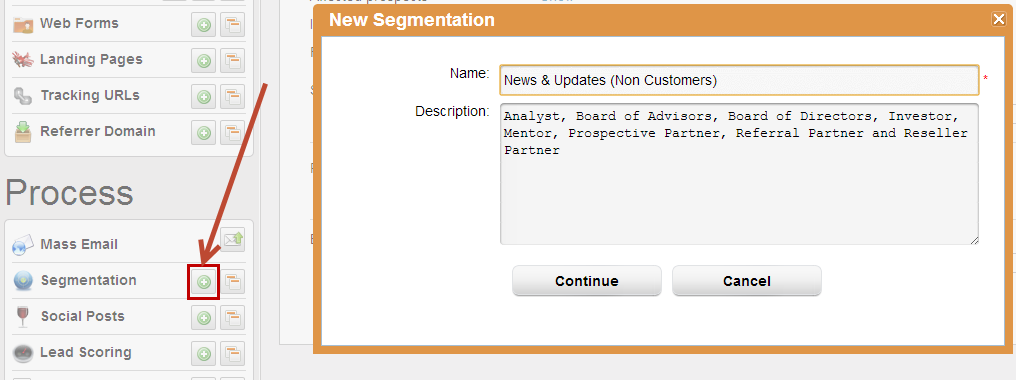
Create a new segmentation by going to Workflow > to New > Segmentation
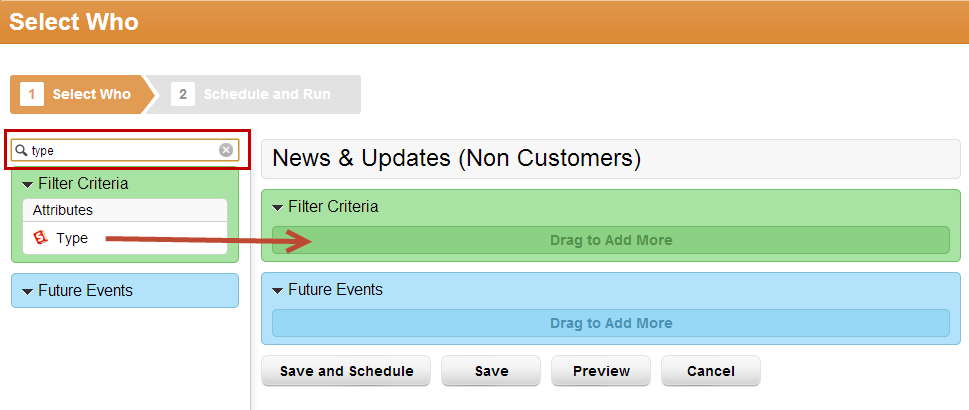
Step 2: Filter the Database
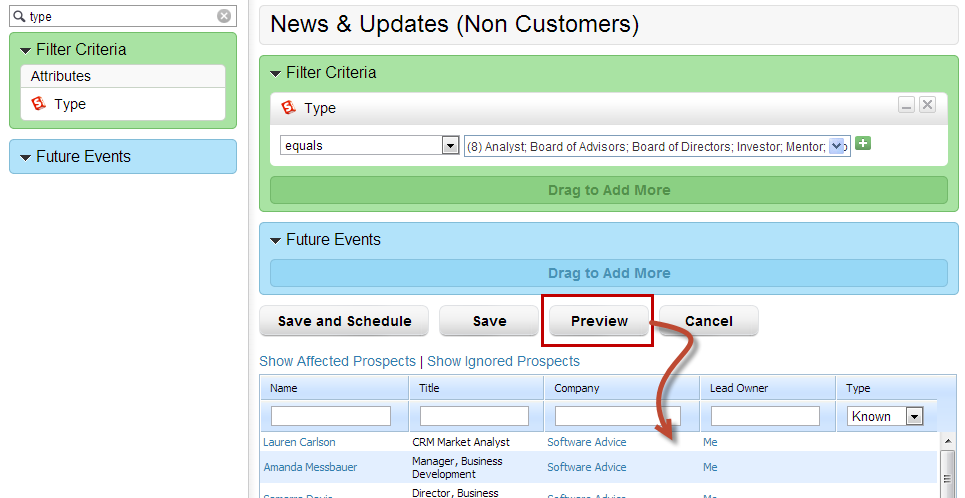
Select the criteria you want to use to filter your database. In this example, we're selecting all Prospects who have a certain account type, defined by the "Type" filter. First, search for the "Type" filter in the search box then drag & drop the filter into the canvas on the right (green to green).
Step 3: Enter Criteria
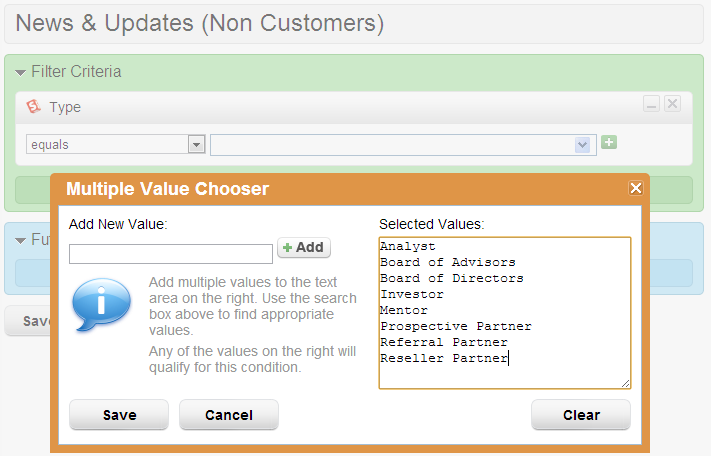
Configure the filter by choosing "equals" from the drop down. Then click the green plus to the right to select multiple values. In this case, we enter Analyst, Board of Advisors, Board of Directors, Investor, Mentor, Prospective Partner, Referral Partner and Reseller Partner on individual rows.
Step 4: Preview Results
Click the "Preview" button to see the Prospects matched by Lead Liaison based on the chosen filters.
Step 5: Schedule and Run
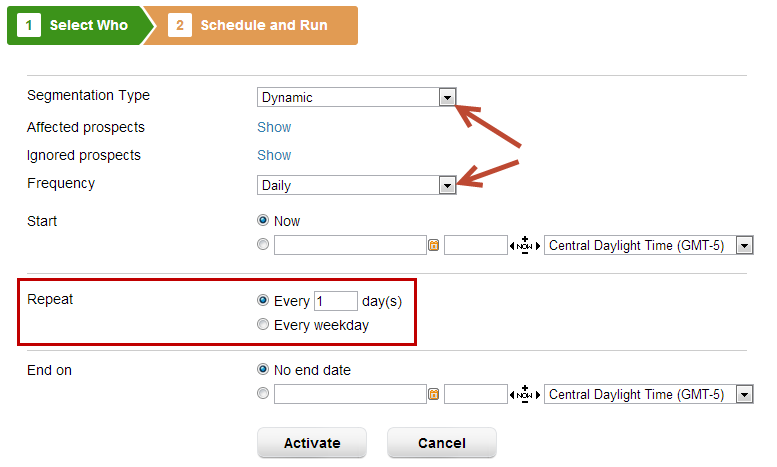
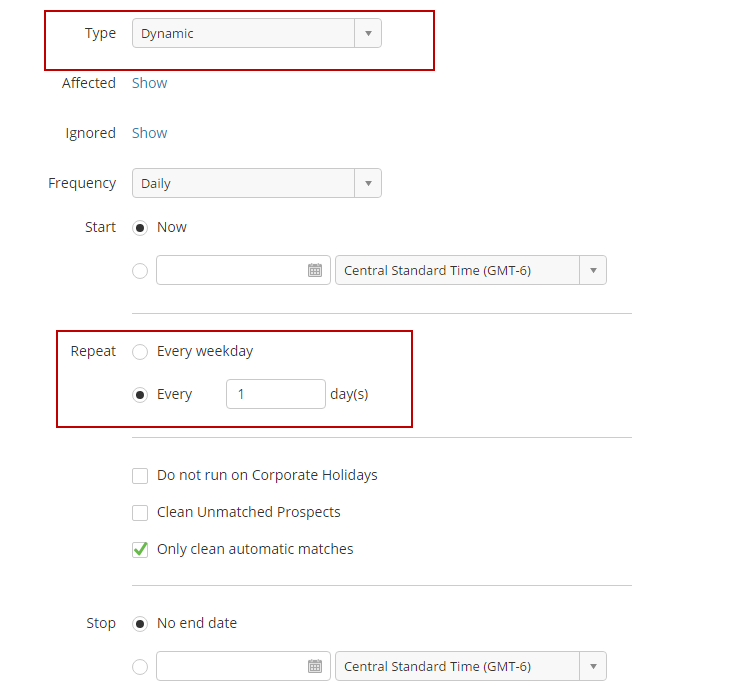
Choose "Dynamic" from the Match prospects drop down to build a dynamic list. A dynamic list is always built for you, which prevents the need to go into the system and re-run the same process to build the list. Choose the "Frequency" in which you want to have the list built. Usually Daily is more than sufficient for dynamic segmentations. Choose how often you want to repeat the list building process.
| Info | ||
|---|---|---|
| ||
If you plan to use your segmentation for email marketing purposes, make sure to click the "Show Advanced Settings" link at the bottom of the Save and Schedule page and select the "Build List" option. This will build an email marketing list which you can use for communication. |
- Validate your list members by going to Manage Prospects > Lists. Click the number next to the list you've built to see the memberships.
...
Now that your list is built, build an email campaign to send to the list. To do this, click Create New > Emails Email. Build your html and text version of the email message.
...
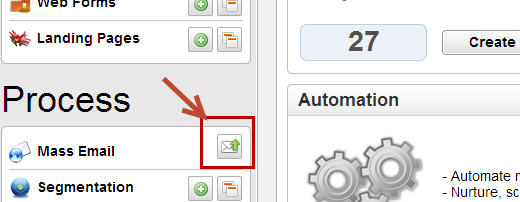
Now that your email marketing message has been built, click the send button next to "Mass Email" under the Design tab to send your message to your list. Alternatively, click Workflow Content > Email > Mass Email.
Send Email Campaign
Step 8: Select the List
...