...
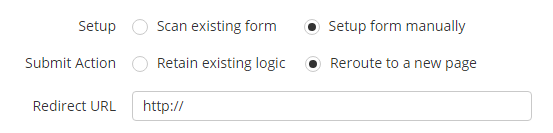
- On the Configure Form step, choose "Setup form manually" for the Setup option.
- Choose For the Submit Action, choose what you want to happen once the form is submitted. There are two options:
- Retain existing logic: After the form is submitted send the user back to the page that contains the form
- Reroute to a new page: After the form is submitted send the user to the provided URL
- We suggest using "Retain existing logic" to keep the existing Gravity Form submit action used when setting up your Gravity Form.
...
- Reroute to a new page" and use the URL of your thank you page if you're unsure.
- Next, enter a Field Name for each field in your Gravity Form under the Field Name column. The values can be anything you choose. Enter values without spaces. The Field Labels are for your identification only. Finally, set the mapping direction and choose the Lead Liaison field to map to.
...
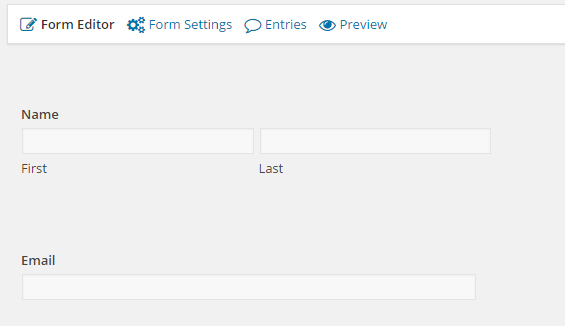
- In the Gravity Form below in Wordpress, we've added only First Name, Last Name and Email. As a result, we've added We'll need to add "first_name", "lastnlast_name", and "email" into the Map Fields step of the Lead Liaison web form wizard as shown above on the far left column.
- In the final step, Publish Form, copy the value in the action= part (in between the quotes) under the "Replace the webform start tag with this code and you're done!" section. Note, if your form is embedded into a web page under SSL (https) then change the http to https.
...
- Select "Redirect" for Confirmation Type.
- For the "Redirect URL", use the URL copied from the last step in Step #1 above.
- Check the "Pass Field Data Via Query String" box.
- Build your query string by using the all values specified under the Field Name in Lead Liaison and use using the small tab to the right of the text field to insert the Gravity Form values as shown below.
...