...
- Navigate to Content > Events > Registrations.
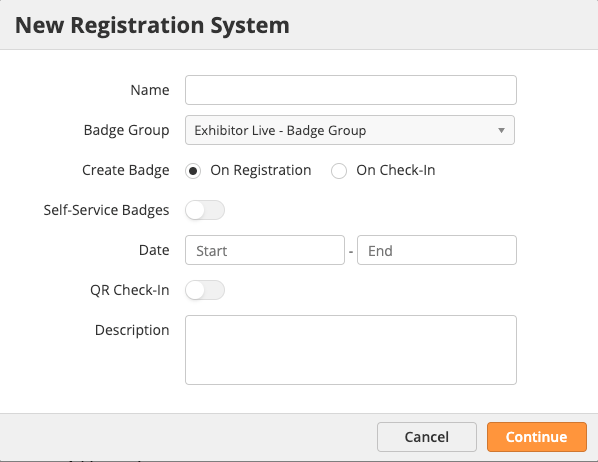
- Click the New button to create a new Registration System.
- Name: Name of your Registration System. We suggest using the name of your event.
- Badge Group: The Badge Group you're using that is associated with your event. To learn more about Badge Groups reference this document. This is where admins will go to print new badges on demand (if badges were not printed/prepared prior to the event or for new registrants at the front door).
- Create Badge: Option to add new people to your Badge Group when they register or when they check-in. Default is on registration.
- Self-Service Badges: Allows attendees to print their own badge after Registration or Check-In (according to your settings). This feature works with laptops or desktop computers running Windows or Mac connected to a supported Dymo printer. It does not work with iPads or Android tablets.
- Date: Start and end date of your event. If check-in occurs outside of this timeframe the system will show an error on check-in.
- QR Check-In: Allows attendees to be checked in via a QR code. QR codes can be emailed to registrants. See section below on Using QR Codes for Tickets/Passes.
- Description: Description for your Registration System.

Customizing the Check-In and Registration System
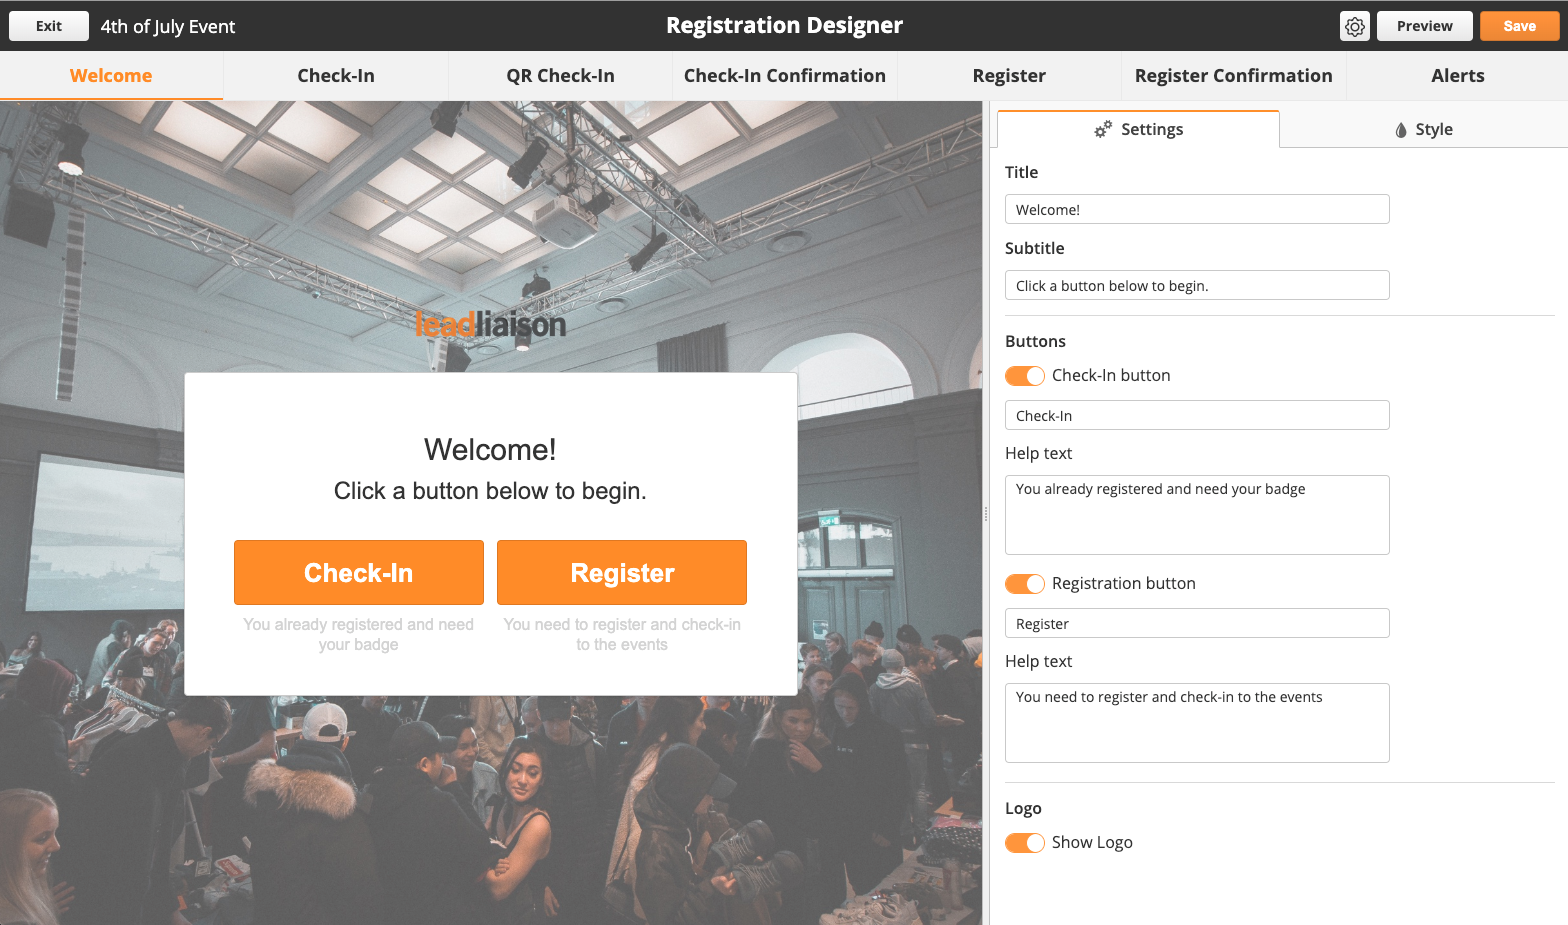
- You'll see the Registration Designer after creating a new system. Alternatively, edit your existing system by navigating to navigate to Content > Events > Registrations and choosing edit next to the system you want to modify.
- In the Registration Designer you have multiple tabs. Each tab is explained below:
- Welcome: Screen that users will see when they arrive at your event. This is where they would choose to Check-In or Register. You can disable either of these options to only have a single option at your event.
- Check-In: Screen users will use to search for their registration and check-in. Control how users search by using the Inputs section on this tab.
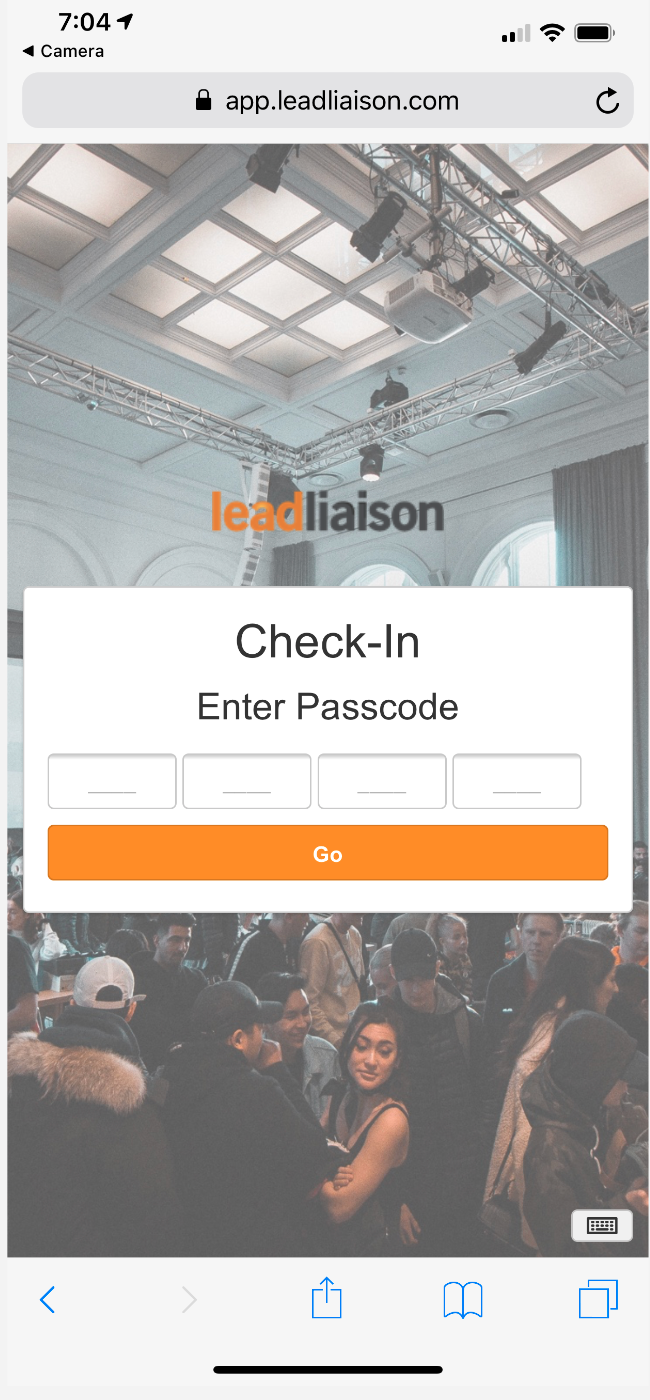
- QR Check-In: Screen to configure check-in via QR codes. Attendees can be emailed a QR code as a pass/ticket, bring the pass/ticket to the event, and check in. An initial Passcode is used by representatives before their device can be used to scan QR codes and check in registrants using this method.
- Check-In Confirmation: Screen users will see once their registration is found.
- Register: Screen users will see when they are registering for your event. Control how users search by using the Inputs section on this tab.
- Register Confirmation: Screen users see after they have successfully registered.
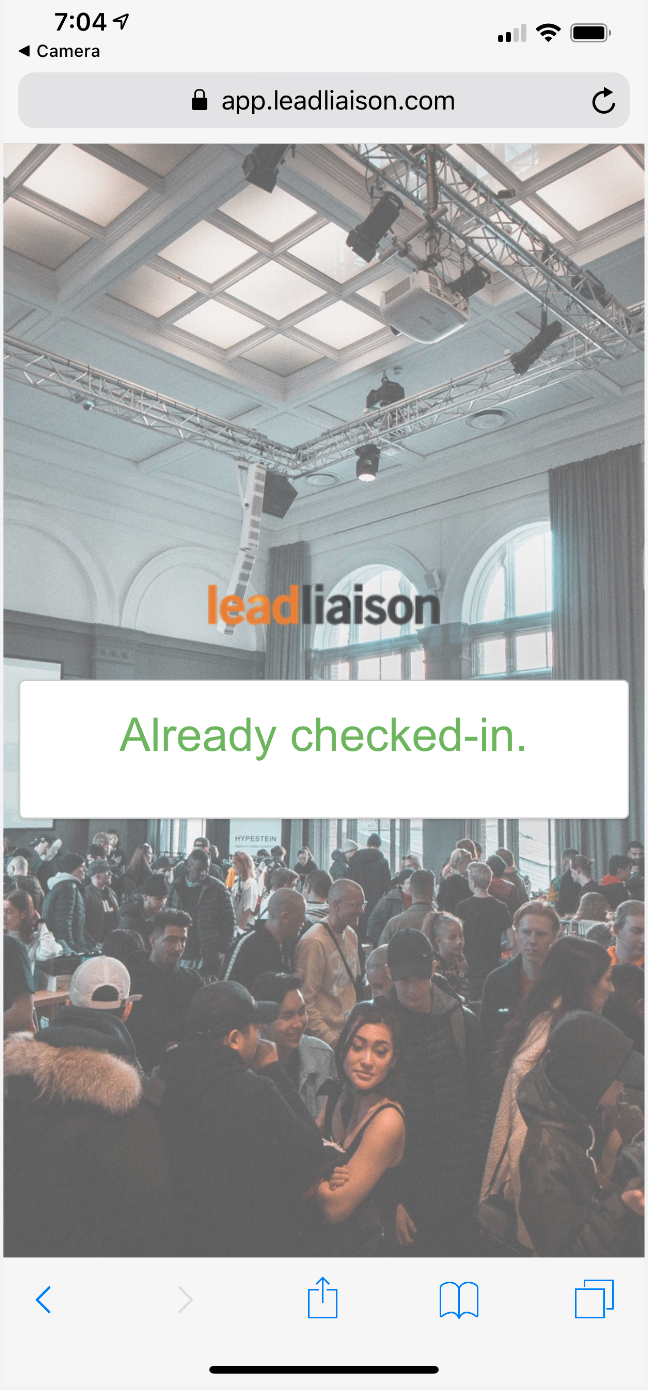
- Alerts: Screen users will see when a registration cannot be found on check-in, if people are already checked-in, or if people are already registered.
- Areas of the system that have input fields have an option for a virtual keyboard. If you're running your registrations and check-ins using a touch screen and don't want to hook up a keyboard, this is a good option. Users can click the small icon on the bottom right to invoke the keyboard. The virtual keyboard can also be disabled by admins in the designer by using the "Touch Keyboard" option as shown in the screenshot below.
...
| Info | ||
|---|---|---|
| ||
|
...
Using QR Codes for Tickets/Passes
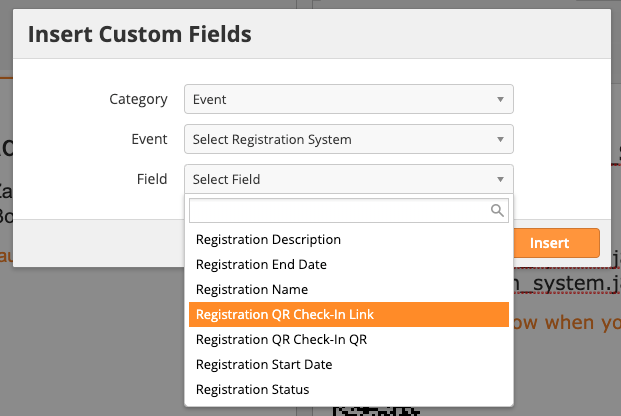
When someone registers for an event the system can send out a pass/ticket via email that includes a QR code. The attendee can bring the QR code with them to the event to have a representative scan and check them in.
There are several merge fields available in the email builder. The screenshot below highlights some of these fields, including a merge field to insert a QR code symbol.
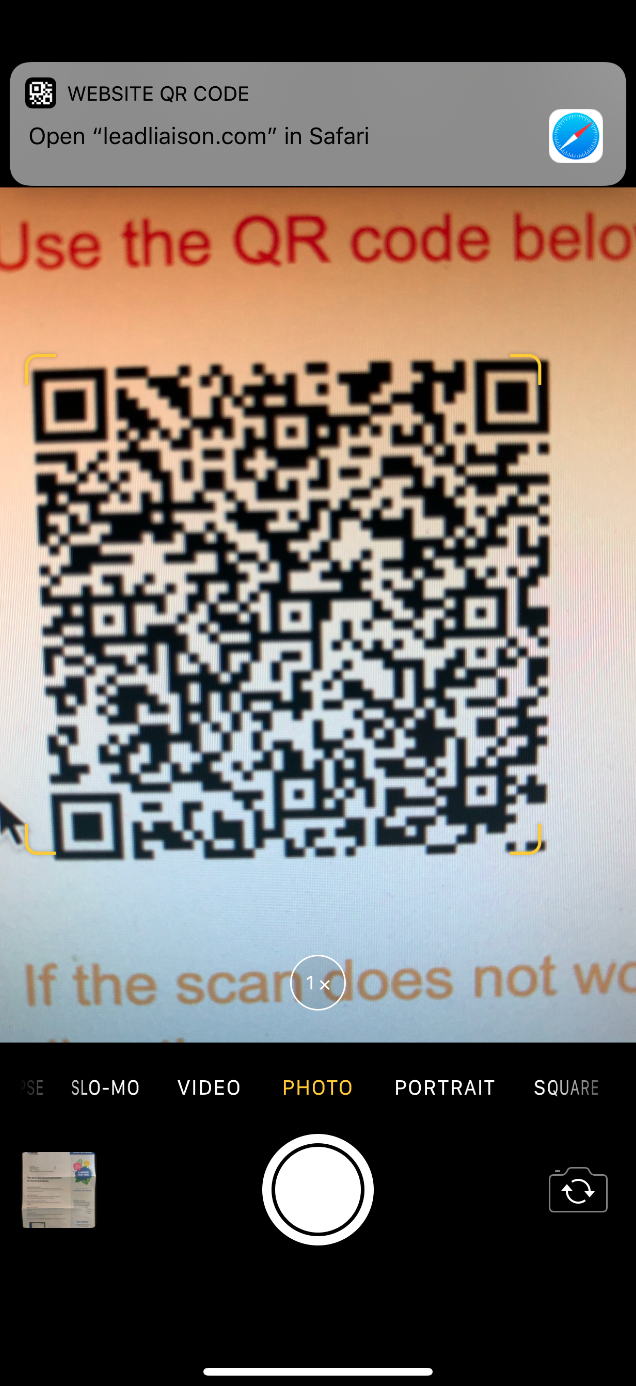
Once an attendee arrives, do the following:
- Use your device's native camera to scan the QR code.
- Open the link that appears.
- If this is the first time your device is being used to check someone in at the event enter the passcode provided by your Administrator. The passcode will only need to be entered once.
- A confirmation message will appear.
| 2. Enter Code (Once) | 3. Confirmation |
|---|---|---|
|
|
|
Publishing your Check-In and Registration System
...