| Table of Contents | ||
|---|---|---|
|
Overview
Deals are the sales opportunities within a Pipeline. Users can create a deal as soon as they can enter a value for the sale. Users can associate deals with Prospects and Organizations, and keep up to date on tasks from the Manage Deals page.
Adding a New Deal
You can manually add new Deal in three different ways. You can click the New button in the top-left corner of the Manage Deals page; you can click the New Deal icon in the Sales Shortcuts; you can click Add Deal on the Deals Info Card. To be able to add a deal, you must have a sale amount.
New Deal Form
Use the New Deal Form to add a Deal to your Pipeline.
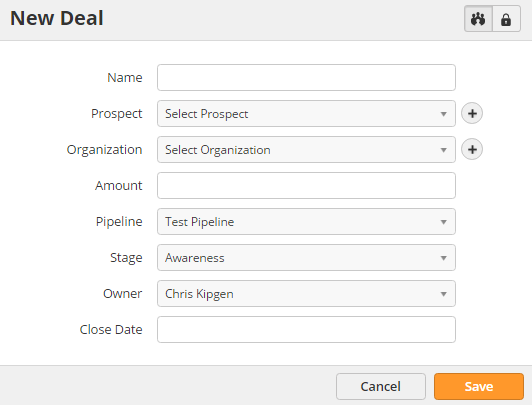
- Name – enter the Deal name
- Prospect – associate the Deal with a Prospect. Click (+) to add a new Prospect
- Organization – associate the Deal with an Organization. Click (+) to add a new Organization
- Amount – enter the sale amount for the deal. Required
- Pipeline – choose the appropriate sales Pipeline
- Stage – choose the appropriate sales Stage
- Owner – select the user who will own the Deal
- Close Date – enter the expected close date
Using Deal Pipelines
You can see an overview of all Deals in a Pipeline from the Manage Deals page. To reach the page, navigate to Main Menu > Sales > Deals. The page will show the Default Pipeline, but you can switch between Pipelines using the drop-down menu in the top-right.
Organization
By default, the page will display Deals in Card format. You can change the view with the buttons in the top-left.
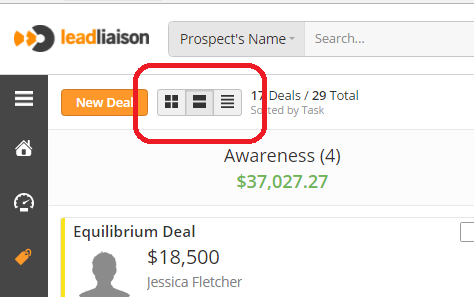
The available views are
- Card View (default) – cards that you can drag and drop to move sales stages
- Mini Card View (left) – smaller cards in two-column format; best to view a large number of deals simultaneously
- Table View (right) – searchable list that you can organize and filter by Prospect, Organization, Deal Name, Amount, Stage, and Expected Close Date
While in Card View and Mini Card View, you will have an additional drop-down menu in the top-right. This menu contains sorting and display options for the Cards.
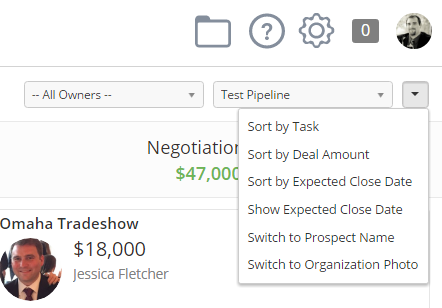
- Sort by Task – sorts deals in order from rotting, overdue, due today, due in the future, no tasks
- Sort by Deal Amount – sorts by amount in descending order (highest to lowest)
- Sort by Expected Close Date – sorts by date with soonest date first
- Show Expected Close Date – toggle close date on the Card
- Switch to Prospect/Organization Name – switch between the Prospect or Organization on the Card
- Switch to Prospect/Organization Photo – switch between the Prospect or Organization's photo on the Card
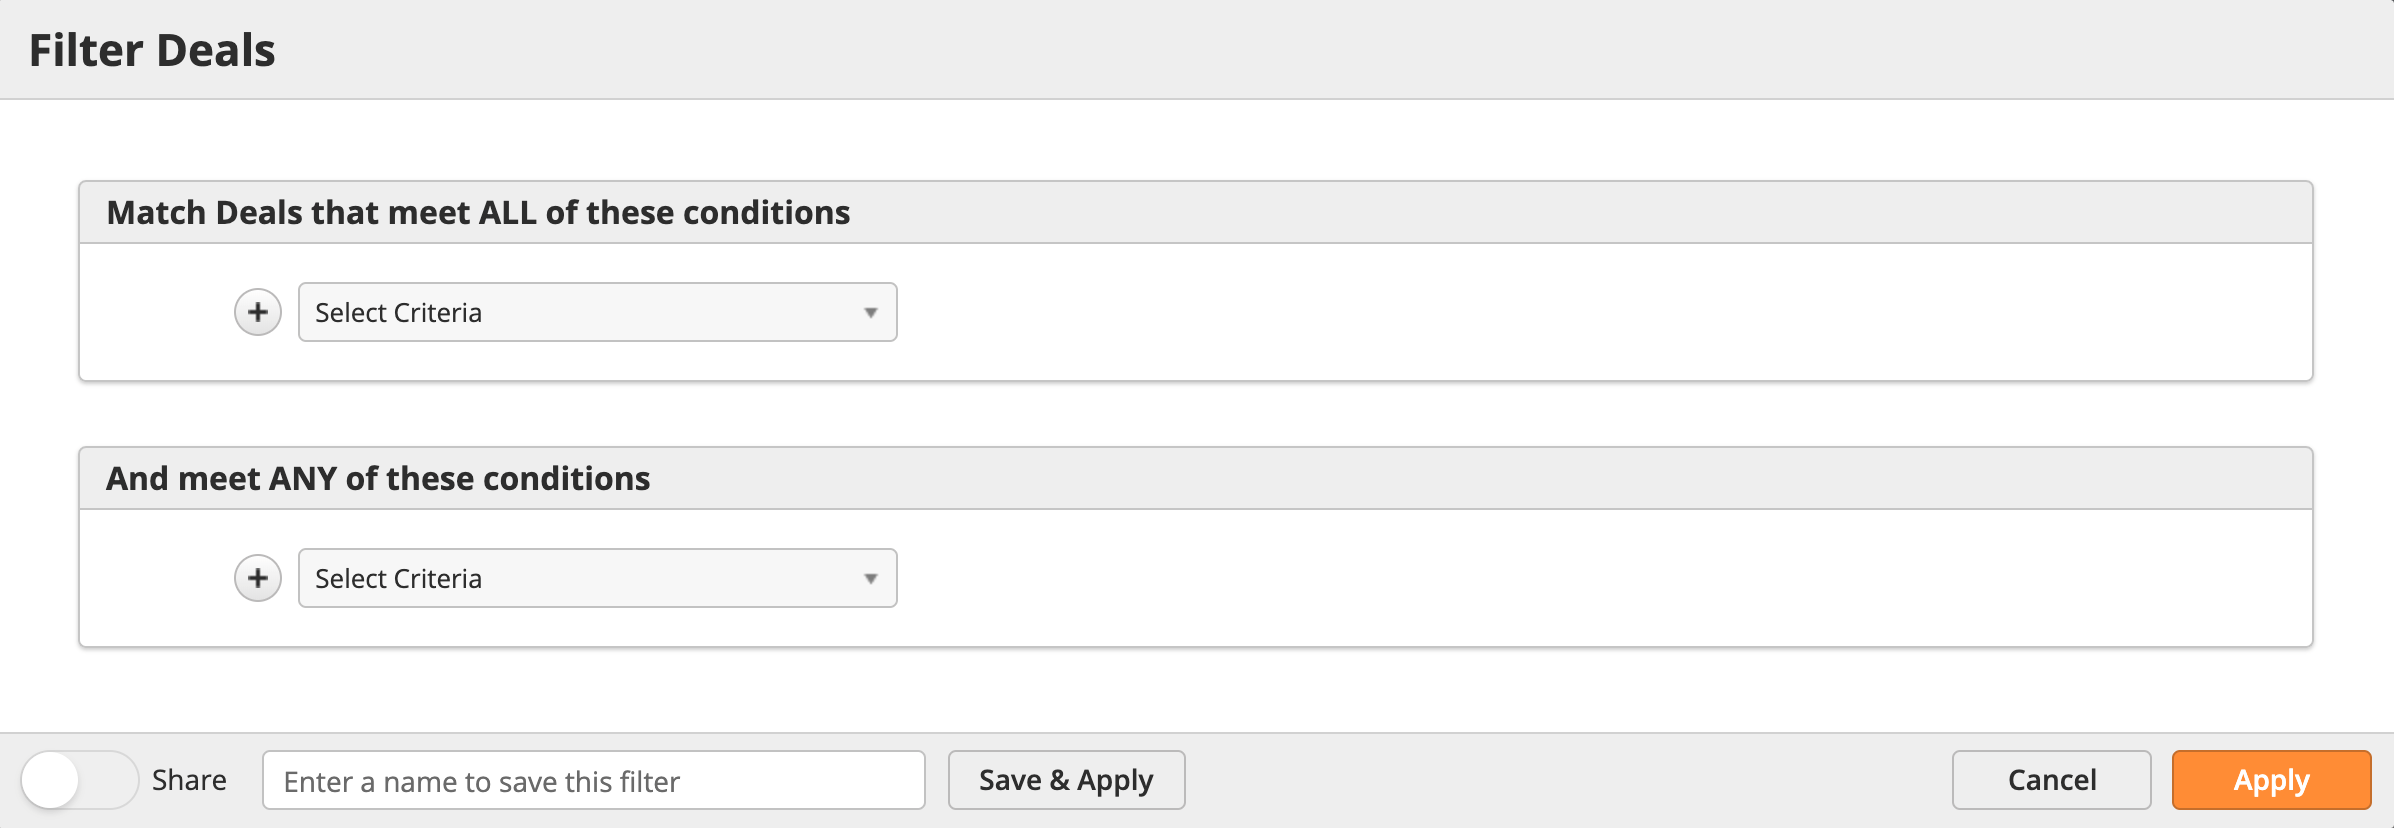
Use the Deal Filter option to search for Deals using any criteria from Standard and/or Custom Deal fields:
![]()
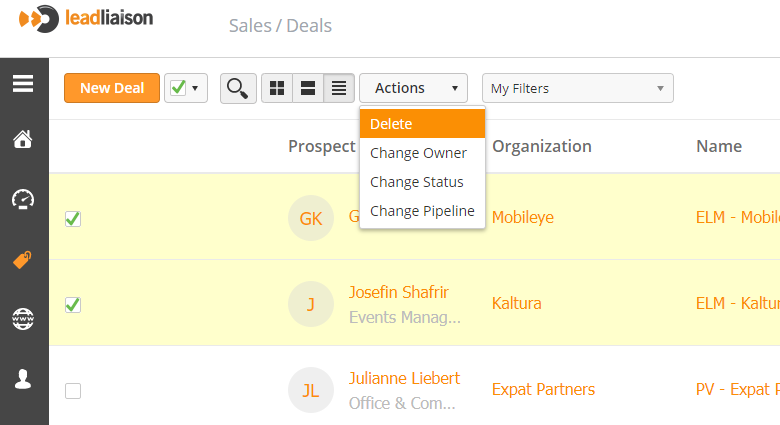
Bulk Actions
You can use Bulk Actions to edit multiple Deals at the same time. First, set your view to Table View (see above). Then, use the checkbox in the top-left corner to select the appropriate Deals and action.
Deal Cards
Deal Cards are a great way to make sure your Deals are getting the attention they need. Cards help you manage Deals through the task box and color coding.
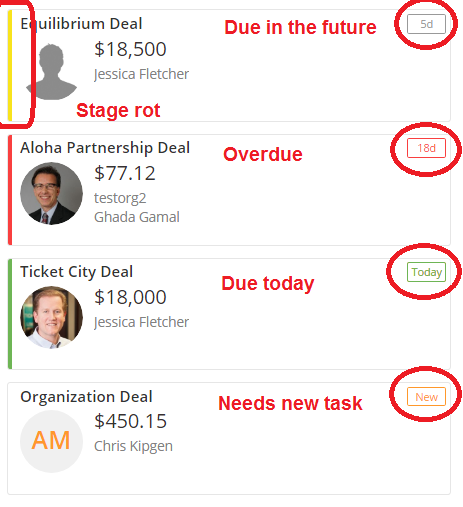
Cards will show you the following Task statuses:
- Future Due Date – gray Task box with the number of days until due; no color stripe
- Overdue – red Task box with the number of days overdue; red color stripe
- Due Today – green Task box saying "Today;" green color stripe
- No Task – orange Task box saying "New;" no color stripe
- Stage Rot– Task has stayed in the same stage for too long; yellow color stripe
| Info |
|---|
Note: a Deal in Stage Rot will always have a yellow color stripe regardless of the task box. |
When sorted by task, Cards will order Stage Rot > Overdue > Due Today > Future Due Date > No Task.
Consolidated Pipelines
Consolidated Pipelines combine multiple Pipelines into a single Pipeline. Linking a standard pipeline to a consolidated pipeline shows all deals from standard pipelines in a single consolidated pipeline. When a consolidated pipeline is created both the deal management page and sales dashboard will have an option to view consolidated pipelines and deals.
| Info |
|---|
Both standard and consolidated pipelines must have the same number of stages. Once a standard pipeline is linked to a consolidated pipeline you cannot add stages, remove stages, or change the order of the stages. |
Creating a Consolidated Pipeline
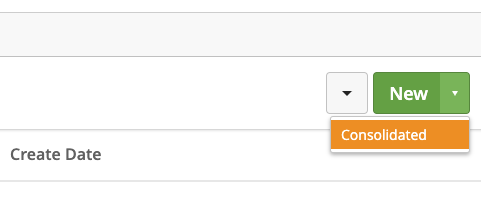
- Navigate to Setup > App Setup > CRM > Pipelines
- Click the down arrow to the right of the New button and choose Consolidated
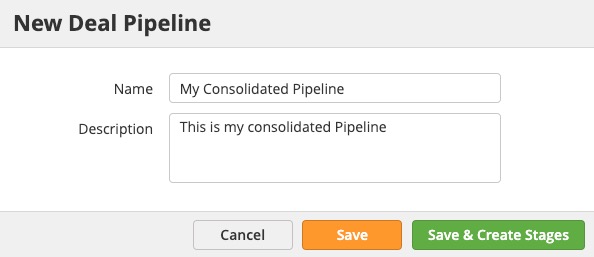
- Enter information for your new Consolidated Pipeline
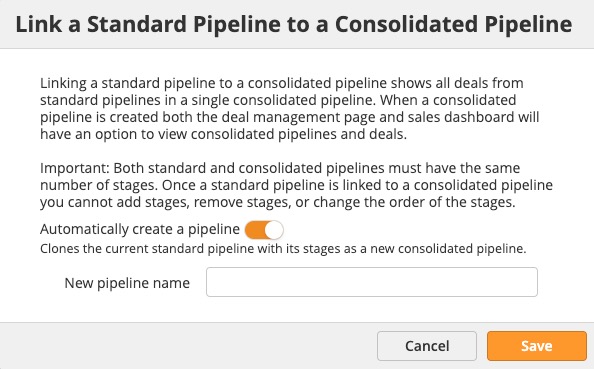
- Link your Standard Pipeline to a Consolidated Pipeline by choosing the down arrow next to the Standard Pipeline and selecting Link to Pipeline.
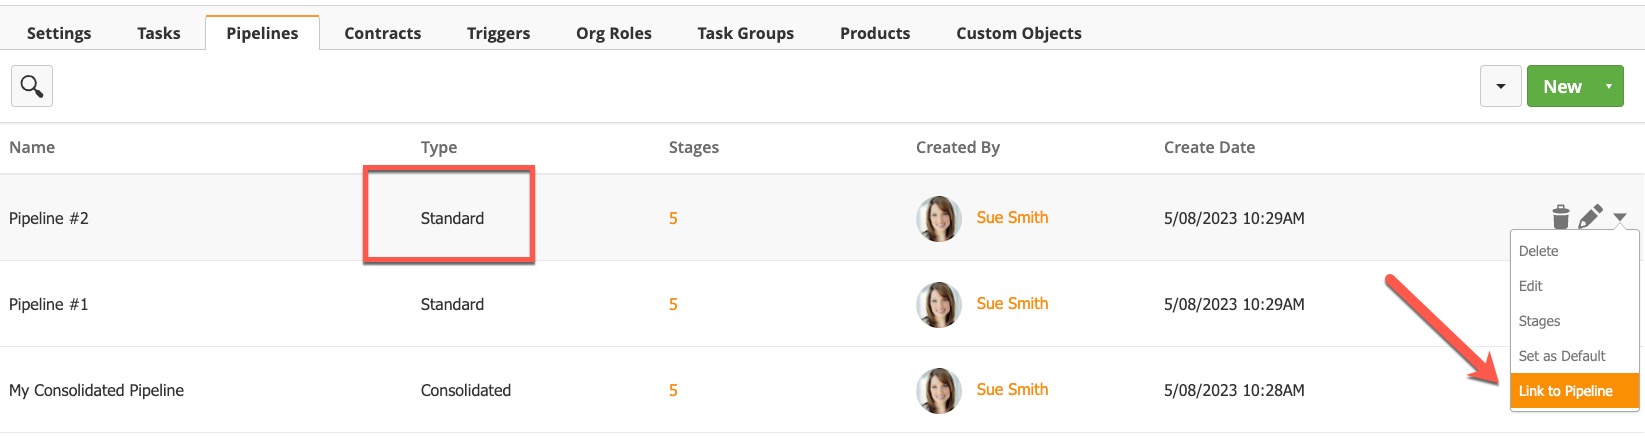
- You'll have two choices when linking your existing Pipelines to a Consolidated Pipeline.
- To link to an existing Consolidated Pipeline (left) keep the toggle off and select the existing Pipeline from the dropdown.
- To create a new Consolidated Pipeline turn the toggle on and give the Consolidated Pipeline a name.
...

...
- Click the Save button
Adding Deals into a Consolidated Pipeline
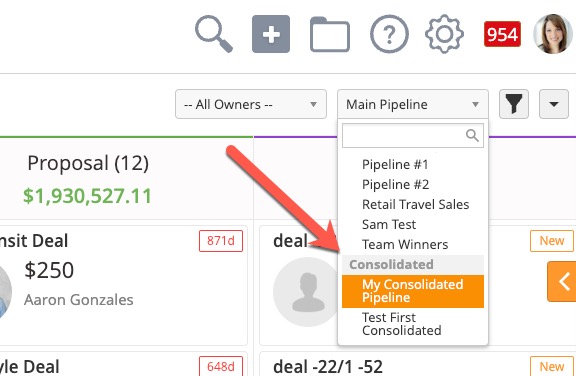
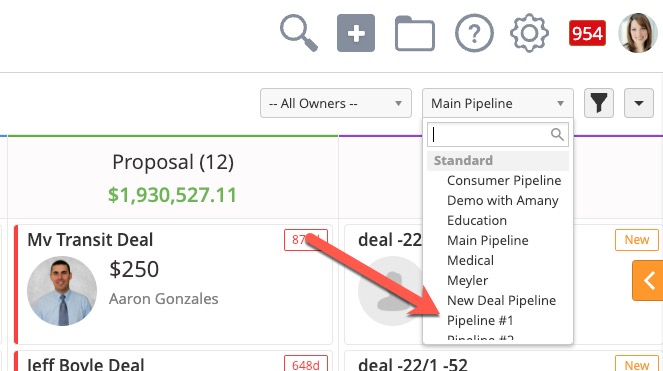
- Navigate to Sales > Deals and select your standard Pipeline. Both Standard and Consolidated Pipelines will now appear under the Pipeline dropdown.
- When you create a Deal in your Standard Pipeline it will mirror into the Consolidated Pipeline.
- When moving Deals to different stages in your standard Pipeline the updated stages will also reflect in the Consolidated Pipeline. Note, it is not possible to move Deals to different stages from a Consolidated Pipeline.
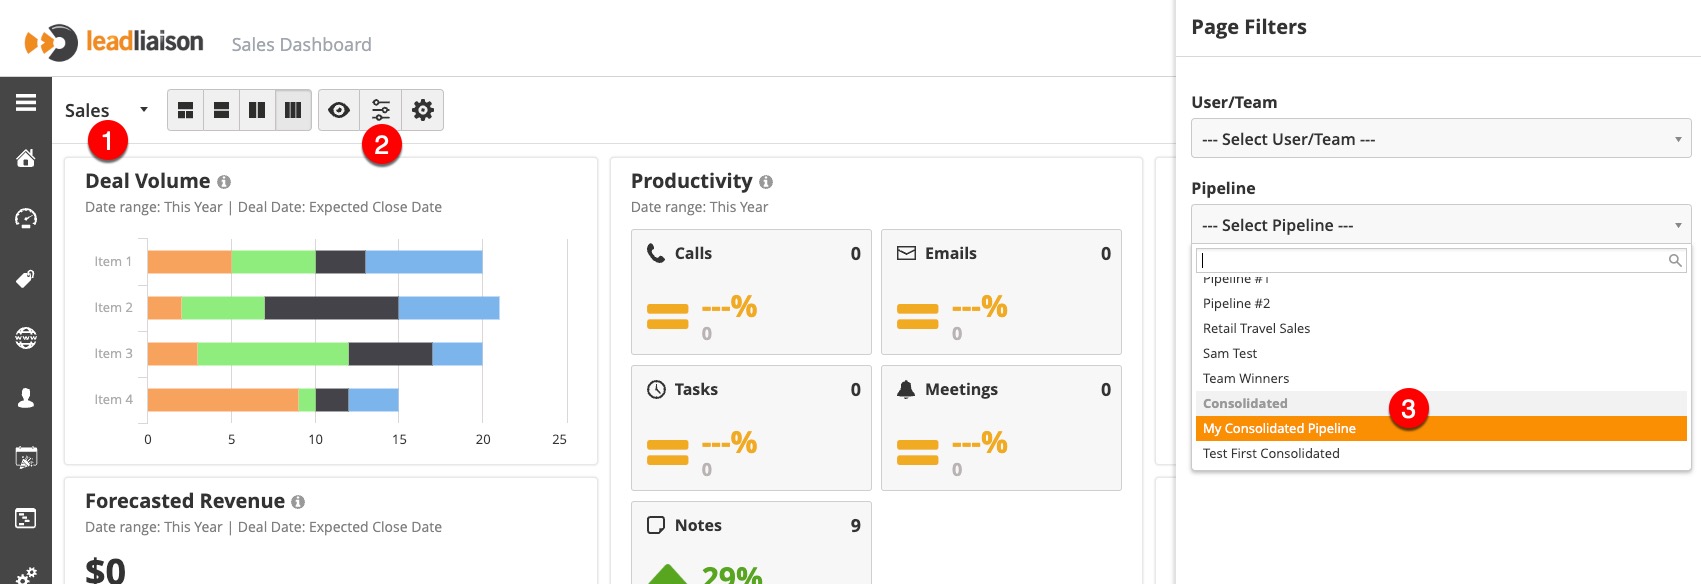
Analyzing a Consolidated Pipeline
To view your Consolidated Pipeline Sales Dashboard do the following navigate to Dashboard on the left menu then:
- Click the dropdown at the top left and select Sales
- Select the settings button
- Select your Consolidated Pipeline from the Pipeline dropdown
Managing Deals
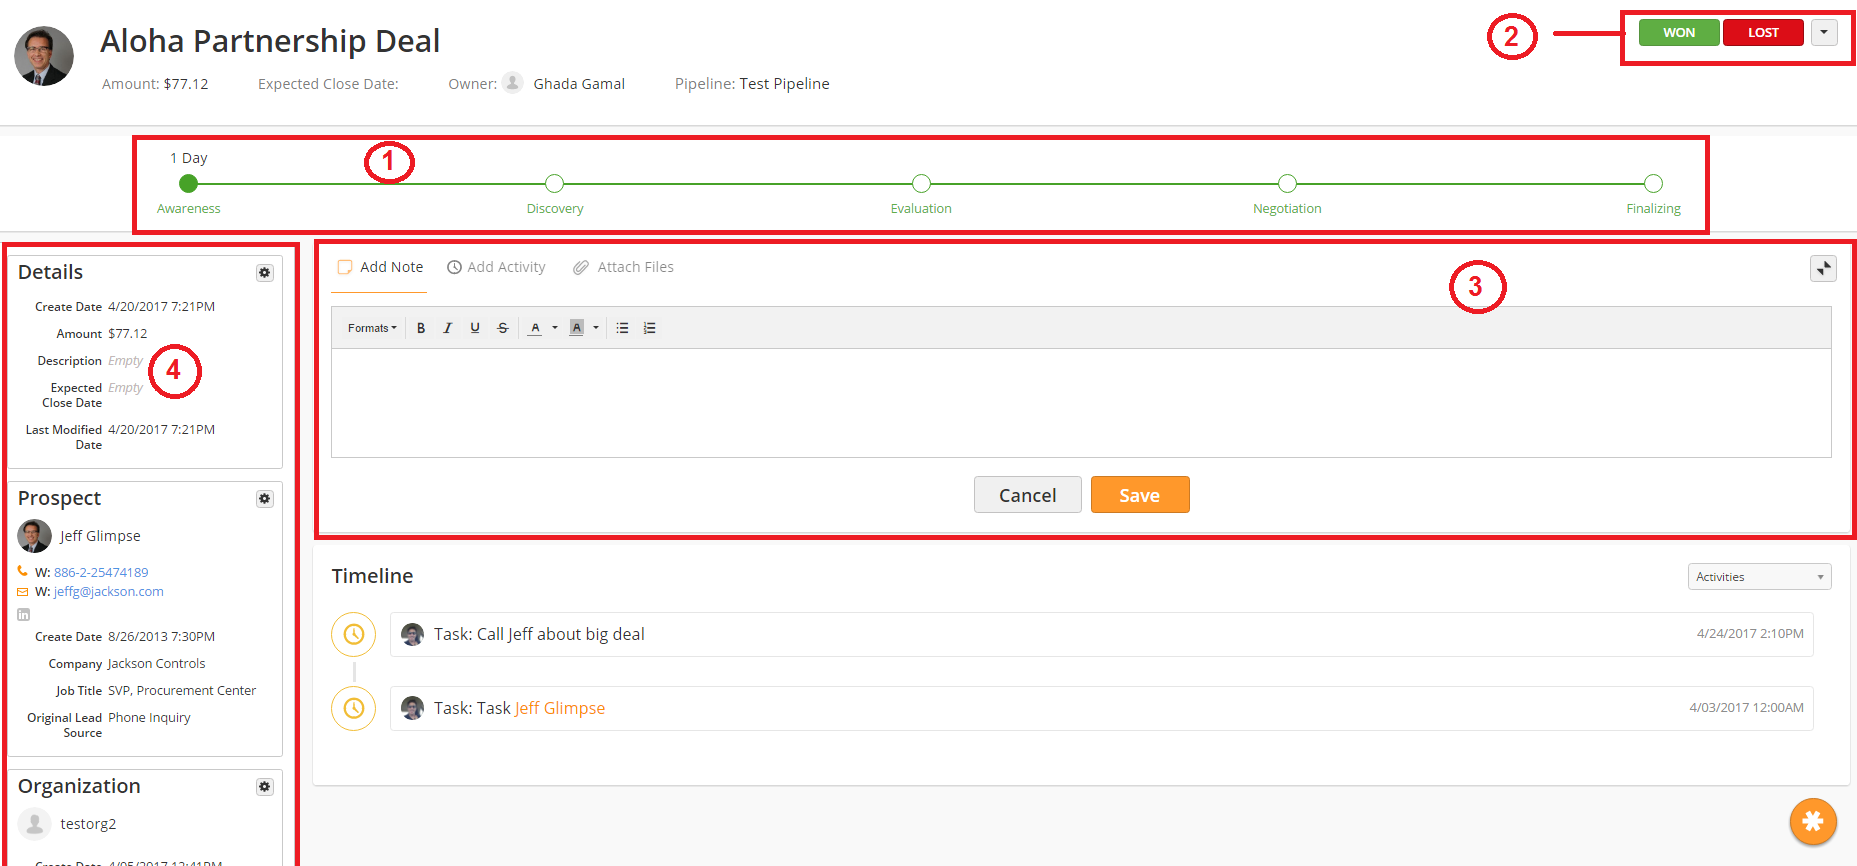
Just like Prospects and Organizations, each Deal gets its own profile. To reach the Deal Profile, either click on the Deal from the Pipeline, or click on the Deals Info Card in the other profile views.
...
Deal
...
Closing Deals
Deals can be closed from the Deal profile page by clicking the WON button.
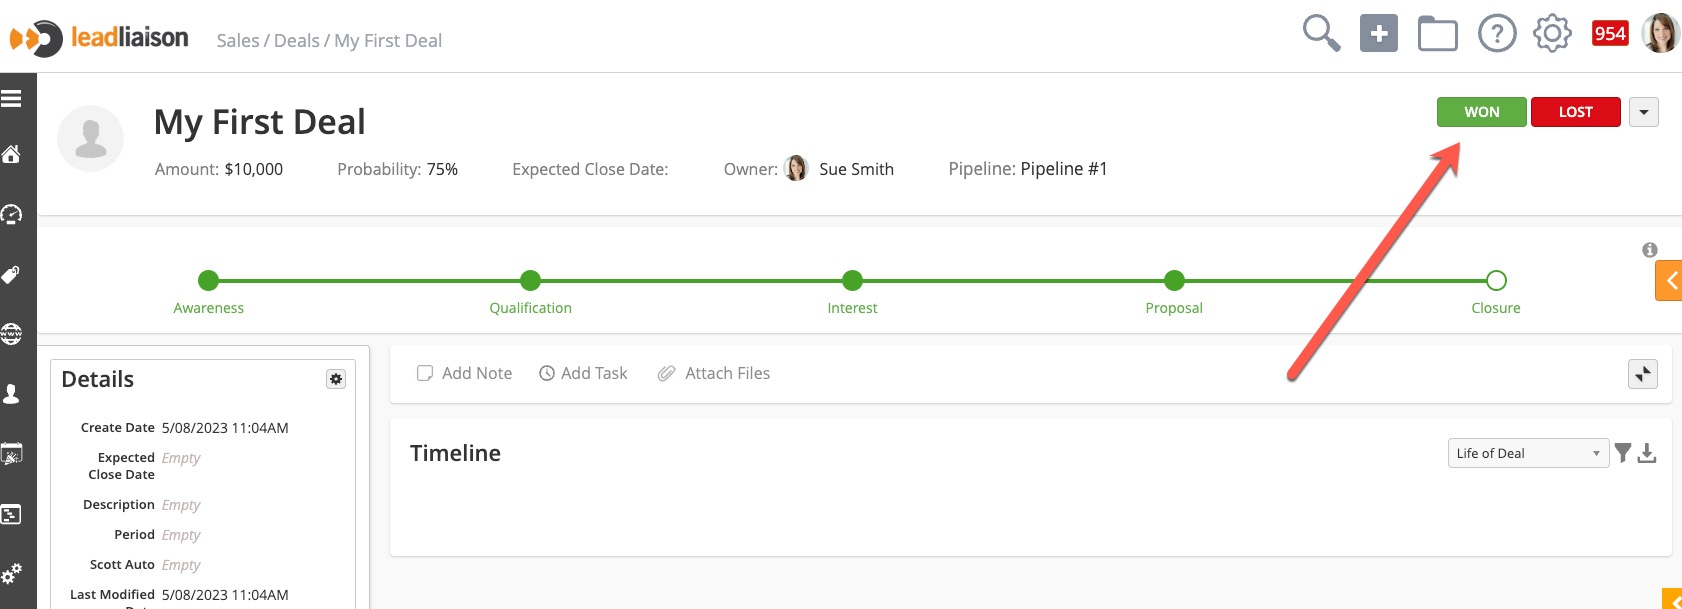
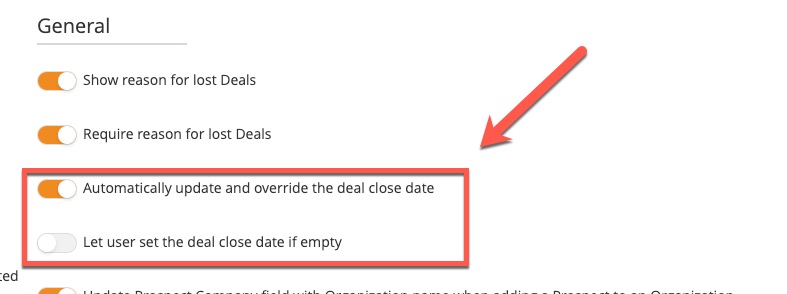
The Close Date will be updated to todays date depending on settings. The following settings provide control over the Closed Date:
- Automatically update and override the deal close date = When enabled the deal close date will automatically update to today's date regardless of the close date field having an existing value or not. If you do not want to override the existing value then turn this switch off.
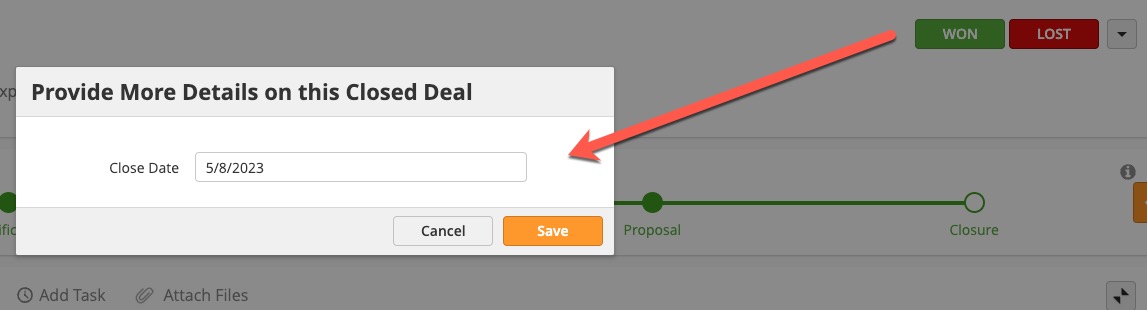
- Let user set the deal close date if empty = When enabled the user will be prompted to provide more details on the closed deal. The prompt includes the option to update the closed-won date if there was no closed-won date already entered. As shown below, if this setting is enabled a prompt will appear after closing the deal asking the user to enter the Close Date.
To update the settings:
- Navigate to Setup > App Setup > CRM > Settings > General section
Deal History
The system logs every Deal's history. Users can view every change to the Deal in the Sales Pipeline from the Deal Profile. To view a Deal's history, click on the info icon to the right of the Pipeline Stages.
...
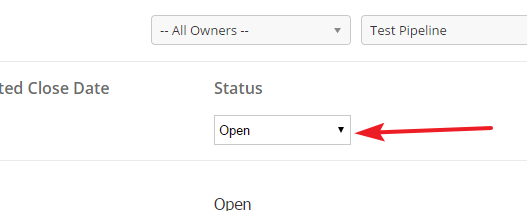
- Change the Status field to Closed Won to view won Deals
OR - Change the Status field to Closed Lost to view lost Deals
Deals can be closed from the Deal profile page by clicking the WON button.
The Close Date will be updated to todays date depending on settings. The following settings provide control over the Closed Date:
- Automatically update and override the deal close date = When enabled the deal close date will automatically update to today's date regardless of the close date field having an existing value or not. If you do not want to override the existing value then turn this switch off.
- Let user set the deal close date if empty = When enabled the user will be prompted to provide more details on the closed deal. The prompt includes the option to update the closed-won date if there was no closed-won date already entered. As shown below, if this setting is enabled a prompt will appear after closing the deal asking the user to enter the Close Date.
To update the settings:
- Navigate to Setup > App Setup > CRM > Settings > General section
Trash
You can also add a Deal to the Trash. When a lead is trashed, it is completely removed from the Pipeline, and you will not see it on any of the Profiles or Manage Deals page. To send a Deal to the Trash, either use the drop-down menu in the Deals Profile or drag the Deal Card to the Trash bucket on the bottom of the screen.
...