| Table of Contents |
|---|
Overview
Lifecycle Stages give you a full perspective on where a Prospect is in your sales and marketing processes. Prospects are meant to be promoted through each Lifecycle Stage, from beginning to end.
...
- Marketing Qualified = Use key conversion forms, such as contact forms, demo requests, trials, etc. and high-value gated content, such as buying guides, playbooks, case-studies, etc. to promote Prospects into the Marketing Qualified Stage.
- Sales Qualified = Used by your sales team to indicate which Prospects they've accepted as being ready for direct contact, and qualified for sales.
- Evangelist = Used to put your promoters or evangelists into this stage.
- Disqualified = Manually or automatically move people into this stage that do not qualify for your services.
- Other = Use this however you'd like!
Where
...
You'll Find Lifecycle Stages
Lifecycle Stages can be used in the following areas of Lead Liaison:
...
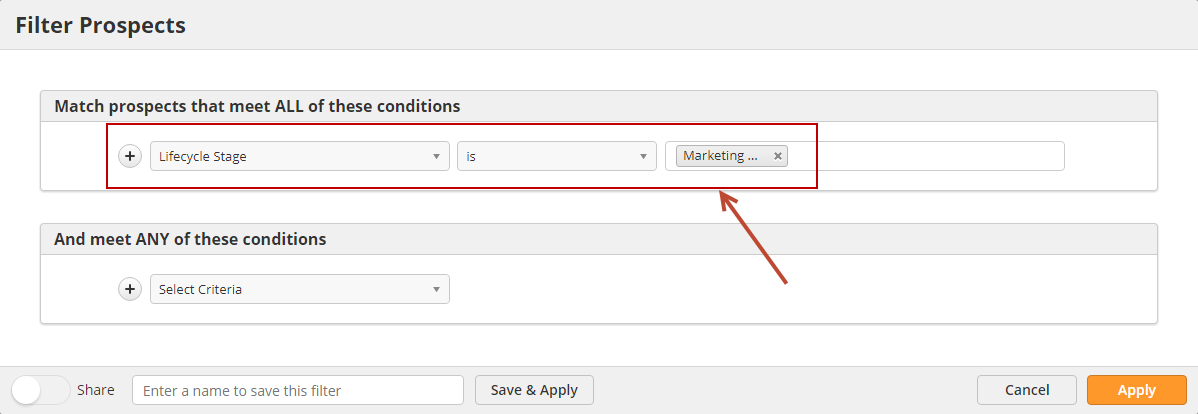
- As criteria when filtering out Prospects from Prospects > All Prospects, running Bulk Actions, or creating Filters. In the example below, we're filtering out all Prospects who are Marketing Qualified:
- Navigate to Prospects > All Prospects
- Click the filter icon.
- Choose Lifecycle Stage from the list of criteria and select your Stage.
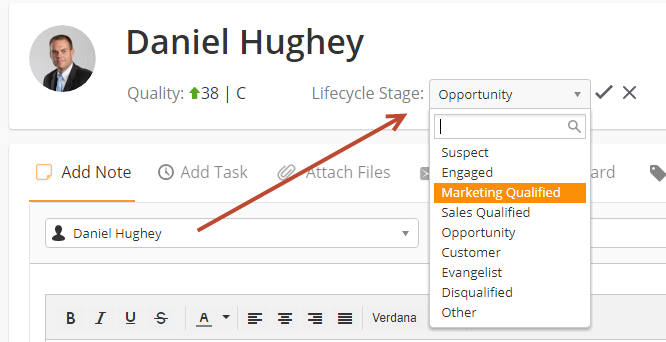
- On Prospect Profiles. The Lifecycle Stage is a standard field that's shown at the top of the Prospect Profile page. Users can change the stage to any stage they want from the Prospect Profile, including moving them backward in the stage.
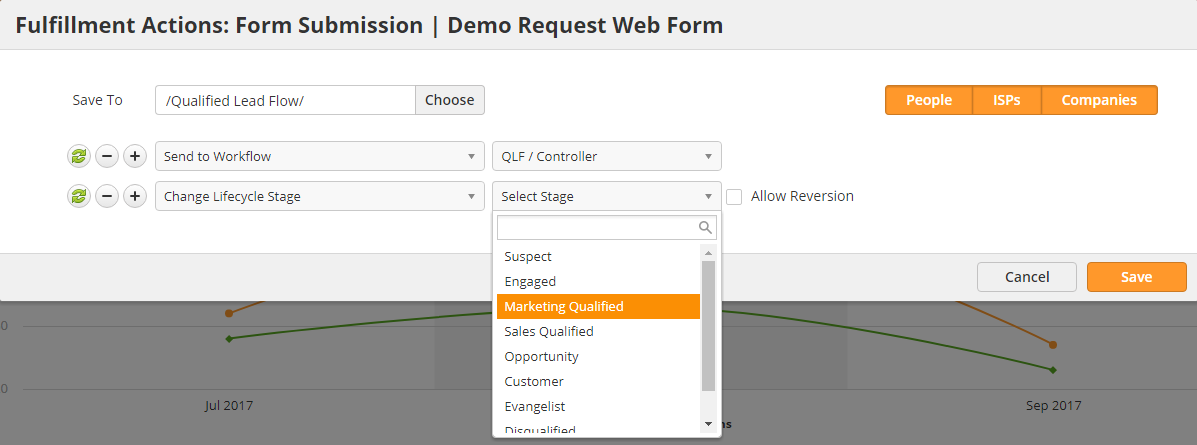
- As an action in Fulfillment Actions or Automations to set the Lifecycle Stage. In the example below, we're setting the stage to Marketing Qualified by using a Fulfillment Action on a key form, such as a Request for Demo.
- Navigate to your form by going to Content > Web Forms
- Click the down arrow next to your form and select Actions (Submissions)
- Select the Change Lifecycle Stage action from the dropdown, choose the stage, then click Save.
- In the screenshot below, you'll see the Change Lifecycle Stage action that can be used in Automations.
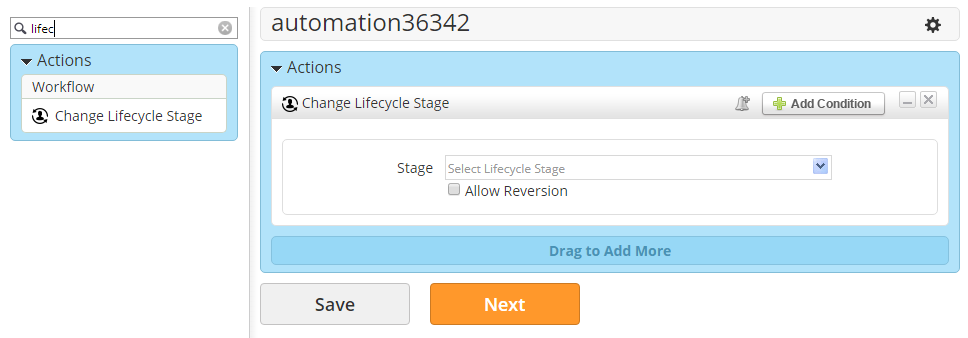
Using Lifecycle Stages in Automation
As discussed in the prior section, a Change Lifecycle Stage action helps automatically promote Prospects to a new stage. By default, Propsects cannot move backward in their stage. For example, suppose a Prospect was in the Customer stage. They cannot be reverted to the Engaged stage. However, there may be times when you want to override the default behavior to revert a Prospect's Lifecycle Stage. Reversion can be done when:
- A Prospect's Lifecycle Stage is manually updated from the Prospect Profile page.
- The Allow Reversion setting is enabled on a Fulfillment Action or Automation action, as shown below.
|
|

