Web Forms
Web Form Types
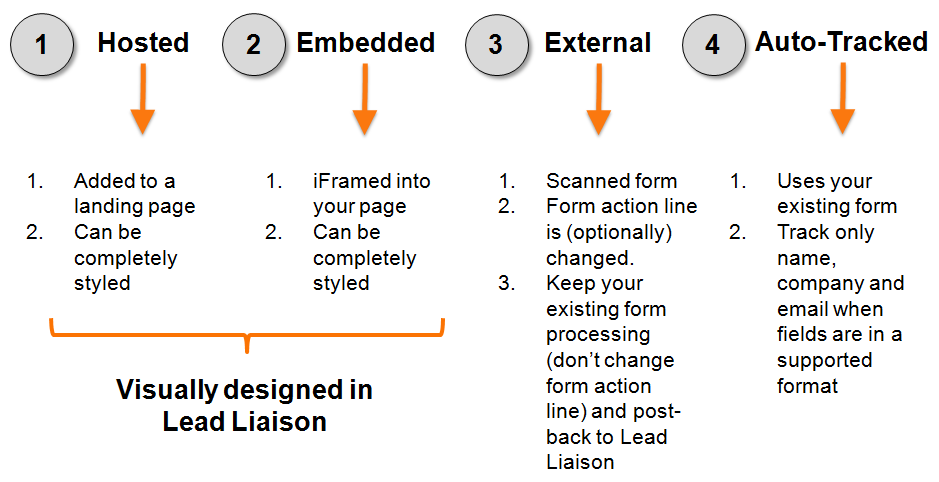
Lead Liaison supports four types of web forms:
- Hosted = Web form built using Lead Liaison's visual designer and subsequently added to a landing page, which is hosted on Lead Liaison's network.
- External = Web form that exists on a tracked website and has web form fields mapped to Lead Liaison fields along with the form action code replaced with custom form action code provided by Lead Liaison.
- Embedded = Web form built using Lead Liaison's visual designer and a small snippet of HTML code is added to your website.
- Auto-Tracked = Lead Liaison uses your existing tracking code to identify name, company and email of a form submission. Documentation for auto-tracking is located here.
Which Forms are Not Tracked?
Web forms will not be recognized/tracked if:
- The fields are not named in the format described on the Automatic Web Form Tracking page.
- Our javascript code is not added to the page to pick up unique fields (Tracking Web Forms With Custom Names/Identifiers section)
- The web form is not an external form type (scanned by Lead Liaison)
- The web form was not created using Lead Liaison (Hosted or Embedded types)
Managing Web Forms
To view web form Total Views, Submissions, Conversion Rate (form effectiveness) and more go to the manage web forms page by doing the following:
- Go to Content > Web Forms
Conversions Graph

The graph on top of the form list shows the number of submissions and the number of conversions.
Conversions Vs. Submissions
Conversions: prospects that were anonymous before submitting a form (new prospects).
Submissions: shows the number of all submissions, including existing prospects.
Column Descriptions
Below is a description of each column in the manage web forms table.
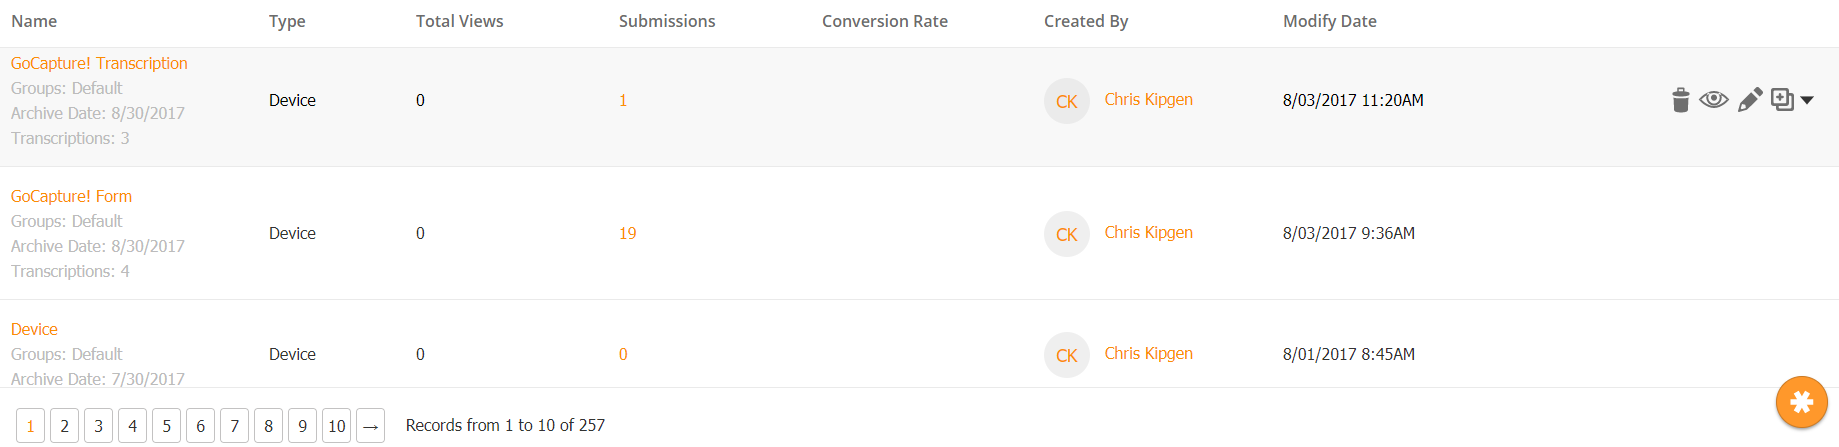
- Name = Name of the web form. Also includes the group, archive date, and transcriptions for device forms.
- Type = Web form type. It will either be "Hosted," "External," "Device," "Payment," or "Donation." See the Web Form Types section above for an explanation of each type of web form.
- Total Views = Total number of times the page containing the web form has been viewed.
- Submissions = Total number of times the web form has been submitted.
- Conversion Rate = Total Submissions divided by the Total Views.
- Created By = Lead Liaison user who created the web form.
- Modify Date = Date and time the web form was last modified.
- Actions Menu= Performs specific actions on the web form.
- Trash Icon = Delete the form.
- Eye Icon = View a preview of the form. No submissions will go through while in preview mode; use the actual HTML page for testing.
- Pencil Icon = Edit the form in the form builder.
- Drop-down Menu = View additional options.
You can take further actions by using the drop-down menu.
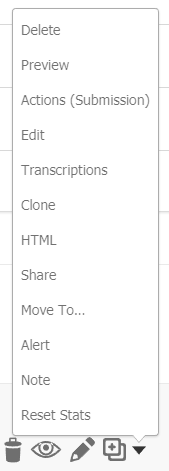
- Actions (Submission) = Add fulfillment actions to the form.
- Transcriptions = View business card transcription submissions for the form (device forms only).
- HTML = View the HTML to use when adding the form to a web page.
- Share = Choose to share this form with other users depending on your security profile access.
- Move To... = Change the form's Lead Liaison folder.
- Alert = Manager alerts for the form.
- Note = Add notes for internal use.
- Reset Stats = Clear views, submissions, and conversion rate.
Creating a New Form
To create a new form, click the green New button in the top-right corner of the Web Forms screen. Choose a name, folder, campaign, vanity URL, and description for the form.
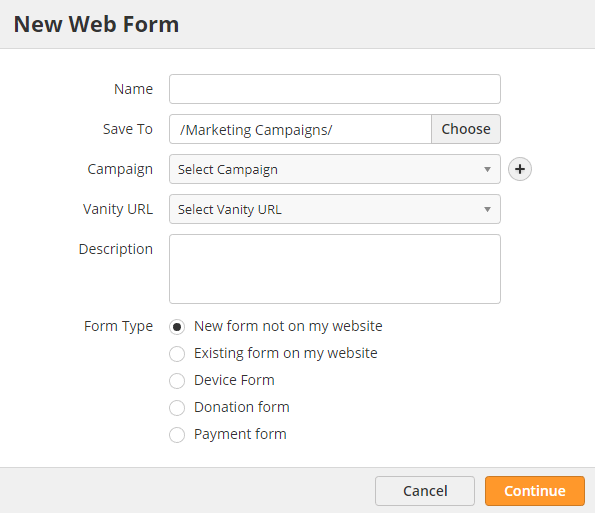
Click below to learn how to add each of the form types
- New form (create a form using Lead Liaison's visual builder)
- Existing form
- Device form
- Donation and payment forms
Creating Surveys
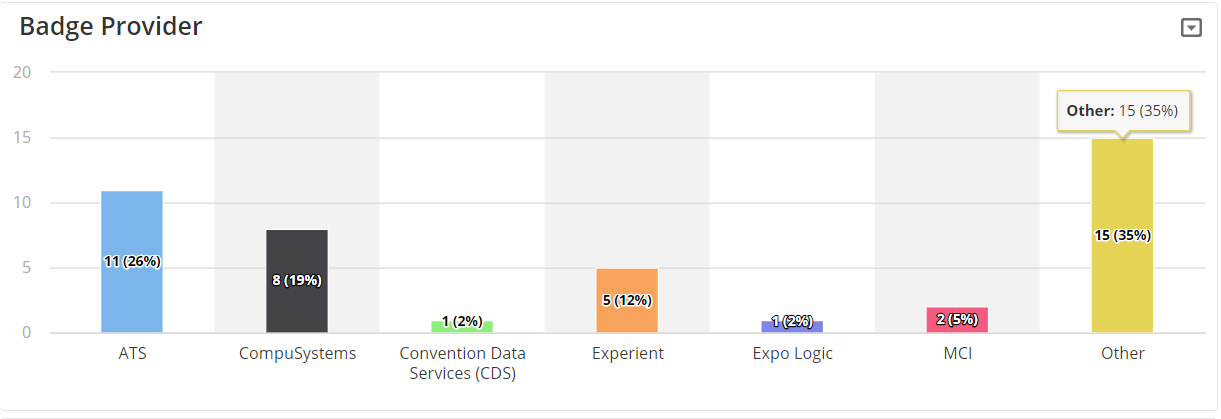
Forms can also be used for surveys. Whether the Form is Hosted or External, you can drill down into the data using the Question Stats or Survey Results feature as shown below.
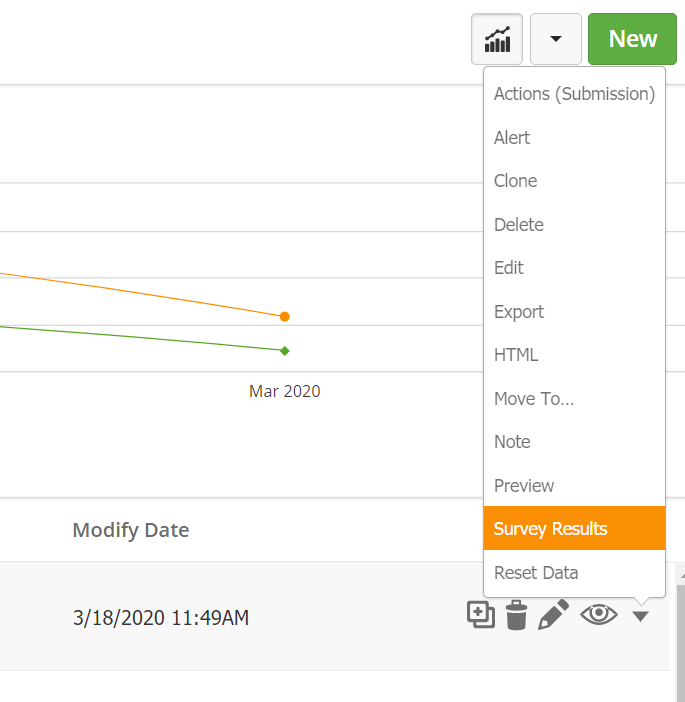
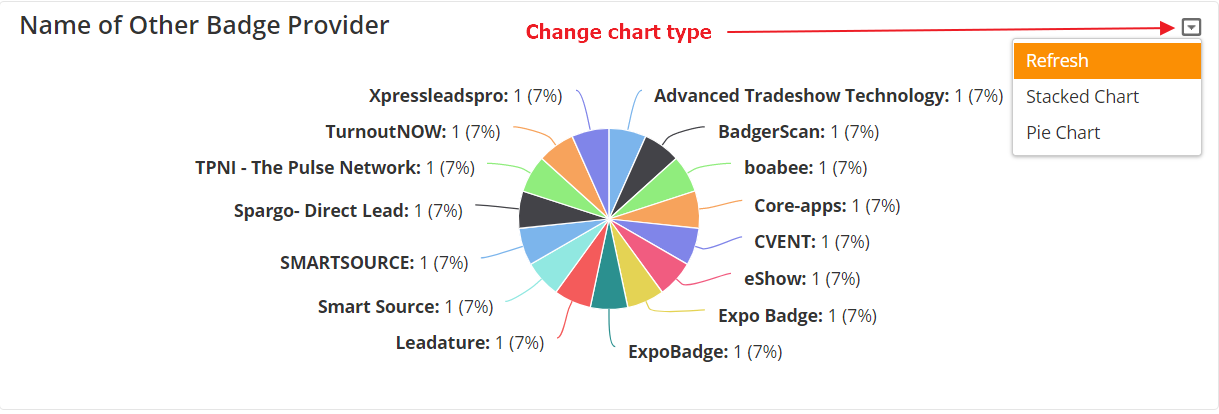
Most fields will have different reports available. You can use the toggle in the upper-right corner of the field to change the report type.
The following reports are available:
- Range Analysis: all responses in a Single-Line Text field by percentage.
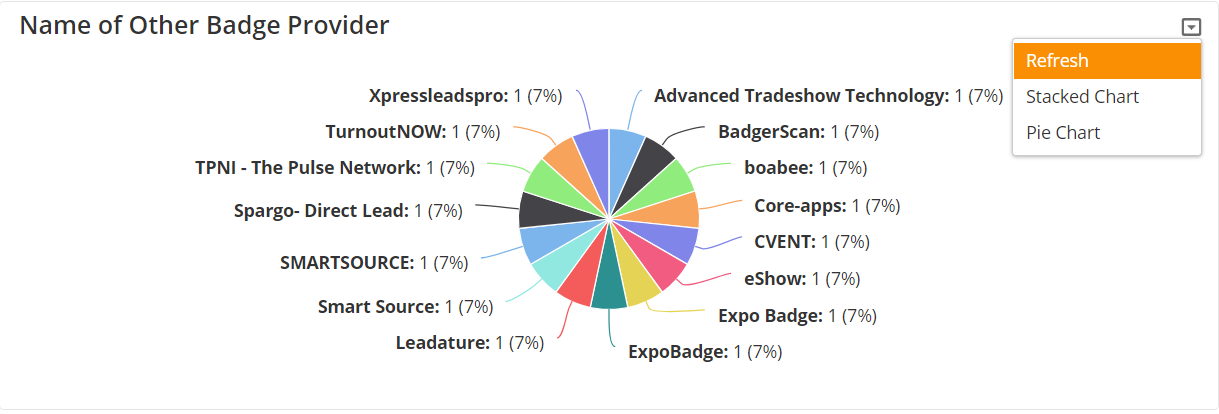
- Column Chart: all responses in a multi-select field by percentage.
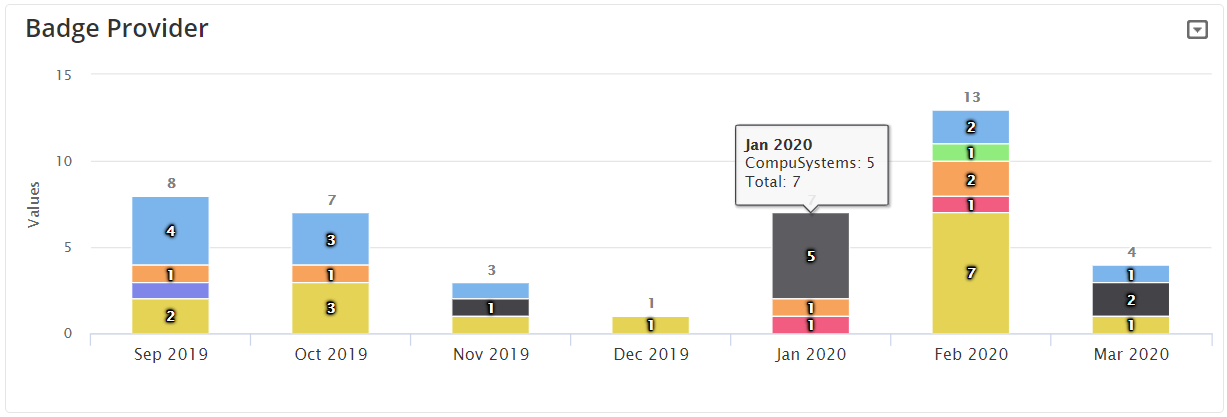
- Stacked Chart: responses by date and percentage for multi-select field. Note: this will only show empty/has value for text-entry fields.
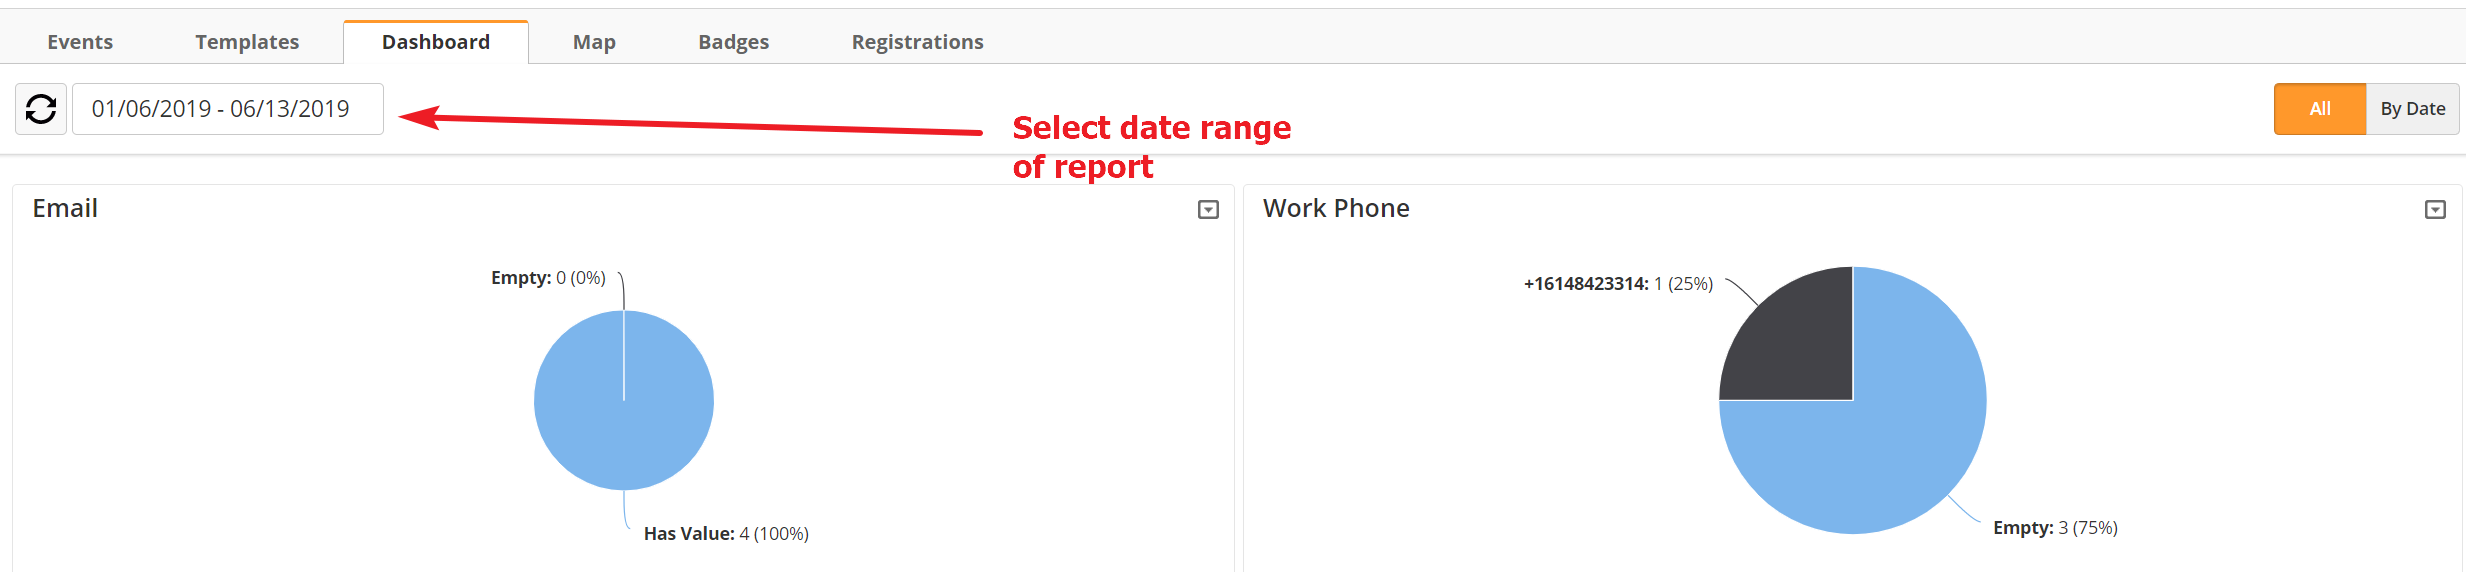
- Pie Chart: percentage of response vs. no response for text-entry fields.
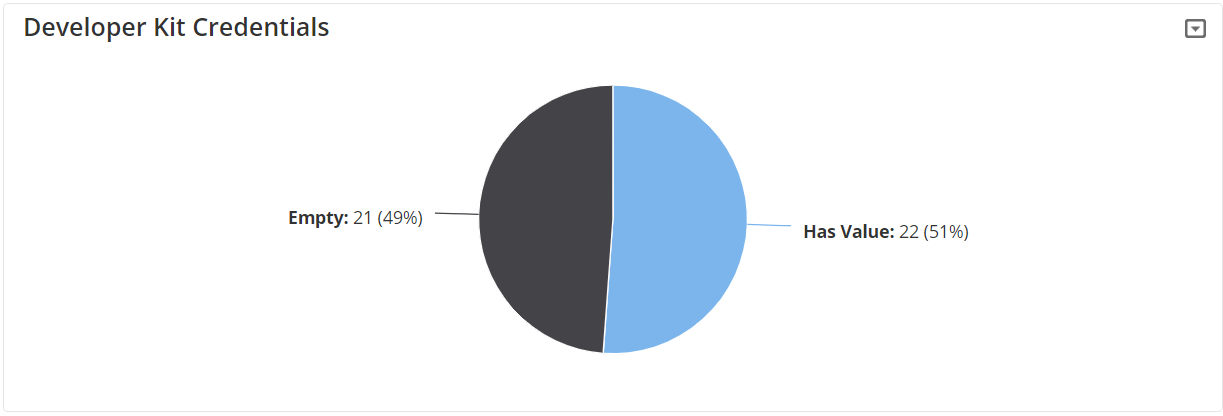
When viewing a report, you can click on any wedge/bar to see the Prospects represented. For example, if you clicked on the Has Value wedge in the screenshot above, you would see a list of all 22 Prospects.
The Prospect List only shows unique Prospects, but the reports show total survey results. If there are duplicate submissions, the number of responses in the reports will not match the number of Prospects in the List.
Managing Web Form Alerts
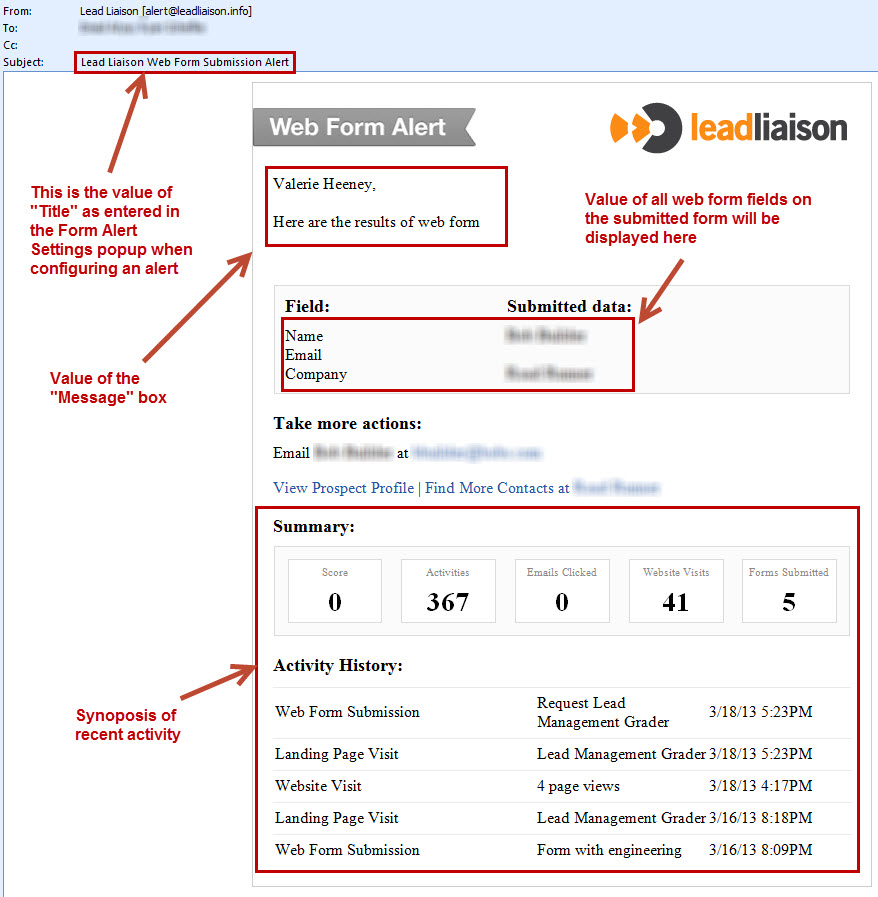
A web form alert notifies the Lead Owner, Teams or Users of any web form submissions. Alerts include a custom subject, custom message and all web form field data to the recipients. If you did not set up the alert while creating a new form or adding an external form, click on the Alerts option in the form's Actions Menu.
Form Types Supported
Web form alerts are not available for Automatic Web Form Tracking. You will need to set up a custom fulfillment action instead.
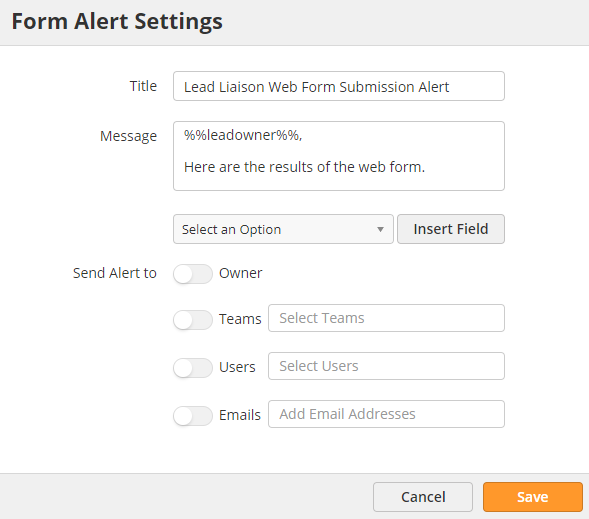
- Title – subject line of the alert email
- Message – message displayed to the recipient
- Merge Field – merge data from the prospect profile
- Send Alert to
- Owner – the prospect owner (sent to the default owner if no unassigned)
- Teams – send to all members of a team
- Users – send to specific users
- Emails – send to specific email addresses
You can choose more than one option for who to send the alert to.
Users receive alerts via email. Here is what the email looks like:
Adding Notes
Notes may be added to any web form. Notes are useful if you need to document the reason the web form is created, where it's used, or simply share insight with your colleagues. When a note on a web form exists, the notes icon (as shown below) is yellow; otherwise, it's grey. To add a note do the following:
- Navigate to Content > Web Forms
- Click the Note option under the Actions column
- Once a note is added it will have a time-stamp associated with it. The user who created the note will also be recorded.
- Hover over a note and click the Edit or Delete button to modify the note.
Importing Submissions
In some cases, you may need to import form submission data. For example, you may want to mass upload a list of candidates from a recruiting event to a careers form.
To import submissions,
- Navigate to Settings > Import
OR - Navigate to Prospects > Import if you are not using OneFocus™ CRM
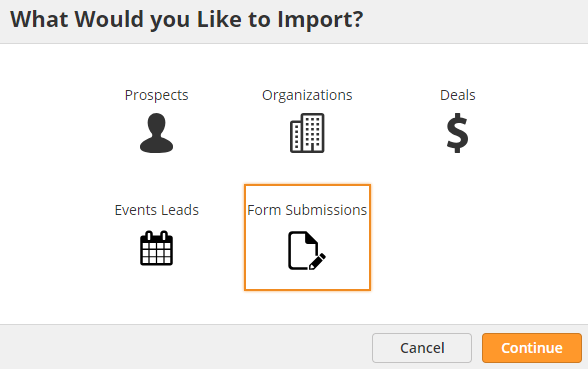
- Select Form Submissions
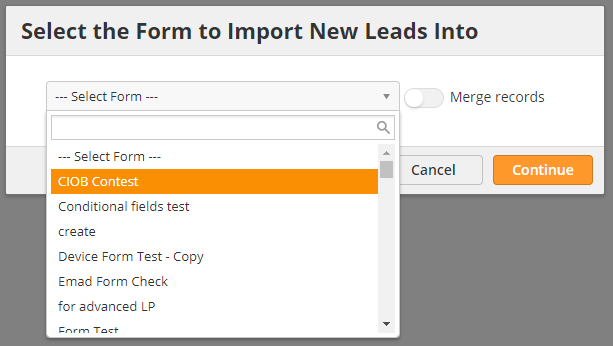
- Select the Form the submissions are from
- Choose whether to merge or create duplicate records
- Drag your spreadsheet into the uploader
OR - Click the Upload button and select your file
- Map spreadsheet fields to the event form fields
- Check the preview for accurate mapping
- Select additional options, such as adding to a List or a Campaign (learn more here)
The system will treat these imports like they are real-time Form submissions. This means Automations and Fulfillment Actions tied to these Forms will trigger.
Resetting Web Form Stats
Resetting form statistics might be necessary after doing some testing on your form. To reset statistics on your web form do the following:
- Navigate to Content > Web Forms
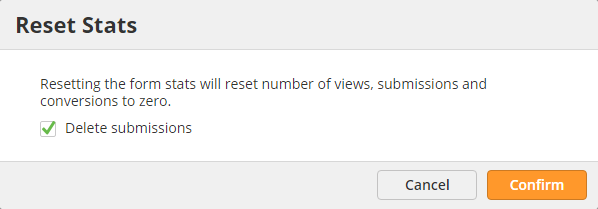
- Click Reset Stats under the Actions column
- Optionally delete form submissions, which will remove all Prospects who have submitted the form.
Deleting Form Submissions
You can delete individual or batch form submissions. For example, you may want to delete a test submission. Deleting a submission will do the following:
- Delete the submission record.
- Delete the submitted data.
- Delete the submission activity history record, including points added to the prospect's score.
- Decrease the number of submissions by one on the Web Forms screen and the statistics logs (for Dashboard graphs, etc.).
To remove a submission, navigate to your submissions page by going to Content > Web Forms, then click the number under the Submissions column.

Click the check box to select all submissions, or click the down arrow to choose individual or an entire page of results.
Deleting the form submission will not delete the prospect profile of the prospect who submitted the form.
![]()
© 2021 Lead Liaison, LLC. All rights reserved.
13101 Preston Road Ste 110 – 159 Dallas, TX 75240 | T 888.895.3237 | F 630.566.8107 www.leadliaison.com | Privacy Policy