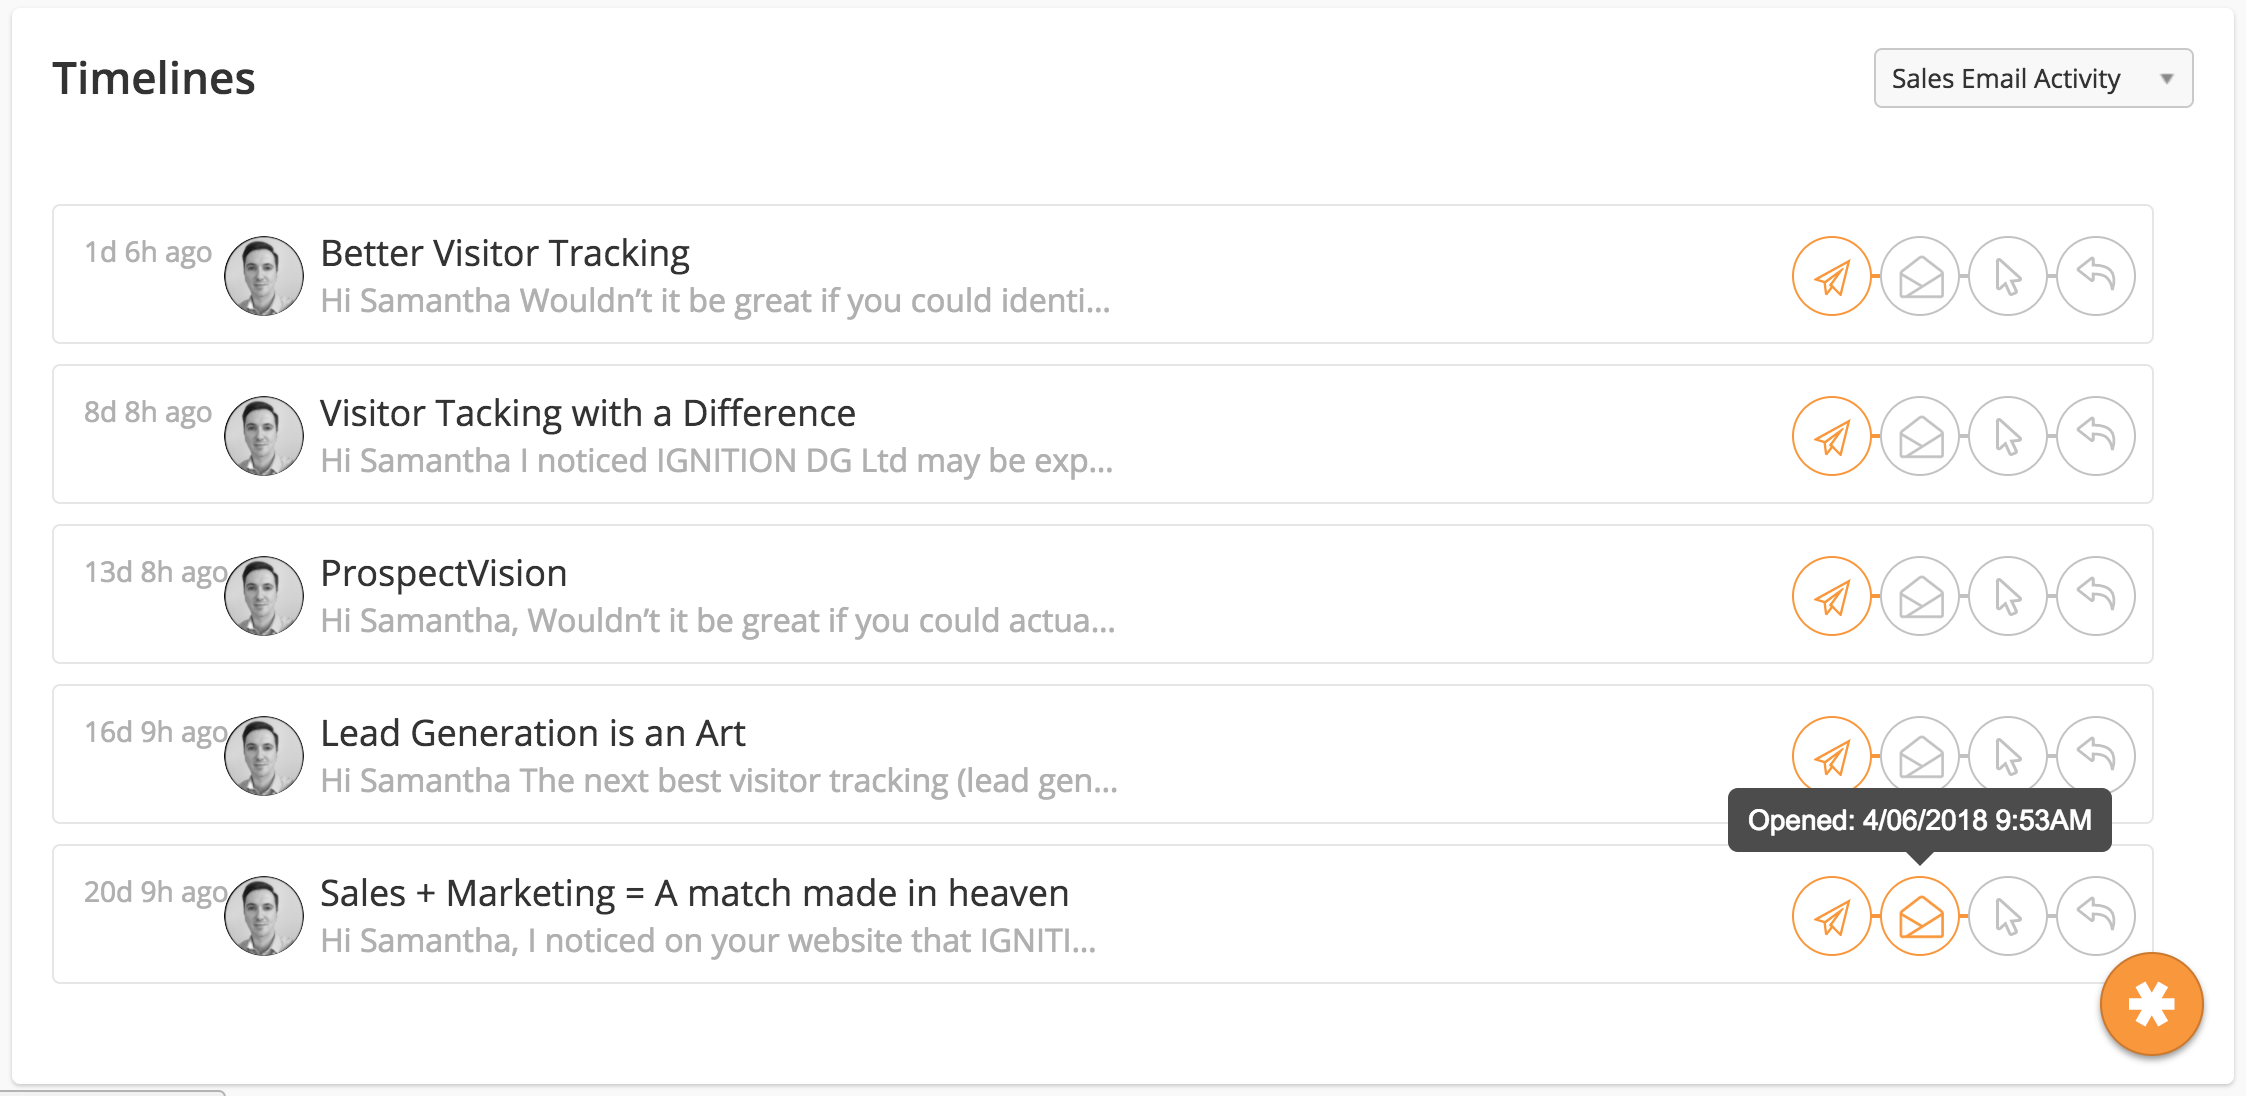
Rhythms automate the sales and prospecting process and are optimized for initial outreach and Account Based Marketing (ABM) efforts. By creating a personalized workflow (what we call a "plan"), sales people can make sure that no Prospect falls between the cracks. In addition to the workflow, Rhythms can help you figure out which types of communication are the most effective, and build the best prospecting schedule possible.
In this documentation, you will see the word Suspect occasionally interchanged with Prospect. While any person with an email in Lead Liaison is counted as a Prospect, as Suspect is a Prospect who does not have recorded inbound activity. In basic terms, they are a cold lead that has not been qualified for marketing. |
Lead Liaison has sending limits per connected email account per GMT day and per minute for your protection. The default limits are below. Limits may vary based on the type of account connected (Gmail, Exchange, etc.).
Emails sent through other Sales Enablement features will count toward the daily limit, but not the per minute limit.
Administrators can create special rules for creating new Rhythms. For example, administrators can create a rule that requires all Rhythms to start with an email and end with a phone call. To create a new rule, navigate to Settings > App Setup > Rhythms and click New. You can edit or delete existing rules from the same page.
The table below details each of the rule settings.
| Setting | Notes |
|---|---|
| Allowed action types | Select the types of actions user can choose when creating a Rhythm. |
| Minimum number of steps per Rhythm | |
| Maximum number of steps per Rhythm | |
| Rhythm must start with _____ | Select a type of action |
| Rhythm must end with _____ | Select a type of action |
| Maximum number of Prospects per day | This setting overrides the Rhythm settings when activated. The Rhythm can be set to activate less Prospects, but not more than the value here. |
| Min/Max number of a type of action | Use the (+) or (-) buttons to add or remove more variables. |
| Maximum number of emails a domain can be sent within HOURS then shift DAYS | The Rhythm will limit the number of emails sent to an email domain within the set number of hours. After the limit is hit, the system will shift the remaining Prospects with the same domain the set number of days. |
| Users | Apply the rule to specific users |
| Teams | Apply the rule to Teams. |
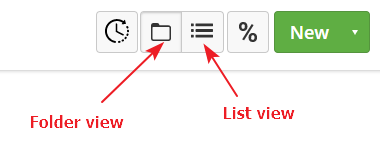
Access Rhythms by navigating to Sales > Rhythms. You can view Rhythms in either a Folder or a List view.
By default, the system will display Rhythms in a Folder view. The folder view is perfect for organizing Rhythms. For example, sales people might want to create a folder for their own personal Rhythms, or a sales manager might create a folder for a specific prospecting event. Similarly, sales teams might create a folder for large accounts and one for small businesses.

To create a new folder,
Each folder is given a card. The top of the card shows the date and time the folder was created, while the bottom of the card shows how many Rhythms are in the folder. Click the trash can icon in the bottom-right corner of the card to delete the folder.
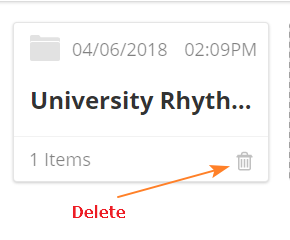
Deleting the folder will also delete any content contained within. Make sure you move any Rhythms you would like to keep. |
To view the Rhythms within the folder, click on the card. From here, you will see a list view of all of the Rhythms in the folder. See the List View section below for more information.
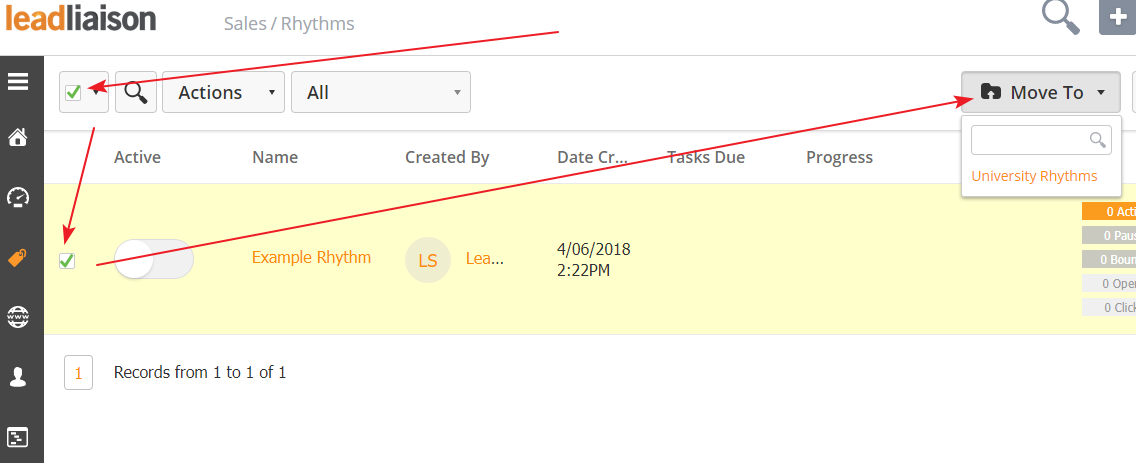
To move a Rhythm to another folder, navigate into the Rhythm's current folder. Then, click on the checkbox icon in the top-left corner of the screen and select the Rhythm. Finally, use the Move To drop-down menu in the top-right corner of the screen to select the appropriate folder.
The List is for viewing and managing individual Rhythms and their progress. You can find the List view by either clicking on a folder or by clicking on the List View icon in the top-right corner of the screen to see all Rhythms.
The system will sort Rhythms by name, though you can re-sort them by clicking on any of the field labels.

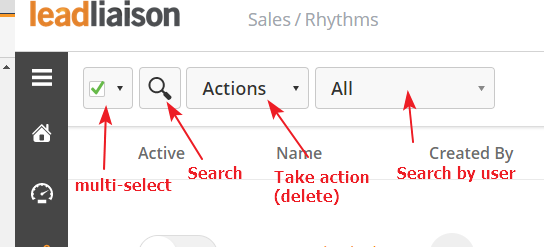
Use the bar in the top-left corner of the screen to search, multi-select, bulk delete, or search/sort by user.
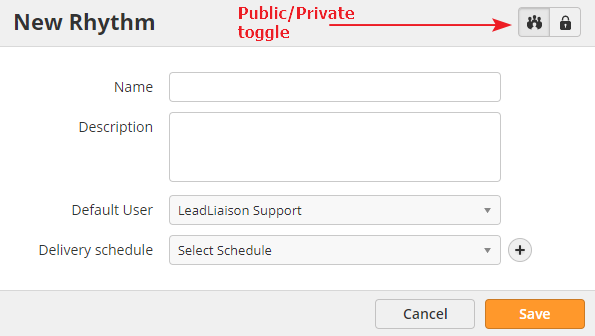
To create a new Rhythm, click the New button in the top-right corner of the screen from either folder or list view. If you click the New button within a folder, the Rhythm willl automatically be added to that folder. Otherwise it will be placed in the "Uncategorized" folder.
After clicking New, fill out the form.
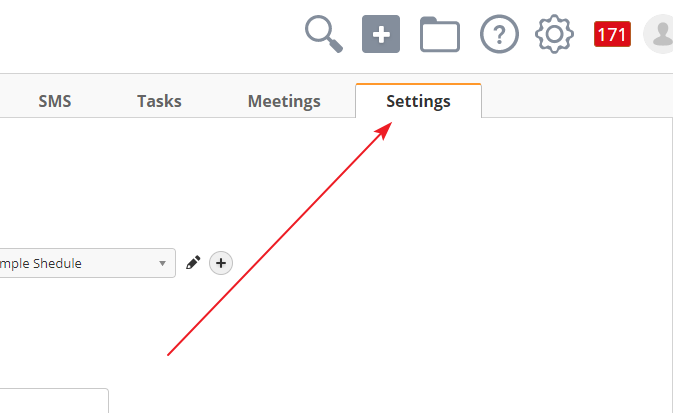
Before adding steps to your workflow, you should make sure your Rhythm's settings are correct. Inside your Rhythm, click on the Settings tab on the right of the menu bar.
The table below describes each of the General settings toggles.
| Setting | Description | Notes |
|---|---|---|
| Throttle email with a 24-hour limit per user | Prevents the system from sending any additional automatic emails after the limit. | Use this option if your email provider limits the number of sends per day. See this page for Gmail sending limits. |
| Daily active Prospects per user | Limits the number of Suspects that can be added for each user per day. Manually added Suspects do not count toward this limit. | Use this option if you will be importing large lists or auto activating Suspects – you don't want to end up with 100 call Tasks all due at the same time. We recommend setting this to 10-20 per day. |
| Automatically activate pending Suspects | Rhythm begins applying steps to Suspects the moment they are added. | |
| Mark Prospect as completed when reply | If the Suspect replies to an email sent through the Rhythm, they will be marked as complete and removed from the remaining Steps. | |
| Include opt-out link | Includes a link that allows Suspects to unsubscribe from emails sent via the Rhythm. | Your country may require an opt-out link, even if the email is not an advertisement. You are responsible for any content sent through Rhythms. |
| Private | Marks the email as Private in the Prospect Profile. | |
Default Action-From User | Unless otherwise specified, all emails will be sent from this user, and all Tasks assigned to this user. | |
Do not add Prospects if the Prospect Owner does not match the Action-From User | If the Suspect already has an owner in Lead Liaison, the system will not add them to the Rhythm unless the Owner is the Action-From User. | |
Mark Prospect as completed when reply | Changes the Suspect's Prospect Profile owner to the Rhythm user | This will override the existing owner. |
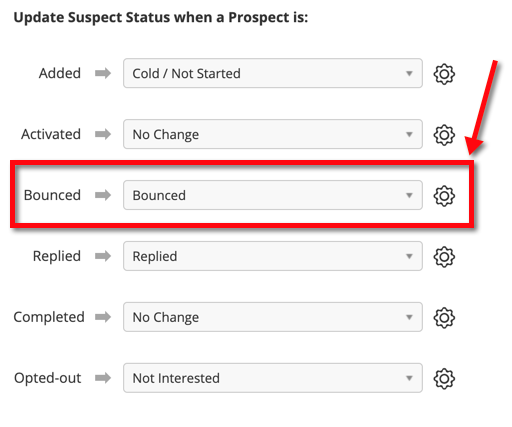
The system can automatically update the Lifecycle Stage Suspect Status based on certain triggers in the Rhythm. Use the drop-down menu next to the trigger to determine what Suspect Status the system should apply. For example, if a Suspect replies to an email, the system can update their Suspect Status to Interested.
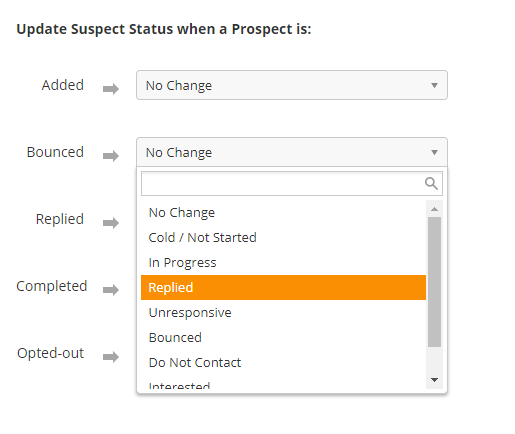
Here is an example of how you might map these options:
Added → Cold/Not Started
Bounced → Bounced
Replied → Replied
Completed → Interested
Opted-Out → Do Not Contact
Click here to learn more about Lifecycle Stages and Suspect Statuses.
Add or remove the Rhythm from a Delivery Schedule. See Schedules section for more.
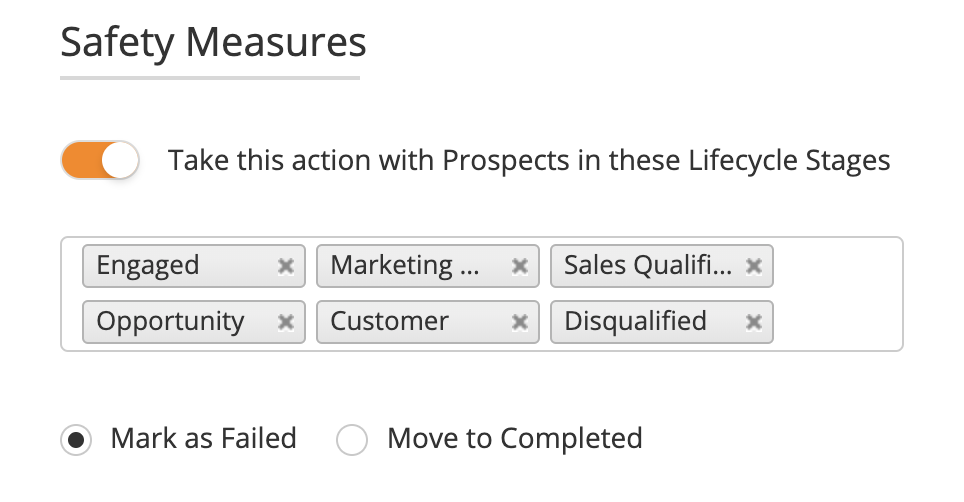
Prospects added into this Rhythm that have the following Lifecycle Stage(s) will change to the specified status in the Rhythm. This safety measure prevents outreach to Prospects who have already been marketed to or who are actively engaged.
Set user goals for the Rhythm.
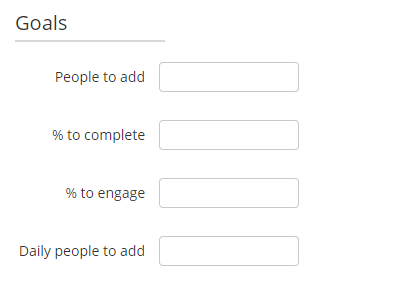
The "Daily Added" metric represents people added to the Rhythm and not the people Activated. Activated is different from Added. When using the manual "Add" function the Goal Added graph will be updated. |
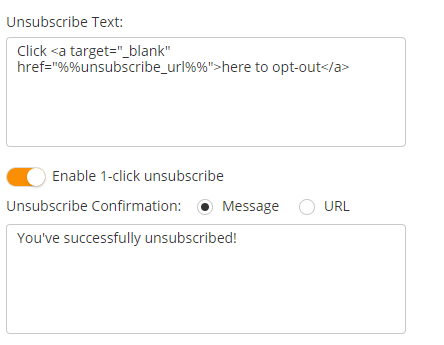
If you add an unsubscribe link, you can adjust the unsubscribe settings by clicking on your profile picture and navigating to Personal Settings > 3rd Party.
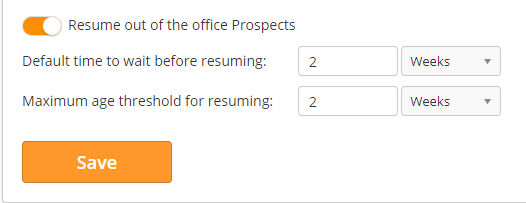
For Suspects that are out of the office, Lead Liaison automatically detects out of office message responses and pauses the Rhythm. Once the Rhythm is paused, the system can automatically resume the Rhythm after a certain time period. To access these settings, click on your profile picture and navigate to Personal Settings > 3rd Party.
To build the Rhythm's Plan, drag Steps from the left side of the screen to the right.
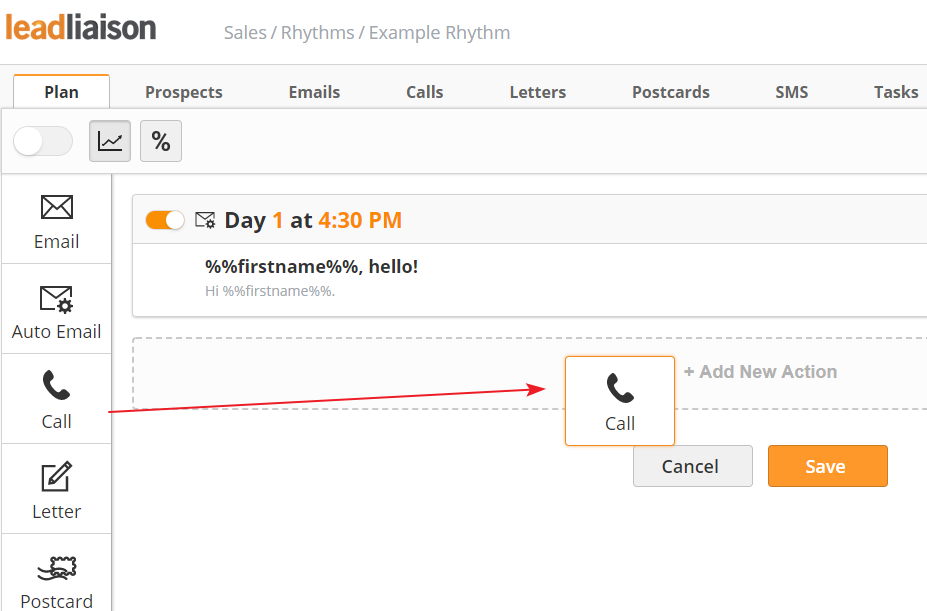
You can also set the day and time that the Step should apply. For example, if a user wanted to send an email on the third day after a Suspect is added to a Rhythm, they would set the Step to apply on Day 3.
Unlike Automations, there are no wait actions in a Rhythm. Instead, Steps are applied on the day and time selected. The system will automatically reorder Steps if you change the day/time. |
Use the toggle in the top-left corner of the step to activate or deactive it. When a step is deactivated, Suspects will skip it.
If you need to edit or delete a step, click on the drop-down menu in the top-right corner of the Step and select the appropriate option.
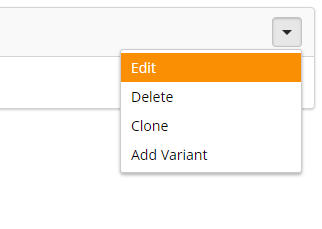
You can also clone existing steps using the drop-down menu. This is a perfect option if you will be repeating an action on different days. For example, users might schedule a phone call for Day 1 and for Day 5. If they will be using the same notes, they can simply clone the first step rather than placing and filling out a second.
The system will automatically perform some Steps, while others must be performed by the user. The table below explains each Step. Items marked with (*) require OneFocus™ CRM in order to assign tasks.
| Step | Description | Screenshot |
|---|---|---|
| Email* | Creates an Email for the user that the user must manually send later. This Step will create an email task in the Task Manager. The system will notify the user when it is time to send the email, but the user must actually perform the send action. See the Sales Enablement section for more details about the email compose window. |
|
| Auto Email | Creates an Email for the user that the system will automatically send out. No user intervention required. See the Sales Enablement section for more details about the email compose window. |
|
| Call* | Creates a Call Task for the user to call the Suspect. Task is due at the time selected. The user can also set a reminder for before the Task is due. |
|
| Letter | System automatically sends out the selected handwritten letter. Click the (+) icon to create a new letter. |
|
| SMS* | Creates a SMS Task for the user to text the Suspect. Task is due at the time selected. The user can also set a reminder for before the Task is due. |
|
| Task* | Creates a generic Task for the user. Useful for actions that don't correspond to any other Steps, such as physical cold calling. The user can also set a reminder for before the Task is due. |
|
| Meeting* | Creates a Meeting Task to schedule a meeting with the Suspect. The user can also set a reminder before the Task is due. |
|
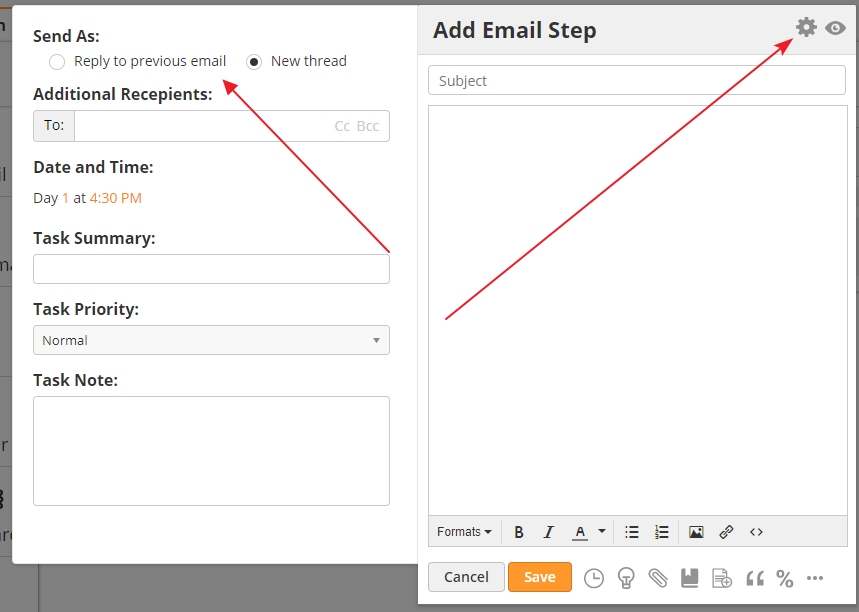
Users can set an email step to either create a new email chain with a unique subject line, or as a reply to their previous email in the Rhythm. This option should not be used if it is the first email step in the Rhythm. To toggle this option on or off, click on the gear icon in the top-right corner of the Add Email Step screen. We suggest using the "Reply to previous email" feature to make communication feel more genuine and authentic.
When using Postcards and Handwritten Letters as steps in your Rhythm note that the mailing address must be valid. If the mailing address does not pass our validation checks the Prospect will at that step. Make sure you have the full mailing address including the country if your Rhythm uses offline communication. If your Prospects fail, don't worry, you can always move them to the next step as shown in the screenshot below. Click on the Failed Prospects, select the Prospects you'd like to move to the next step, then use the Actions pull down to select Move to Next Step.
|
|
Users can add variations to Steps to see which actions get the best results. For example, users may have one variation of an email Step which sends the email as a new thread, and another variation that sends it as a reply to the previous email. To add a varation to a Step, find the appropriate Step and click on the drop-down menu in the top-right corner. Select Add Variant.
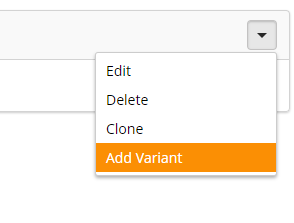
Fill out the variant the same way you add a new Step. Once you save it, it will appear as a variant in the Step. As Suspects run through the Steps, the system will evenly split them through the different variants.
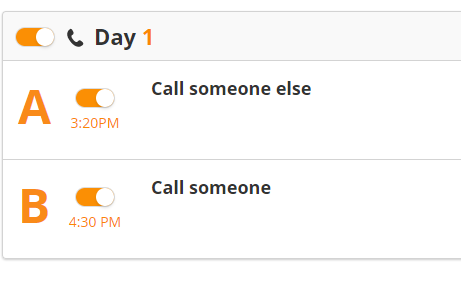
You can use the toggles next to the variant to disable it. For example, you might realize that one email is getting significantly more responses than another. You could disable the variant with less reponses to make sure your Suspects are getting your most effective email.
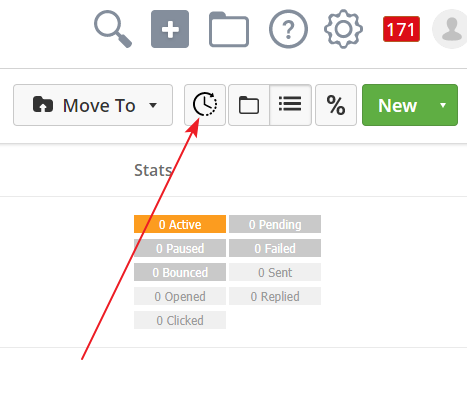
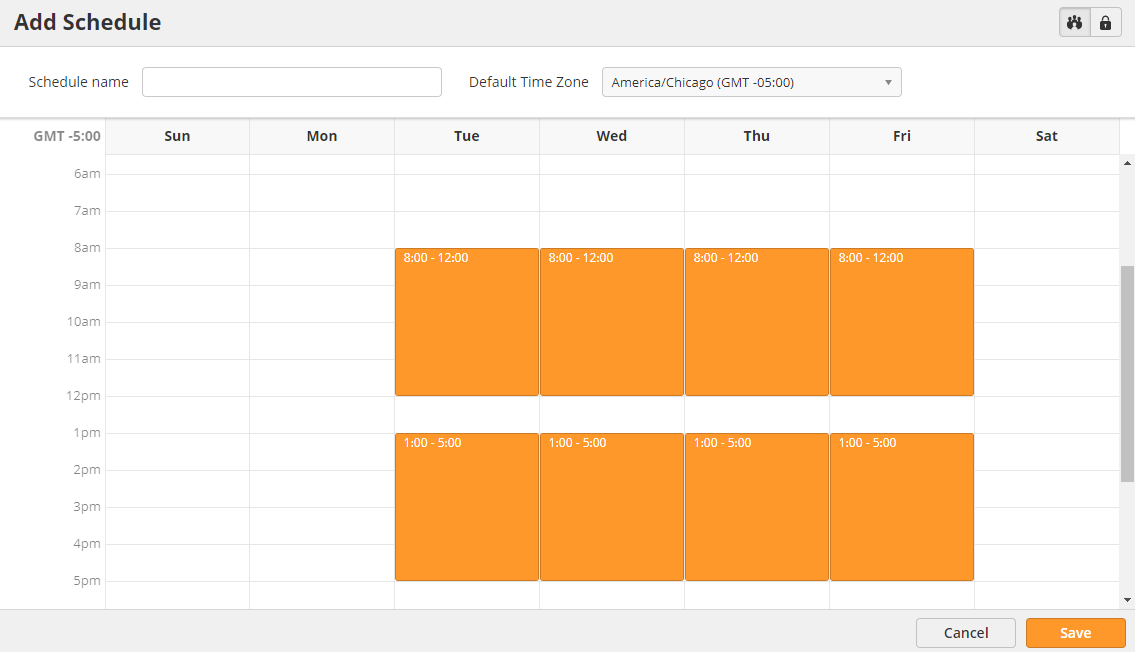
You can control when a Rhythm will perform steps throughout the week using Delivery Schedules. For example, you might want to limit Rhythms to only run from 8am-5pm to make sure emails go out while most people are working.
To create Delivery Schedules,
In the example below, we created a Delivery Schedule that runs every weekday except for Monday, and runs from 8am-5pm while skipping the lunch hour.
When trying to set a time for a Step that is outside of the Delivery Schedule the system will display a prompt as shown below.

Once your Rhythm is ready, you can activate it from the toggle in the upper-left hand corner of the Plan tab.
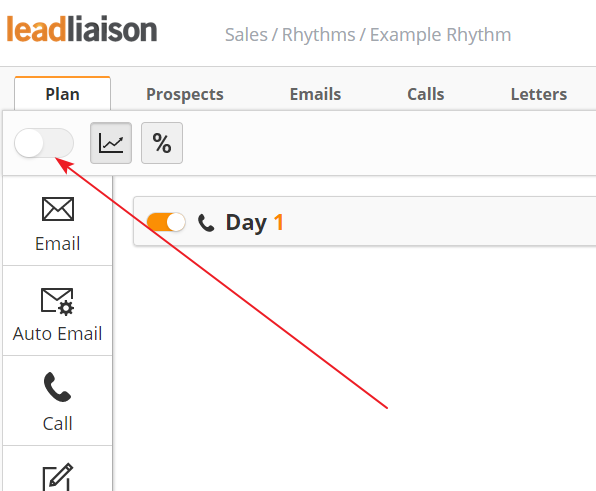
We strongly recommend testing your Rhythms. To do this, change all Steps to Day 1, and order them five minutes apart from each other. Make sure the system sends emails and assigns the proper Tasks.
When testing, make sure you use an email outside of your normal company domain. Some Rhythm functions will not work if you use your work email. If you don't have one already, you can create a test email account with Gmail or Yahoo! for free. |
You can add Suspects in two ways: manually or via import. Add Suspects manually if you have specific Suspects in mind that are already in the Lead Liaison database, and add Suspects via import if you have a large or external List.
To manually add Suspects, click on the Actions button in the top-right corner of the Plan tab.
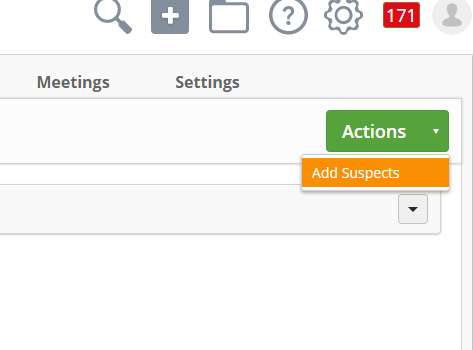
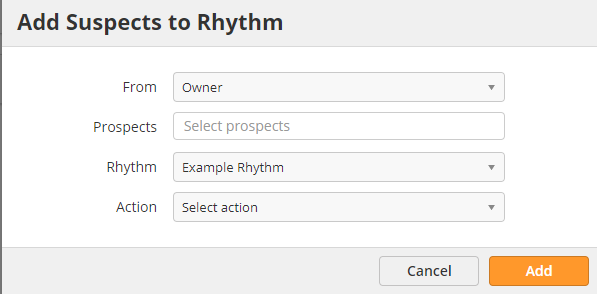
To add Suspects to a Rhythm via Lead Liaison's Import tool, upload a CSV list following the instructions here. On the final step, use the Add to Rhythm drop-down menu to select the appropriate Rhythm.
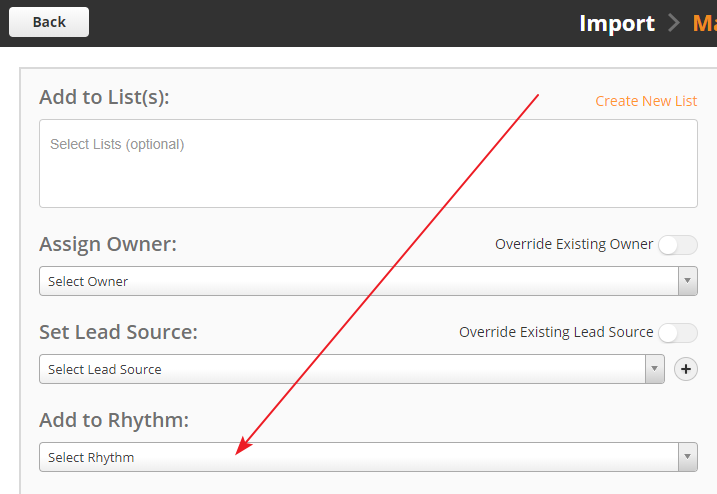
When importing Prospects into a Rhythm, the Prospect will be assigned to the Owner. If there is no Owner, the system will use the Default User instead. |
If you have a ZoomInfo account, you can import Suspects directly from ZoomInfo. To use this feature, you will need to have an active ZoomInfo account. To connect your account to Lead Liaison
Once you have connected the account, you can search ZoomInfo for new Suspects to add to your Rhythm. Then
Click General Search
You can use Named Accounts to quickly search domains from Accounts your own. To set your Named Accounts, navigate to Personal Settings > Personal, and scroll down the Named Accounts section. |
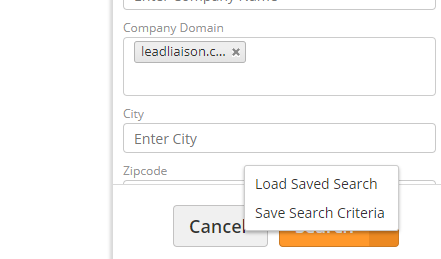
Fill out the form with your search criteria
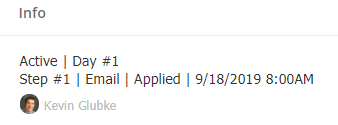
You can manage the Suspects in a Rhythm from the Prospects tab. On this tab, you will see a list of all Suspects within the Rhythm, as well as filters. On each Suspect record, you can see their status, what step they are in, the type of step, the status of the step's action, and the date/time the action is scheduled. Use this feature for high-level troubleshooting of your workflow.
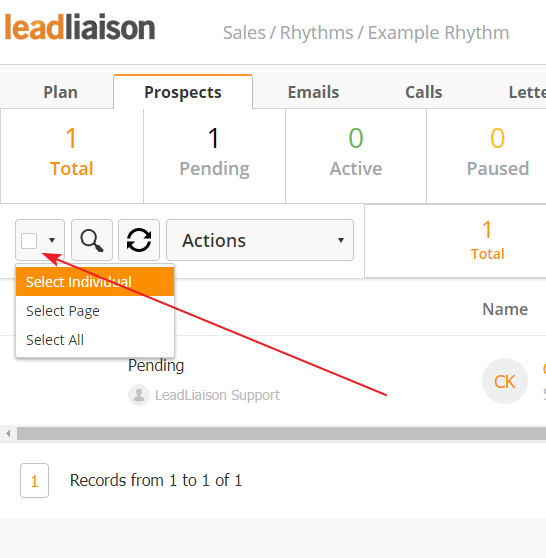
You can also move the Suspects around the Rhythm, pause them, and more. Use the checkbox to select the appropriate Suspects to take action on, and then use the Actions drop-down menu to select the appropriate actions.
You can use the “Shift Actions” option on the prospect level to delay or accelerate applying actions. For example, if an Action is schedule for the 10th and today is the 8th, you could shift the actions forward 2 days to make the actions apply today. |
Emails sent from a Rhythm can occasionally bounce due to various reasons, such as an incorrect email address, full mailbox, etc. When an email bounces the system automatically does the following:
To resume steps in the Rhythm, correct the email address and change the status of the person in the Rhythm to Active.

Updating the person's status in a Rhythm:

Keep in mind that Fulfillment Actions can be triggered when a person's status in the Rhythm changes to Bounced.
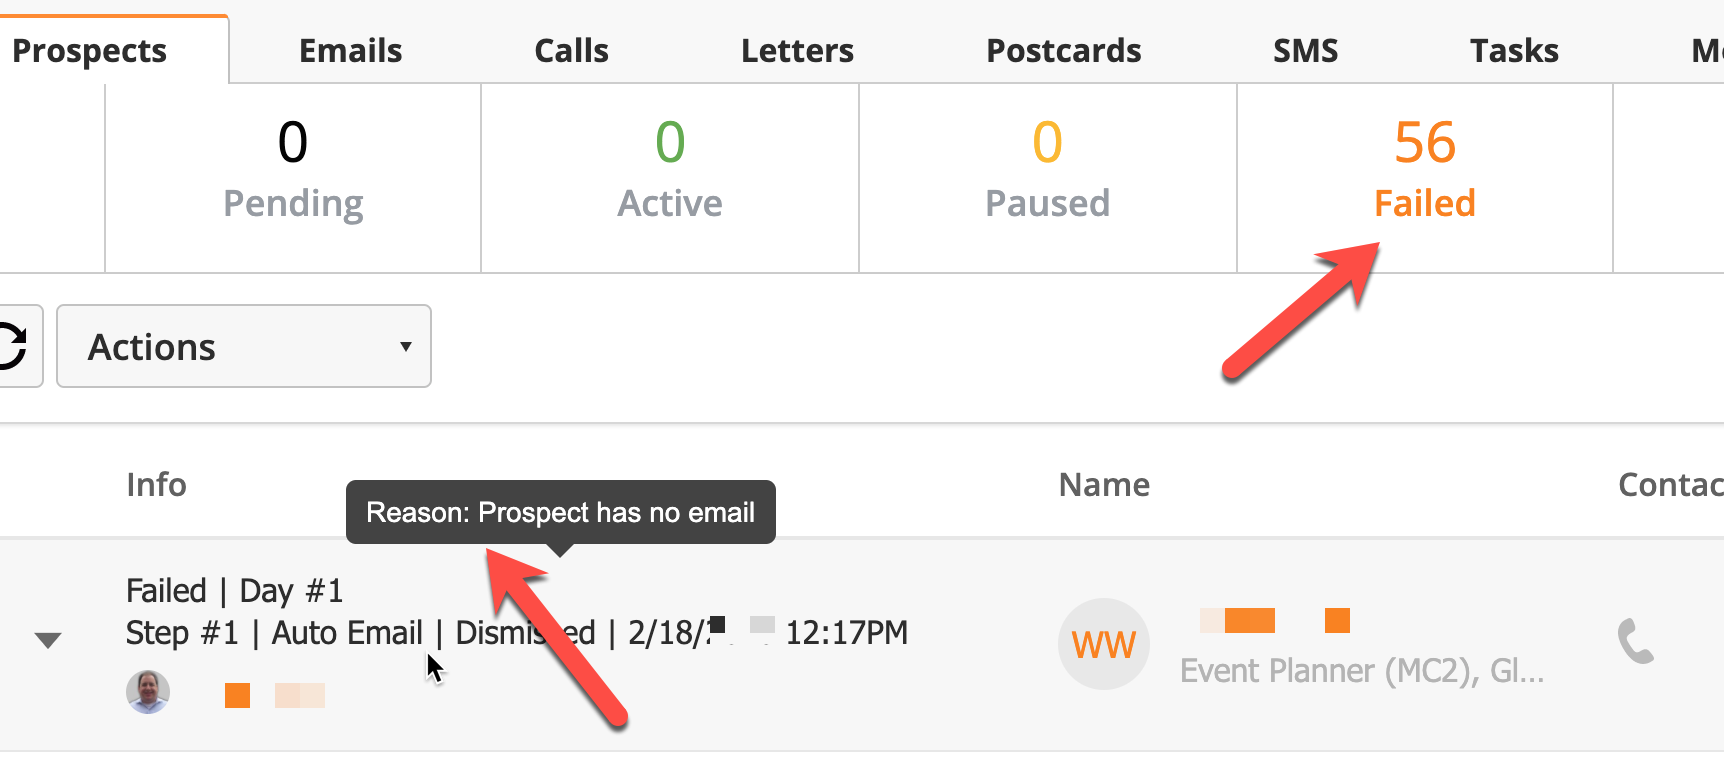
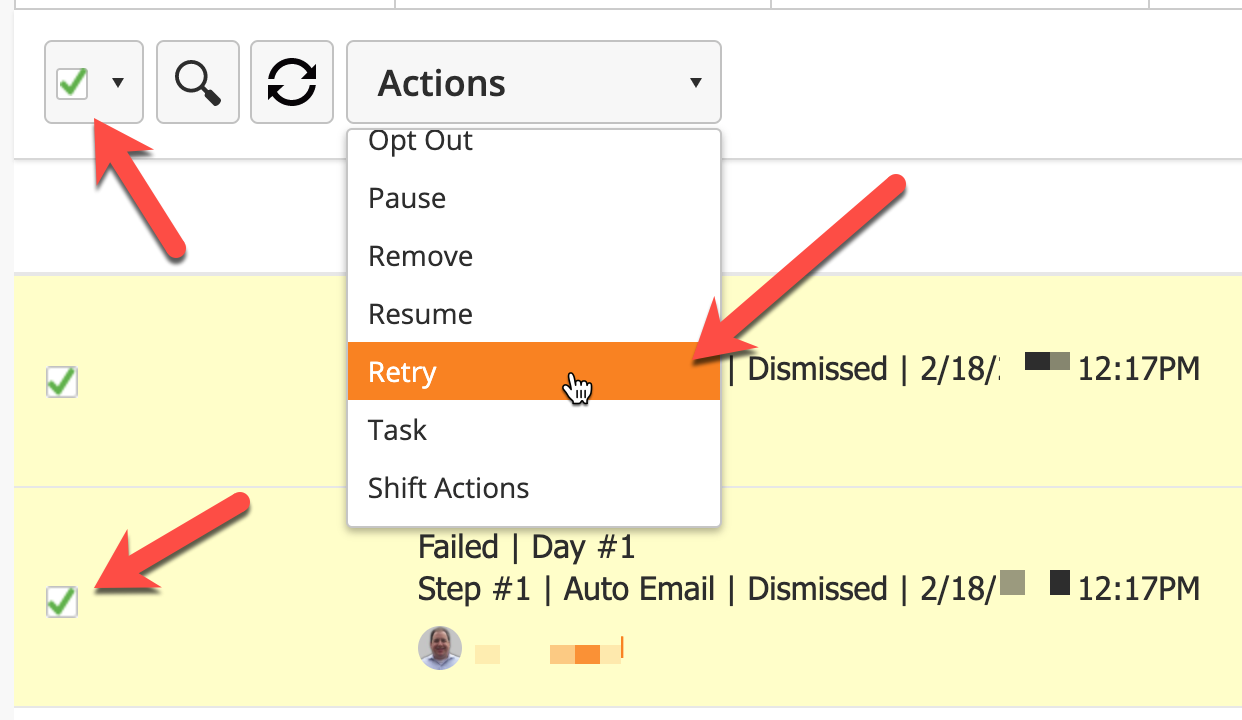
Rhythm emails can fail for various reasons. For example, if the Prospect doesn't have an email address or when an issue occurs with your email account. When an Action fails you'll find it under the Failed status as shown below. Once the issue is cured, you can retry the Action. Do the following to retry the Actions:
You can measure the results of a Rhythm by navigating to Sales > Rhythms and either opening a folder or switching to List view. The last two columns on the right, Progress and Stats, indicate how the Rhythm is doing.
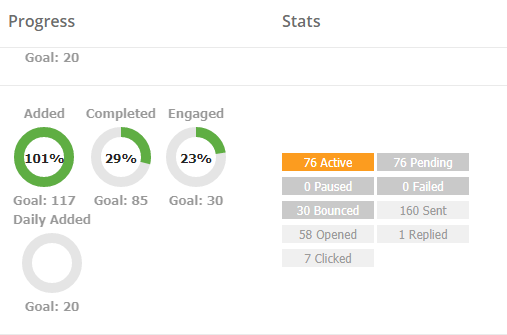
The Progress column shows you the percentage to complete each of your defined goals. Depending on your Rhythm settings, you may not see all four charts.
The Stats column shows you how Suspects are progressing through the Rhythm.
| Error | Cause |
|---|---|
| No action found to schedule | When Suspect is set to have a Rhythm step occur, but no steps were found in your schedule. |
| Rhythm start action already scheduled | When Suspect is set to start the Rhythm, but is found to already be present |
| Rhythm start action not found | When no action is found to start the Rhythm steps |
| No available next actions to schedule | When a Suspect is still marked as active in the Rhythm, but no further steps can be found |
| Current action not found and No action found to schedule | When a Suspect is to perform the next step, but the step has been deleted, and the previous step is also deleted so it can't locate where they should be in the schedule |
| No active variant found | When a step is set to have multiple variations, but no variations were found |
| Rhythm has no actions | When the Rhythm has no steps |
| User not found | When the user assigned to the Suspect no longer exists |
| Lifecycle Stage protection | When your using the Lifecycle Stage setting, and the Suspect becomes or is part of that Lifecycle |
| Unable to schedule task | When an error occurs trying to schedule the Suspect for the next Rhythm step |
| Prospect has no email | When Suspect has no email recorded on their profile |
| Prospect marked as Email Opt Out | When Suspect has been flagged to opt out of emails |
| Prospect marked as Bounced | When Suspects email address has hard bounced |
| User not connected to active email account | When there is no Sales Enablement account setup for the Suspects assigned User |
| Linked object not found | |
| Postcard not found | When the configured/requested Postcard no longer exists |
| HWL not found | When the configured/requested Hand Written Letter no longer exists |
| Prospect address not valid | When the Suspects address is considered invalid |
You can also check the stats of the Step Actions within a Rhythm. For example, you might want a more detailed overview of how your Suspects are progressing. To view stats for Step Actions, open the Rhythm and use the navigation bar at the top of the screen.

You can filter down stats by clicking on the objects directly below the navigation bar. For example, if you are on the Email tab and want to only see Suspects who have replied to an email, you can click on the Replied button as show in the example below.

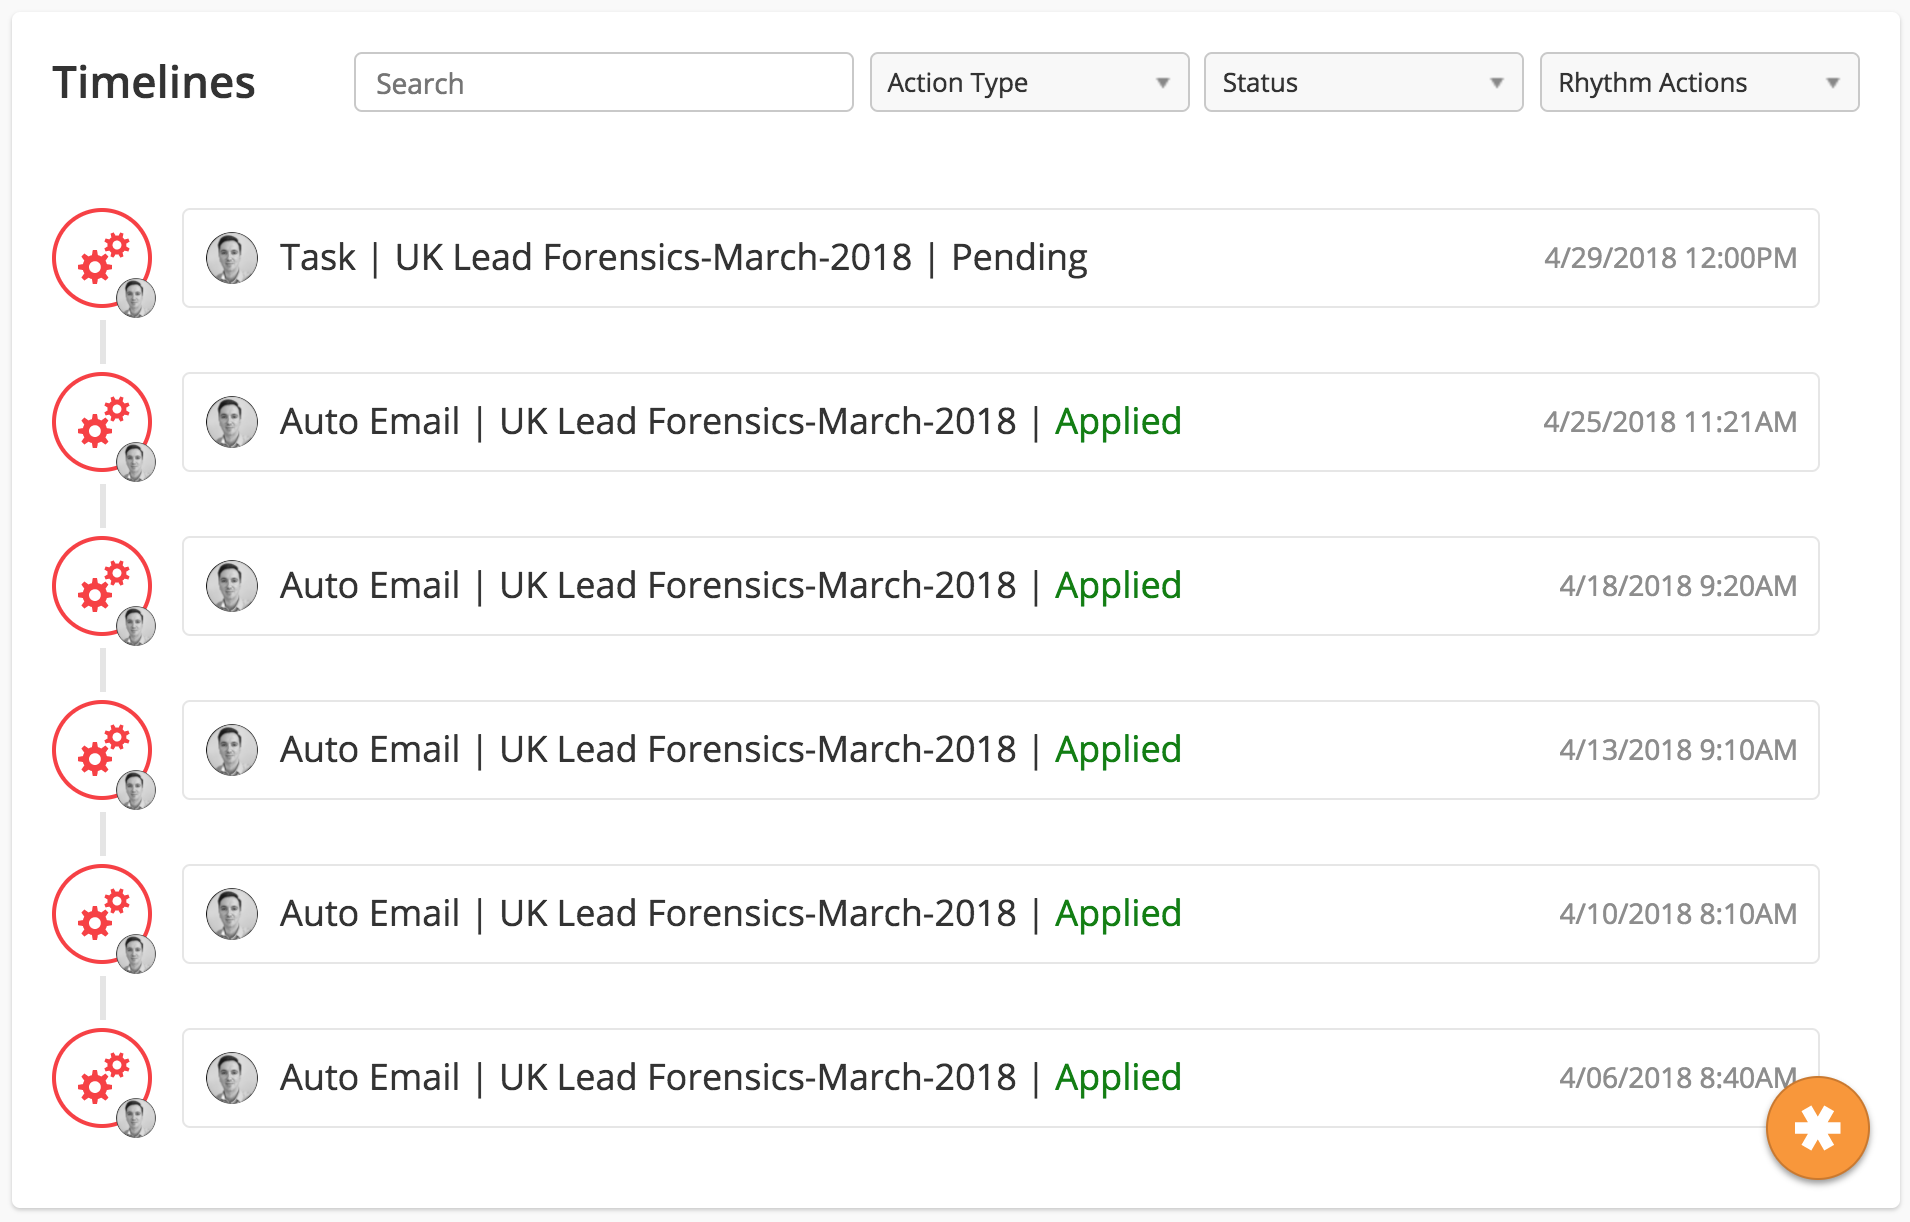
There may be times when you need to audit activity/Steps on a Suspect. A full list of completed and upcoming Rhythm Steps can be found in the Suspect's Profile timeline.
To view the list of Rhythms the Suspect is part of:
|
|
To view completed and and upcoming Steps applied by a Rhythm on a Suspect:
To view email engagement from your Rhythm:
