Overview
Emails are one of the best ways to reach your clients. You can create emails within Lead Liaison to send to lists, or to send via fulfillment action or automation. To get started, create a new email.
Creating a New Email
To create an email do the following:
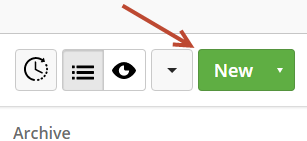
- Navigate to Content > Emails.
- Click the New button.
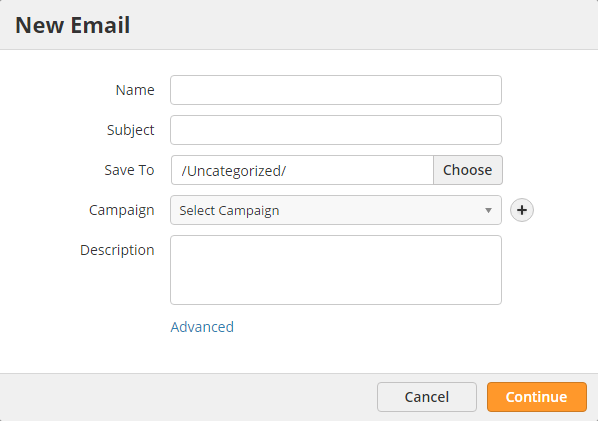
- Complete the information in the popup.
- Name = Internal name for the email. This is never seen by your prospects.
- Subject = Subject of your email.
- Save To = Folder you want to save your email into.
- Campaign = Campaign you want to add the prospect into when they click a link in the email. Click the plus symbol next to the field to create a new campaign on the fly.
- Description = Optional description of the email.
Using the Visual Designer
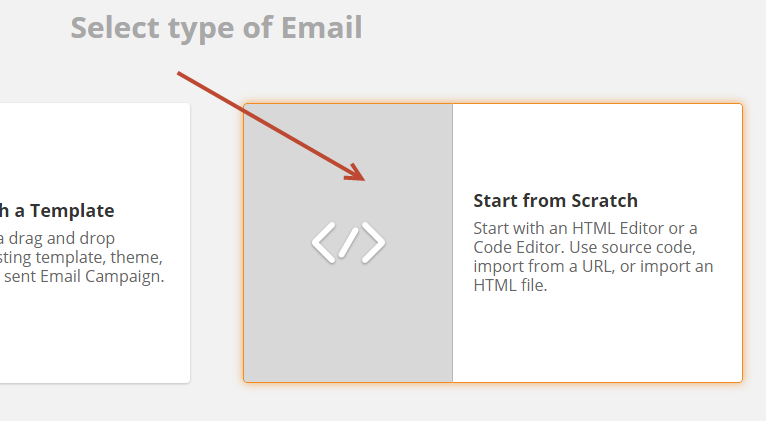
The visual designer lets you create an email by using drag-and-drop elements. To use the visual designer, select Start with a Template.

Using the WYSIWYG Editor
- Click Start from Scratch.
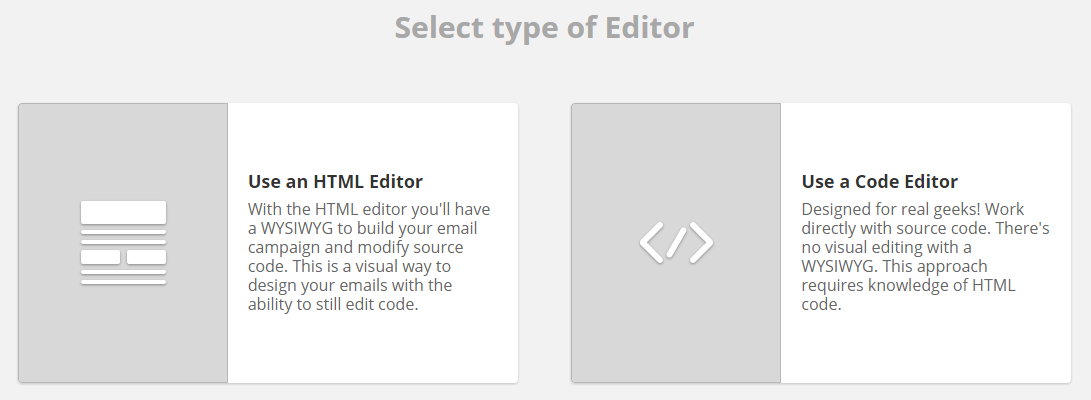
- Select Use an HTML Editor.
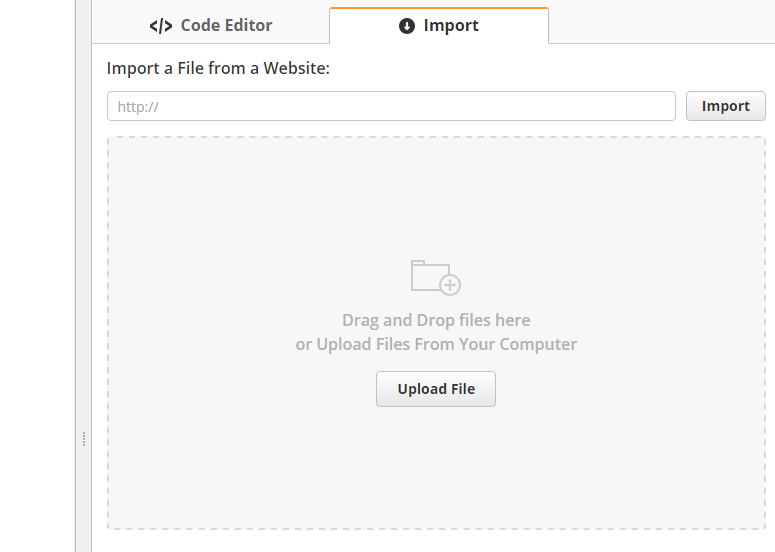
Using the Code Editor
- Click Start from Scratch.
- Select Use a Code Editor.
- If you have HTML code you can copy/paste it into the Code Editor tab. Alternatively, if you have a file or web page to pull the code in from you can use the Import tab.
Importing HTML from a 3rd Party Tool
When importing HTML/CSS from a 3rd party tool, such as MailChimp, it might be necessary to inline your CSS before adding the code into Lead Liaison. Use many of the free tools available to convert your HTML to inline CSS. Here are three tools to use: