Step 3 - Schedule and Run
Overview
The Schedule and Run page, Step 3 of the Automation Configuration Wizard, allows marketers to run campaigns immediately or pre-configure campaigns and schedule them to run at a later date. The ability to schedule campaigns for execution at some point in the future is handy as it enables marketers to run campaigns in a set-it and forget-it mode. For example, say it's mid-January and your company is discussing the possibility of attending a trade show scheduled for March 15th. If you know you'll be following up with prospects two days later then you can schedule the automation campaign to run on March 17th. As a marketer you're instantly prepared and can share your strategy ahead of time with the rest of your organization.
Contact List Creation
Contact Lists are built automatically if the automation has a Send Email action in it or if the "Build List" check box is checked (under "Show Advanced Settings"). Contact Lists can be used for email marketing or nurturing purposes. If a prospect is added to a Contact List then the prospect will see that list as an option to unsubscribe from when the click the Unsubscribe link embedded in an email.
Settings
Below is a list of the specific settings on the Schedule and Run page.
- Matched
- Only once = Runs the automation one time only and never again. This action mode might be helpful when trying to create a segmentation from your existing database, perhaps profile your database via lead scoring or mass update values in your database.
- Continuously = Runs the campaign at the specified "Frequency" with a Start and End period defined. This action mode might be helpful when trying to create a Dynamic Segmentation or run a lead nurturing program that's always working for sales/marketing to nurture prospects.
- Affected = Total number of people (Known and Unknown) who will be affected by your campaign if you activated the campaign now. Click the number and a preview table will open towards the bottom of the page and display all Known people (when Lead Liaison has a name and/or email address) by default. Change the value under the "Type" column to view all (Known/Unknown) people affected or just Known or Unknown.
- Ignored = Total number of people (Known and Unknown) who will not be affected by your campaign. Adding the Affected and Ignored numbers together is the total number of prospects for your account in Lead Liaison's database.
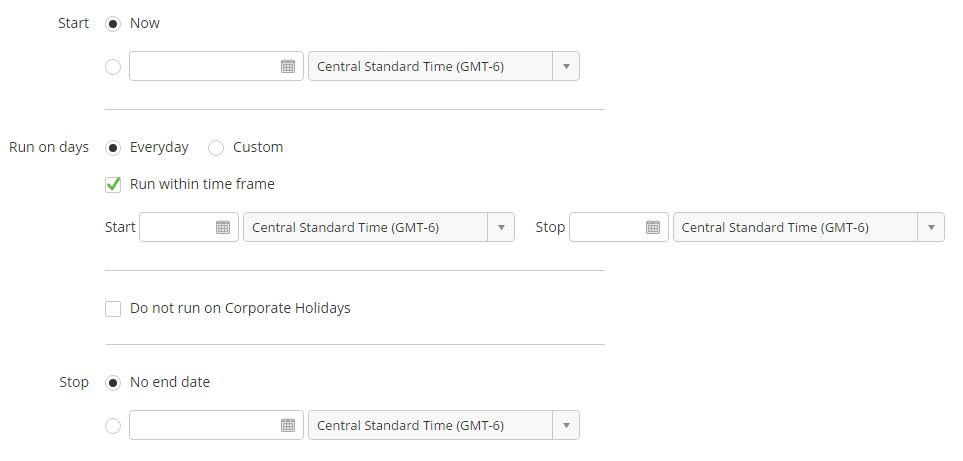
- Start = The day and time in which to start running the campaign. To run the campaign now select the "Now" radio button. Make sure to select the time zone in which to start the campaign. Lead Liaison loads the default time zone setting for your user account. To change your default time zone go to Home > Setup profile.
- Run on days = Runs the automation every day or on certain days. To select certain days choose the "Custom" radio button.

- Run within time frame = Runs the automation within a certain time frame. Click the "Enable" check box to enter a Start and Stop time. This setting is helpful if you're running rules, such as for distributing leads, and you only want the rules to run during the work week and during work hours.

- Do not run on Corporate Holidays = Skips running a process on "Corporate Holidays", which is a setting. See this description on Corporate Holidays for more information.
Note: Turning on the Do Not Run on Corporate Holidays setting will not pause the actions in an automation. It will only affect adding new people into the Automation i.e. if this setting is enabled, no new Prospects will be added to the workflow on that day. - Frequency (see screen shots below)
- Real-Time = Runs the campaign about every minute.
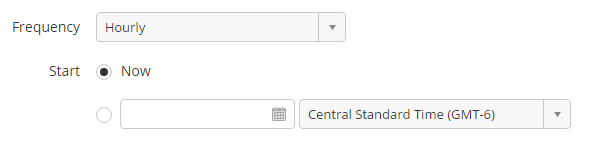
- Hourly = Runs the campaign hourly. Specify during which days and hours to run.
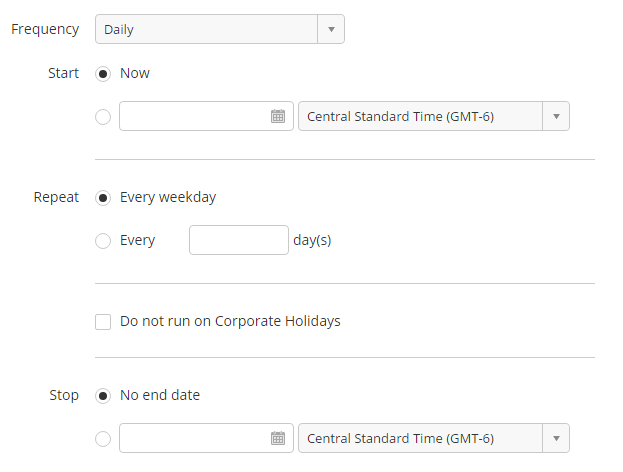
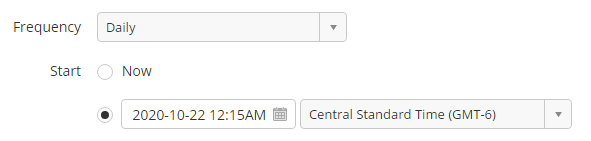
- Daily = Runs the campaign daily. Specify only running on the weekday or running every other X day(s).
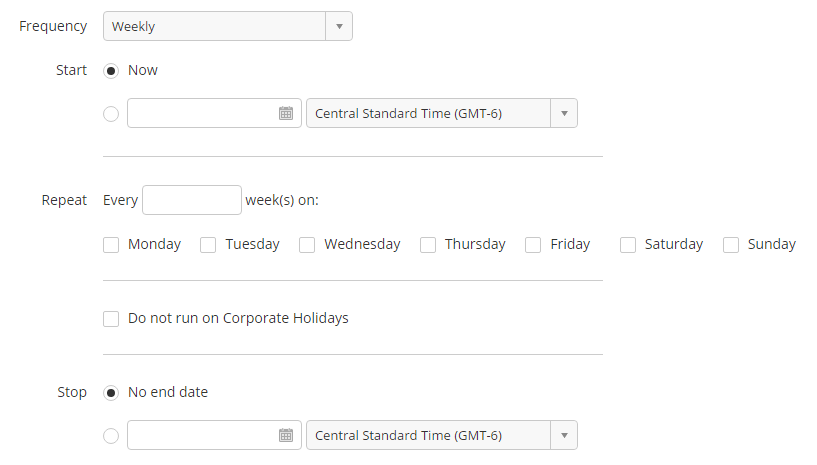
- Weekly = Runs the campaign every X week(s) on specific days.
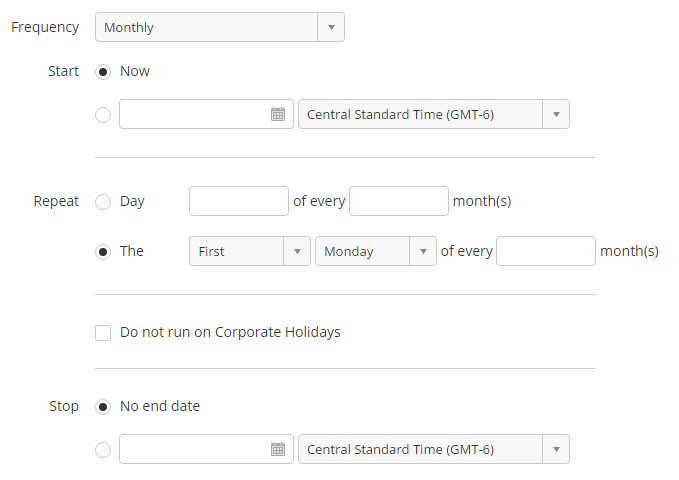
- Monthly = Runs the campaign on a specific day (1 through 31) of every month or the first, second, third or fourth Monday, Tuesday, Wednesday, Thursday, Friday, Saturday or Sunday of every month.
Changing from Running Only Once to Continuously
When changing the run-time frequency of an automation from Only Once to Continuously, the next automation start will be from the last time the automation ran. For example, if you run an automation at 3PM and run it "Only Once", then change it to run Daily at 10PM, the automation will run next at 3PM the next day, not at 10PM.
Real-Time
Availability of Real-Time Option
The Frequency Type of "Real-Time" and "Hourly" is available only when any of the following criteria is added to an Automation:
- Future Events > Activities > ALL
- Future Events > CRM > ALL
- Filter Criteria > Attributes > Create Date (or any Date and Date Time standard/custom field)
- Filter Criteria > Attributes > Member of List
- Filter Criteria > Historical Events > Website Activity
Hourly
Daily
Weekly
Monthly
Setting Start/End on Time
When specifying the start and/or end time on an automation the system will show the time based on your current timezone settings after the page loads. For example, if you entered 5:16PM Eastern Standard Time (GMT-5) when you're initially setting up an Automation, and your timezone setting was Eastern Daylight Time (GMT-4), then the time that will be loaded on Step 3 once the page is reloaded (after a save, future edits) will be 6:16PM (GMT-4), which is shown according to your timezone setting. The time shown on this page whenever another user loads it will be according to the user's time zone settings in their profile.
Advanced Settings
Lead Liaison builds a contact list for every automation created only when the Send Email action is present in Step 2. The Advanced Settings section displays additional settings for your campaign. If a Send Email action is not present in your automation then a "Build List' check box will be visible. Checking the Build List check box shows additional fields that apply to the Contact List created for the campaign. By default, information used to setup your Lead Liaison account is used.
Let's look at an example to better understand how these settings are used. Say you're building a lead nurturing campaign that continuously runs and has a Send Email action as part of the campaign. The Send Email action will use the Lead Owner's name and email address by default; however, if you select "Use Default" (settings within Send Email action) then the information in the Advanced Settings section will be used when sending an email message to your prospect. In this example, the email will be sent from Bob Sanders with an email address of info@ourcompany.com if "Use Default" was set in the Send Email action.
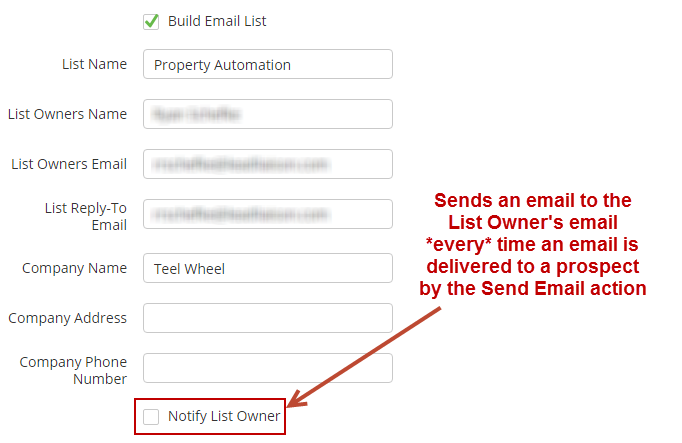
To be alerted every time an email message is sent to a prospect by your campaign check the "Notify List Owner" check box.
Take Caution
If several prospects will receive email messages then multiple notification emails will be sent. We suggest only checking the notification box if you're confident only a small number of prospects will be affected/sent emails by your campaign; otherwise, you'll get inundated with emails from the system.
Can't See the Advanced Settings Section?
Once a Contact List has been built (either automatically or by using the Built List option) the Advanced Settings section will no longer appear.
Build List option appears when no Send Email action exists in the Automation
Default list options will appear when a Send Email action exists in the Automation
When using Segmentation the Build List option will always be present under Advanced Settings. Contact Lists will not be built by default with Segmentation unless this setting is checked.
![]()
© 2021 Lead Liaison, LLC. All rights reserved.
13101 Preston Road Ste 110 – 159 Dallas, TX 75240 | T 888.895.3237 | F 630.566.8107 www.leadliaison.com | Privacy Policy