Overview
There are essentially two ways to use email messages created in Lead Liaison; send an email to a list and send emails through a nurture workflow. Sending emails to a list is a common practice for sending out your company newsletter. When sending emails to a list the email messages will be sent from one person. When sending emails through lead nurturing email messages may be sent from different people, such as the Lead Owner. These instructions show you how to get started with both use cases.
Sending a One-Off Email
- Create an Email following the instructions here.
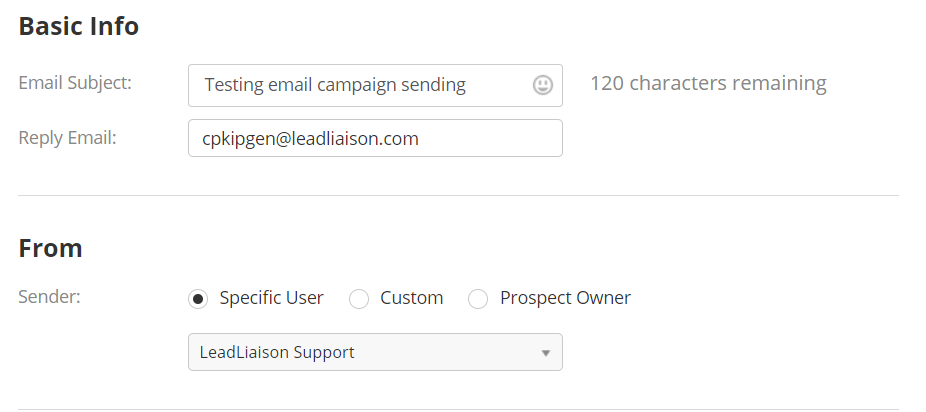
- Confirm the subject, Sender, and Reply email.
- If you have multiple Email fields, select which to use.
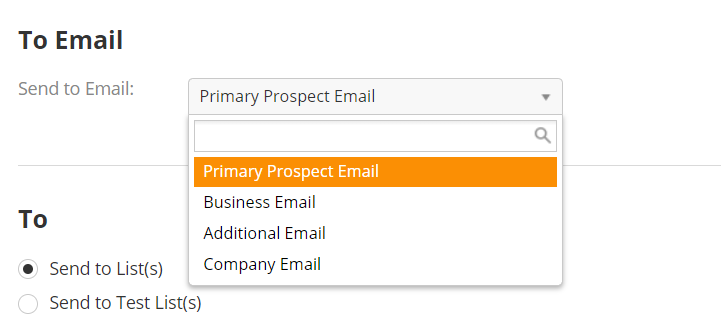
- Select how to send the email.
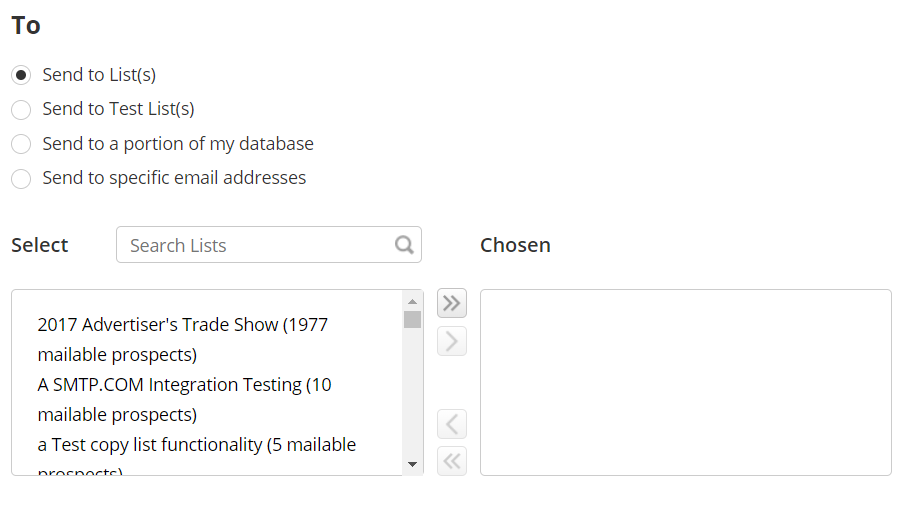
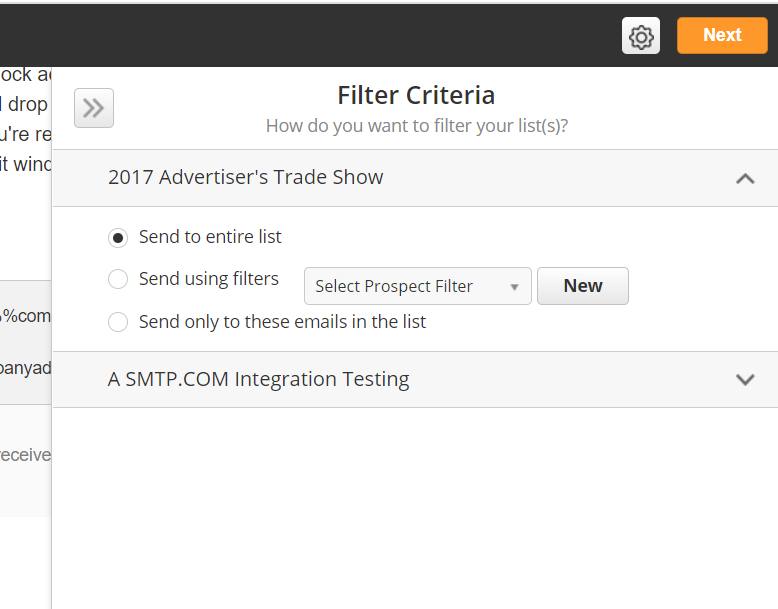
- Send to List(s) – send to one or more marketing email Lists; select in boxes below.
- Send to Test List(s) – send to one or more test Lists; select in boxes below.
- Send to a portion of my database – create a new marketing email List using Filters.
- Send to specific email addresses – manually enter the email address for sending; select a List to add the emails into or select the One-Time Emails List.
Send to every List that should be included at the same time. If a Prospect is on multiple Lists, they will only receive the email one time as long as you send to both Lists at once. For example, if you selects Lists A and B, the prospect will get one email. If you select List A and the later send the same email to List B, the Prospect will get the email twice.
Every time you send to a portion of your database, the system creates a new marketing email List. If you need to use the same filter criteria again, use the previous List or the system will create duplicates.
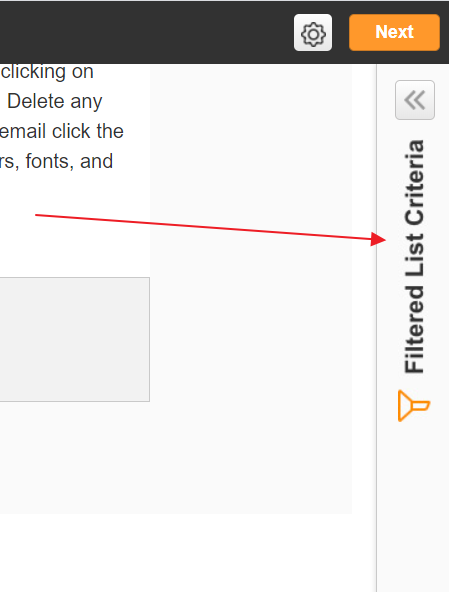
If you've selected Send to List(s), you can also choose to apply filters to your List. For example, you may wish to only send to people in a certain state/country, or might want to apply a Saved Filter. To Filter your List, select Filtered List Criteria on the right side of the screen. You can apply different filters to different Lists.
- Choose to send the Email now or send later.
- Optionally adjust Advanced Options
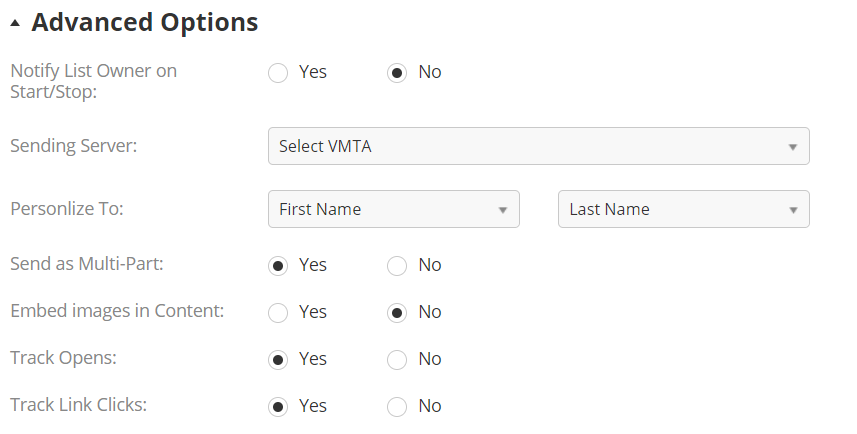
- Notify List Owner on Start/Stop – send the List Owner a notification when the first and last email are sent.
- Sending Server – if your account has multiple VMTA providers, you can select which to use here.
- Personalize To – adjust metadata.
- Send as Multi-Part
- Embed Images in Content – directly embed images instead of loading remotely.
- Track Opens – disable for deliverability to high-security servers.
- Track Link Clicks– disable for deliverability to high-security servers.
Embedding images will force them to load when the user opens the email. On most email clients, this will allow them to see images without having to give permission first. However, it makes the email more likely to be blocked by hight-security spam filters and increases the size of the email.
- Click Next.
- Review your email one last time.
- Click Schedule.
Once you schedule, the email will be sent within 1 minute. Make sure the email is correct before you schedule it!
Send Email through Automation
You can use Fulfillment Actions and Automations to automatically send your emails to prospects. For example, you might want to send an email in response to filling out a form. You might also want to build an email drip campaign for prospect nurturing.
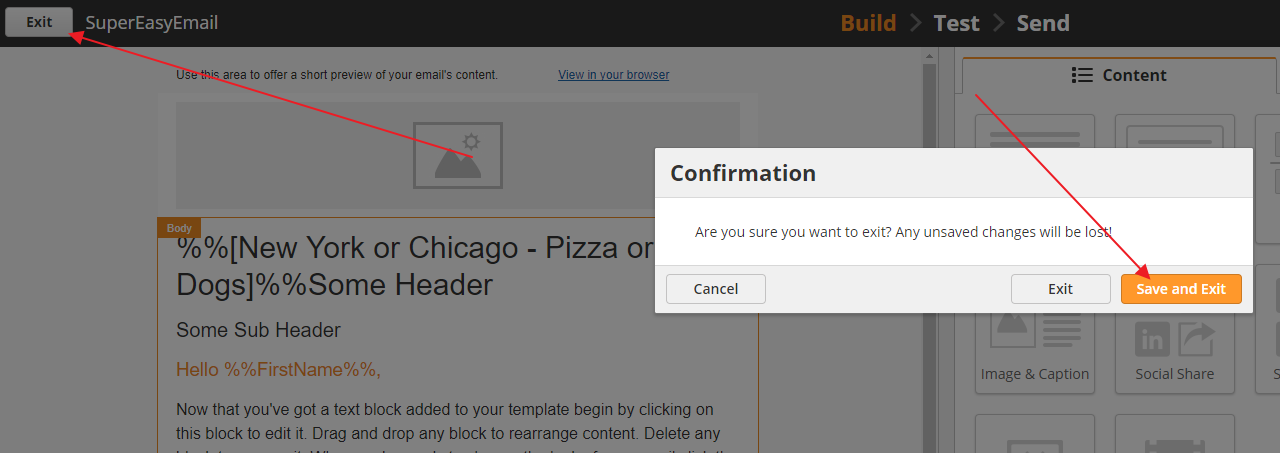
If you want to use this email in a Fulfillment Action or Automation, simply click the Exit button and Save and Exit.
Once the email is saved, it will appear in the drop-down menu for the Send Email action in Fulfillment Actions and Automations. Learn more about Fulfillment Actions and Automations from here.
Configuring the vanity URL used for tracking in Email
By default, when you send emails using Automation or Once off sending methods they will have open and click tracking enabled. This means links will be rewritten so our server can properly log and track when they are accessed.
By default the links will appear as 'https://email.leadliaison.com/xxxxxxxxxx'. We now offer the ability to customize this so the tracking appears to come from your domain. To customize the domain you need to have access to your DNS settings.
- Create a new DNS record that is unused such as redirect.yourcompay.com as a CNAME type
- Point the CNAME to email.llanalytics.com
- Contact support and let them know you created the CNAME and wish to use it in your emails
Once you contact support, they will validate the CNAME is setup properly, and configure the back end so your emails going forward will use that Vanity URL for the tracking.
SSL / HTTPS
By default, Vanity URL's are done using HTTP. If you desire it to be HTTPS additional setup steps and fees will be required. Contact your Sales Rep for more information.