Lead Liaison / Captello integrates with Oracle Eloqua to send lead capture results and event metadata into Eloqua Campaigns for further processing.
| Table of Contents |
|---|
Installing the Oracle Eloqua App
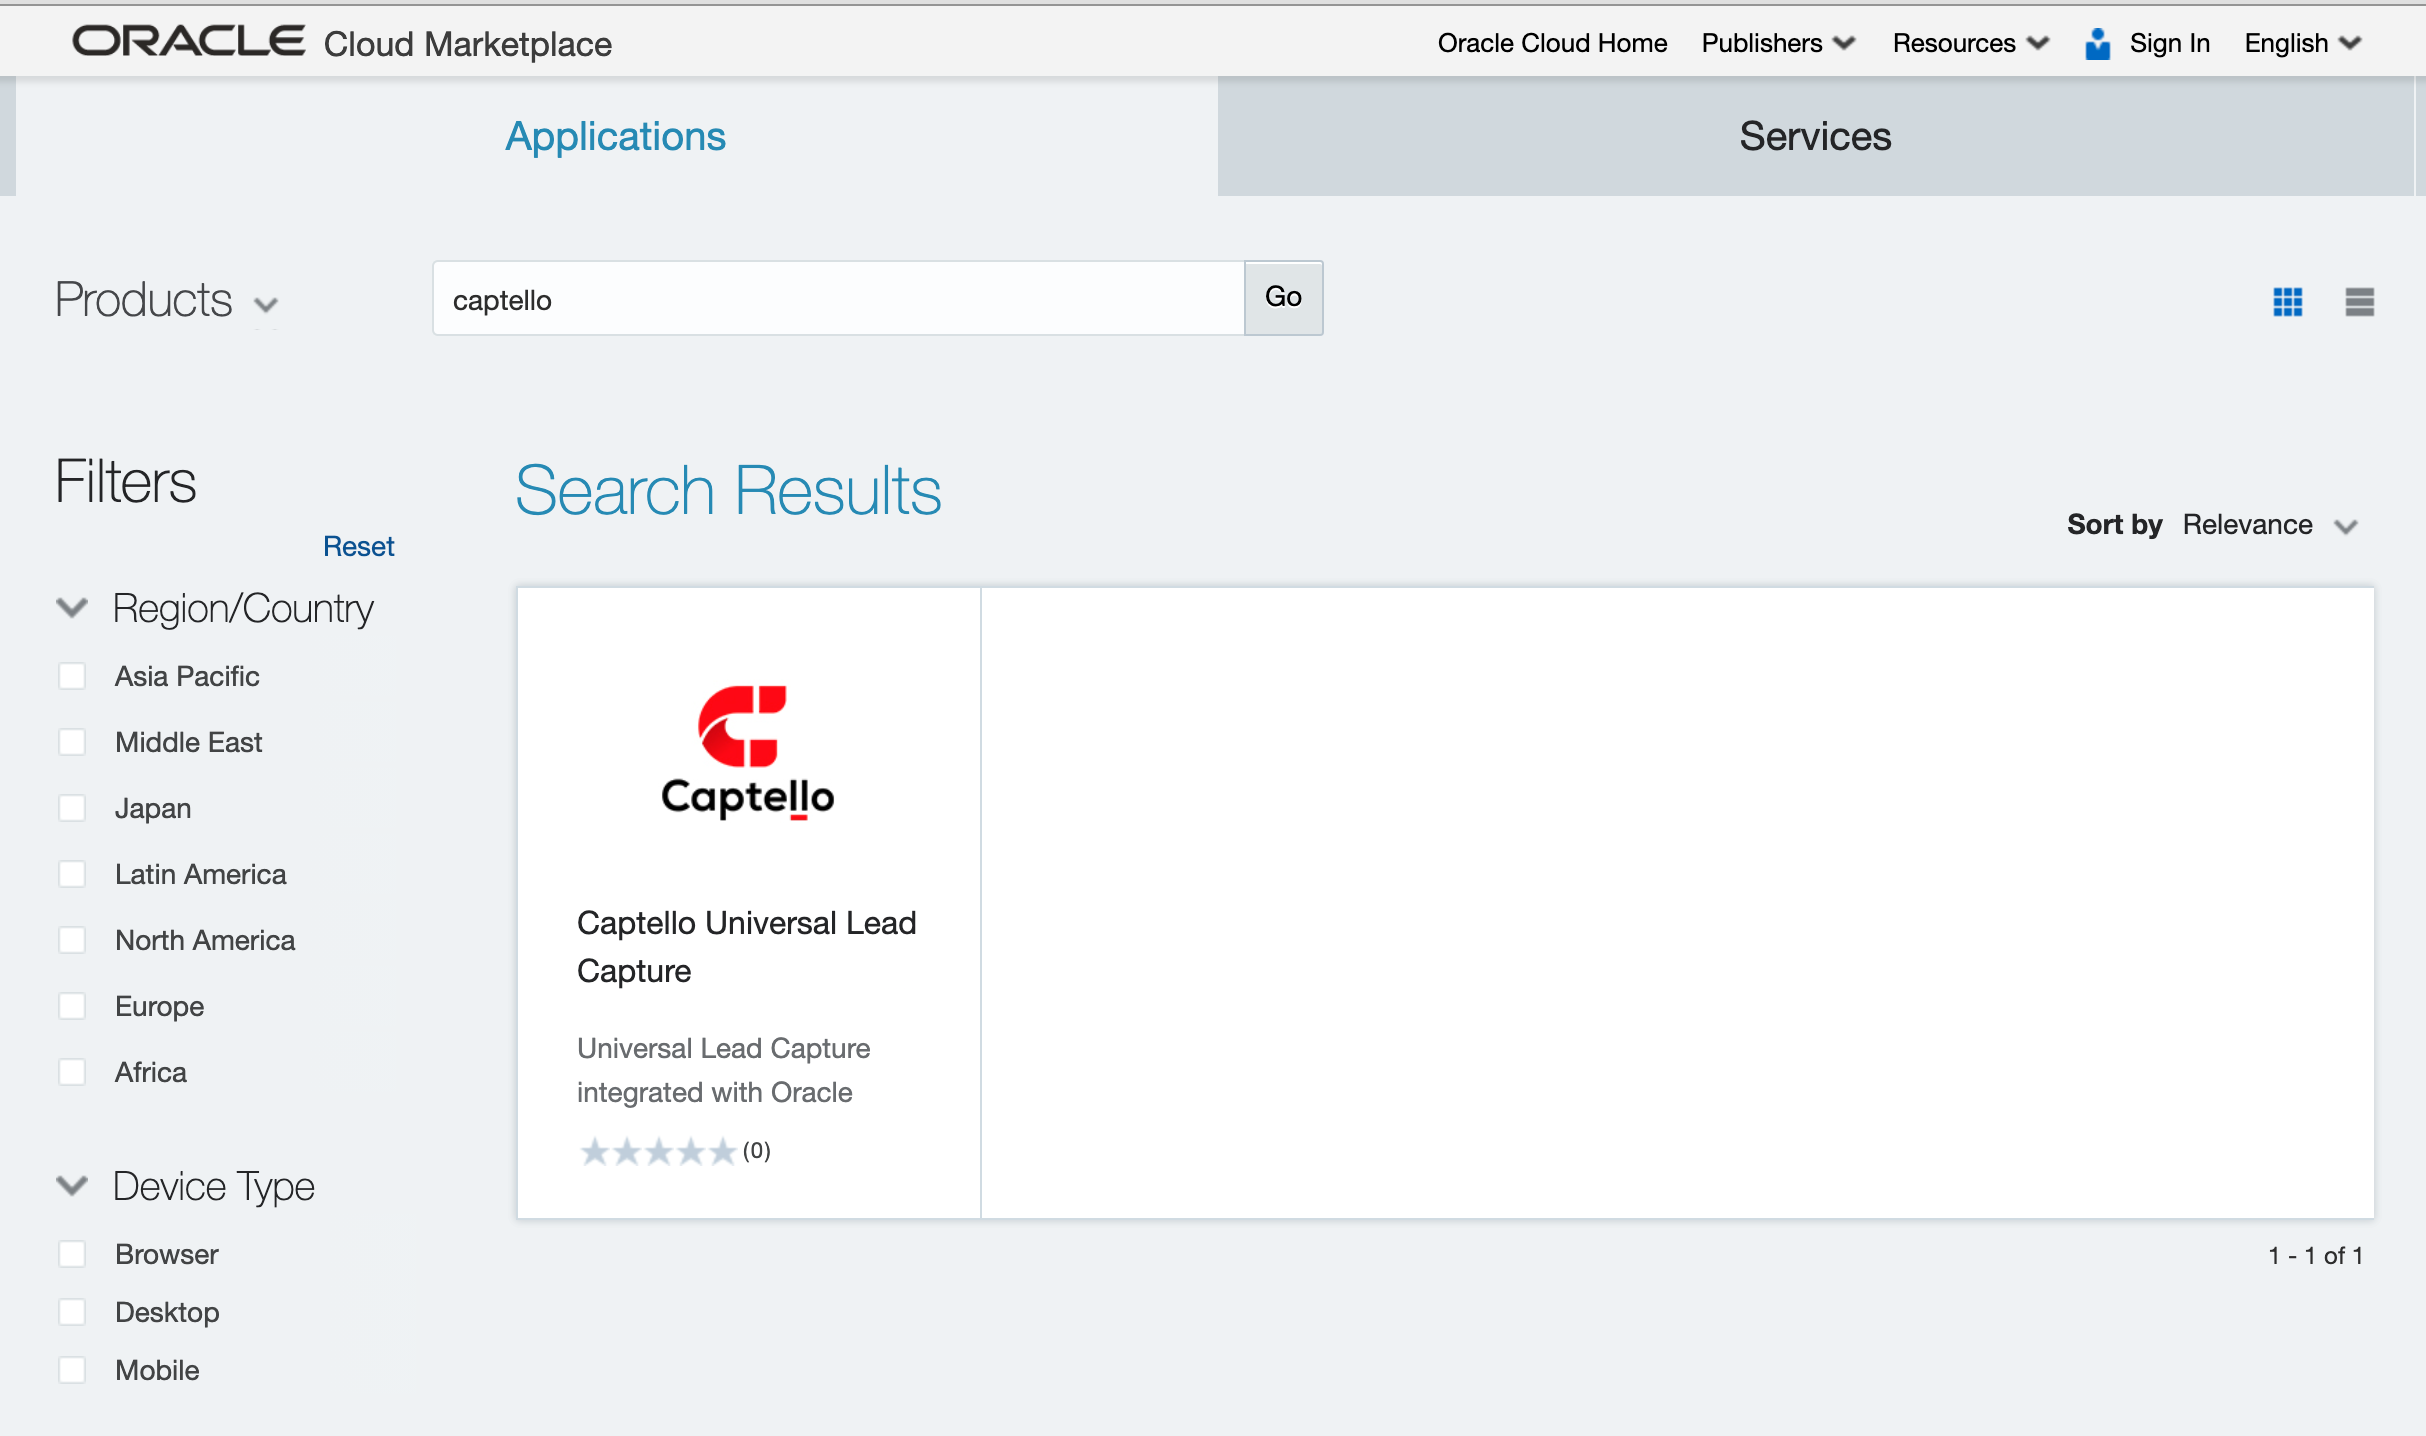
The application is available on the Oracle Cloud Marketplace.
Visit the Oracle Cloud Marketplace and search for “captello” as shown below (or use this direct link):
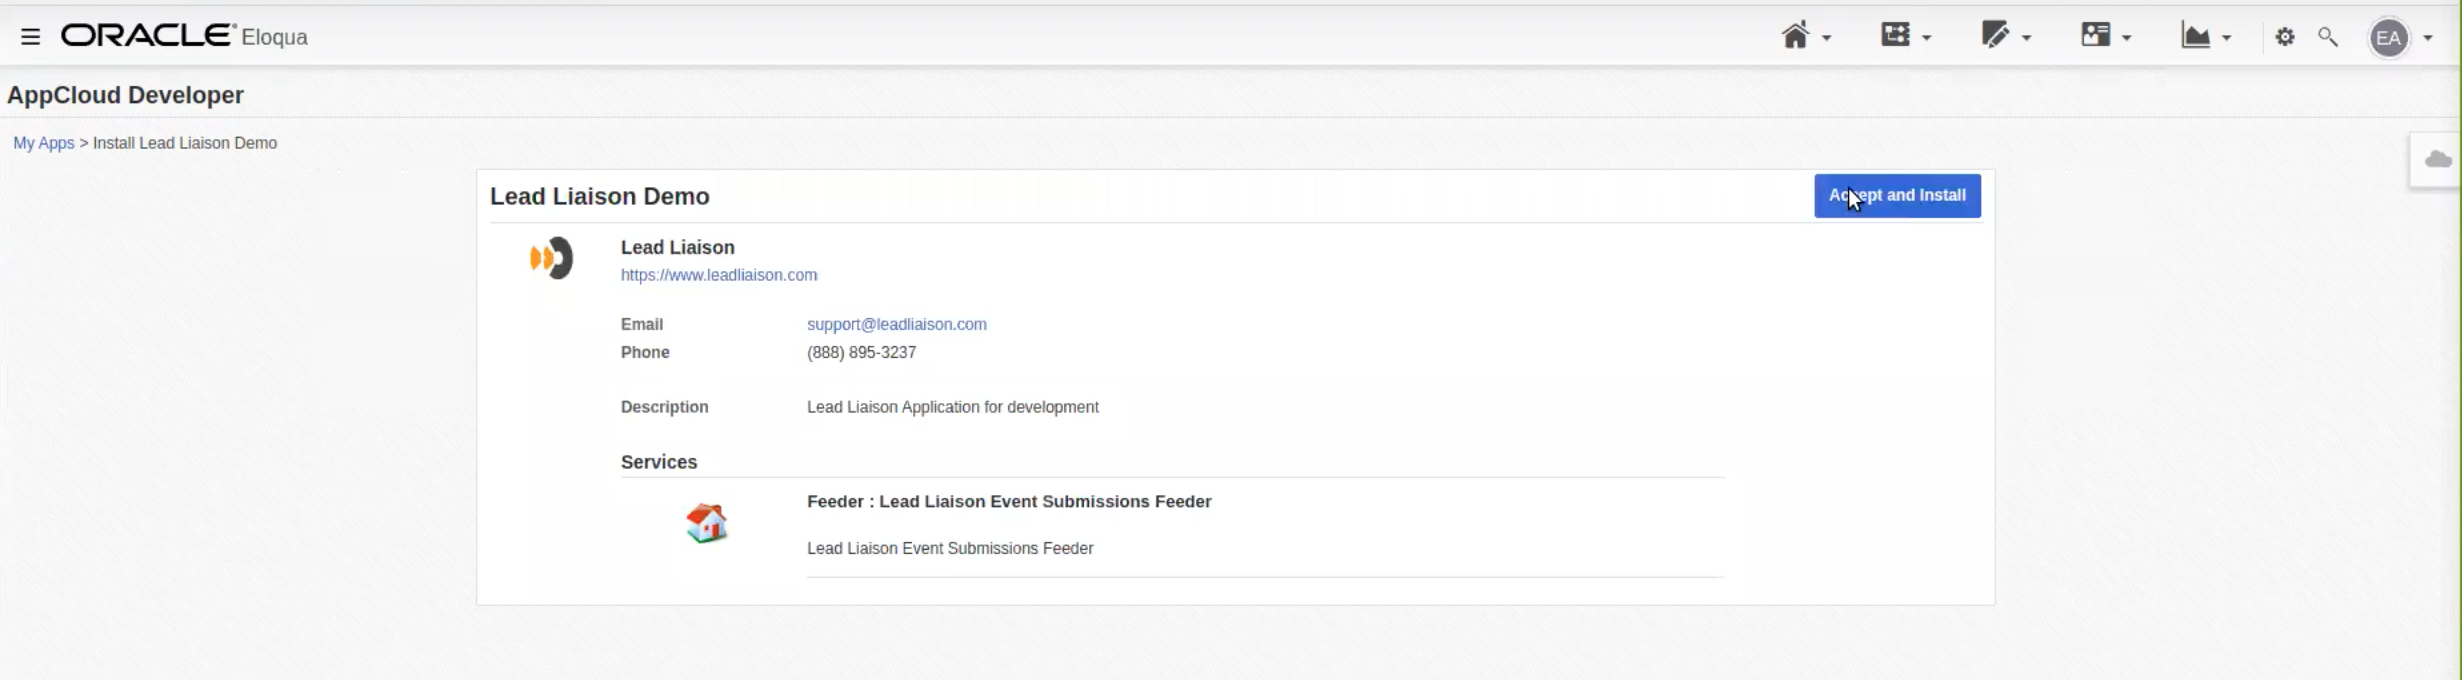
Begin the installation by clicking the Accept and Install button.
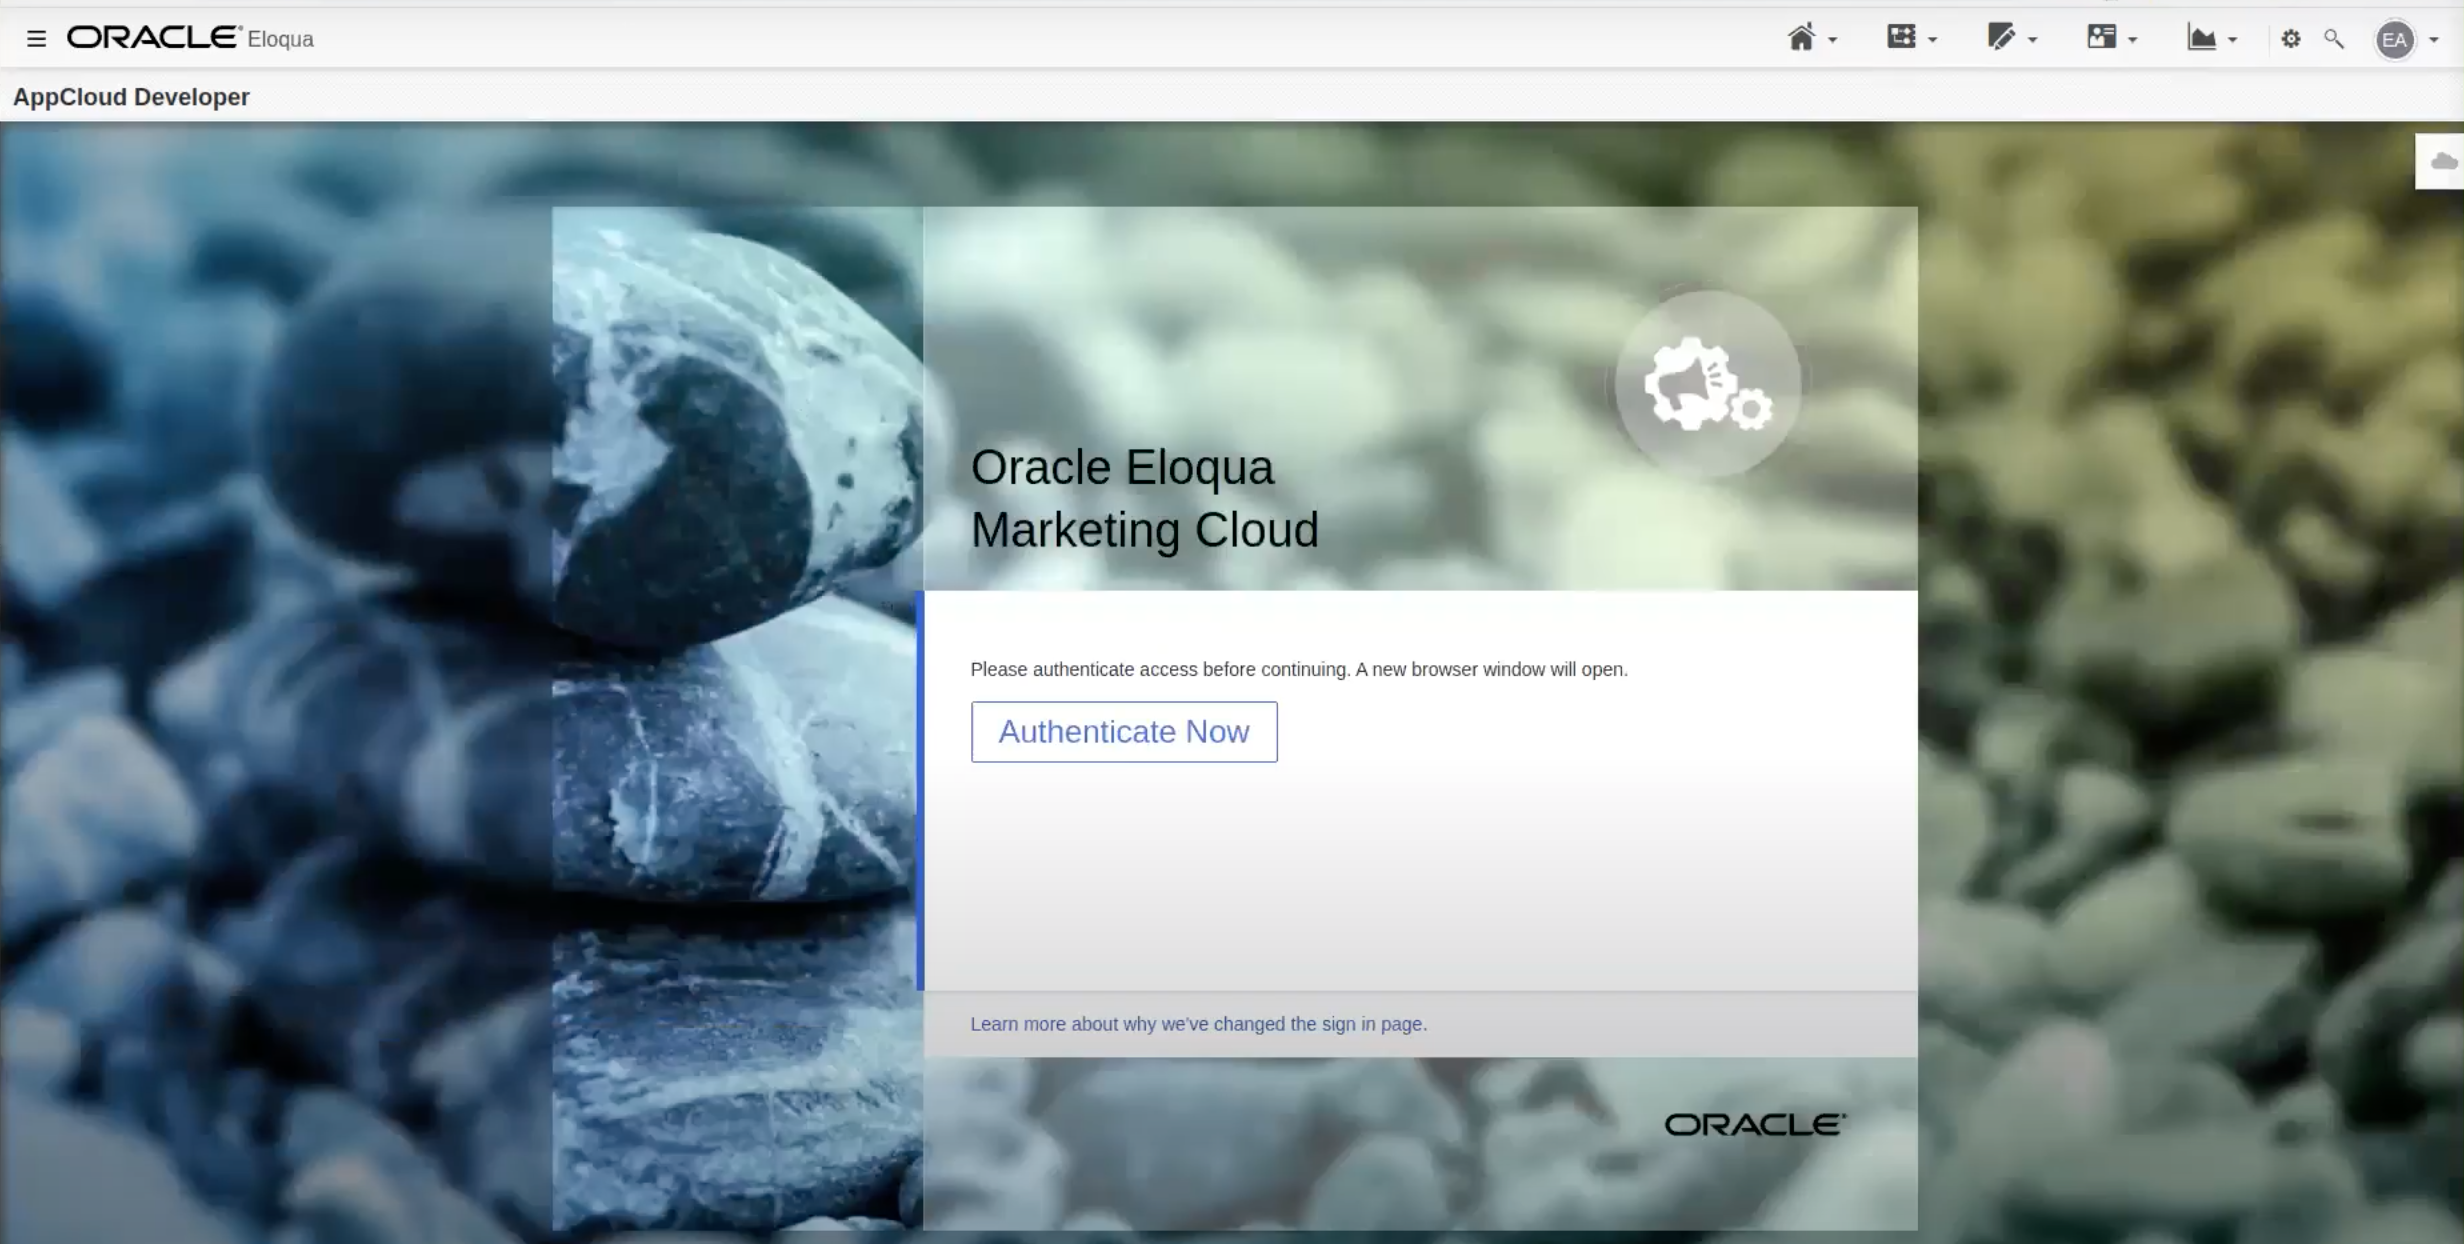
Click Authenticate Now.
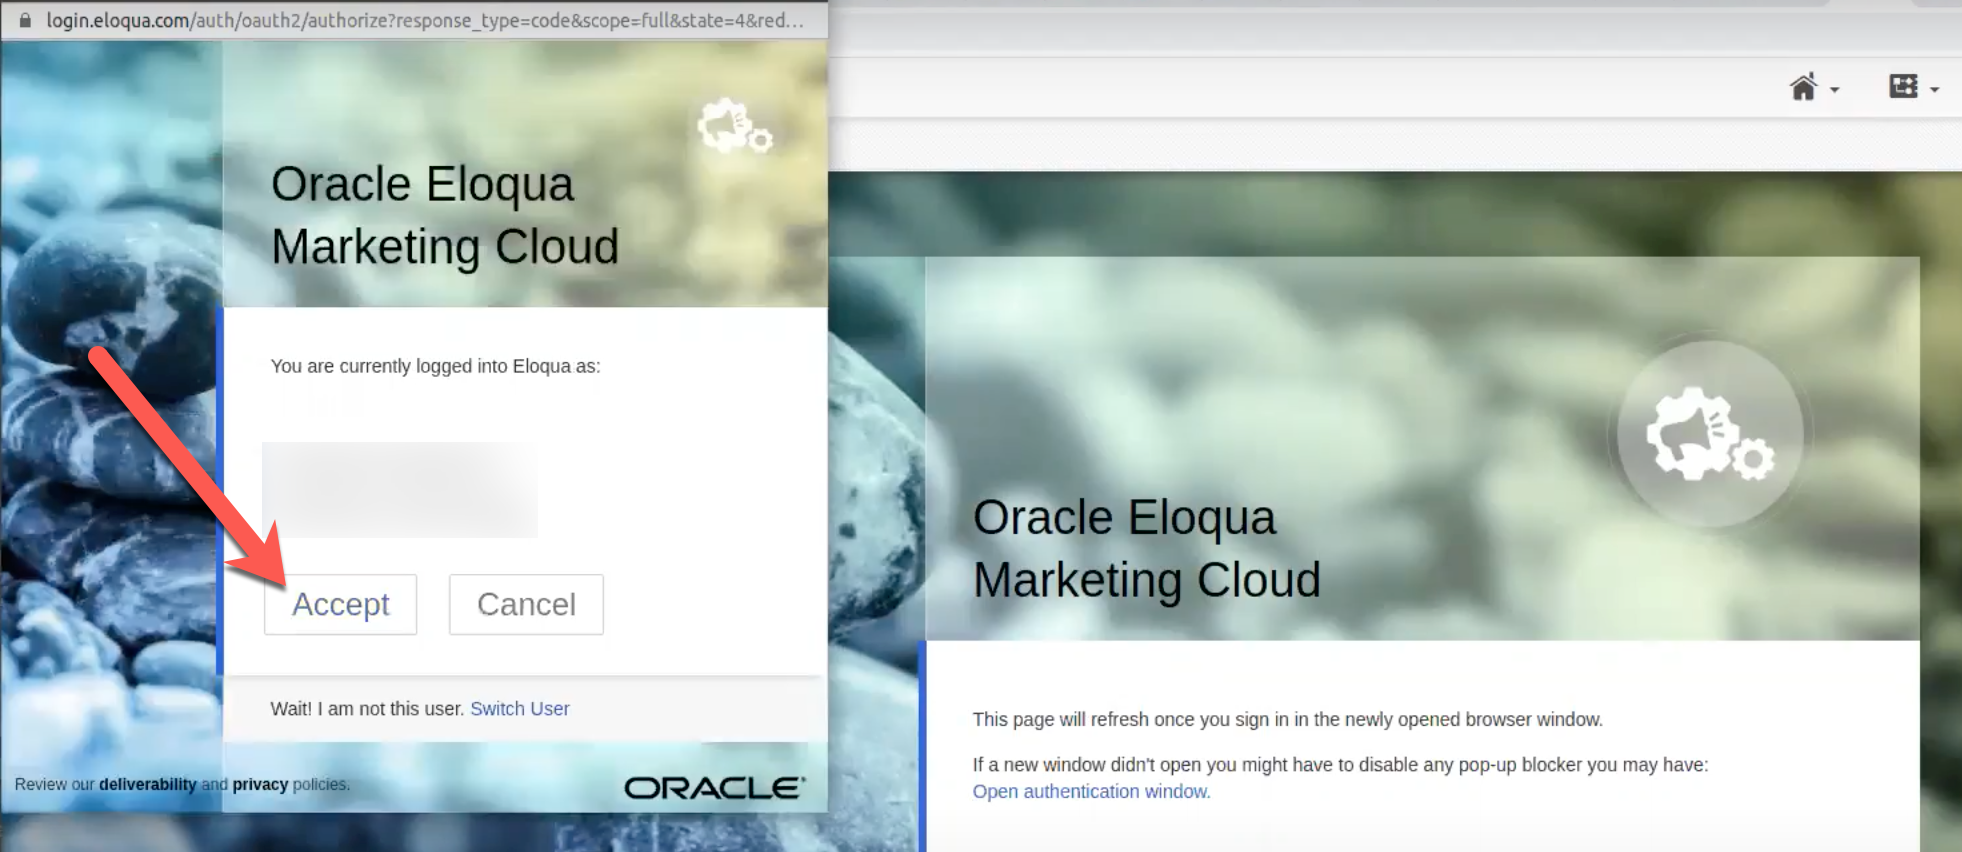
A popup will appear. Click the Accept button.
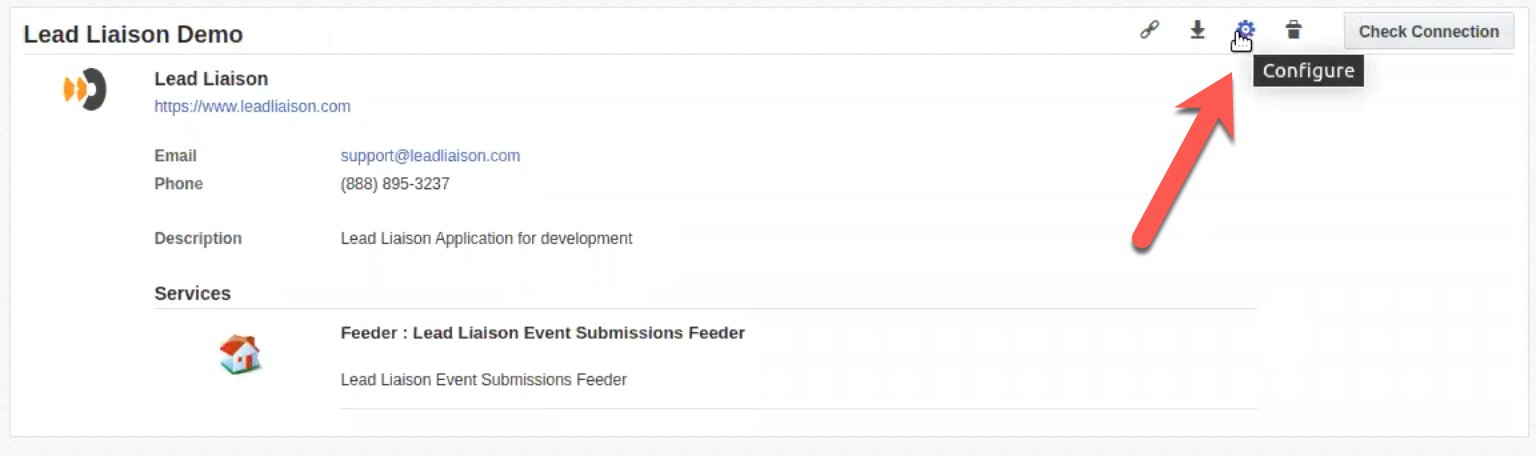
Click the Configure icon.
Follow the prompts to login to Lead Liaison.
Congrats, you’ve connected Eloqua with Lead Liaison.
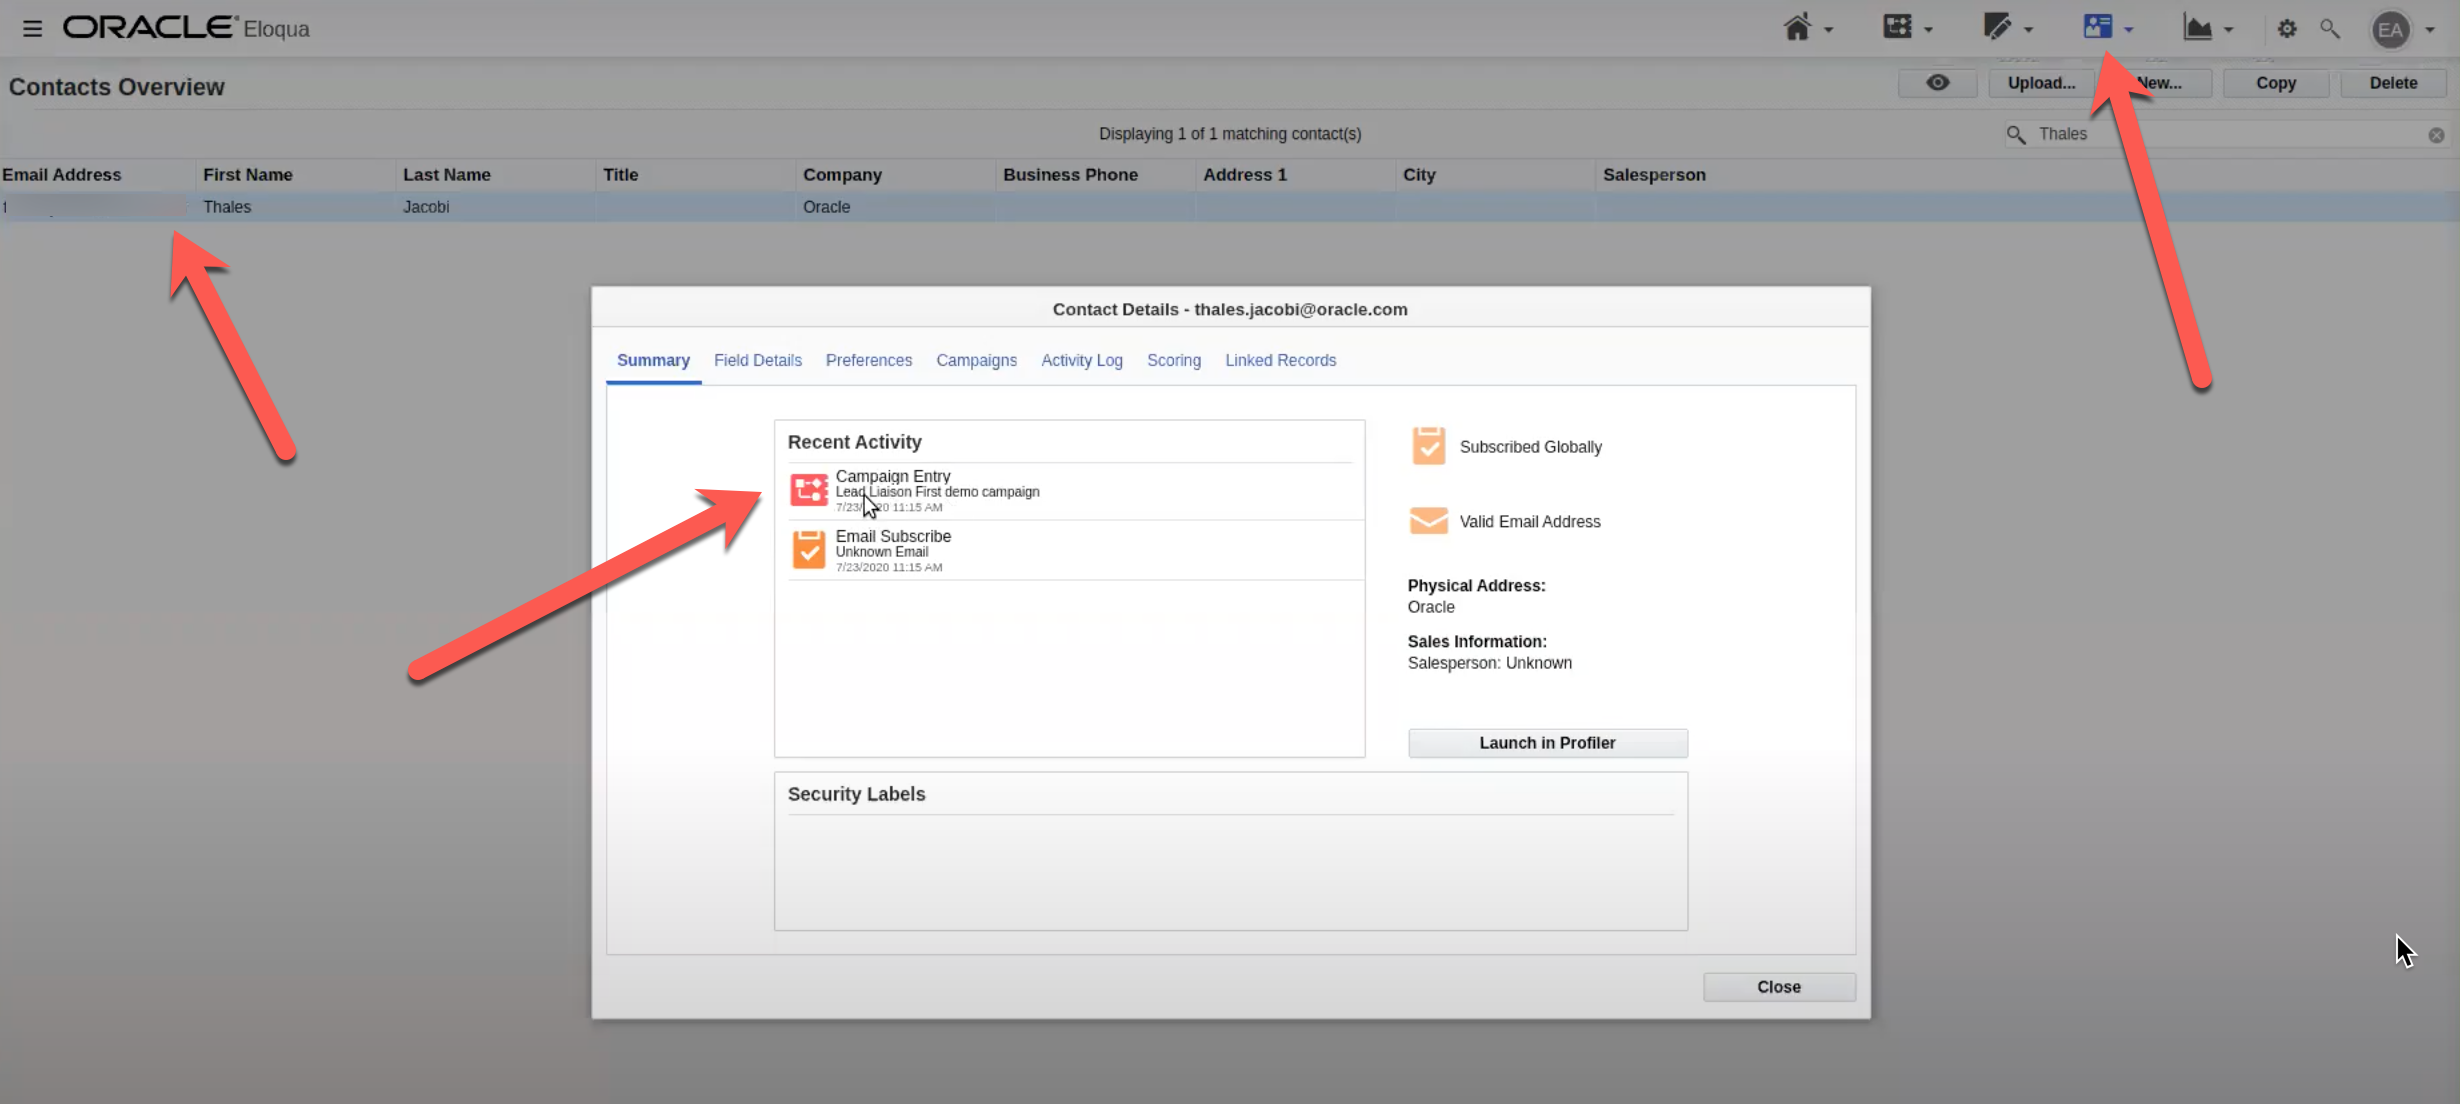
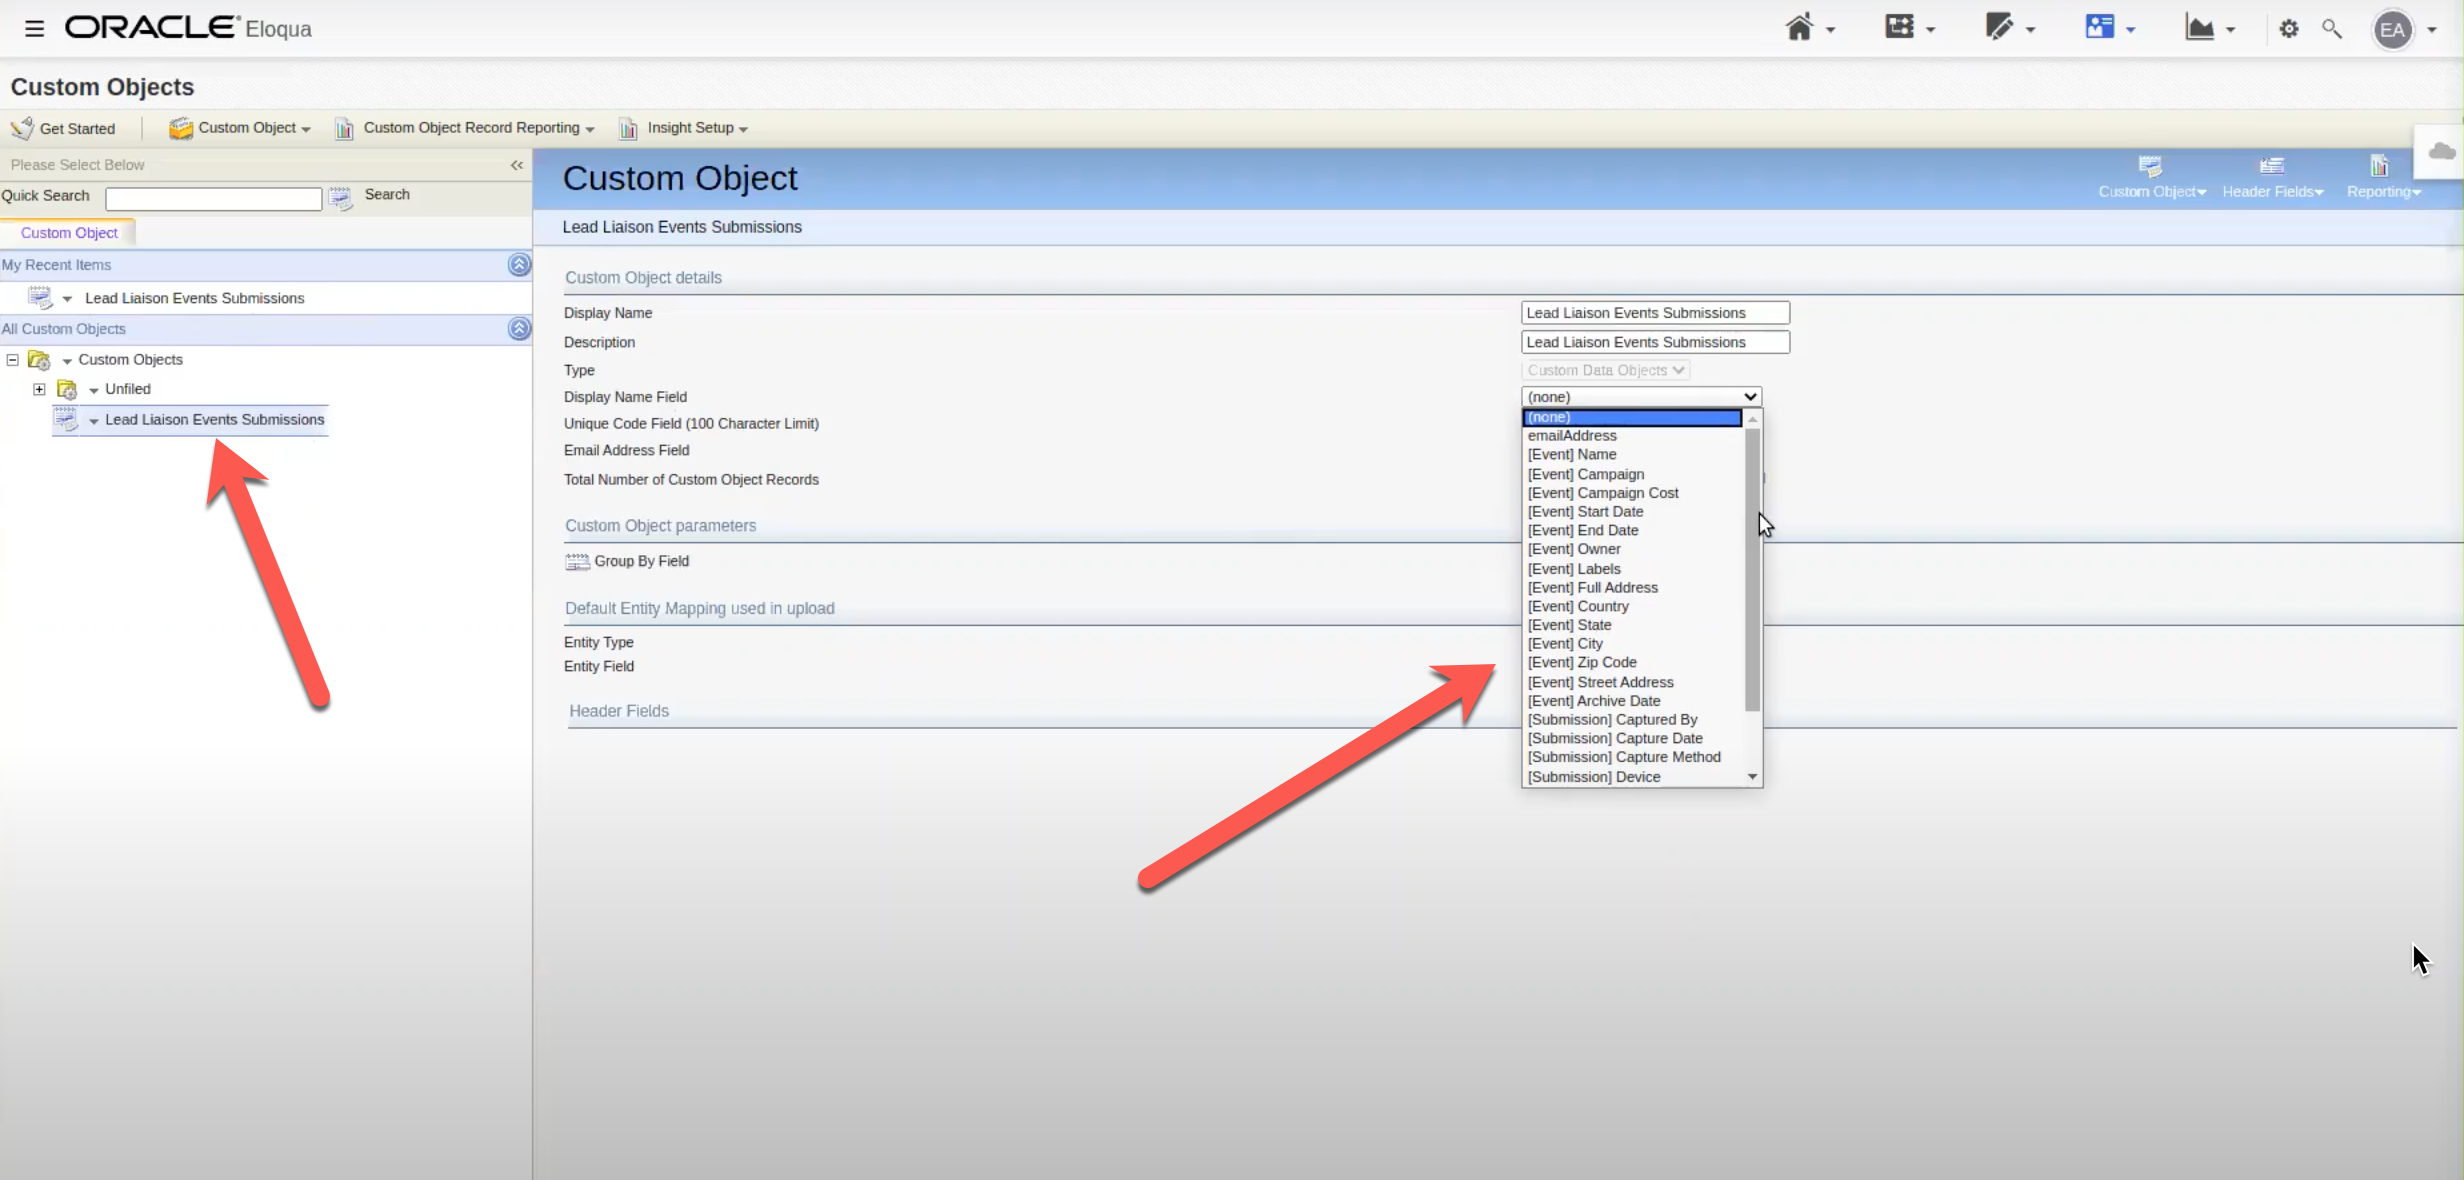
Once installed a new Custom Object called Lead Liaison Events Submissions will be created. As show in the dropdown to the right in the screenshot below, all Event Metadata and Submission Data will be stored in the Custom Object with each record linked to an Eloqua Contact. Lead Liaison sends Lead Liaison Prospect record fields to the Eloqua Contact.
| Info |
|---|
Since Lead Liaison sends Lead Liaison Prospect data to Eloqua Contacts make sure you map all Event Custom Fields to Prospect Fields when building your Event. |
Configuring Eloqua Campaigns
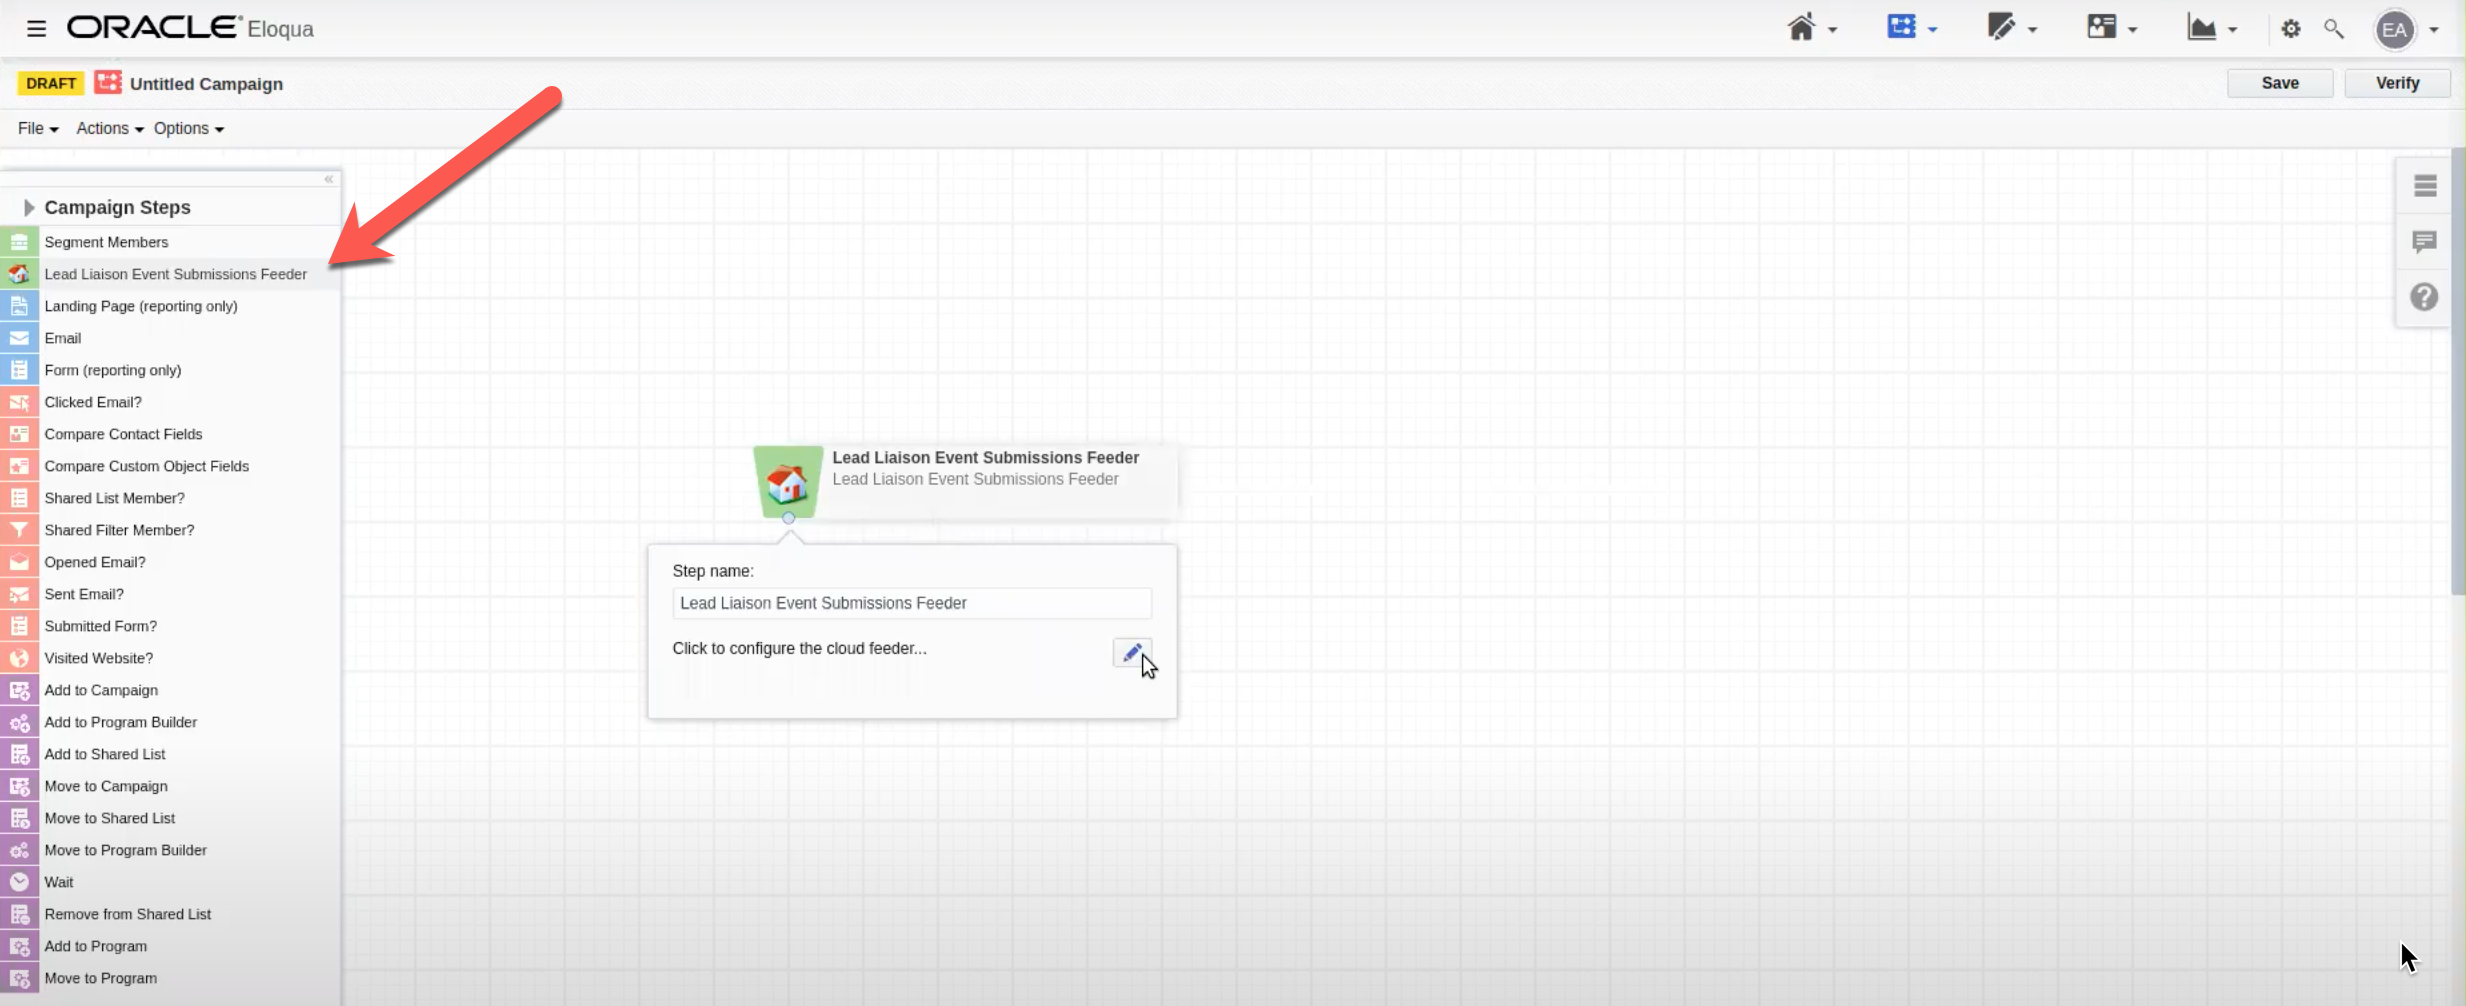
To start creating your Eloqua Campaign add the Lead Liaison Event Submissions Feeder to the canvas.
Drag and drop the element from the left panel to the canvas on the right as shown below:
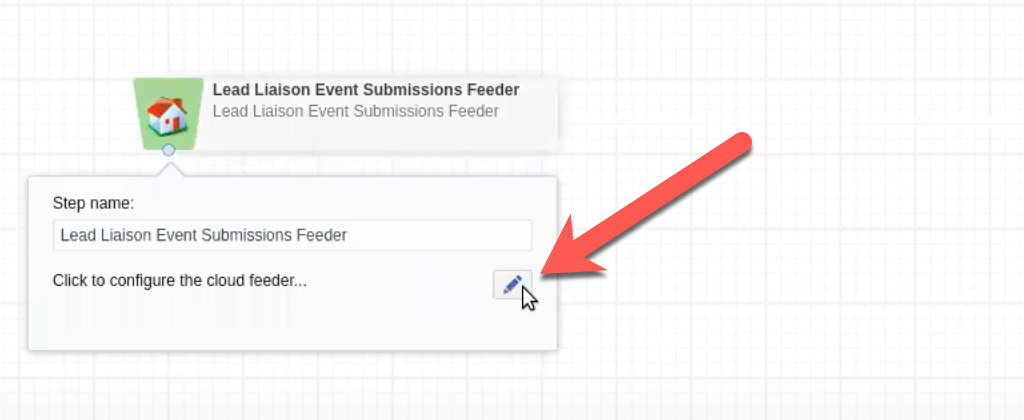
Next, click the pencil icon to configure the Feeder.
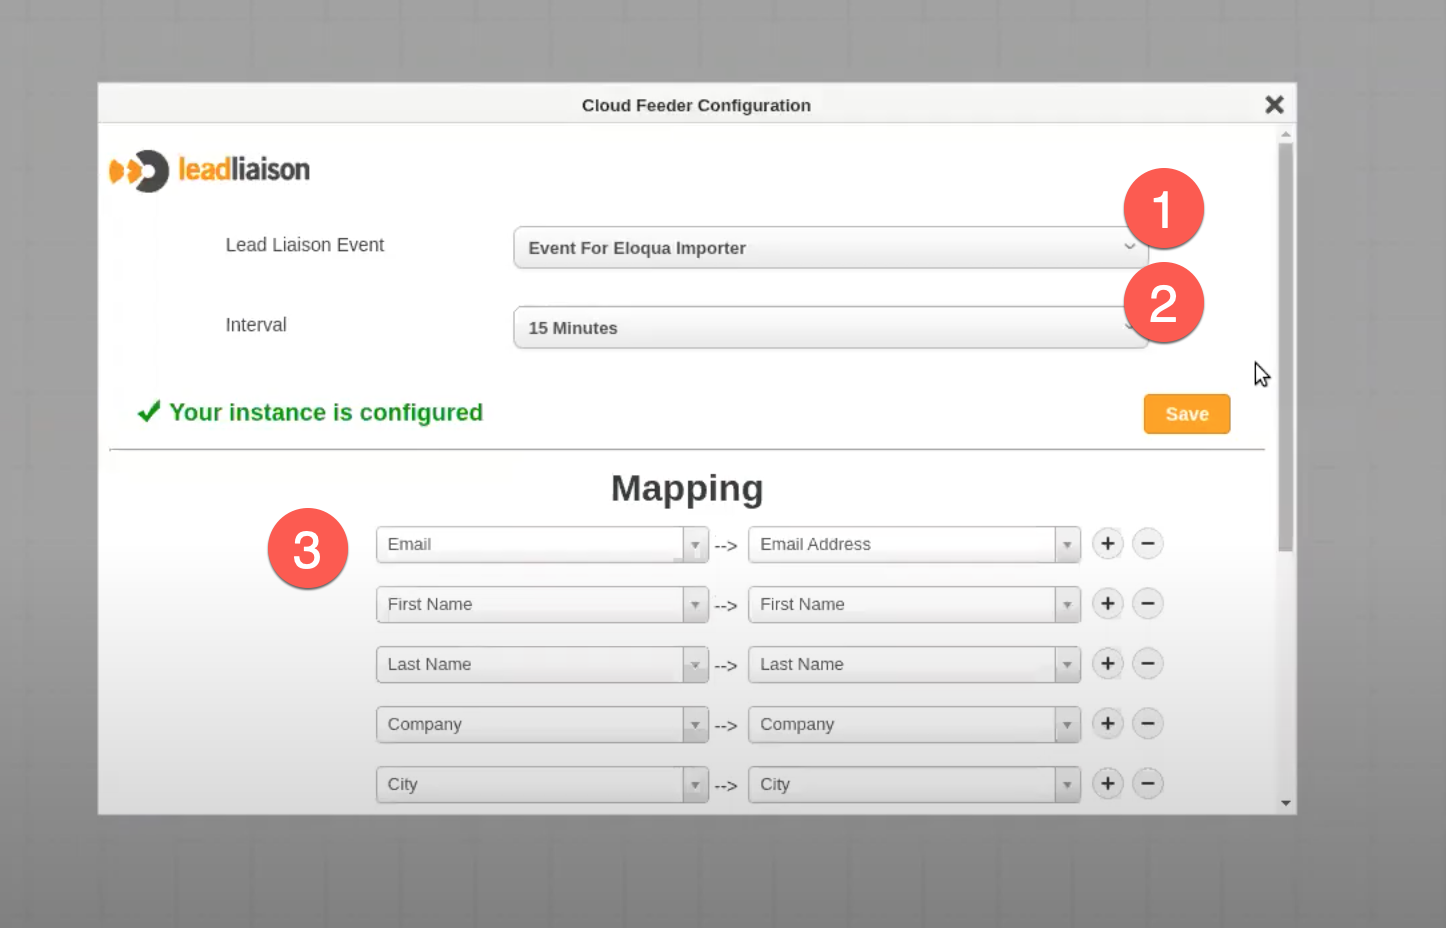
Configure the Feeder. The steps below correlate to the number in the screenshot below.
Step 1: Lead Liaison Event = The Event you’d like to pull in leads for.
Step 2: Interval = The frequency in which Eloqua will pull in new leads from Lead Liaison.
Step 3: Mapping = Mapping of Lead Liaison Prospect Fields to Eloqua Contact Fields. Lead Liaison Fields are on the left side and Eloqua Contact Fields are on the right side.
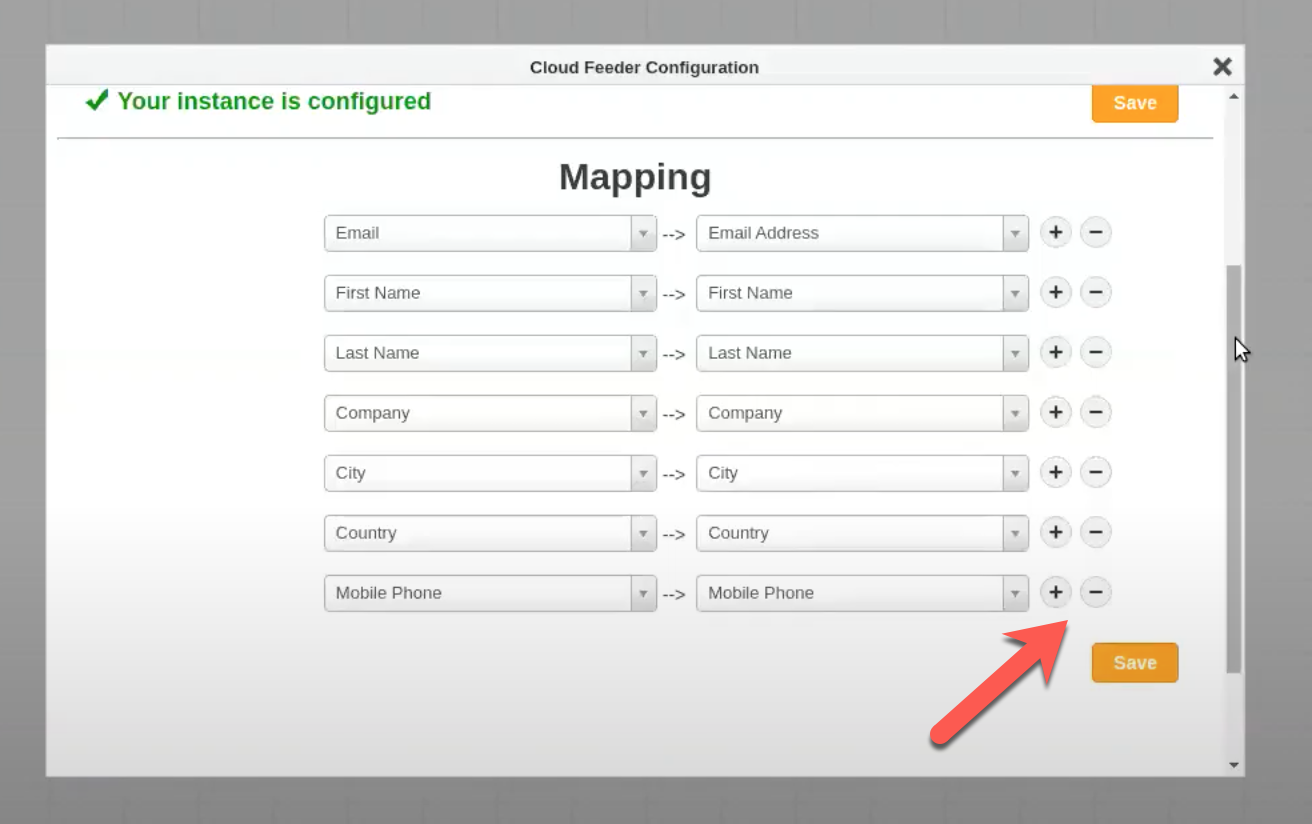
The following fields will be mapped by default for all new Feeders:
Lead Liaison Prospect Email (Email) to Eloqua Email Address (Email Address)
Lead Liaison Prospect First Name (First Name) to Eloqua First Name (First Name)
Lead Liaison Prospect Last Name (Last Name) to Eloqua Last Name (Last Name)
Lead Liaison Prospect Company (Company) to Eloqua Company (Company)
Lead Liaison Prospect City (City) to Eloqua City (City)
Lead Liaison Prospect Country (Country) to Eloqua Country (Country)
Lead Liaison Prospect Mobile Phone (Mobile Phone) to Eloqua Mobile Phone (Mobile Phone)
Add or remove fields for mapping by using the + and - icons as shown below.
Activating Eloqua Campaigns
Once your Eloqua Campaign is configured Save, Verify, and Activate the campaign.
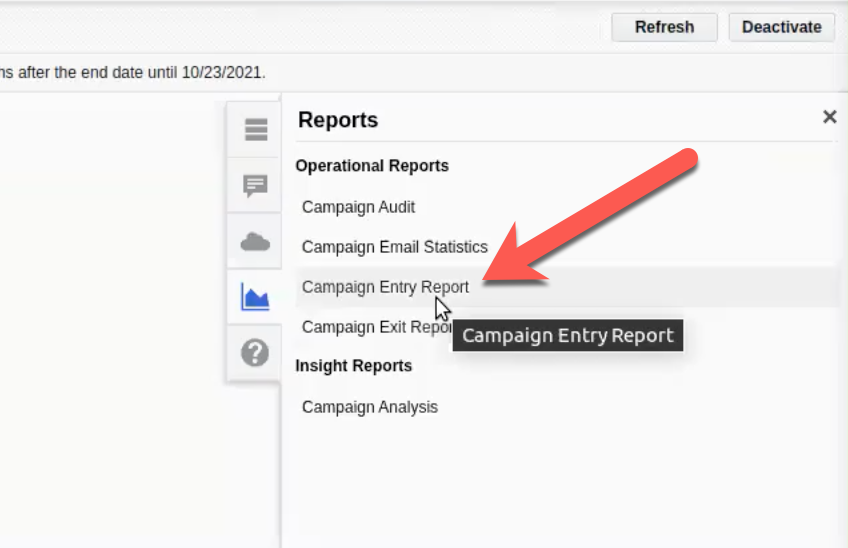
To see Campaign results as they’re fed into Eloqua click the Campaign Entry Report as shown below. You’ll start to see data within about one minute.
In the screenshot below the Feeder pulled in four Prospects from Lead Liaison that are now Eloqua Contacts.

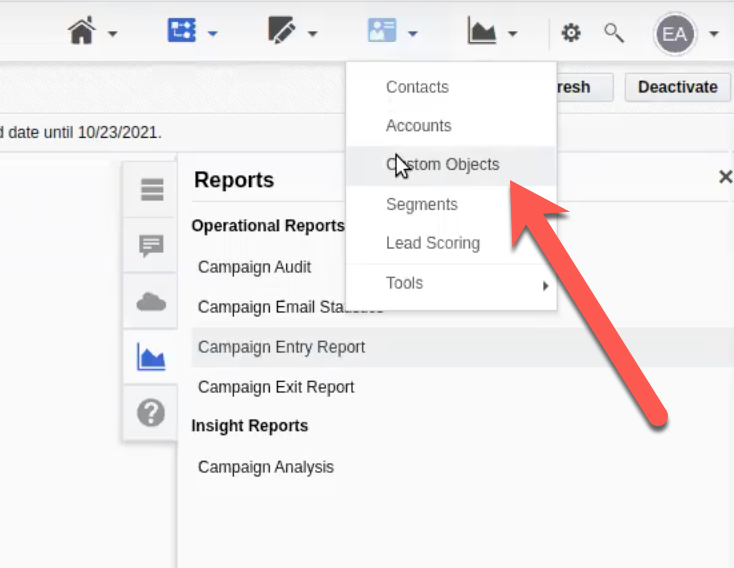
View Submission data by clicking the Custom Objects drop down as shown below:
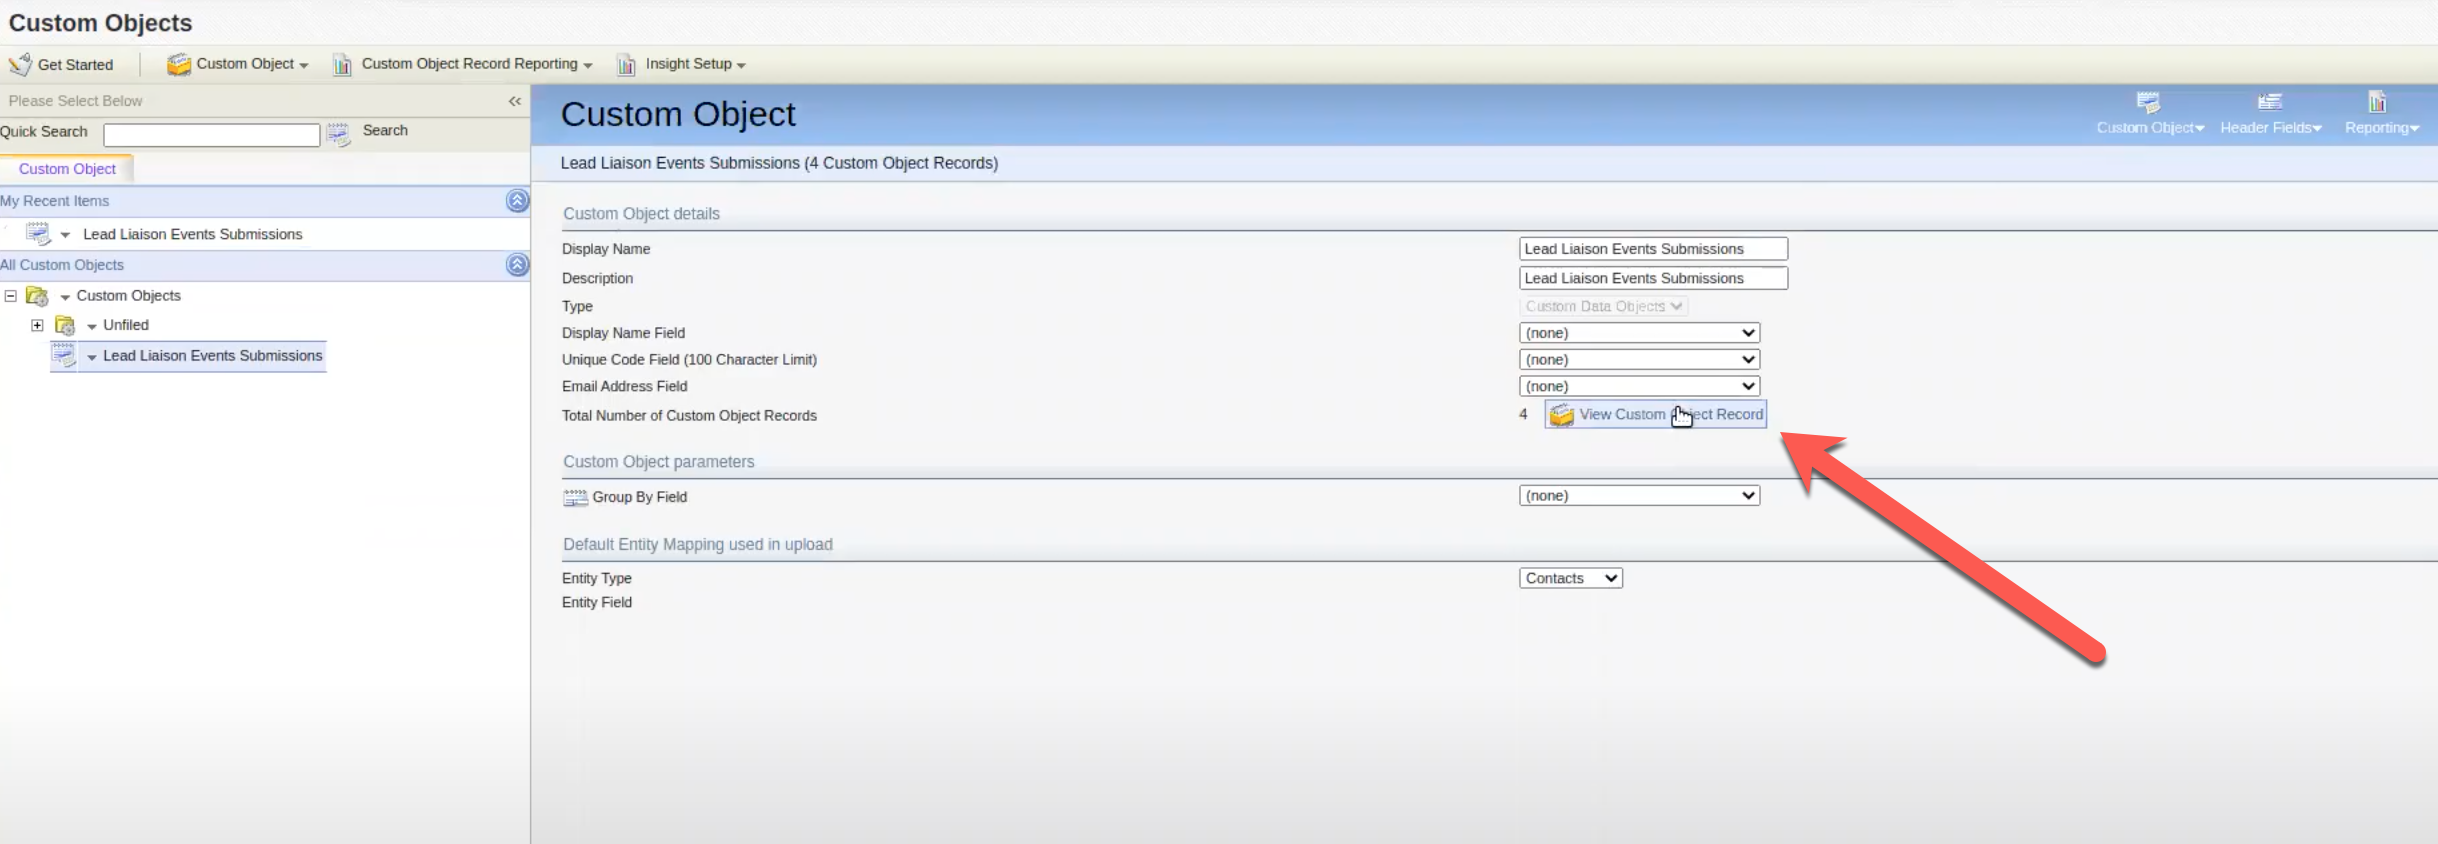
Click View Custom Object Record as shown below:
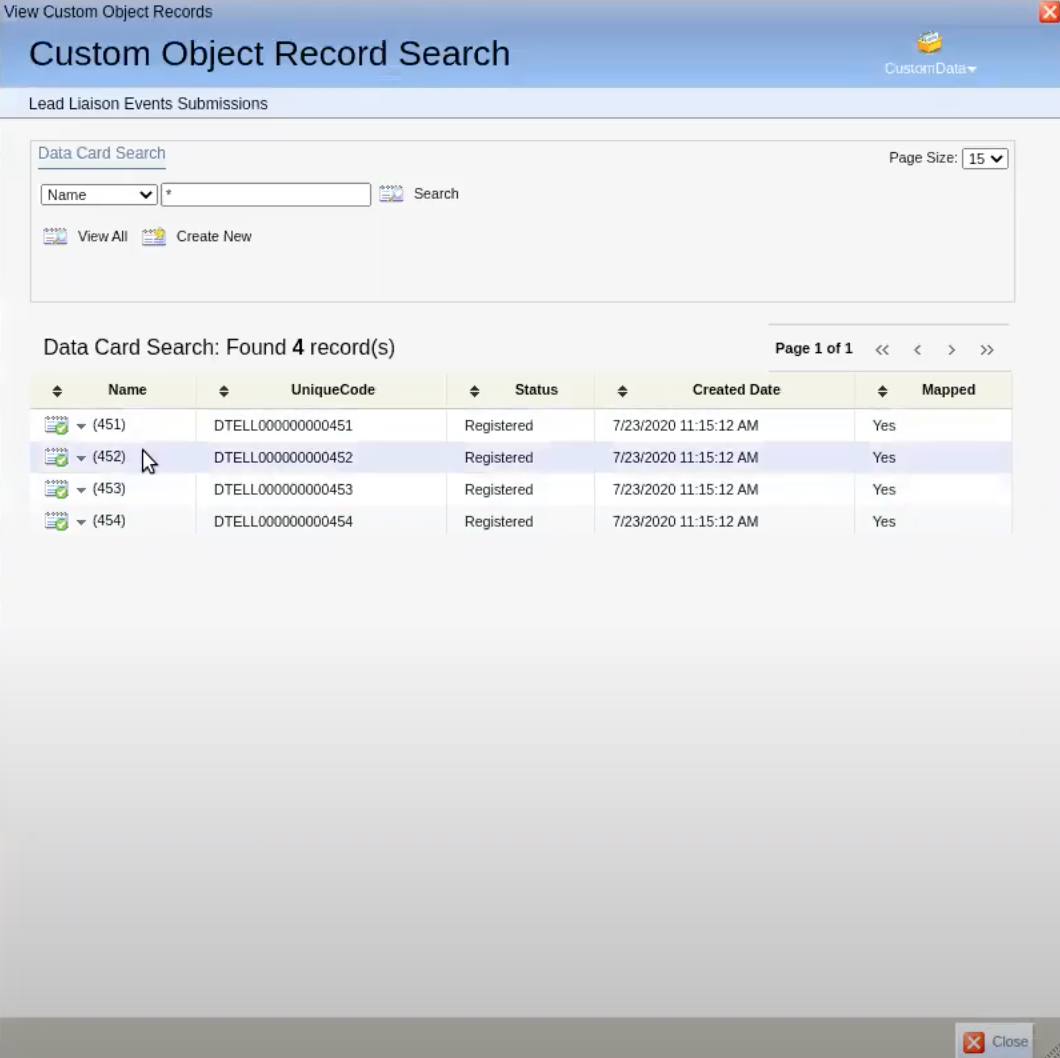
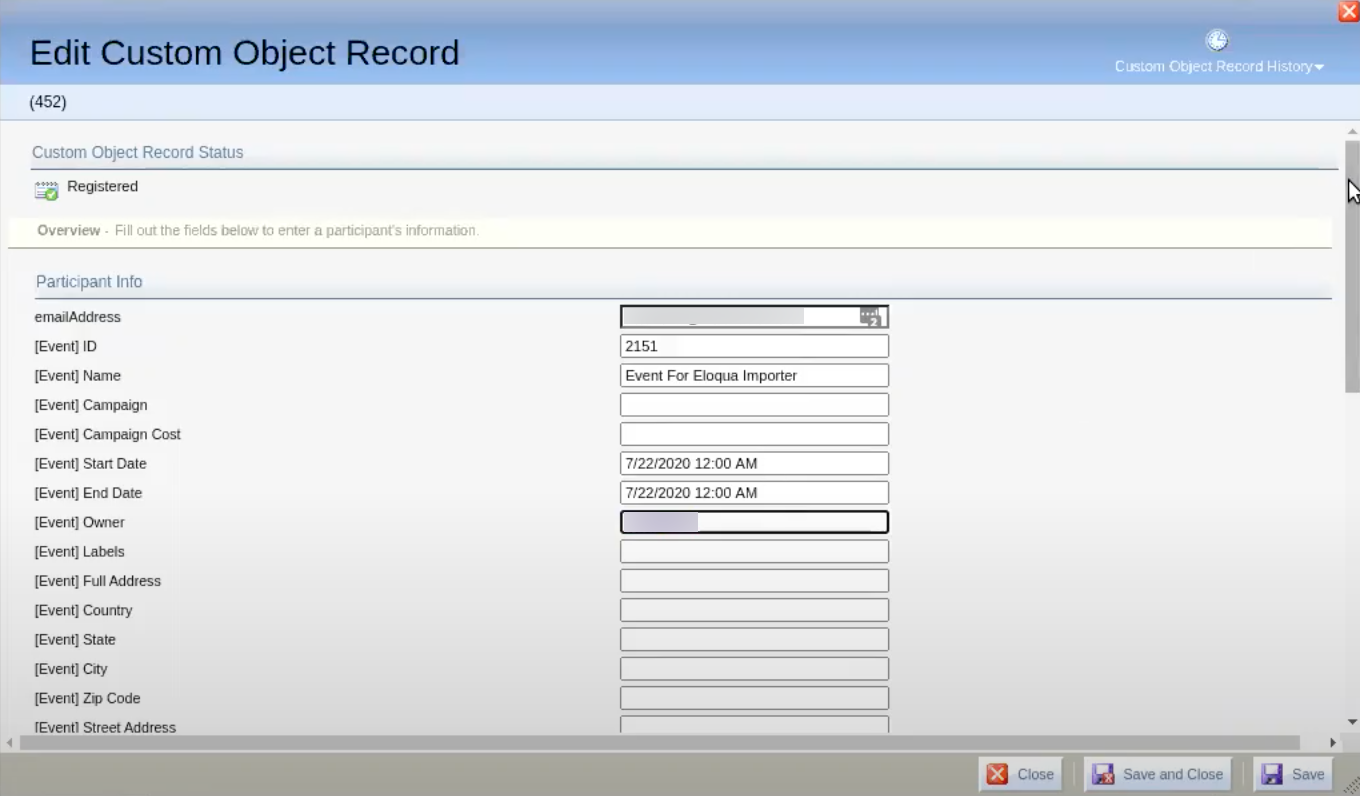
Click on any Submission Record to view/edit the details:
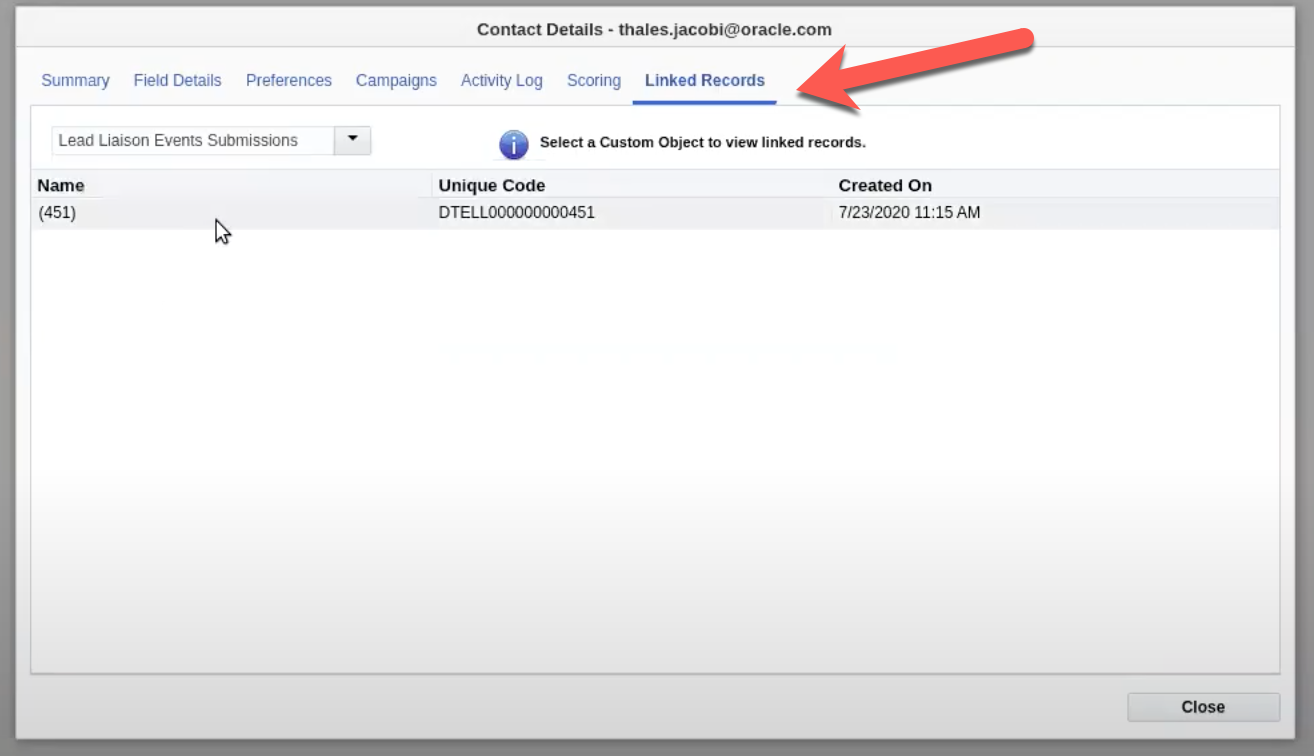
You can also view your Eloqua Contact Records and see Linked Records as shown below: