...
Lead Liaison Campaigns are used with GoToWebinar Events in two ways. First, any member of an Event, or a member based on event status (i.e. registered), can be associated with a specific Campaign. Second, a Campaign can be assigned to all new and existing Prospects created in Lead Liaison after being imported from GoToWebinar (see Step 2) or added to the GoToWebinar events. Campaigns help marketers measure ROI and attribute sales to their marketing efforts. If the GoToWebinar Event is the Prospect's first campaign touch then a First Touch Campaign will be recorded.
...
- Go to Settings > Integrations > Connectors
- In the GoToWebinar section click the "Connect more" button
- In the popup, choose your settings for the GoToWebinar Connector
- Display Name = The internal name for the GoToWebinar account
- Campaign = The Lead Liaison Campaign assigned to any Prospects created via syncing with GoToWebinar or already existing in Lead Liaison. The Campaign is also assigned to any Prospects added to any GoToWebinar event. Campaign assignment can also be done based on the Prospect's status (i.e. registered) in the event.
- Create Prospects in Lead Liaison if they don't exist = If the Prospect is not in Lead Liaison they will automatically be added as a new Prospect when the system imports registrants from webinars in the GoToWebinar account.
- Pull historical webinars = Loads all historical webinars which includes webinars created before connecting the account. Note, we do not import the list of registrants with historical webinars. This is a limitation of the GoToWebinar API.
- Click the Create Connector button
...
- Go to New > Event
- Setup your Event
- Tags: Tag your Event. Tags make it easy to find events later on.
- Campaign: Members of the Event, or members based on event status (i.e. registered), are added to this Lead Liaison Campaign.
- Partner: Choose your Event partner, in this case GoToWebinar.
- Account: Choose the GoToWebinar account you'd like to use for your Event.
- Event Name: Once you choose the Partner and Account the Event Name field will be populated with Events from your GoToWebinar account. If you don't see any GoToWebinar events in the drop down make sure to "Sync Events" (see Configuring GoToWebinar Accounts below).
- Campaign Description: Populates with the description of the event as entered into GoToWebinar.
- Once you select your webinar Lead Liaison will pull in the Campaign Description and webinar details as shown below.
- Validate your webinar information and proceed to the next step.
...
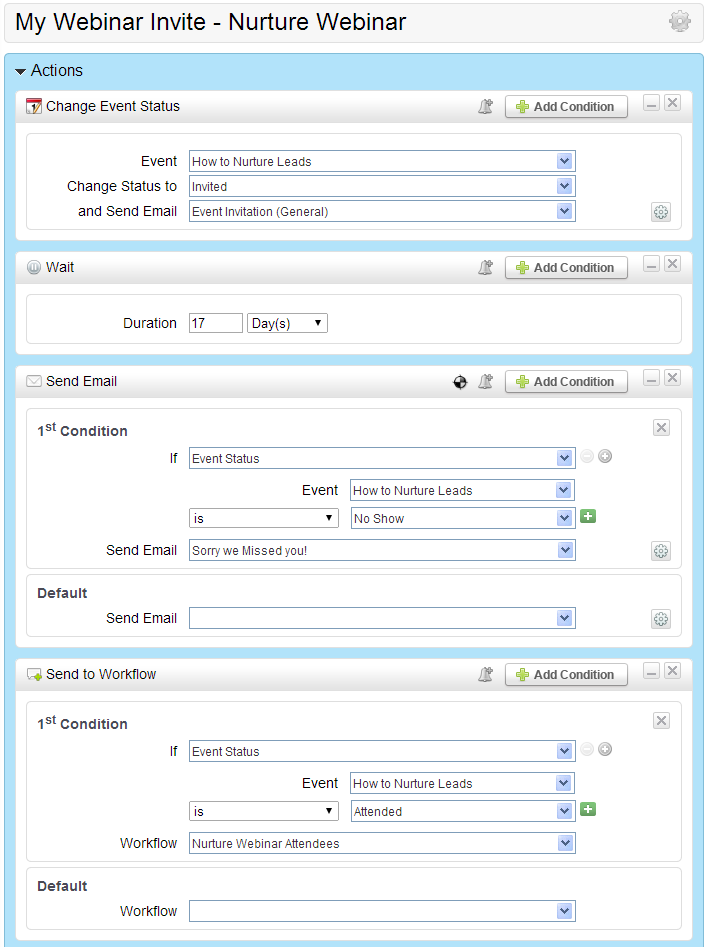
- In Step 3, you can activate your Workflow immediately or schedule to run it in the future. In other words, you might want to plan the day and time in which your webinar invitation will go out.
- The screenshot below shows another way to follow up with your audience. Instead of creating independent No Show and Attended Workflow you could combine these steps with your invitation email. In the example below, we schedule the invite Workflow to go out two weeks before the event and check the status of the people we invited three days after the end of the event (hence the Wait 17 days action).
Managing Your Webinar Events
Viewing Webinar Events
To view your webinar events in one area do the following:
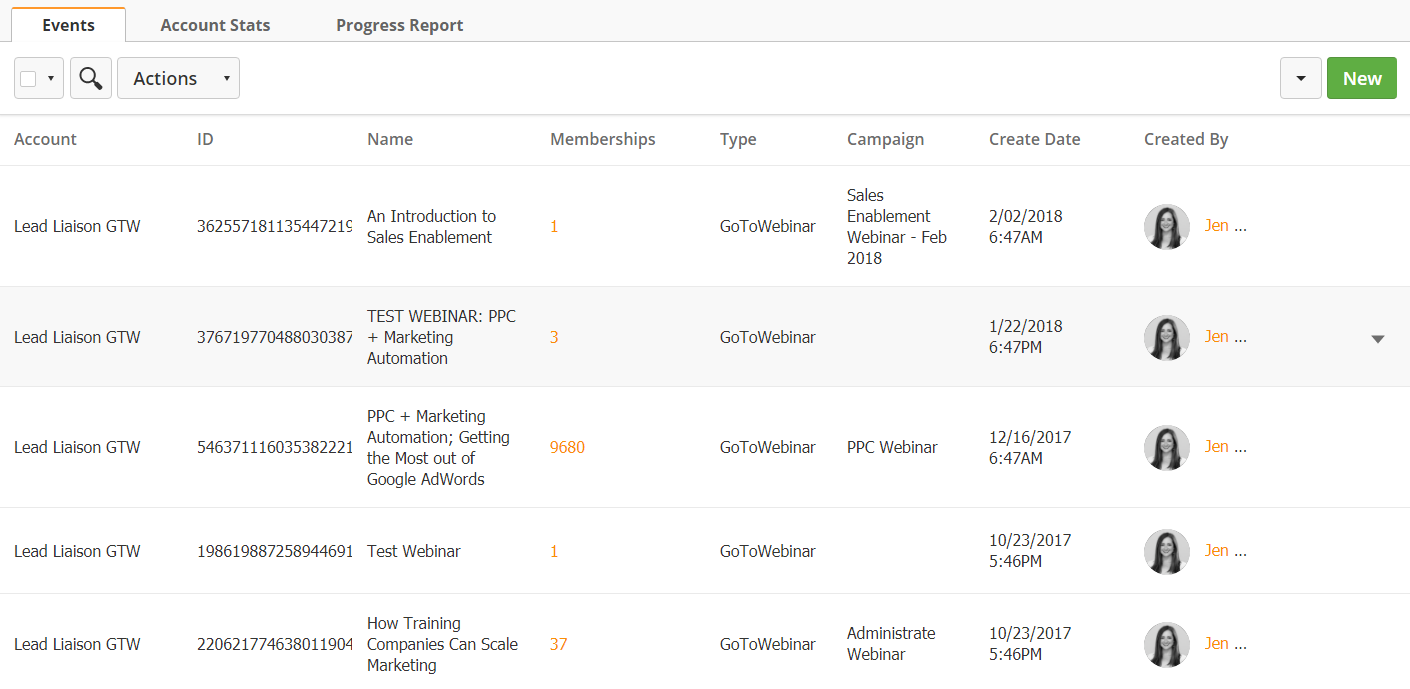
- Go to Content > Events Webinars
- Under the Type column select GoToWebinar
- Columns are explained below
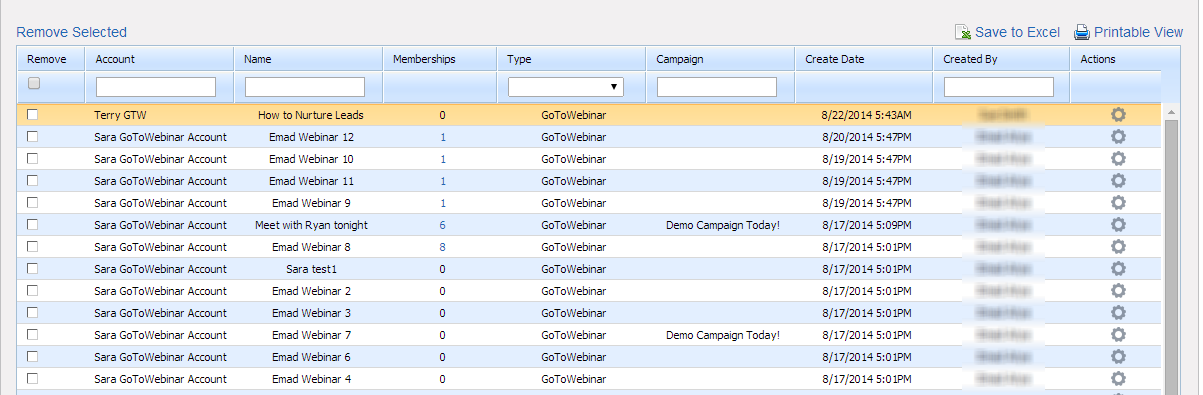
- Remove = Removes the Event from Lead Liaison
- Account = The GoToWebinar Account used for the Event
- Name = Name of the Event
- Memberships = Prospects currently in the Event in any status
- Type = Event type
- Campaign = Default Lead Liaison Campaign assigned to new Prospects imported into Lead Liaison from your webinar Event, or by event status (i.e. registered).
- Create Date = Date and time the Event was created
- Created By = Person who created the Event
- Actions = Tag the Event or view the Event Schedule
Renaming Events
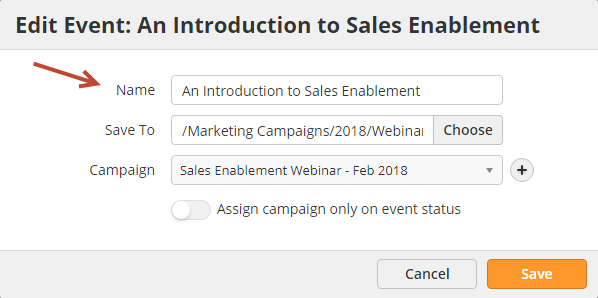
- To change the name of your Lead Liaison Event, click the pencil icon next to the Event as shown in the Event was created
- Created By = Person who created the Event
- Actions = Tag the Event or view the Event Schedule
- screenshot above. If you do not see the pencil icon then the you'll need to create a Lead Liaison Event and associate it with your GoToWebinar event. In the popup, change the name of your event using the Name field as shown below.
| Info | ||
|---|---|---|
| ||
When changing the name of an event inside GoToWebinar, the new name will only show in Lead Liaison if the event is not linked to a Lead Liaison Event. If the event is linked to a Lead Liaison Event (from the Add Event popup), then the name provided in the popup will be used. The Lead Liaison Event name can also be changed by editing the event as shown above. |
Manually Changing a Prospect's Event Status
...
Level 0: "No Status" and "Removed"
Level 1: "Invited"
Level 2: "Pending Approval", "Wait List" and "Rejected"
Level 3: "Registration Error" and "Registered"
Level 4: "Attended" and "No Show"
Reporting on Webinar Events
To view a report of all your Events do the following:
- Go to Content > Events Webinars
- Select a timeframe for which you want to run your report
- The graph at the top shows statistics for all people in the Invited, Registered and Attended status for all events.
...
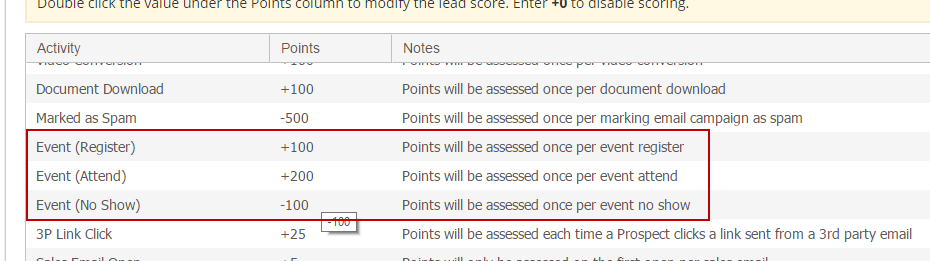
- Go to Settings > App Setup > Lead Qualification > Lead Scoring
Tracking Webinar Event Status
Each time a Prospect's Event status changes, from Invite to Attended/No Show and anything in between Lead Liaison records this activity in the Activity History section on the person's Prospect Profile. When a status is recorded it will look similar to the screenshot below: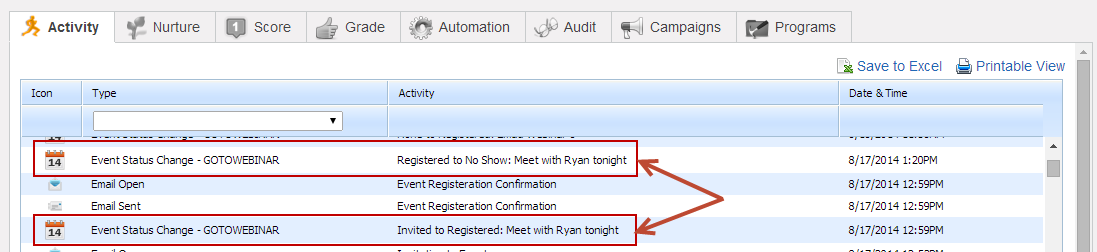
Tips
- When setting up your automation and you're ready to schedule and run it have it run for the period around the event. This will avoid running the automation outside of the event and minimize any potential issues if statuses change outside the timing of an event.
...