| Table of Contents |
|---|
...
- Prepare your file for import. For a contact to be imported, the contact must have at least an email address or full name. If an email address is not provided then we check for a Full Name (or First Name and Last Name). If a Prospect is found with the same name then the import record is matched with the first contact the system finds. If no match is found then a new Prospect record will get created.
- There is also an "Ignore the name field" option available. If this option is turned ON, then we will not use the prospect name as a second identifier to match Prospects. So by default it will attempt to create a new prospect (incase the other settings are configured to accept new records).
- There is also an "Ignore the name field" option available. If this option is turned ON, then we will not use the prospect name as a second identifier to match Prospects. So by default it will attempt to create a new prospect (incase the other settings are configured to accept new records).
- Optionally create a List. Note, it's not mandatory to import contacts into a list. They can be directly imported into the system.
- Click Prospects > Import
OR - Click Sales > Import and select Prospects if you are using OneFocus™ CRM
- Drag & Drop the file into the dashed border box or select your file using the Upload button
...
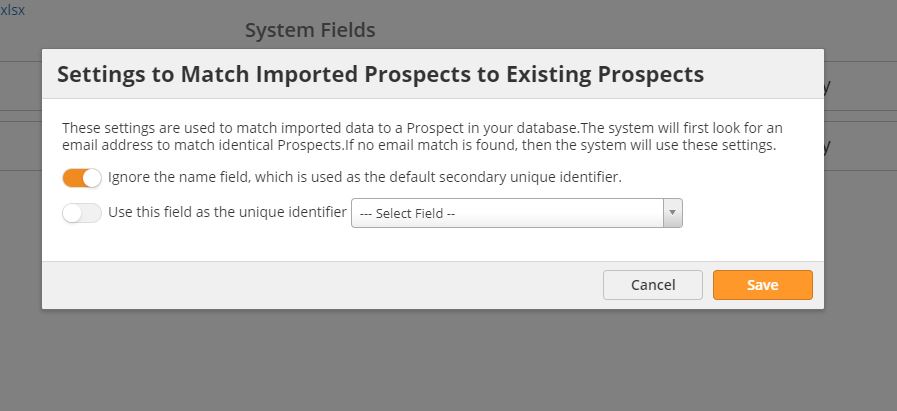
This is where you can select a unique identifier for matching imported Prospects to existing database. The system will first look for an email address to match identical Prospects. If no matching email is found, then the system will use the settings defined here:

Please note that in this case, system will NOT use Full Name (or First Name and Last Name) if the email address is not provided. Instead, it will use the unique identifier specified here to match Prospects.
| Info |
|---|
You can add a Prospect into an Organization during the import process by mapping a field to the Organization field. The system will add the Prospect to an existing Organization if the Organization Name or Domain match. If there is no match, the system will create a new Organization. |
...
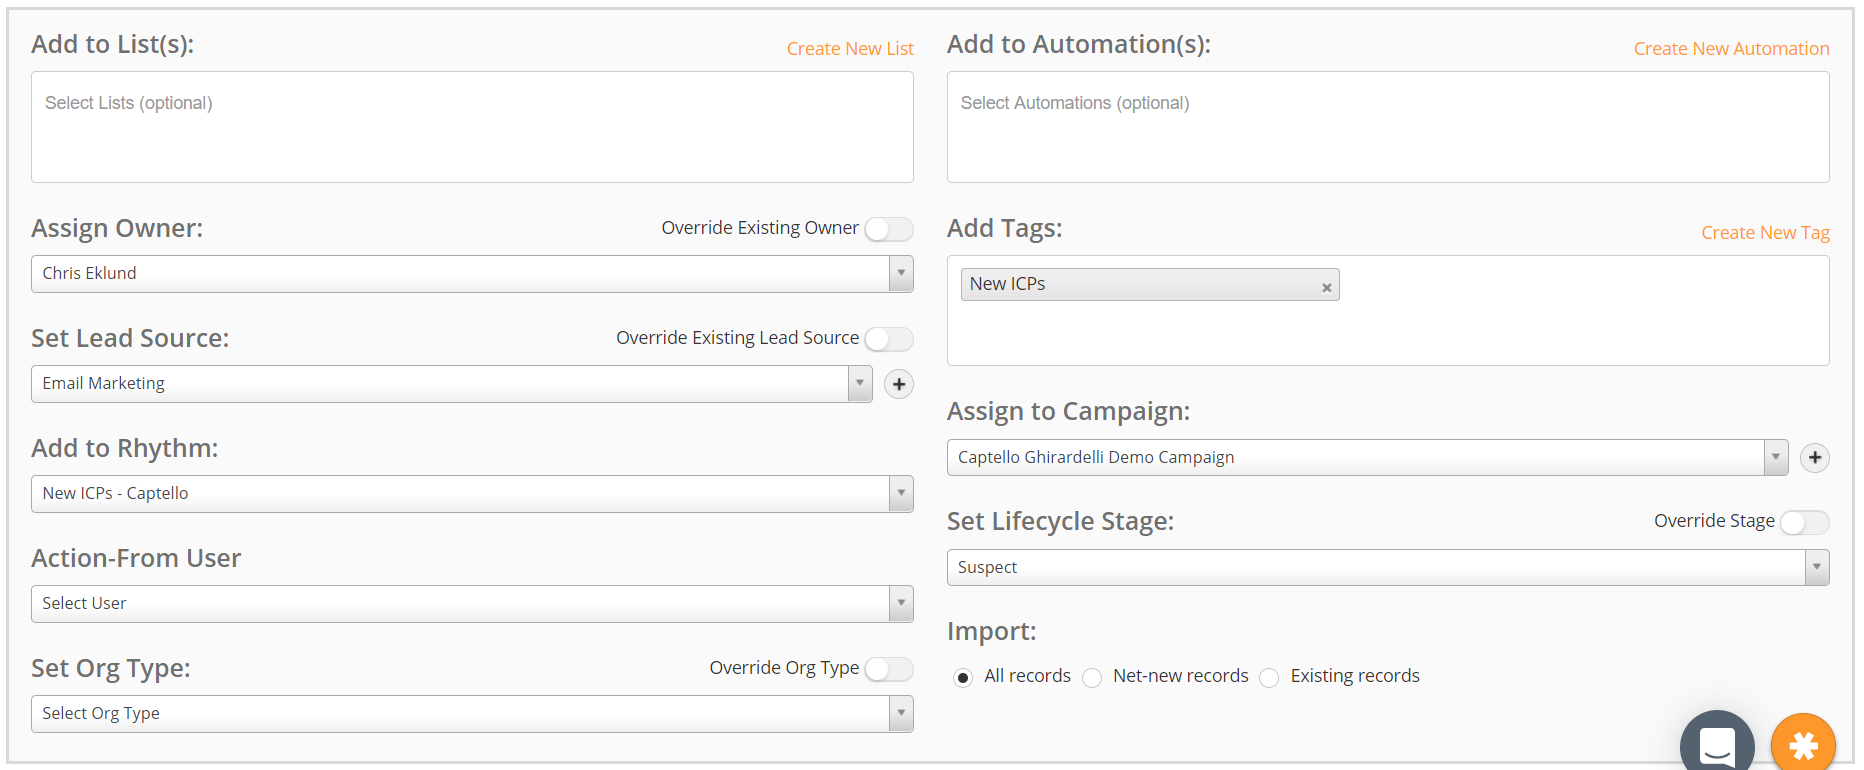
- Add to Lists(s). Select which list(s) to import contacts into. Click the Create New List link to create a new list on the fly.
- Add to Automation. Select workflows to add Prospects into.
- Add Tags. Assign one or more tags to your imported Prospects. Click the Create New Tag link to create a new tag on the fly. To learn more about Tags read this.
- Assign Owner. Select which Owner to be assigned to all imported contacts. If your file includes Prospects from multiple owners See Setting Lead Owner section below.
- Set Lead Source. Attribute the same Lead Source to all Prospects. Use the toggle to override the current lead source for existing Prospects. If your file has Prospects from multiple lead sources, map a field in your file to the Original Lead Source field instead.
- Assign to Campaign. Assigns imported Prospects to a Lead Liaison Campaign. To learn more about Campaigns click here. To create a new Campaign click the plus icon to the right of the drop down.
- Add to Rhythm. Adds all Prospects to selected Rhythm.
- Action-From User. If adding Prospects to a Rhythm, select the Action-From User. If you don't select anything, the system will use the Rhythm's default Action-From User.
- Set Lead Source. Assigns a value to the Original Lead Source field. If the Prospect already exists you can override the Original Lead Source value by enabling the Override Existing Lead Source toggle switch. To create a new Lead Source, click the plus icon to the right of the drop down.
- Set Lifecycle Stage. Sets all Prospect's Lifecycle stage to the selected Stage. Use the toggle to allow existing Prospects to revert stages (for example, from Marketing Qualified to Engaged). If your file has Prospects with different Lifecycle Stages, create a corresponding field in your file and map it to Lifecycle Stage instead.
- Set Org Type. For visitor tracking, select the Prospects Organization Type. For accounts with OneFocus™ CRM, we recommend using the Org Type on the Organization object.
- Import.
- All records – Import all records, creating new Prospects and updating existing Prospects with matching rules.
- Net-new records – only create new Prospects, ignoring existing records.
- Existing records – only update existing Prospects, ignoring new records.
- Include blocked records – Import Prospects who have previously been marked as Blocked (i.e. they are on global blocked list).
- Skip blocked records – Do not import Prospects who are already on global blocked list.
- Click Next.
- Click Run.
| Info | ||
|---|---|---|
| ||
The import process gets queued in the system and happens in the background. While the import occurs, you can access other areas of the application so your work is uninterrupted. Check back on your import by navigating to Prospects > Import. |
...