...
Lifecycle Stages give you a full perspective on where a Prospect is in your sales and marketing processes. Prospects are meant to be promoted through each Lifecycle Stage, from beginning to end. The order of the Lifecycle Stages is as follows:
Suspect > Engaged > Marketing Qualified > Sales Qualified > Opportunity > Customer > Evangelist > Disqualified > Other
Description of Lifecycle Stages
...
- Anonymous = Any Prospect, such as a visitor, who does not have an email address is added to this stage.
- Suspect = Any Prospect without inbound activity who has an email is automatically promoted to this Stage.
- Engaged = Any Prospect with inbound activity is promoted to this Stage.
- Opportunity = Any Prospect associated with a Deal created in OneFocus™ will automatically move to this stage.
- Customer = Any Prospect associated with a Deal created in OneFocus™ that has moved to Closed-Won will automatically move to this stage.
You're responsible for defining and setting up your company's business processes to move Prospects into the following stages:
...
- A Prospect's Lifecycle Stage is manually updated from the Prospect Profile page.
- The Allow Reversion setting is enabled on a Fulfillment Action or Automation action, as shown below.
|
|


Suspect Stage and Suspect Status
Suspect Status Overview
The Suspect Lifecycle Stage has an additional set of configurable options to further define the status of a Prospect in the Suspect stage. The default statuses, called Suspect Status, are listed below but can be changed to meet your business preferences:
- Cold / Not Started
- In Progress
- Replied
- Unresponsive
- Bounced
- Do Not Contact
- Interested
- Not Interested
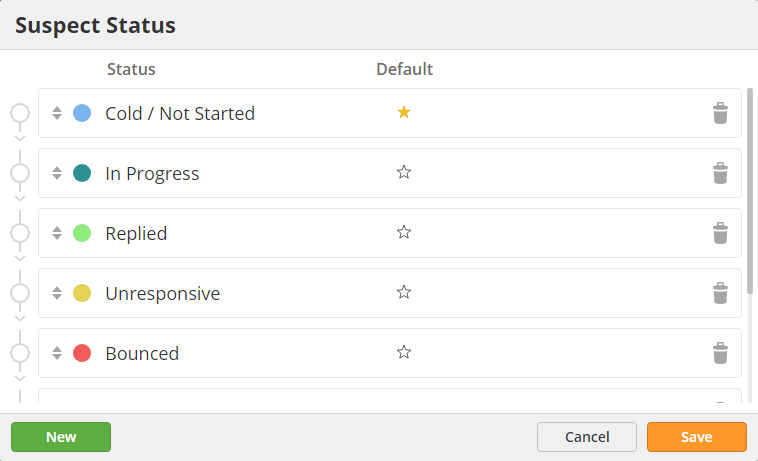
Configuring Suspect Status
To configure your Suspect Statuses do the following:
- Navigate to Settings > Account > Settings > Suspect Status
- Single click on a name under the Status column to change the default name.
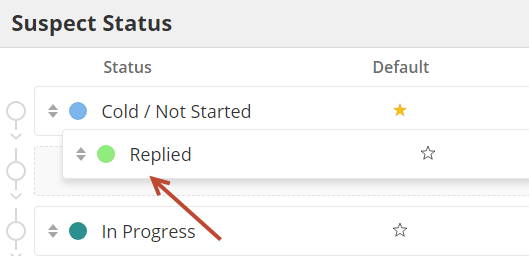
- Click and drag on a status to re-order the status. The order of the statuses will change wherever the Suspect Status options are shown (Prospect Profile page, automation actions, etc.).
- Click the star to select the Default Suspect Status (shown when setting the value).
- Click the trash icon to delete a Suspect Status.
Updating a Prospect's Suspect Status
A Prospect's Suspect Status can be updated manually, from the Prospect Profile page or via the Change Suspect Status action that's found in Fulfillment Actions or Automations.
From the Prospect Profile page:
- Once you bring up a Prospect's Profile page, and select the Lifecycle Stage as Suspect, another dropdown appears to select the Suspect Status.

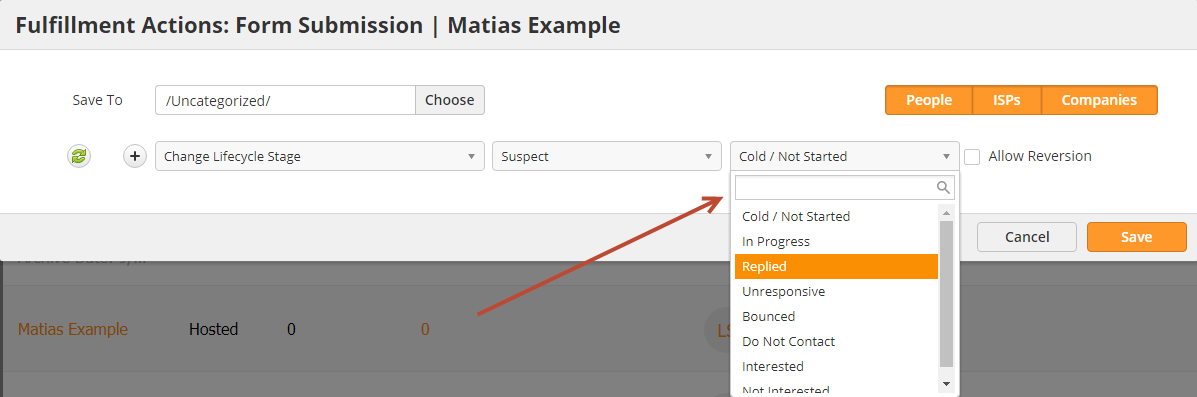
From Automation:
- The option to change the Suspect Status will only appear in the Change Lifecycle Stage action when the Suspect stage is chosen from the dropdown. In the screenshot below, we're setting the Suspect Status inside a Fulfillment Action.