...
- To view details about the email campaign split tests configured in the email software, click Content > Emails > Email Campaigns in the navigation bar, then click View split teststhe Split Tests tab.
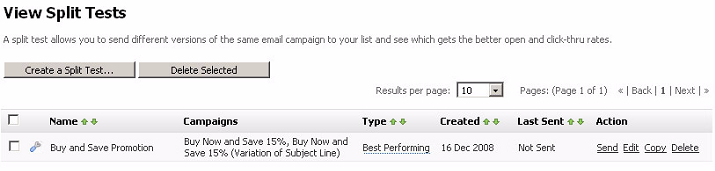
- Each area is described in more detail below:
- Create a Split Test button New = Click this to begin configuring a new split test.
- Highlighting one of the split tests will give the options to:
- Delete Selected = Select one or more split test’s checkboxes and click this to remove the split test from the email software. Deleted split tests cannot be retrieved.
- Checkboxes = Select a box belonging to an email campaign before choosing an option from the Choose an action list. Select the box at the top of the column to select all campaigns.
- Name = This displays the name of the split test.
- Campaigns = This displays the name of each email campaign in the test. Note: This is the name that displays internally Lead Liaison, not the email subject line.
- Type = This displays the type of test:
- Split test displays if you selected Find a winning email and show me the results when you created the test. The campaigns are sent to the whole contact list in equal proportion, and the winner is displayed to you.
- Best performing displays if you selected Find a winning email then send it to my list automatically when you created the test. The campaigns are sent to a small part of your contact list, and the winner is automatically sent to the rest of the list.
- Created = This displays the date on which the test was created.
- Last Sent = This displays the date on which the test was last performed. If the test has never been performed, Not sent displays.
- The following actions can be taken:
- Click Waiting to send to see when a scheduled test will be sent. The View scheduled email queue screen displays (see Viewing Scheduled Email Campaigns). Note: This option displays only when a test is scheduled and has yet to be sent.
Click a test’s Pause link to stop sending the test. Click its Resume link to begin sending the test again. Note: These options display only when a test is currently being sent.
Click a test’s Send link to perform the test. Note: Before you send Best performing tests, you need to enable Split test campaigns in the Settings > Cron settings screen.
- Click a test’s Edit link to make changes to the test. See Creating and Editing Split Tests for information on the screen that displays.
- Click a test’s Copy link to create a new test with the same properties as the original. The new test displays in the list with Copy of prepended to its name.
- Click a test’s Delete link to remove the test from the email software. Deleted tests cannot be retrieved. Note: When you delete a test, its associated email campaigns are not deleted.
...
To send a split test to members of your contact lists:
- Click Content > Emails > Email campaigns in in the navigation bar, then click View split tests Split Tests tab. Click the relevant split test’s Send link. Alternatively, while creating or editing a split test, click its Save and send button (see Creating and Editing Split Tests).
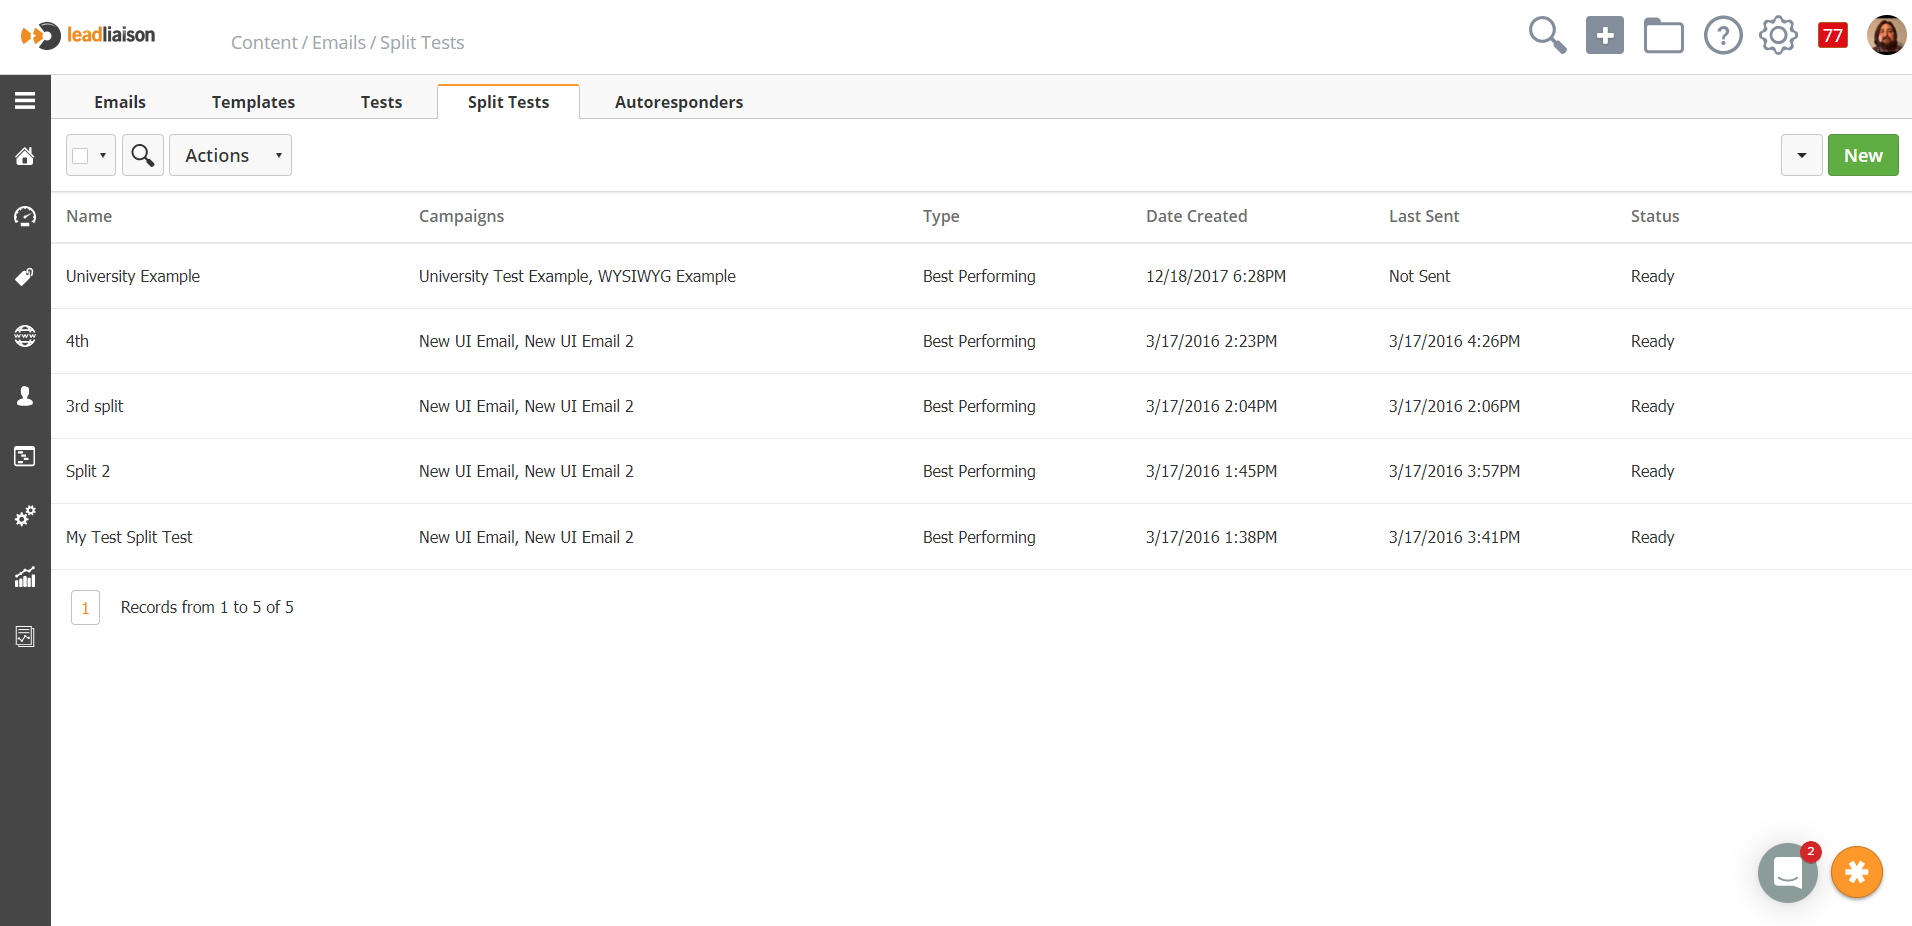
- The first screen that displays allows you to specify to whom you want to send the testsetup the split test campaign.
- Select the contacts to whom you want to send the test in the I want to section:
- To send the campaign to the entire list you select in the Contact list field, select Send the selected split test to all contacts in the selected list(s) below.
- To send the campaign to the segment you select in the Segments field, select Send an email to all contacts in the selected segment(s) below. Note: Segments define a sub-section of a contact list. In order to select a segment here, you must first create segments.
- Select the contact list(s) or segment(s) to which you want to send the email campaign. Use the search box below the list to search for contact lists or segments.
- Click Next
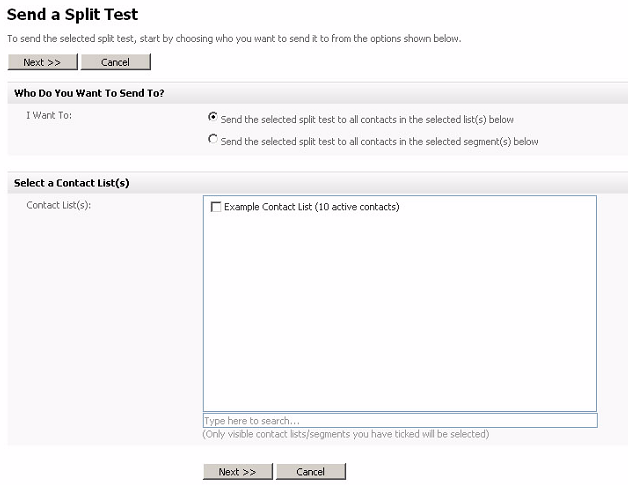
- The screen that displays allows you to configure your campaigns’ settings.
- The areas shown in the screenshot above are discussed in more detail below:
- Send From This Name = This displays the default “from” name for the contact list you selected. If you want to use a different name, enter the new name in this field.
- Send From This Email Address = This displays the default “from” email account for the contact list you selected. If you want to use a different email account, enter the new address in this field.
- Send Reply Emails To = This displays the default reply email address for this contact list. When a contact replies to your email campaign, this is the address to which the reply is sent. If you want to use a different address, enter the new address in this field.
- Send Bounced Emails To = This displays the default bounced email address for this contact list. This is the address to which undeliverable emails are sent. If you want to use a different address for handling bounced emails, enter the new address in this field.
- Send Your Split Test Now = Select this if you want to send the split test campaign immediately. Deselect this to schedule a date and time to send the email. Select the date, month and year in the first three lists, and select the hour, minute and AM/PM in the last three lists.
- Notify Owner About Sending = Select this if you want to send an email to the list owner when a scheduled campaign starts sending, and another when it finishes sending.
- Send Your Email as Multipart? = Select this to send both HTML and text elements of a multipart email campaign to recipients. This allows a recipient’s email client to choose the correct display method. Note: Use this option if you are unsure. Also, use this option if you don’t provide your recipients with the ability to choose HTML or text emails.
- Track Open Rates for these Emails = Select this to have the email software track the proportion of HTML emails opened by their recipients. Note: This option cannot be deselected, as it is necessary for split testing campaigns to work.
- Track Links Clicked in these Emails = Select this to have the email software track the proportion of links in this split test that are clicked by the recipient. Note: This option cannot be deselected, as it is necessary for split testing campaigns to work.
- Embed Images as Attachments = Select this to embed the images you send in HTML emails, rather than linking to them. This allows recipients to view the email campaign offline, but can increase the email size significantly.
- Click Next. In the screen that displays, review your split test.

- Click Schedule My Split Test Campaign when you are ready to send your test.
- Your Split Test begins to send:
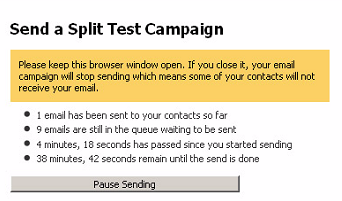
| Warning | ||
|---|---|---|
| ||
As stated in the warning that displayed previously, do NOT close this window, otherwise your test will not be sent correctly. The browser window closes automatically when the split test has been completely sent. |
- Congratulations, your Split Test has been sent!
Viewing Split Test Statistics
To view statistics about the split tests you have performed, including the winner of each test, click Content > Emails > Statistics in the navigation bar, then click Split Test Statistics. Note: This screen displays information about both manual and automatic split tests. This screen shows an overview of your split tests, and the winner of each (if the test has finished sending, and tracking information has been returned). You can:
- View a split test’s detailed statistics. These include information about the winning email campaign (based on the criteria you selected), the number of opened emails, links clicked, bounced emails, and unsubscribed contacts.
- Export a split test’s statistics to a CSV (Comma-Separated Value) file.
- Print a split test’s statistics.
- Delete a split test’s statistics from the email software. The statistics cannot be retrieved.

- The following areas of the screenshot above are explained in more detail below:
- Choose Action = Select one or more split tests’ checkboxes, select an option from the list and click Go to perform the selected action.
- Checkboxes = Select a box belonging to a split test before choosing an option from the Choose an action list. Select the box at the top of the column to select all split tests.
- Split Test Name = This displays the name of the split test.
- Split Test Type = This displays the type of test:
Split test displays if you selected Find a winning email and show me the results when you created the test. The campaigns are sent to the whole contact list in equal proportion, and the winner is displayed to you.
Best performing displays if you selected Find a winning email then send it to my list automatically when you created the test. The campaigns are sent to a small part of your contact list, and the winner is automatically sent to the rest of the list.
Sent To = This displays the name of the contact list, contact lists, or contact list segments to which this test was sent.
Emails Sent = This displays the name of each email campaign that is part of this split test.
Winner = This displays the name of the winning email campaign (based on the criterion you selected when you set up the test). If no tracking information has been received, or all campaigns are performing equally, None displays. If the test has not yet finished sending, Still sending displays. Note: Place the mouse pointer over the winner’s name to see more information.
Finished Sending = This displays the date and time at which the split test completed sending the test emails.
Action = The following options are available to take action on the Split Test:
Click View to see detailed statistics about the split test. See Viewing Detailed Split Test Statistics.
Click Export to save a split test’s statistics as a CSV (Comma-Separated Value) file.
Click Print to select the split test’s statistics you want to print, view a preview of the printed document, and send the print job to your printer.
Click Delete to remove a split test’s statistics from the email software. The statistics cannot be retrieved.
Viewing Detailed Split Test Statistics
To view detailed statistics about a split test, click Content > Emails > Statistics in the navigation bar, then click Split Test Statistics. Click a test’s View link. The Detailed split test statistics screen displays at the Statistics snapshot tab:
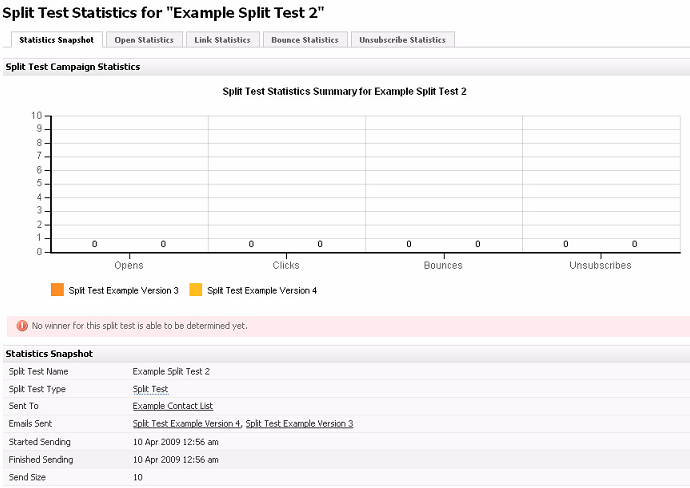
The following table describes the tabs in the screenshot above:
- Statistics Snapshot = Use this tab to see general information about the split test, including the best-performing email campaign, as well as:
- The number of opened emails of each type.
- The number of clicks in each email (the click-through rate).
- The number of bounced emails of each type.
- The number of contacts unsubscribing from each email.
- Open Statistics = Use this tab to see information about the number and percentage of unique email opens for each email campaign in this test.
- Link Statistics = Use this tab to see information about the number and percentage of links in emails of each type in this test that were clicked by their recipients.
- Bounce Statistics = Use this tab to see information about the number and percentage of undeliverable emails of each type in this test.
- Unsubscribe Statistics = Use this tab to see information about the number of contacts who have unsubscribed using a link in emails of each type in this test.
...
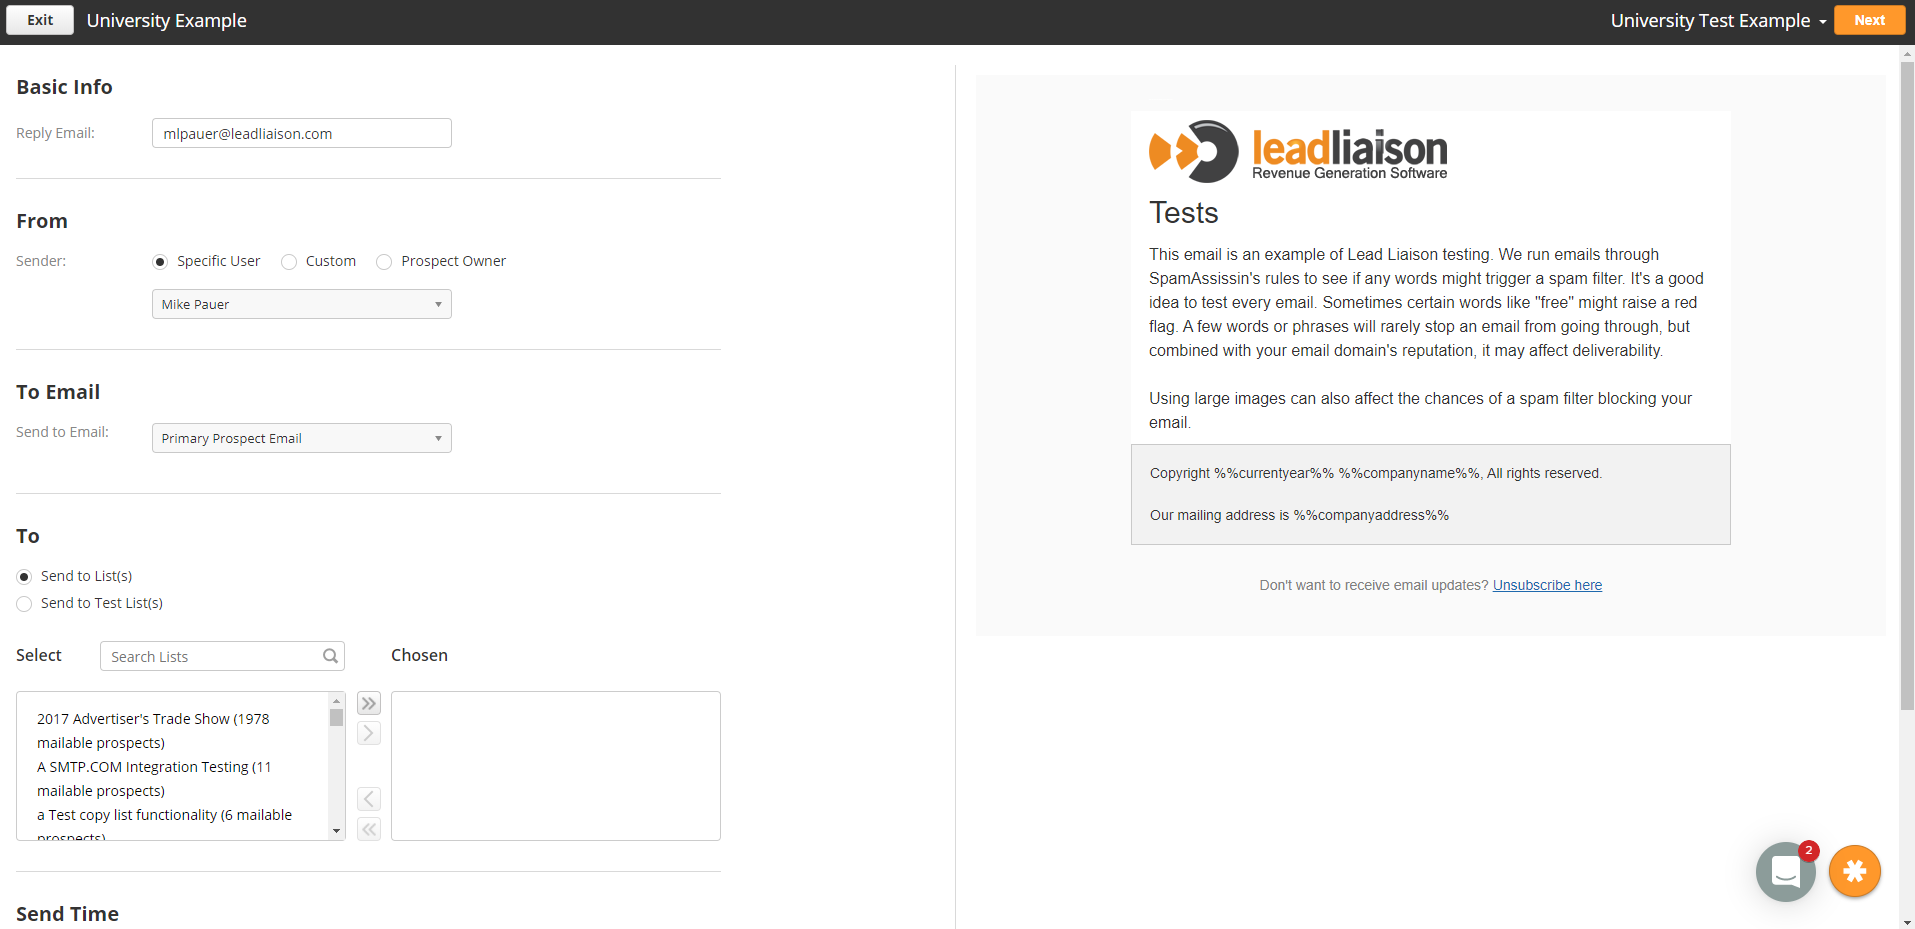
- Basic Info
- Reply Email - Configures the reply-to address for the campaign.
- From
- Sender - Configures the email address you will be sending the campaign from
- To Email
- Send to Email - Lets you configure if you should send the campaign to a prospects Personal, Work, or known Primary email address
- To
- Select the contact list(s) or segment(s) to which you want to send the email campaign. Use the search box below the list to search for contact lists or segments.
- Send Time
- Configures sending the email immediately, or at a specific time
- Advanced Options
- Notify list owner on start / stop - Select this if you want to send an email to the list owner when a scheduled campaign starts sending, and another when it finishes sending.
- Sending Server - If you have multiple email sending servers you can pick which one will be used
- Personalize To - Lets you setup / configure what name will be shown as part of the To address
- Send as multi-part - Select this to send both HTML and text elements of a multipart email campaign to recipients. This allows a recipient’s email client to choose the correct display method. Note: Use this option if you are unsure. Also, use this option if you don’t provide your recipients with the ability to choose HTML or text emails.
- Embed Images in content - Select this to embed the images you send in HTML emails, rather than linking to them. This allows recipients to view the email campaign offline, but can increase the email size significantly.
- Click Next
- In the screen that displays, review your split test.
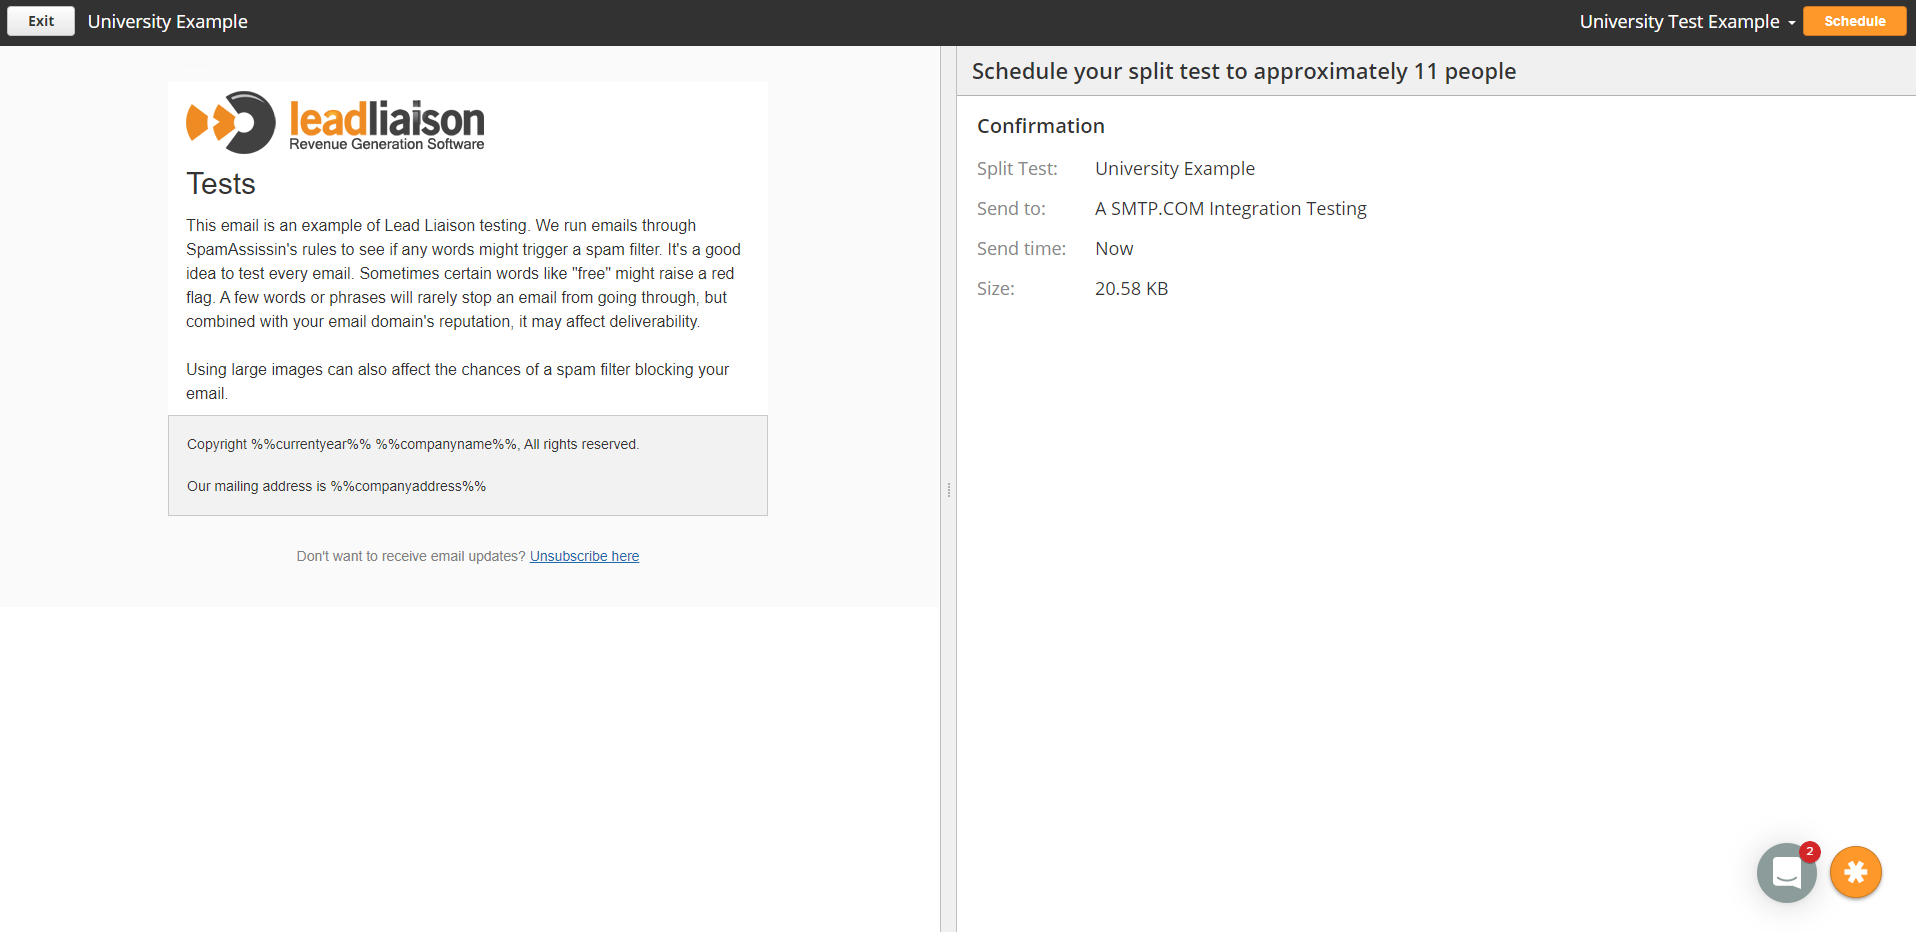
- Click Schedule when you are ready to send your test.
- Your Split Test will now appear in the email sending queue:

Congratulations, your Split Test has been sent!
Viewing Split Test Statistics
To view statistics about the split tests you have performed, including the winner of each test, click Reports > Emails in the navigation bar, You will be able to see all the campaigns that were part of the split test along with it's statistics. Note: This screen displays information about all campaigns, not just split tests.
Creating a Split Test
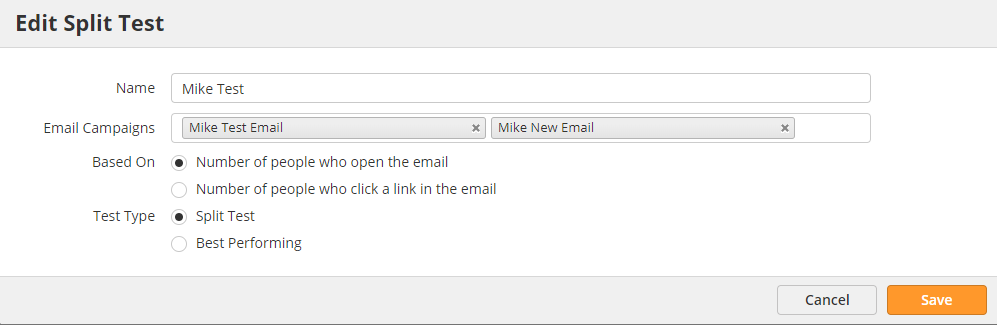
To create a new split test, click Content > Emails > Email Campaigns Split Tests tab in the navigation bar, then View Split Tests. Click the Create a Split Test button New button. To edit an existing split test, click Email campaigns Split Tests in the navigation bar, then View split tests. Then click the relevant test’s Edit link. Note: This screen allows you to set up your test; you can choose the people to whom you want to send it later on.
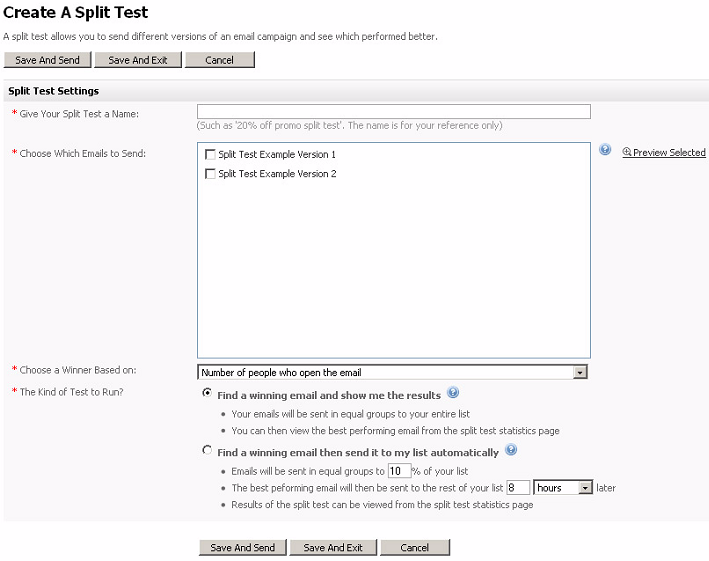
- Each area of the screenshot above is explained in detail below:
- Give Your Split Test a Name = Enter a name for this split test. The name only displays in the configuration interface, and not to your contacts.
- Choose Which Emails to SendEmail Campaigns = Select the email campaigns that you want to include in this test. Note: You can select as many email campaigns as you want.
- Preview Selected = Click this to see all the email campaigns you selected in the Choose which emails to send list. Each email campaign opens in a new browser window.
- Choose a Winner Based on select as many email campaigns as you want.
- Based On = Use this field to specify how the winning email campaign is chosen. Note: When you select this option, the email software counts the total number clicks on all links in each email campaign, not any one link in particular.
Select Number of people who open the email to choose the email campaign that is opened most often.
Select Number of people who click a link in the email to choose the email in which a link is clicked most often (the one with the highest click-through rate).
- The Kind of Test to RunType = Use this section to define whether to perform a manual test or an automatic test, and to configure how the test should proceed:
- Select Find a winning email and show me the results if you want to perform a manual test. When you select this option, the email software splits the contact list (or lists) into equal parts and sends each email campaign to one part. You can then view each email campaigns performance in the Statistics > Split test statistics screens. For example, if you select two email campaigns and have 1000 people in your contact list, each email campaign is sent to 500 people. Note: If you choose this option, you may want to first set up a new contact list for test subjects, rather than sending it to your complete contact list. If so, see Creating and Editing Contact Lists.
- Select Find a winning email then send it to my list automatically if you want to perform an automatic test. When you select this option, you can specify the percentage of your contact list’s contacts that are test subjects. The email software performs the test, then waits the amount of time you specify before declaring a winning email campaign (based on the criteria you select). The email software then sends the winning email campaign to the remainder of your contact list’s contacts (those not in the test group). In the Emails will be sent in equal groups to (...) % of your list field, enter the percentage of your contact list’s contacts that should be in the test group. The default is 10%. In the The best performing email will then be sent to the rest of your list (...) later field, select the number of Hours or Days after which the email software decides the winning email. Note: The minimum test time is two hours, and the maximum is thirty days. For example, if you have a contact list of 5000 people, select five email campaigns, specify a test group of ten percent and a test time of one day, each email is sent to 100 people, and the winning email is sent to the remaining 4,500 people the next day.
Save And Send = Click this to save your changes to the test, and send it immediately.Save And Exit = Click this to save your changes to the test and return to the View split tests screen.
Cancel = Click this to return to the View split tests screen without saving your changes.
...