...
- Use the drop-down menu below to select the appropriate payment account.
- Click Continue
- Choose either a 1 column, 1:2 column, or 1:3 column layout.
- The form builder will automatically insert insert Email, Credit Card, and Amount fields like in the screenshot below. Add new fields by dragging them from the right side, and edit existing fields by clicking on them.
| Info | ||
|---|---|---|
| ||
You can hide the Amount field if needed by clicking on the field on the left then selecting Hidden under the Rules section. |
...
- Once you have finished adding fields, you will need to configure the your payment options. To configure the payment options click on the form Properties tab of the form:

- Under the Plan Type section configure your options:
- None = Used for one-time charges at a fixed price.
- When selected enter a value in the Amount field. This value will be used to bill for one-time charges.
- Custom = Used for recurring charges.
- When selected enter a value in the Amount field.
- Select a Recurring Frequency to bill the specified amount at periodic intervals.
- Optionally enter a Frequency Title to add text to your form that describes the transaction.
- Gateway = Used to link a Payment Plan from a payment gateway, such as Stripe, with a transaction. Aavailable This option is currently only available for Stripe only.
- Select a payment plan from your Strip account from the Payment Plan dropdown.
- Enter a Plan Multiplier Value (PMV). Your payment plan amount will be multiplied by the Plan Multiplier Value (PMV). For example, if your payment plan is $10, and your PMV is 2, then the amount charged will be $20.
- None = Used for one-time charges at a fixed price.
...
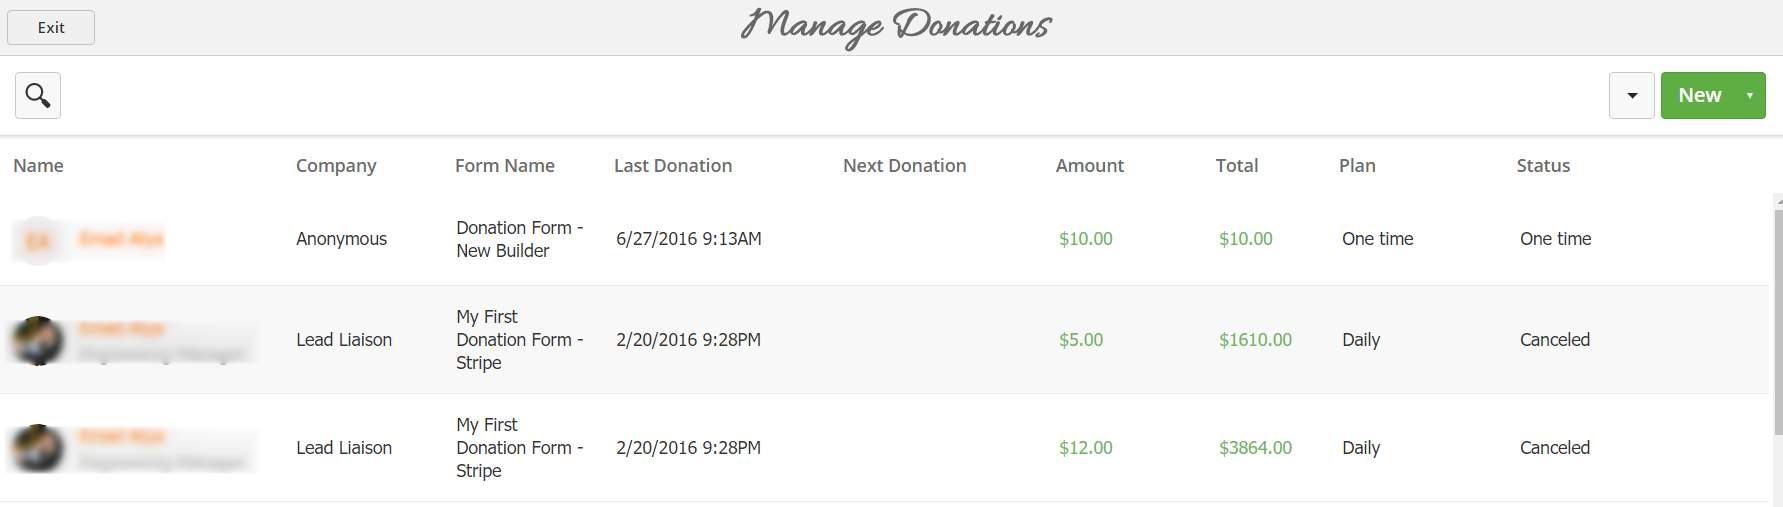
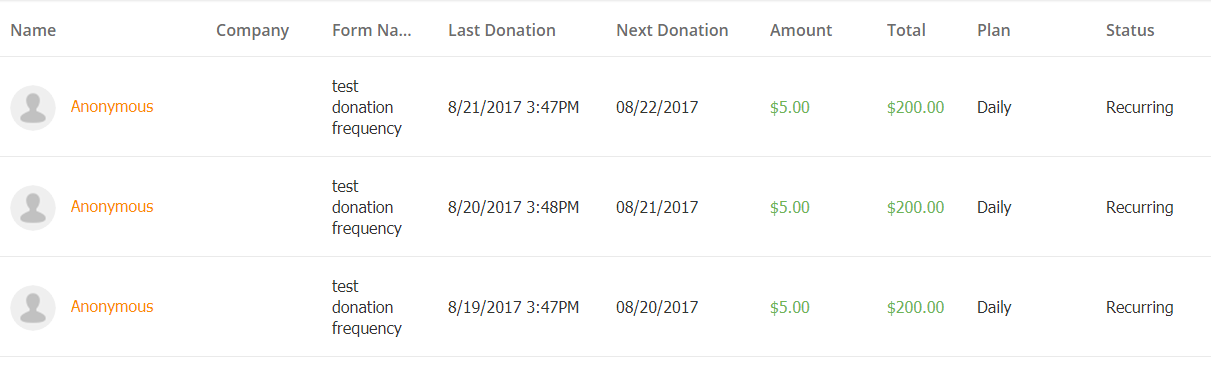
- Name = Name of the Prospect making the donation. The Prospect will be "Anonymous" if they are unidentified.
- Company = Name of the company the Prospect works for.
- Form NameSubmitted = Name of the Donation or Payment Web Form.
- Last Payment/Donation = The last time a donation was collected.
- Next Donation = The next time a donation will be collected. Value will be empty for one-time payments/donations.
- Amount = Donation amount.
- Total = Total amount of donations received from the Prospect for the same donation plan.
- Plan = Frequency of recurring donation or , one-time donation/payment, or name of Payment Plan.
- Status = Recurring or One time.
- Actions = Only visible for recurring donations. Allows the user to cancel the recurring billing plan.
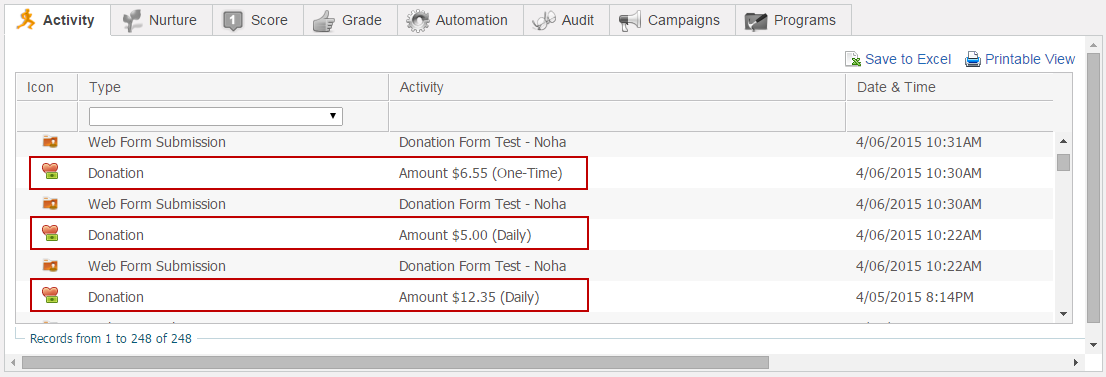
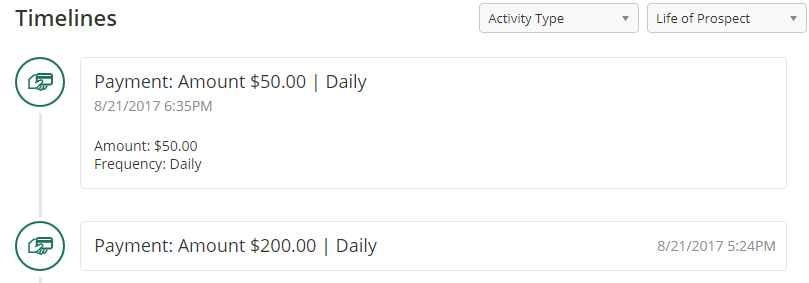
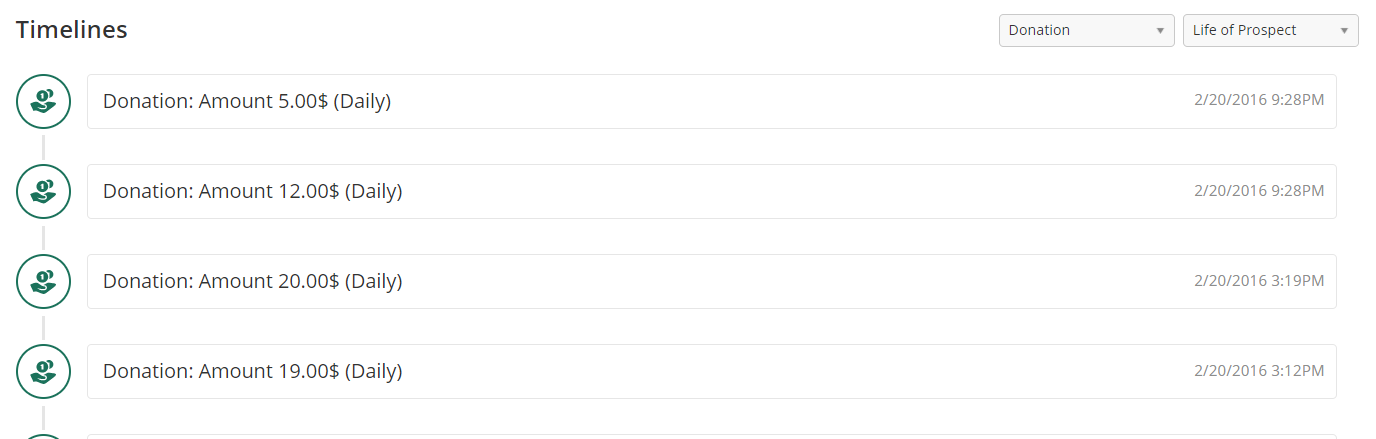
Prospect Activity
Each donation or payment is added to the Activity History for a Prospect in their Prospect Profile. The top screenshot represents the classic Lead Liaison Prospect Profile, as well as what would be seen in Salesforce.com. The bottom screenshot is the OneFocus™ CRM Prospect Profile Timeline.
Using Filters in Automation
There are three filters and one trigger that can be used in a Workflow. The filters and trigger are described below:
- Payment/Donation Amount = The amount of the payment/donation.
| Note | ||
|---|---|---|
| ||
Only whole dollar amounts may be used. For example, 60 (implying $60) should be used instead of $60 or 60.36 or $60.36 |
- Last Payment/Donation Date = If the date of the last payment/donation meets the criteria details. For example, find people that made a payment/donation within the past 30 days.
- Made Payment/Donation = If a payment/donation was made using the specified payment/donation form.
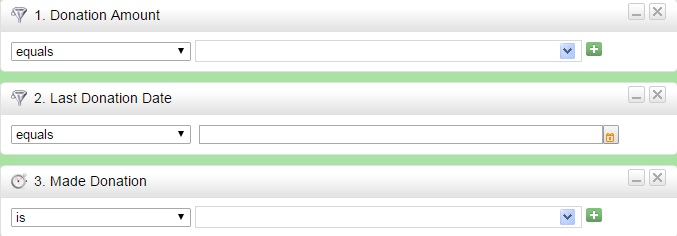
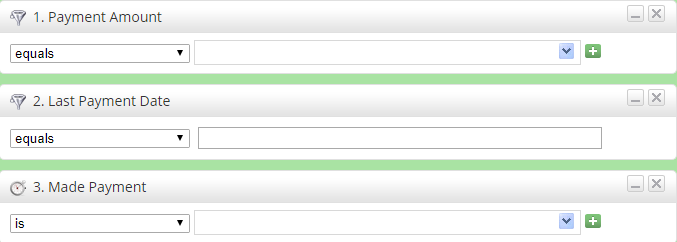
- Makes Payment/Donation = If a payment/donation is made using the specified payment/donation form. This is a future event wherein Lead Liaison looks for payments/donations and uses that to trigger something else (email response, alert, etc.).
...